- Align the locating mark of the tire and the wheel to the hub to install the tire and wheel assembly.
- Install the wheel nuts.
- Install the hub cap. Refer to Aluminum Wheel Hub Cap Replacement .
- Lower the vehicle.
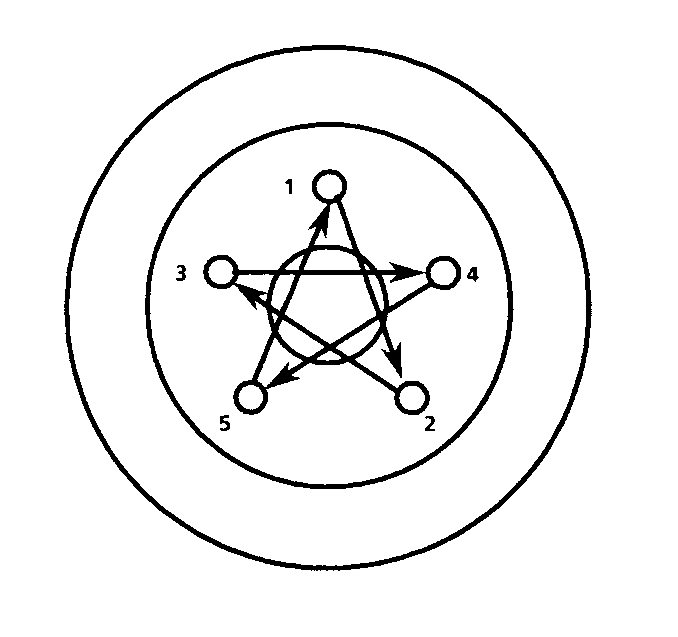
Caution: Never use oil or grease on studs or nuts. Tighten the wheel nuts with your fingers until they are snug. Then, tighten the nuts (in the sequence shown) to the fastener tightening specification shown in Specifications in this Section. Improperly tightened wheel nuts could eventually allow the wheel to come off while the vehicle is moving, possibly causing loss of control, personal injury, and property damage.
Notice: Use the correct fastener in the correct location. Replacement fasteners must be the correct part number for that application. Fasteners requiring replacement or fasteners requiring the use of thread locking compound or sealant are identified in the service procedure. Do not use paints, lubricants, or corrosion inhibitors on fasteners or fastener joint surfaces unless specified. These coatings affect fastener torque and joint clamping force and may damage the fastener. Use the correct tightening sequence and specifications when installing fasteners in order to avoid damage to parts and systems.
Tighten
Tighten the wheel nuts in sequence to 140 N·m (100 lb ft).
