For 1990-2009 cars only
Removal Procedure
Important: The following information contains the replacement procedure for the wiring harness and the electrical connector assembly ONLY. For service information on the solenoids or sensors, refer to the following procedures:
- Remove the case side cover. Refer to Control Valve Body Cover Replacement .
- Disconnect the wiring harness assembly (224) from the following components:
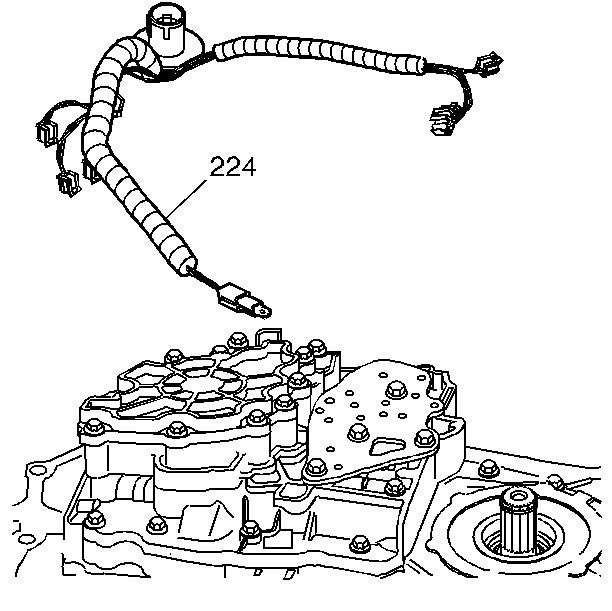
- Remove the wiring harness assembly (224).
- Inspect the wiring harness assembly (224) for:
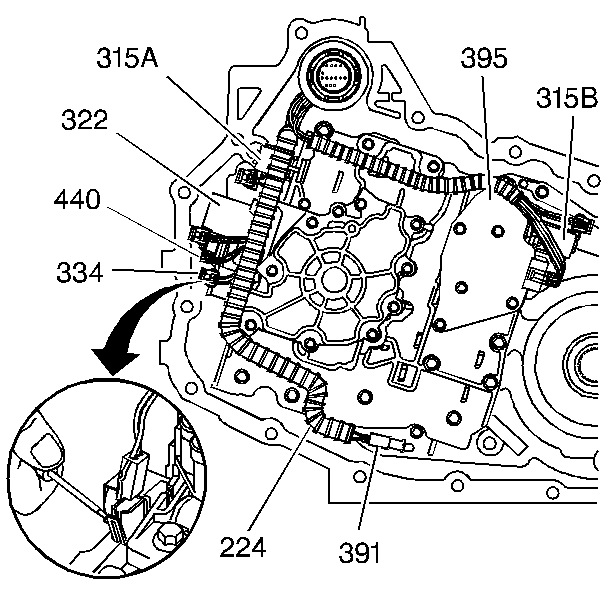
| • | TFP manual valve position switch (395) |
| • | 1-2 shift solenoid (315A) |
| • | 2-3 shift solenoid (315B) |
| • | Torque converter clutch PWM solenoid (334) |
| • | Pressure control solenoid (322) |
| • | Input speed sensor (440) |
| • | Fluid temperature sensor (391) |
| • | Wiring harness clips |
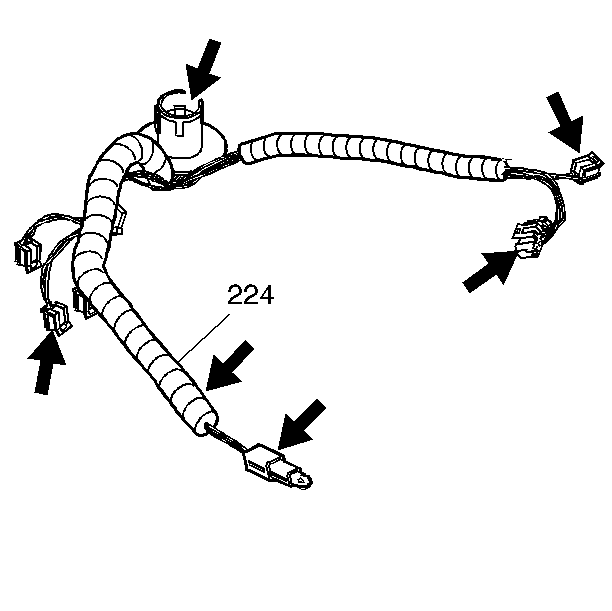
| • | Cut or pinched wires |
| • | Cut wire insulation |
| • | Bent or broken electrical connections |
| • | Damaged terminal pins |
Installation Procedure
- Install the wiring harness assembly (224).
- Connect the wiring harness assembly (224) to the following components:
- Install the case side cover. Refer to Control Valve Body Cover Replacement .
| • | TFP manual valve position switch (395) |
| • | 1-2 shift solenoid (315A) |
| • | 2-3 shift solenoid (315B) |
| • | Torque converter clutch PWM solenoid (334) |
| • | Pressure control solenoid (322) |
| • | Input speed sensor (440) |
| • | Fluid temperature sensor (391) |
| • | Wiring harness clips |
