Removal Procedure
Tools Required
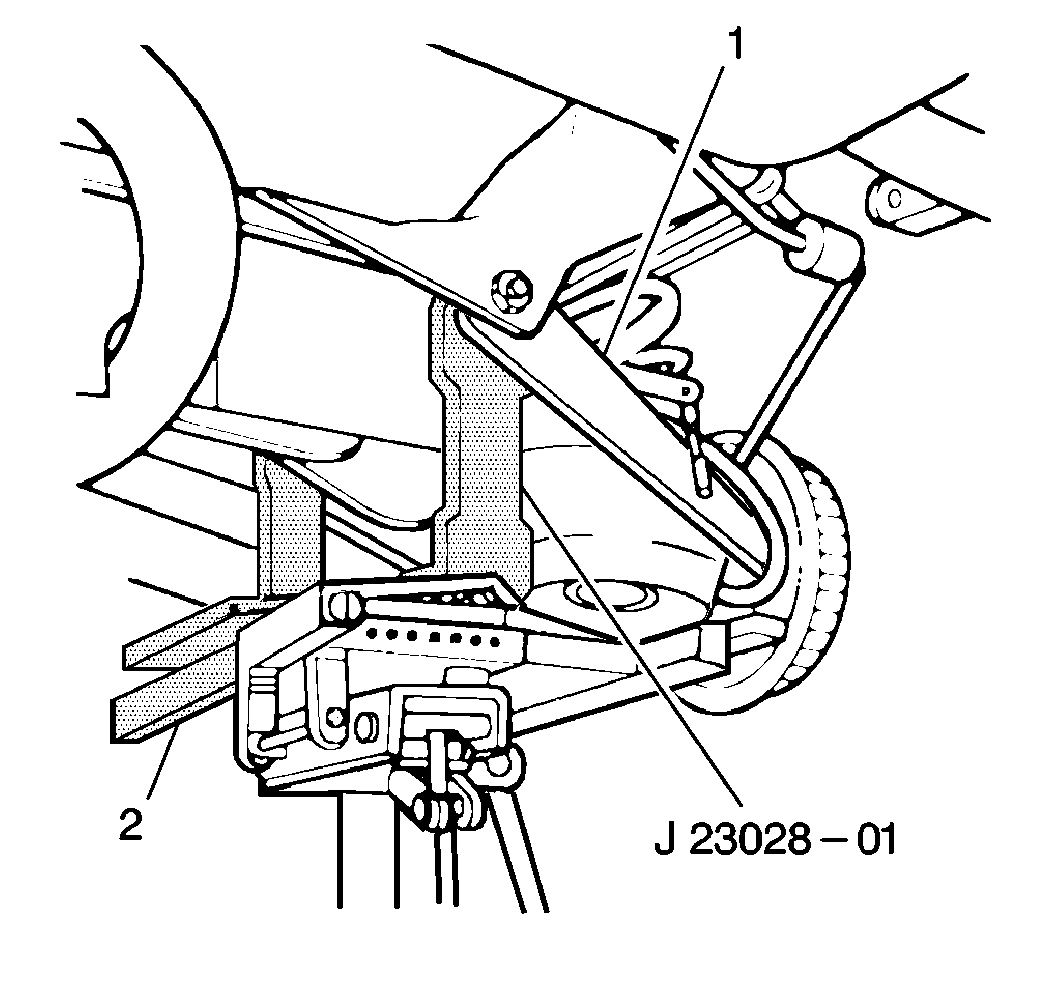
J 23028-A Rear Coil Spring Remover and Installer
Important: Support the vehicle so that the control arm hangs free. Refer to Lifting and Jacking the Vehicle in General Information.
- Remove the rear wheel and the tire.
- If Electronic Level Control (ELC) -equipped, remove the height sensor link from the right control arm.
- Remove the parking brake cable retaining clip from the left control arm.
- Remove the rear stabilizer shaft from the bracket on the knuckle.
- Mount the J 23028-A on the transmission jack (2) and position to cradle the control arm bushings.
- Raise the jack to remove the tension from the control arm pivot bolts.
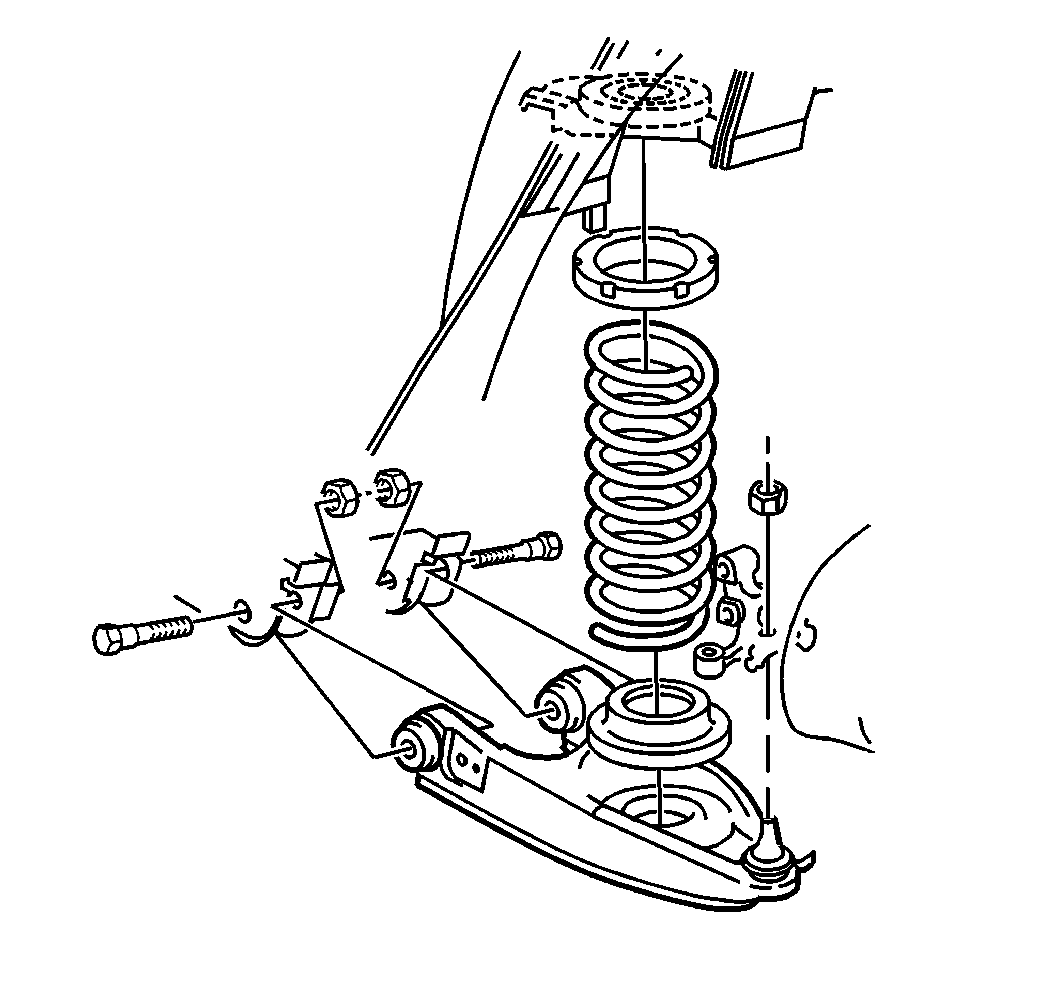
- Remove the rear bolt and the nut from the rear control arm.
- Slowly maneuver the jack to relieve the tension from the front control arm bolt.
- Remove the front bolt and nut from the rear control arm.
- Lower the jack to pivot the control arm downward. When all the compression is removed from the spring, remove the safety change, the spring, and the insulators.
- Inspect the insulators carefully and replace if cut or torn. Replace the insulators if the vehicle has over 80,450 km (50,000 miles).

Caution: Tool J 23028-01 should be secured to a suitable jack or personal injury could result.
Important: Place a chain around the spring and through the control arm pivot bolts.

Important: Do not apply force to the control arm and/or ball joint to remove the spring. Proper maneuvering of the spring will allow for easy removal.
Installation Procedure
- Snap the upper insulator onto the spring before installation.
- Position the lower insulator and the spring in the vehicle.
- Using the J 23028-A mounted on the transmission jack (2), raise the control arm into position.
- Slowly maneuver the jack to permit the installation of the control arm bolts and the nuts.
- Install the rear stabilizer shaft to the knuckle bracket with the link assembly.
- If ELC-equipped, install the height sensor link from the right control arm.
- Install the parking brake cable retaining clip at the left control arm.
- Install the rear wheel and the tire.

Important: Install the coil springs so the upper ends are positioned as shown in the above figure.


Notice: Use the correct fastener in the correct location. Replacement fasteners must be the correct part number for that application. Fasteners requiring replacement or fasteners requiring the use of thread locking compound or sealant are identified in the service procedure. Do not use paints, lubricants, or corrosion inhibitors on fasteners or fastener joint surfaces unless specified. These coatings affect fastener torque and joint clamping force and may damage the fastener. Use the correct tightening sequence and specifications when installing fasteners in order to avoid damage to parts and systems.
Important: The control arm nuts should be tightened with the vehicle unsupported and resting on its wheels at the normal trim height. Failure to do so may adversely affect ride and handling.
Tighten
| • | Tighten wheel nuts to 140 N·m (100 lb ft). |
| • | Tighten the control arm nuts to 115 N·m (85 lb ft). Optional Torque: Tighten the control arm bolts to 182 N·m (134 lb ft). |
| • | Tighten the stabilizer shaft link bolts to 17 N·m (13 lb ft). |
