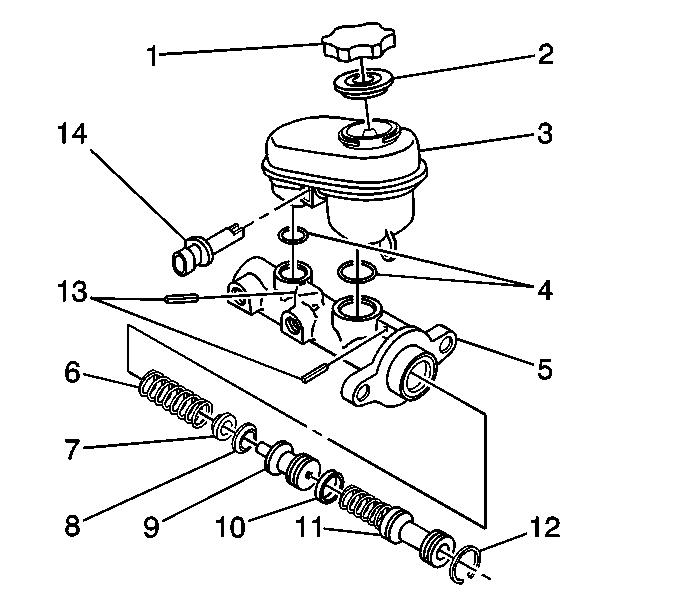
- Wipe the reservoir cover (1)
clean before removing.
- Remove the master cylinder. Refer to
Master Cylinder Replacement
.
- Remove the master cylinder reservoir cover (1) and the
reservoir diaphragm (2).
Caution: Brake fluid may be irritating to the skin or the eyes, or may cause
nausea, vomiting, or diarrhea if swallowed. In case of contact or swallowing
take the following actions:
| • | Eye contact - rinse thoroughly with water |
| • | Skin contact - wash with soap and water |
| • | If swallowed - Contact a physician immediately. Give
two glasses of water and induce vomiting by sticking fingers down the throat. |
Notice: Avoid spilling brake fluid on any of the vehicle's painted surfaces,
wiring, cables, or electric connectors. Brake fluid will damage the paint
and the electrical connections. If any fluid is spilled on the vehicle, flush
the area to lessen the damage.
- If the master cylinder is to be completely removed and overhauled, empty
the fluid from the reservoir (3).
- Inspect the master cylinder reservoir cover (1) and the
diaphragm (2) for the following and replace any damaged parts:

- Remove the fluid level
switch (3).

- Remove the piston snap
ring (12) while depressing the primary piston (11).
Do not damage the following components:
| • | The master cylinder bore |
| • | The piston retainer groove |
- Remove the primary piston and the primary piston spring.
In order to remove the parts, perform the following steps:
| 8.1. | Plug all of the outlet ports, except the upper outlet port. |
| 8.2. | Apply low-pressure non-lubricated compressed air into the upper
outlet port at the blind end of the bore. |
- Remove the following components from the secondary piston (9):
| • | The spring retainer (7) |
- Clean all of the parts with clean, denatured alcohol.
- Dry the parts using non-lubricated compressed air.
- Inspect the master cylinder bore for scoring or corrosion. Replace
the master cylinder if scoring or corrosion is present.


