If a tire goes flat, avoid further tire and wheel damage by driving slowly to a level place. Turn on your hazard warning flashers.
Caution: Changing a tire can be dangerous. The vehicle
can slip off the jack and roll over or fall on you or other people. You and they could
be badly injured or even killed. Find a level place to change your tire. To help prevent
the vehicle from moving:
To be even more certain the vehicle will not move, you should put blocks at
the front and rear of the tire farthest away from the one being changed. That would
be the tire, on the other side, at the opposite end of the vehicle.
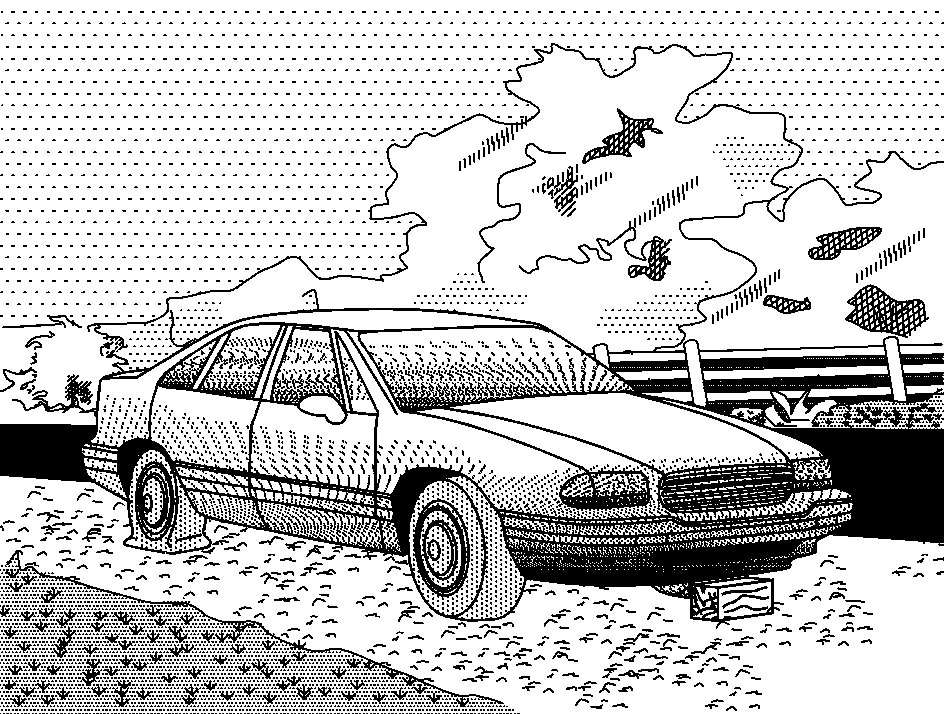
The following steps will tell you how to use the jack and change a tire.
Removing the Spare Tire and Tools
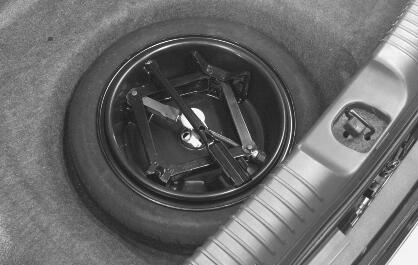
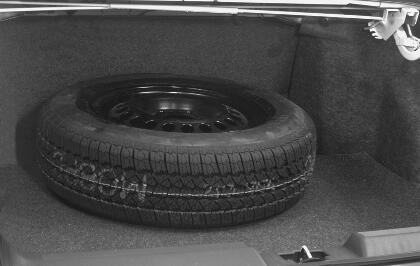
The equipment you'll need is in the trunk.
Instructions for changing your tires are on the inside of the tire cover. You can rest the cover near you for easy reference while you change the tire.
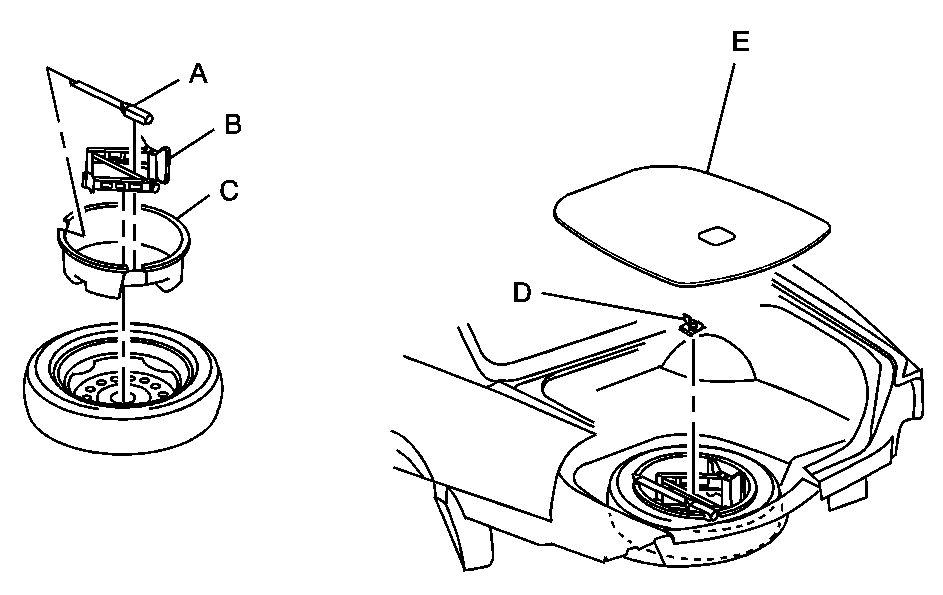
- Lift the tire cover to gain access to the compact spare tire and jacking equipment. See Compact Spare Tire for more information.
- Remove the wheel wrench and jack from the jack container.
- Remove the compact spare tire from the trunk.
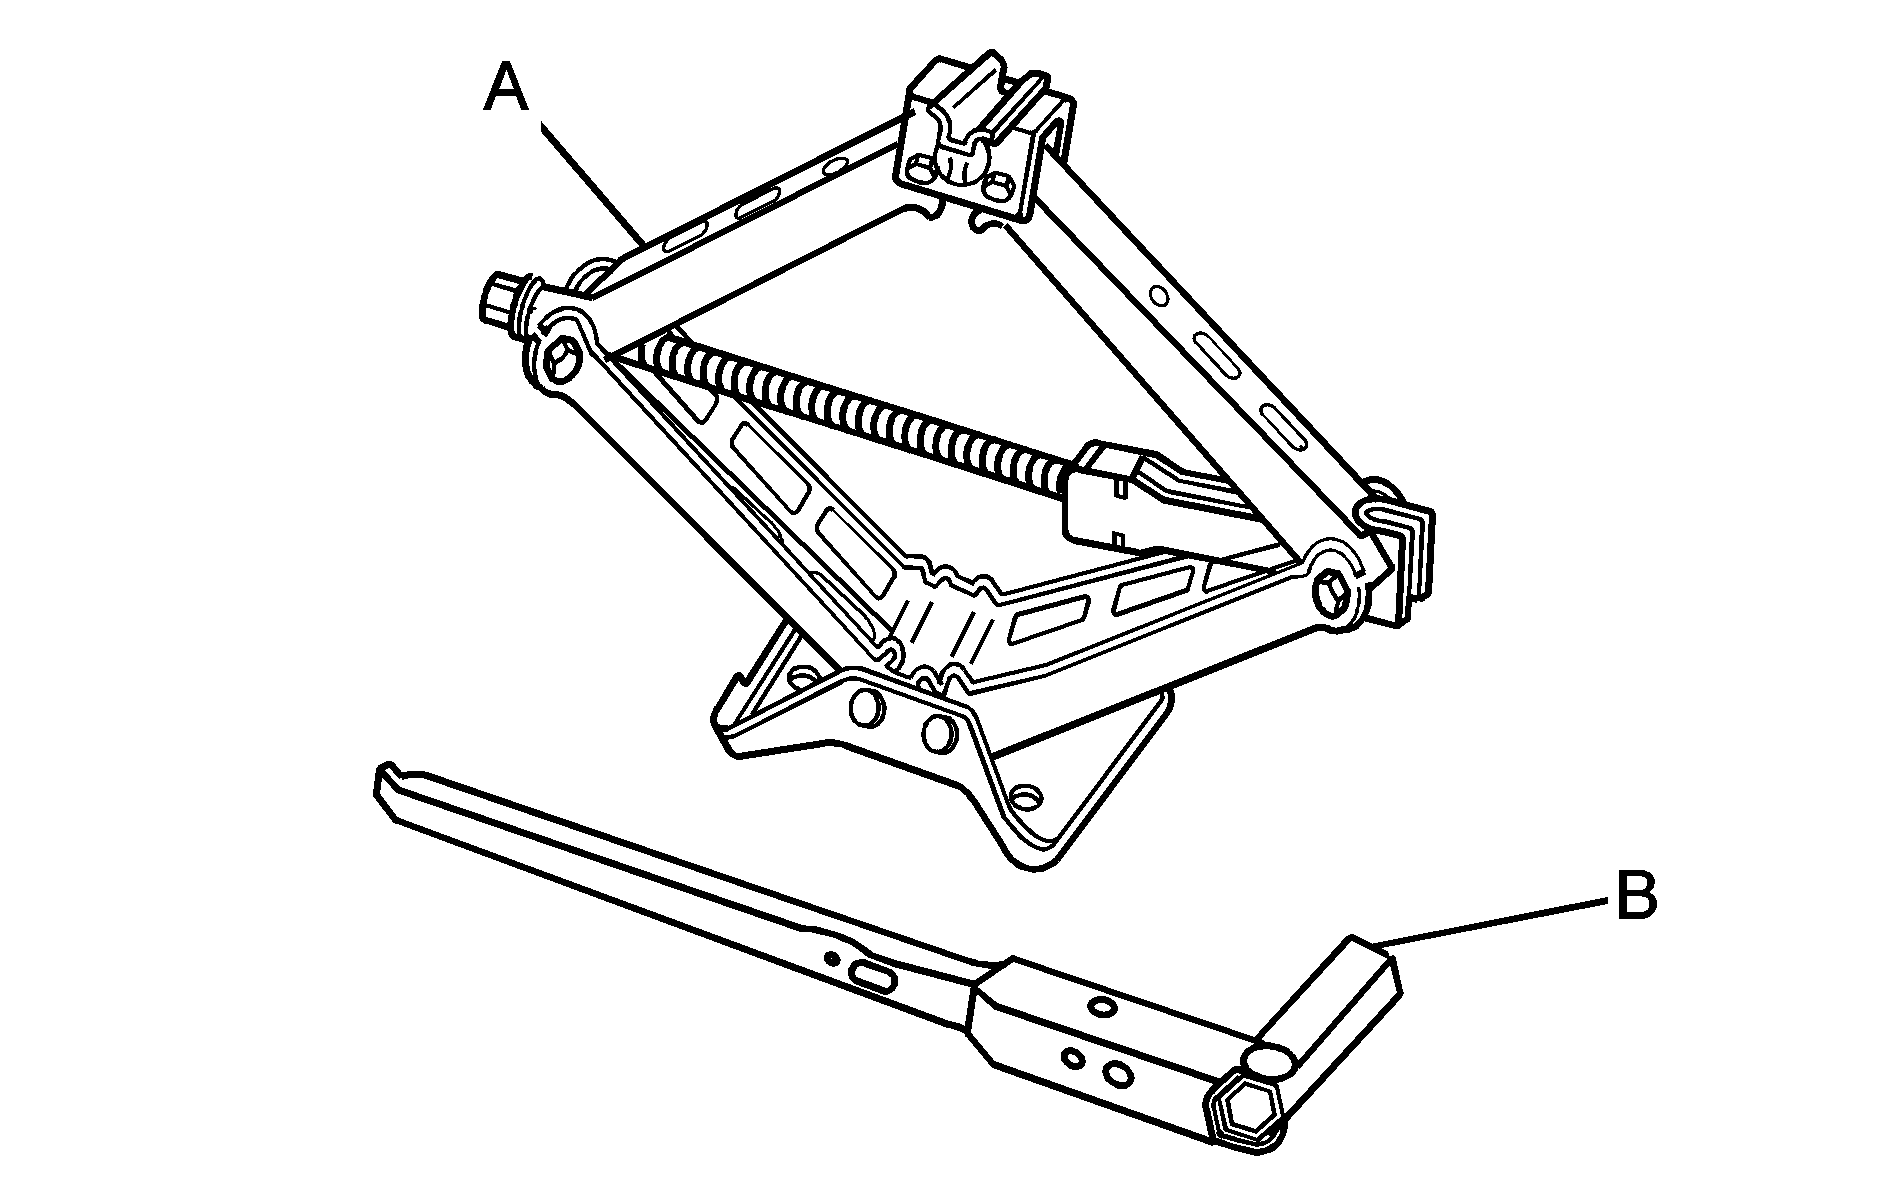
The tools you'll be using include the jack (A) and wheel wrench (B).
Removing the Wheel Covers
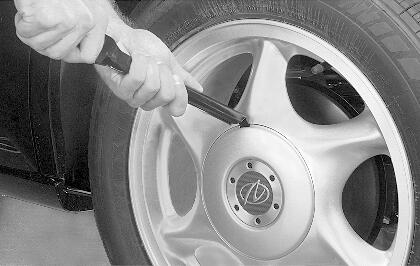
Insert the hooked end of the wheel wrench in one of the two small notches in the center cover and pry the cover off. Do not drop the cover or lay it face down, as it could be scratched or damaged.
Removing the Flat Tire and Installing the Spare Tire
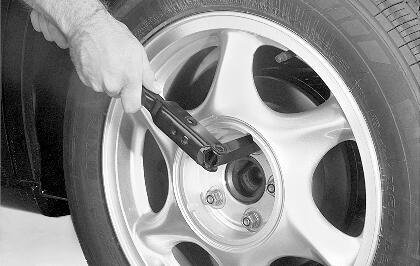
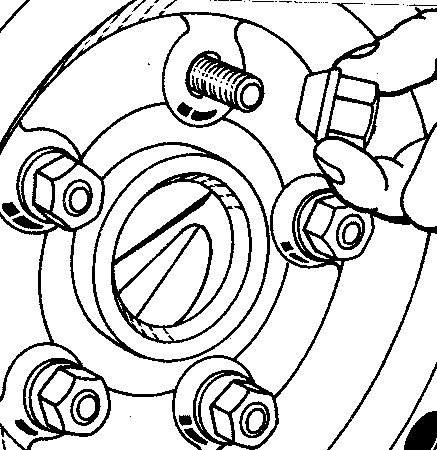
- Position the wheel wrench securely over the wheel nuts and turn the wrench counterclockwise to loosen the wheel nuts, but don't remove them.
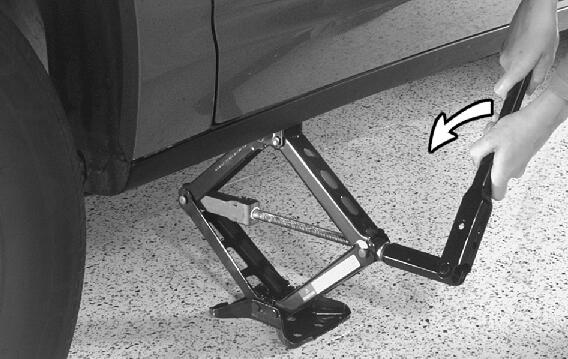
- Attach the wheel wrench to the bolt on the end of the jack to create a jack handle.
- Turn the wheel wrench counterclockwise by hand to lower the jack head until it fits under the vehicle.
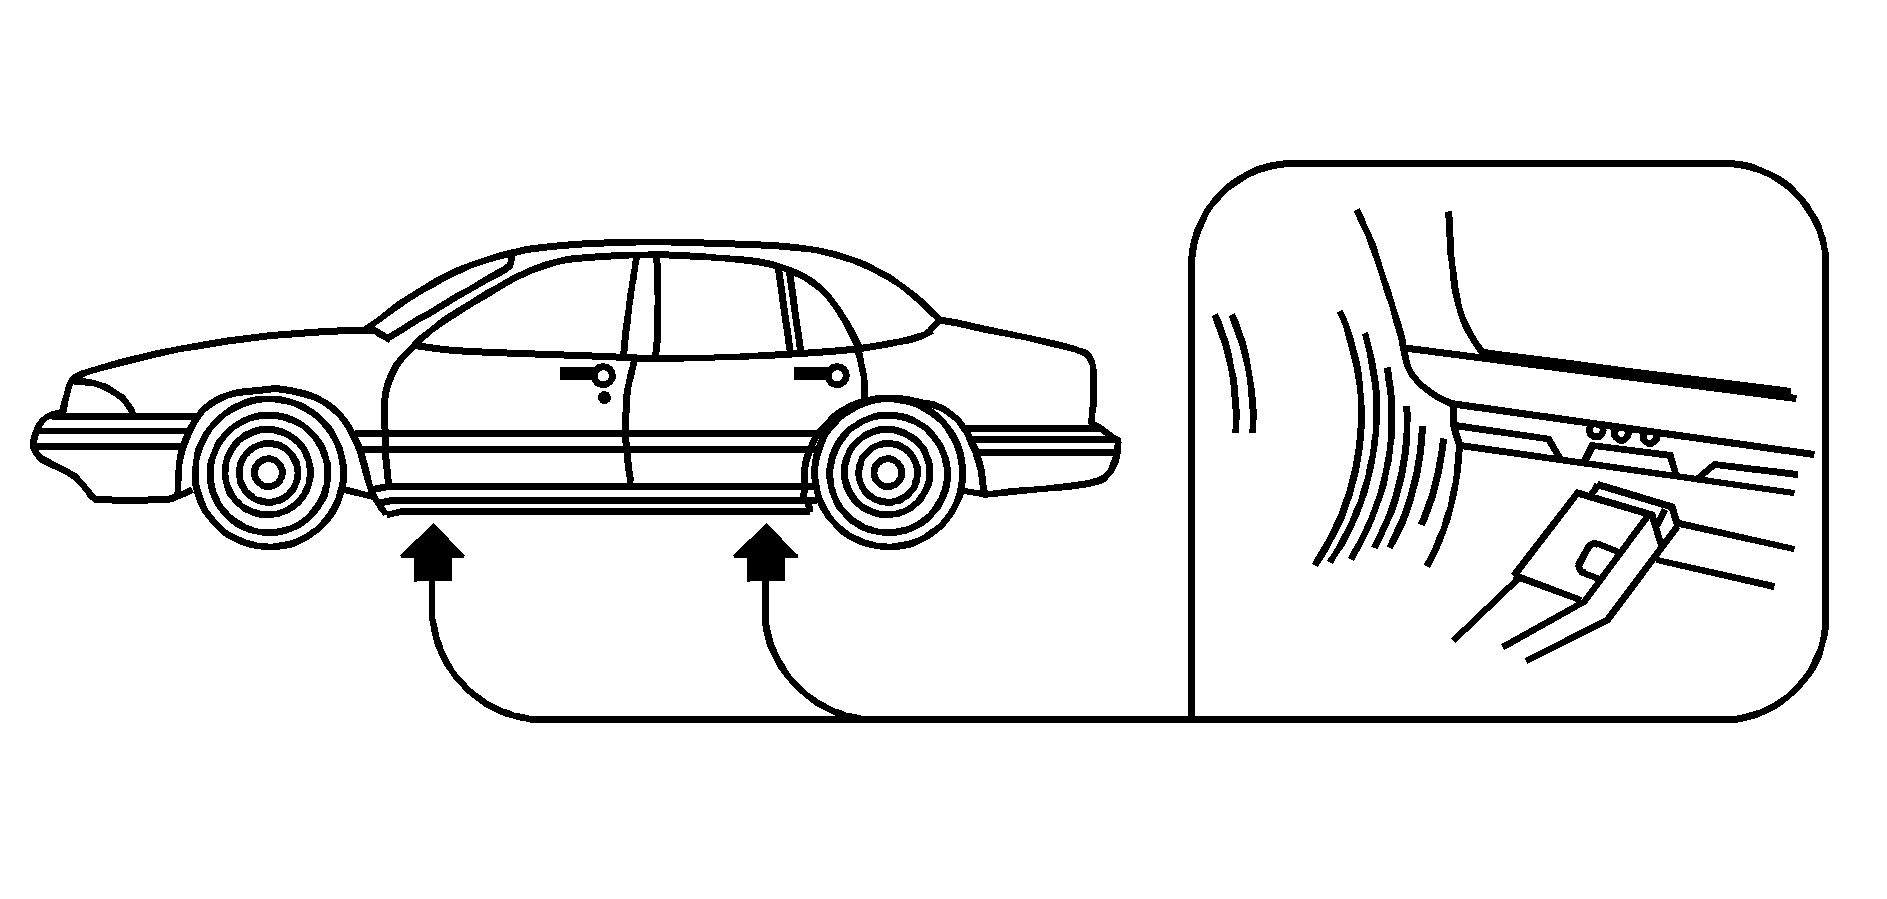
- Near each wheel well is a notch in the frame to position the jack head. Position the jack under the vehicle and raise the jack head until it fits firmly against the sheet metal. Do not raise the vehicle yet. Put the compact spare tire near you.
- Raise the vehicle by turning the wheel wrench clockwise on the jack. Raise the vehicle far enough off the ground so there's enough room for the compact spare tire to fit underneath the wheel well.
- Remove all the wheel nuts and take off the flat tire.
- Remove any rust or dirt from the wheel bolts, mounting surfaces and spare wheel.
- Place the compact spare tire on the wheel-mounting surface.
- If a nut cannot be tightened by hand, use the wheel wrench, and see your dealer right away.
- Lower the vehicle by turning the wheel wrench counterclockwise. Lower the jack completely.
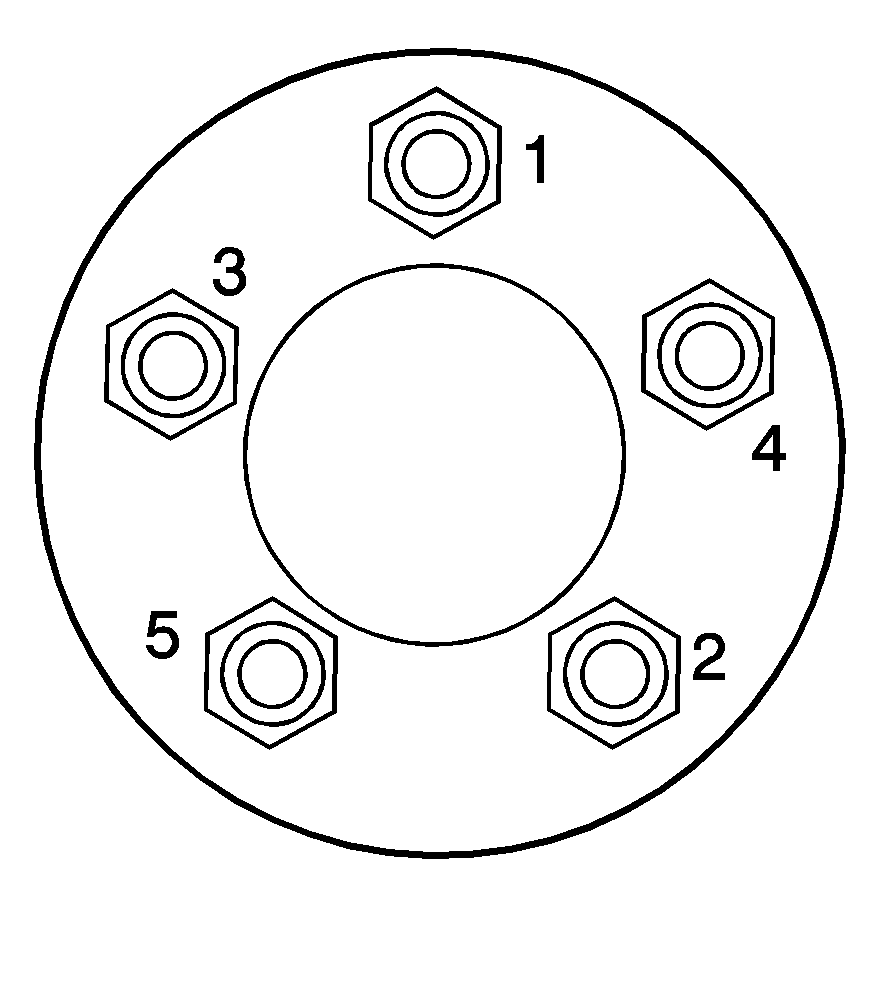
- Using the wheel wrench, tighten the wheel nuts firmly in a crisscross sequence as shown.
- When the flat tire has been repaired or replaced, reinstall the wheel cover. Be sure to position the alignment pin on the cover with the notch in the wheel. Apply pressure around the edge of the cap to snap it in place. Do not use a hammer or mallet to reinstall the cover.
Caution: Getting under a vehicle when it is jacked up is dangerous. If the vehicle slips off the jack you could be badly injured or killed. Never get under a vehicle when it is supported only by a jack.
Caution: Raising your vehicle with the jack improperly positioned can damage the vehicle and even make the vehicle fall. To help avoid personal injury and vehicle damage, be sure to fit the jack lift head into the proper location before raising the vehicle.
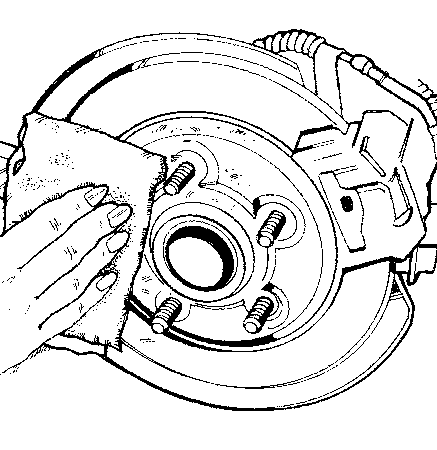
Caution: Rust or dirt on a wheel or other parts to which it is fastened, can make the wheel nuts become loose and eventually the wheel could come off and cause a crash. Always remove all rust and dirt from wheels and other parts.
Caution: Never use oil or grease on bolts or nuts because the nuts might come loose. The vehicle's wheel could fall off, causing a crash.
Put the wheel nuts back on with the rounded end of the nuts toward the wheel. Tighten each nut by hand until the wheel is held against the hub.
Caution: Incorrect or improperly tightened wheel nuts can cause the wheel to come loose and even come off. This could lead to a crash. If you have to replace them, be sure to get new original equipment wheel nuts. Stop somewhere as soon as you can and have the nuts tightened with a torque wrench to the proper torque specification. See Capacities and Specifications for wheel nut torque specification.
Notice: Improperly tightened wheel nuts can lead to brake pulsation and rotor damage. To avoid expensive brake repairs, evenly tighten the wheel nuts in the proper sequence and to the proper torque specification. See Capacities and Specifications for the wheel nut torque specification.
Store the wheel cover in the trunk until you have replaced the compact spare tire with a regular tire.
Notice: Wheel covers will not fit on your vehicle's compact spare. If you try to put a wheel cover on the compact spare, the cover or the spare could be damaged.
Storing the Flat Tire and Tools
Caution: Storing a jack, a tire, or other equipment in the passenger compartment of the vehicle could cause injury. In a sudden stop or collision, loose equipment could strike someone. Store all these in the proper place.
Store the flat tire as far forward in the trunk as possible. Store the jack and wheel wrench in their compartment in the trunk. For storage, the jack must be raised until the screw end is flush with the edge of the jack.
Storing the Spare Tire and Tools
Caution: Storing a jack, a tire, or other equipment in the passenger compartment of the vehicle could cause injury. In a sudden stop or collision, loose equipment could strike someone. Store all these in the proper place.
The compact spare tire is for temporary use only. Replace the compact spare tire with a full-size tire as soon as you can. See "Compact Spare Tire" later in this section. See the storing instructions label to return your compact spare tire into your trunk properly.
-
Wrench
Jack
Jack Container
Retainer
Compact Spare Tire Cover
