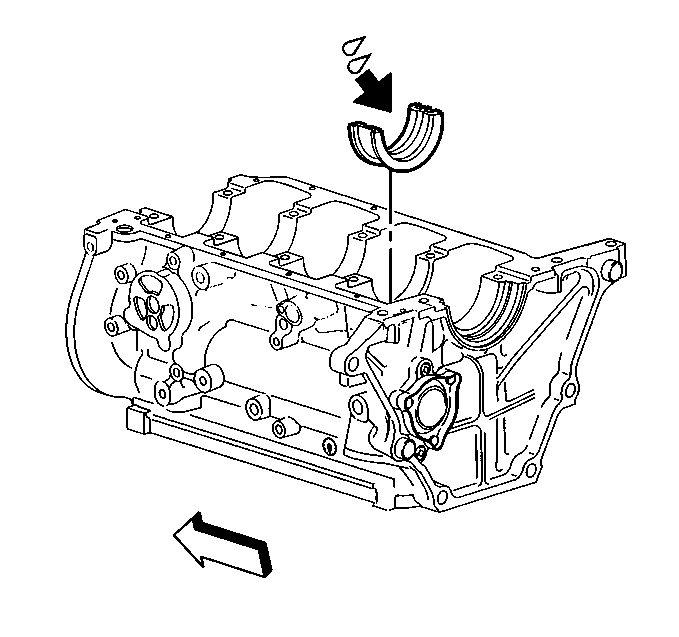
- Apply engine oil to the crankshaft bearing inserts.
- Install the upper crankshaft bearing inserts.
- The number 3 crankshaft bearing insert does not have a groove.
- Install the crankshaft.
- Install the lower crankshaft bearing inserts to the crankshaft bearing caps.
- Install the crankshaft bearing caps to the engine block.
- Install the crankshaft bearing cap bolts to the engine block.
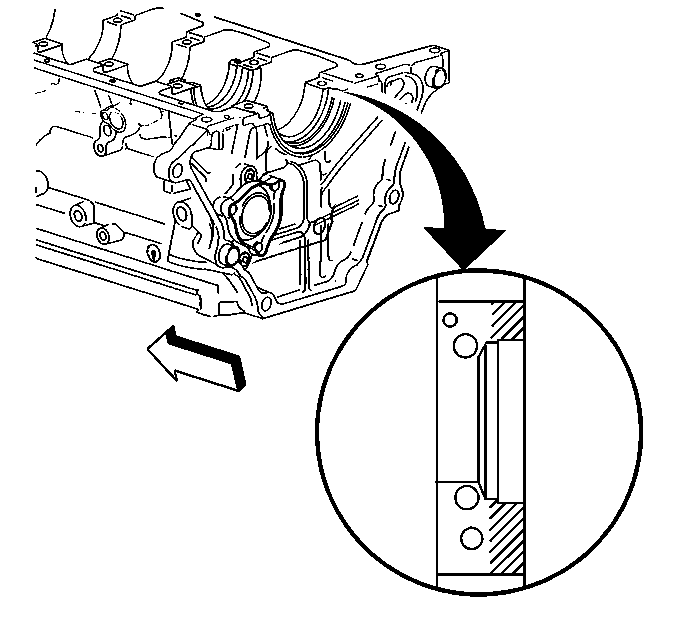
- Before installing the rear crankshaft bearing cap, coat the face of the block where it mates to the cap with sealer GM P/N 1052942.
- Measure the crankshaft end play using the following procedure:
- Measure the crankshaft end play at the front end of the rear crankshaft bearing with a feeler gauge.
Important: The number 3 crankshaft bearing insert is specific to the number three crankshaft journal.
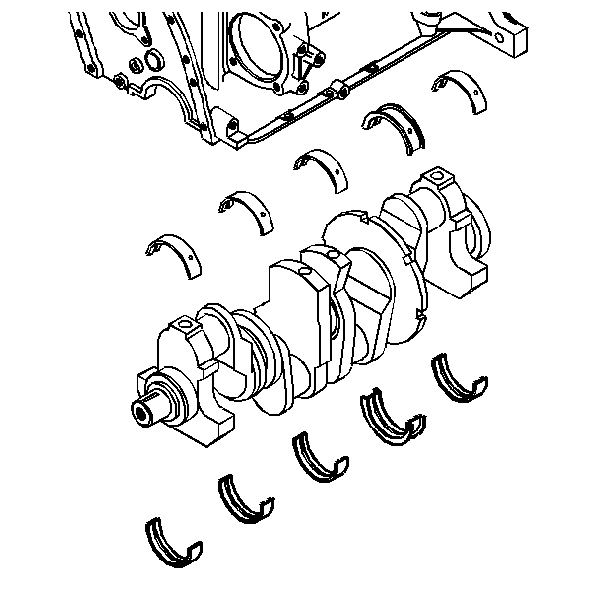
| • | Make sure that the inserts are the correct size. |
| • | Measure the crankshaft bearing clearance. |
| • | Refer to Engine Mechanical Specifications . |
| • | Apply engine oil to the inserts. |
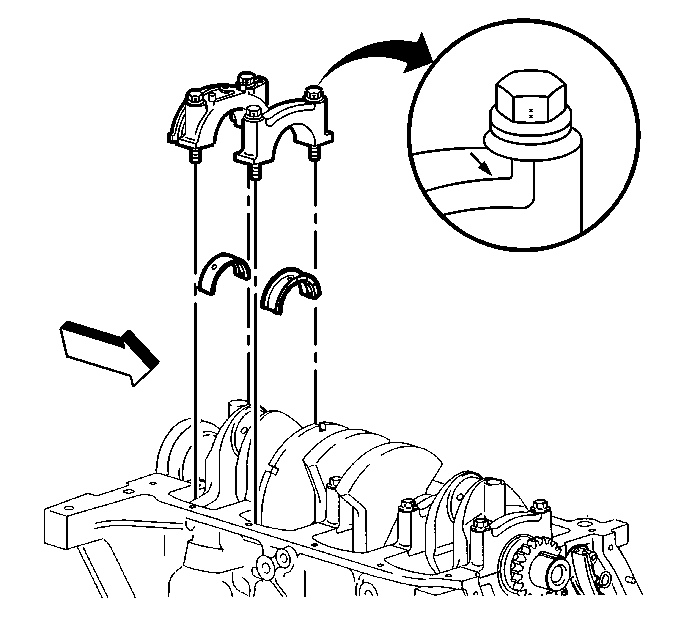
Notice: Use the correct fastener in the correct location. Replacement fasteners must be the correct part number for that application. Fasteners requiring replacement or fasteners requiring the use of thread locking compound or sealant are identified in the service procedure. Do not use paints, lubricants, or corrosion inhibitors on fasteners or fastener joint surfaces unless specified. These coatings affect fastener torque and joint clamping force and may damage the fastener. Use the correct tightening sequence and specifications when installing fasteners in order to avoid damage to parts and systems.
Tighten
Tighten the crankshaft bearing cap bolts first to 50 N·m
(37 lb ft).
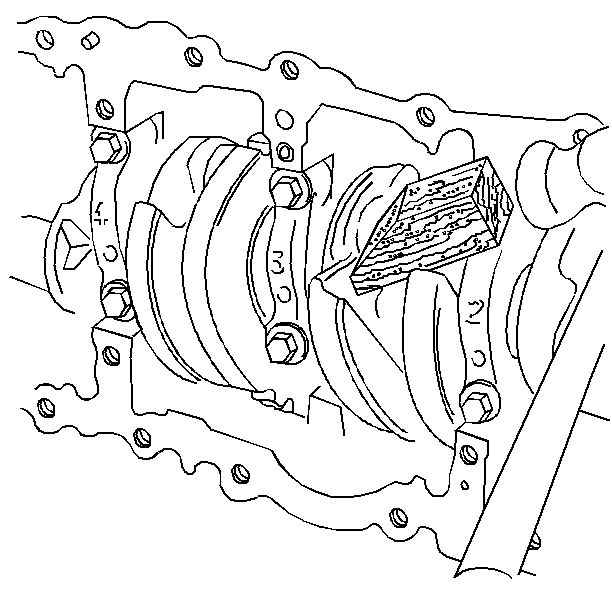
| 9.1. | Firmly thrust the crankshaft rearward. |
| 9.2. | Firmly thrust the crankshaft forward. |
| 9.3. | This will align the crankshaft bearing and the crankshaft thrust surfaces. |
Tighten
Tighten the crankshaft bearing cap bolts to 95 N·m (70 lb ft).
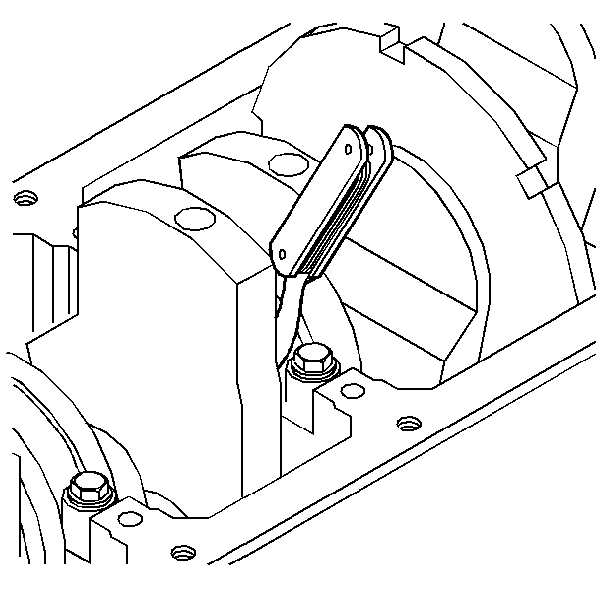
| • | The crankshaft should still be wedged forward. |
| • | The proper clearance is 0.0511-0.1780 mm (0.002-0.007 in). |
- Apply engine oil to the crankshaft bearing inserts.
- Install the upper crankshaft bearing inserts.
- The number 3 crankshaft bearing insert does not have a groove.
- Install the crankshaft.
- Install the lower crankshaft bearing inserts to the crankshaft bearing caps.
- Install the crankshaft bearing caps to the engine block.
- Install the crankshaft bearing cap bolts to the engine block.
- Before installing the rear crankshaft bearing cap, coat the face of the block where it mates to the cap with sealer.
- Measure the crankshaft end play using the following procedure:
- Measure the crankshaft end play at the front end of the rear crankshaft bearing with a feeler gauge.

Important: The number 3 crankshaft bearing insert is specific to the number three crankshaft journal.

| • | Make sure that the inserts are the correct size. |
| • | Measure the crankshaft bearing clearance. Refer to Engine Mechanical Specifications . |
| • | Apply engine oil to the inserts. |

Notice: Use the correct fastener in the correct location. Replacement fasteners must be the correct part number for that application. Fasteners requiring replacement or fasteners requiring the use of thread locking compound or sealant are identified in the service procedure. Do not use paints, lubricants, or corrosion inhibitors on fasteners or fastener joint surfaces unless specified. These coatings affect fastener torque and joint clamping force and may damage the fastener. Use the correct tightening sequence and specifications when installing fasteners in order to avoid damage to parts and systems.
Tighten
Tighten the crankshaft bearing cap bolts first to 50 N·m
(37 lb ft).


| 9.1. | Firmly thrust the crankshaft rearward. |
| 9.2. | Firmly thrust the crankshaft forward. |
| 9.3. | This will align the crankshaft bearing and the crankshaft thrust surfaces. |
Tighten
Tighten the crankshaft bearing cap bolts to 95 N·m (70 lb ft).

| • | The crankshaft should still be wedged forward. |
| • | The proper clearance is 0.0511-0.1780 mm (0.002-0.007 in). |
