Name
| Location
| Locator View
| Connector End View
|
4WD Fuse 15 (IP Fuse Block) (4.3L Engine)
| In the IP Fuse Block
| IP Fuse Block Details in Power
Distribution in Engine Electrical
| --
|
ATC Fuse (UBEC) (W/ Electric Shift 4WD or Active Transfer
Case)
| In the Underhood Bussed Electrical Center
|
Figure 6: UBEC Internal Location View
| --
|
Body Bussed Electrical Center (BBEC)
| LH side of dash, near IP fuse Block
| --
| --
|
BTSI Fuse (UBEC)
| In the Underhood Bussed Electrical Center
|
Figure 6: UBEC Internal Location View
| --
|
CRANK Fuse (UBEC)
| In the Underhood Bussed Electrical Center
|
Figure 6: UBEC Internal Location View
| --
|
CTSY LP Fuse 8 (IP Fuse Block)
| In the IP Fuse Block
| IP Fuse Block Details in Power Distribution in Engine
Electrical
| --
|
Data Link Connector
| Lower LH side of instrument panel
| --
| Page 202-3 in Connector End
Views in Electrical Diagnosis
|
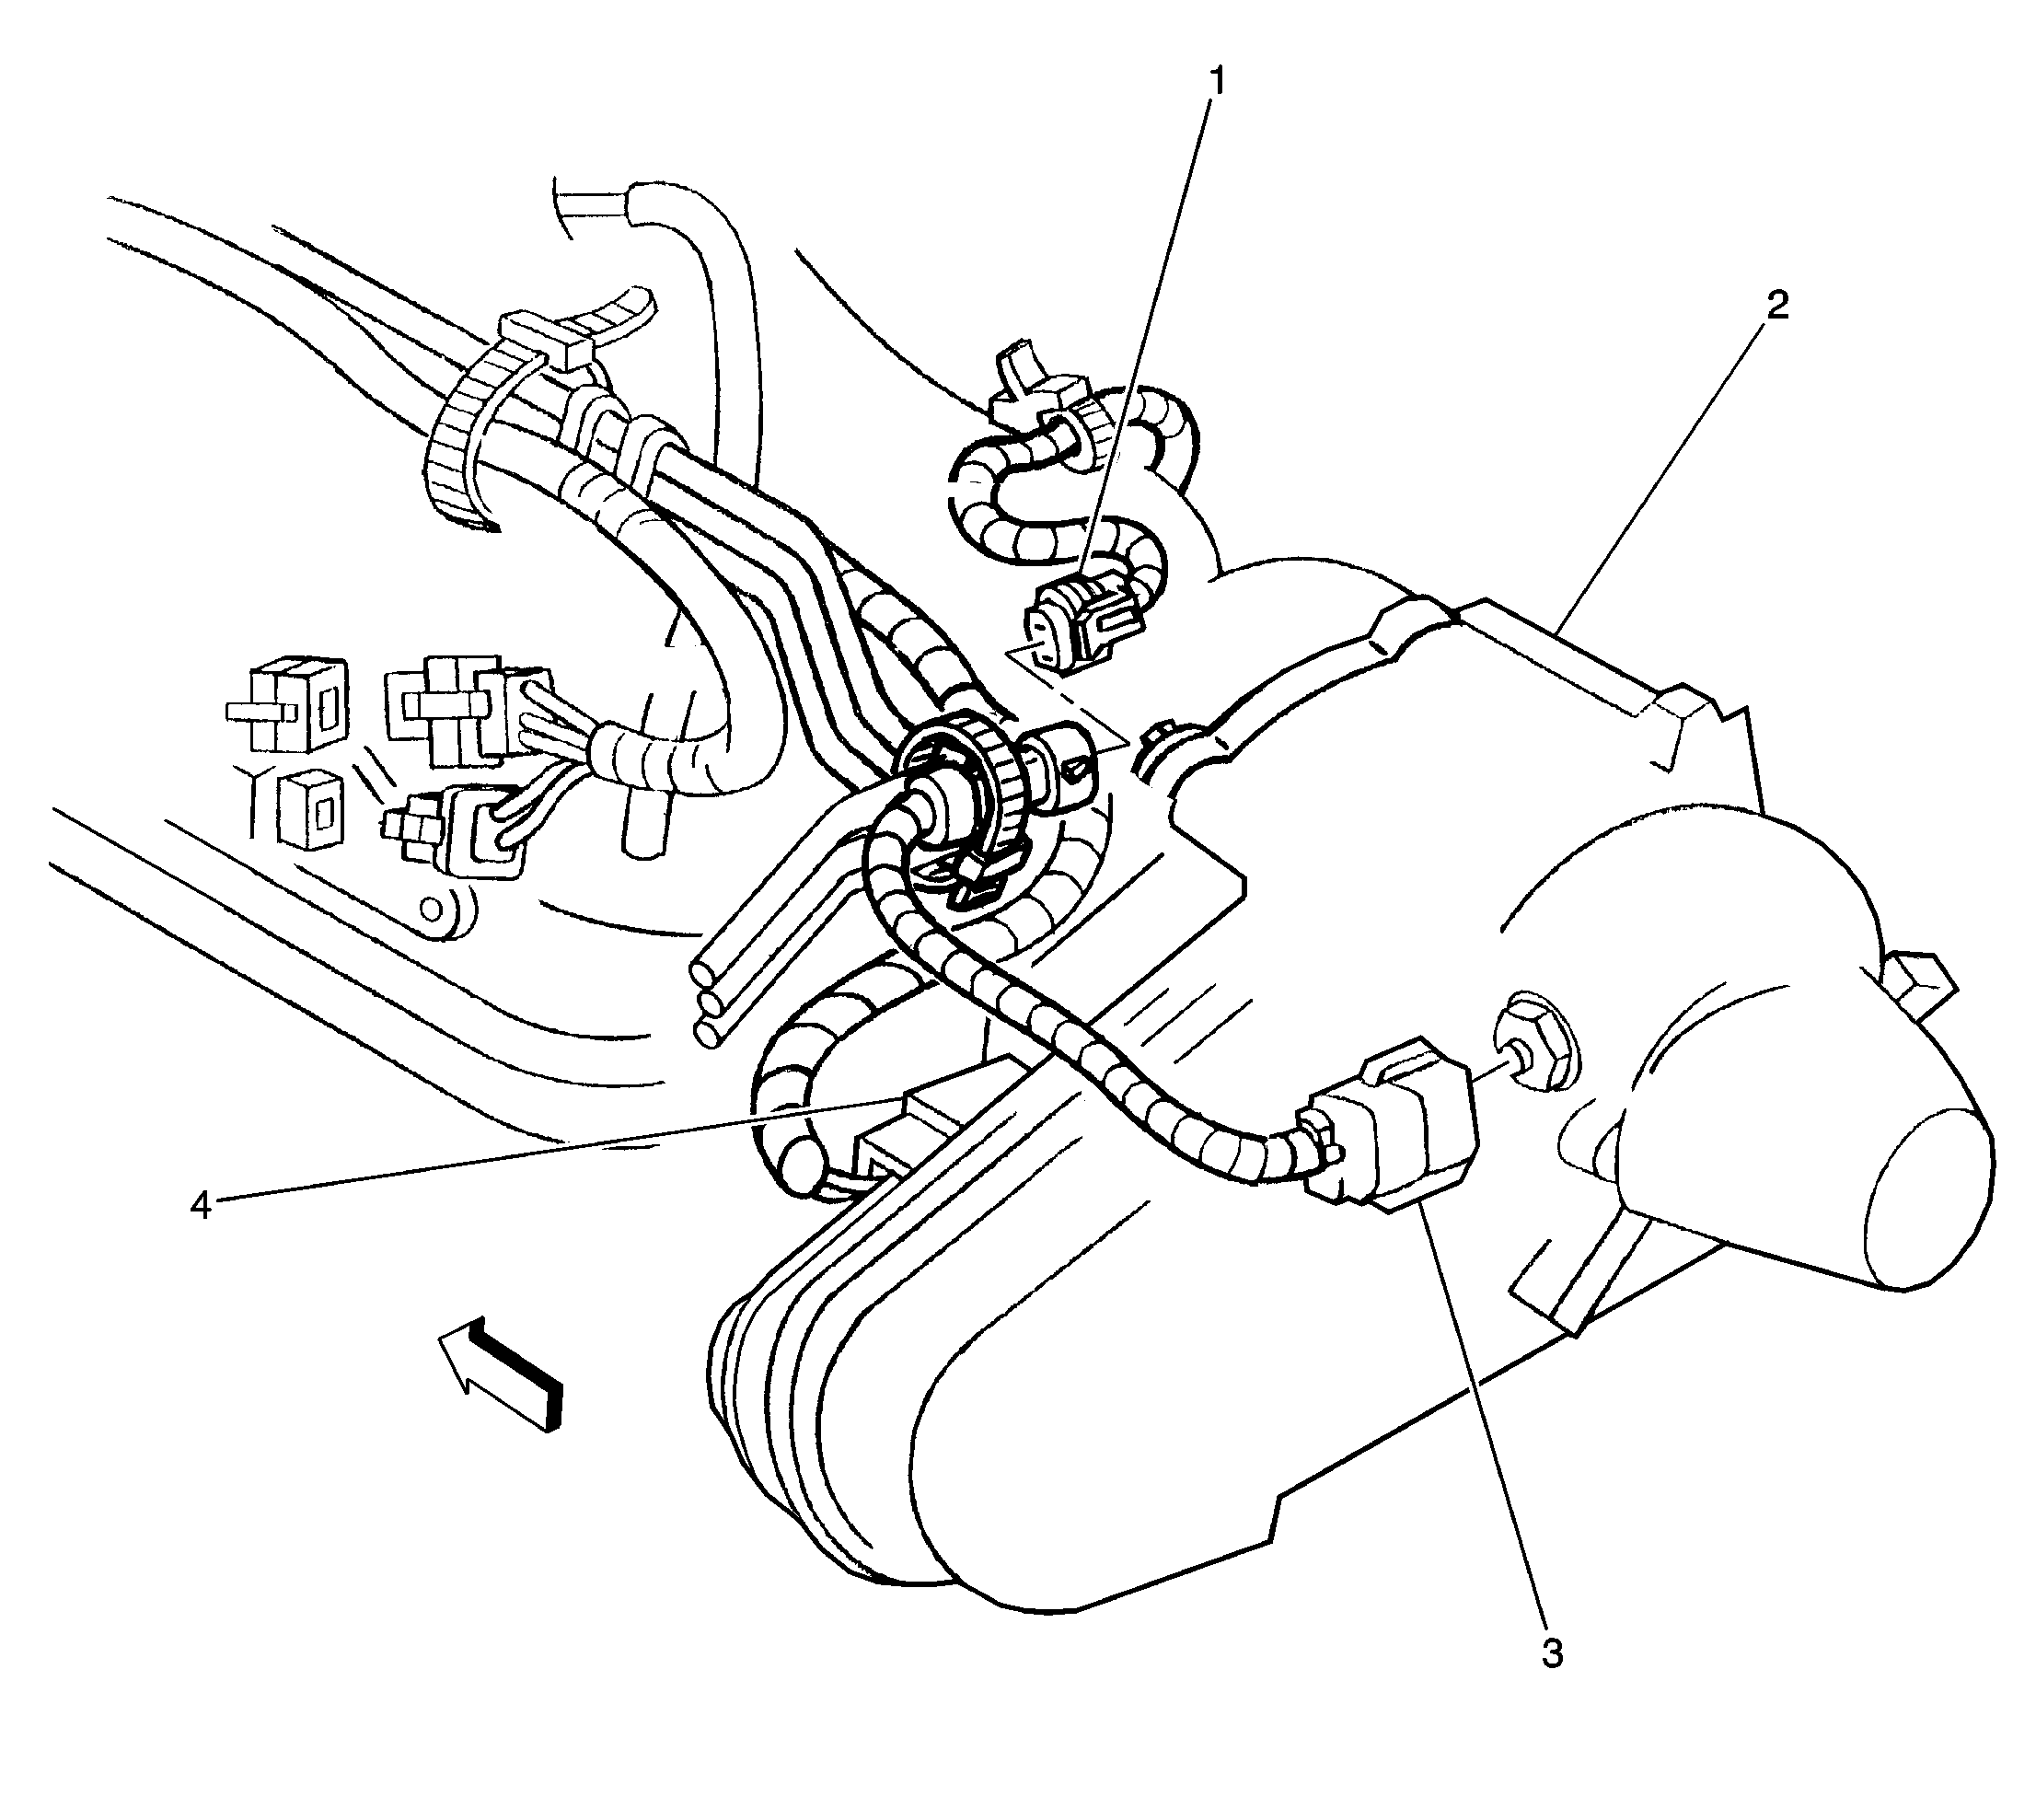
Electric Shift Transfer Case (W/ S4WD)
| To the rear of the transmission
|
Figure 1: Electric Shift Transfer Case Locator View
| --
|
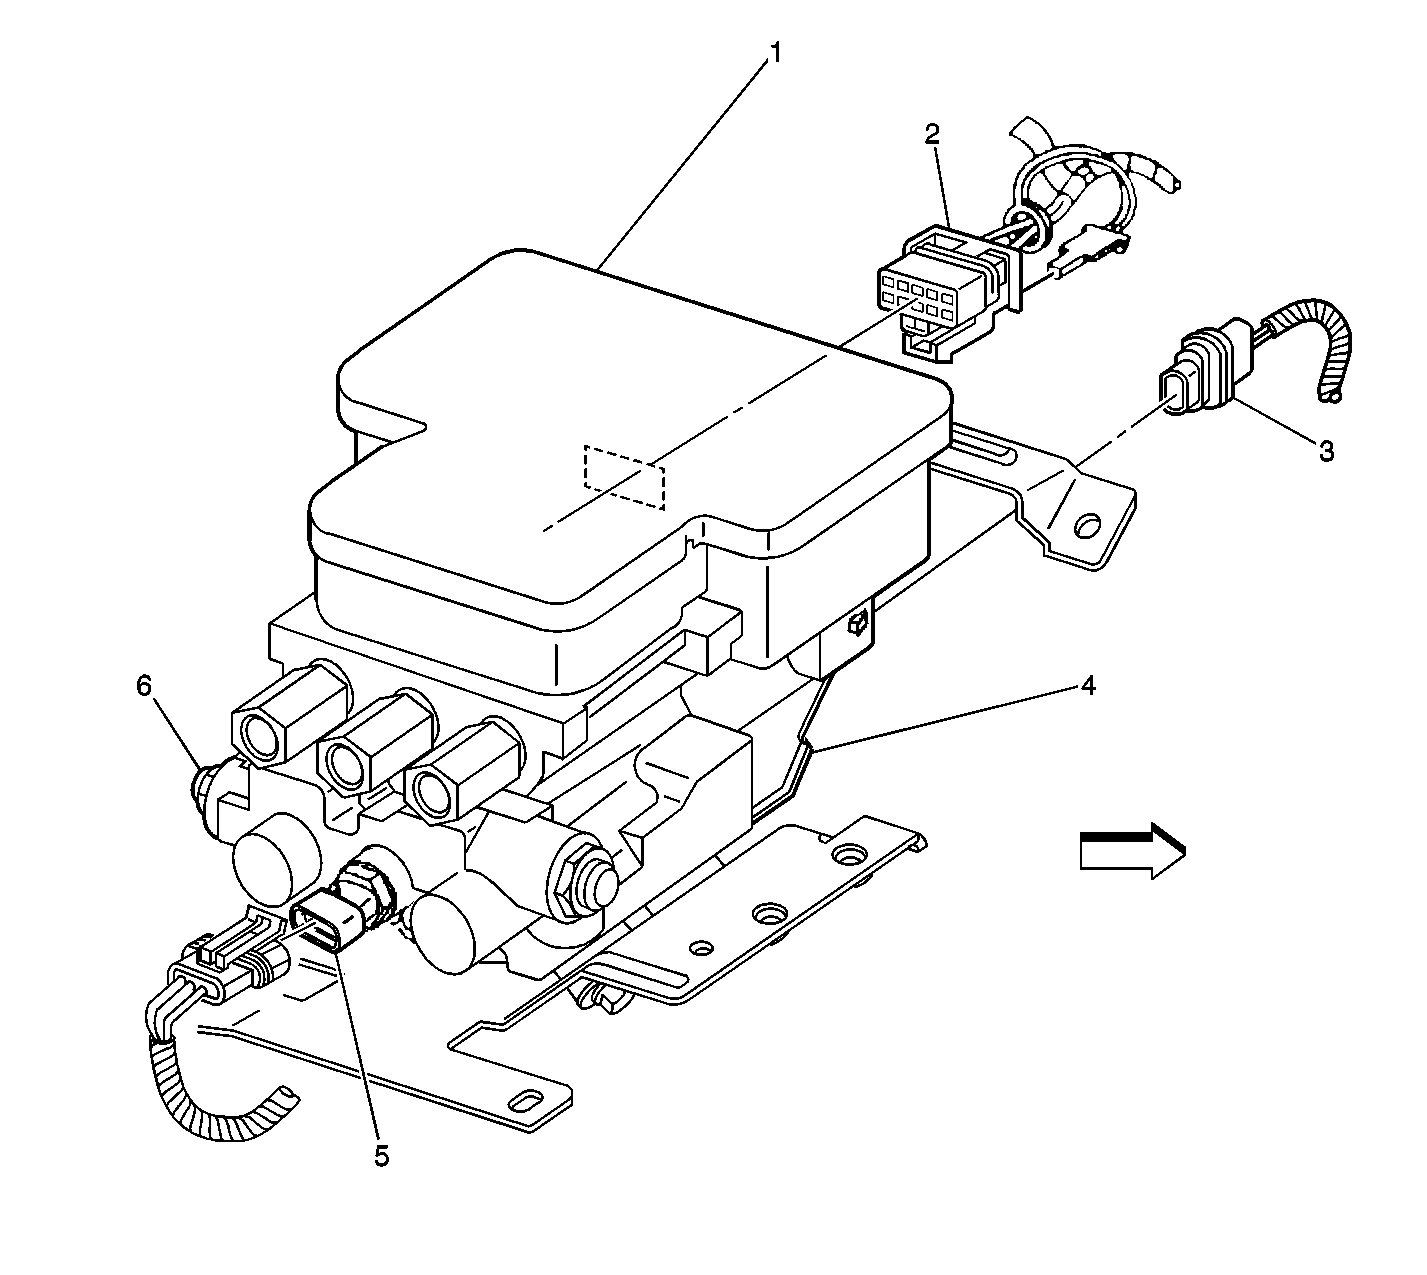
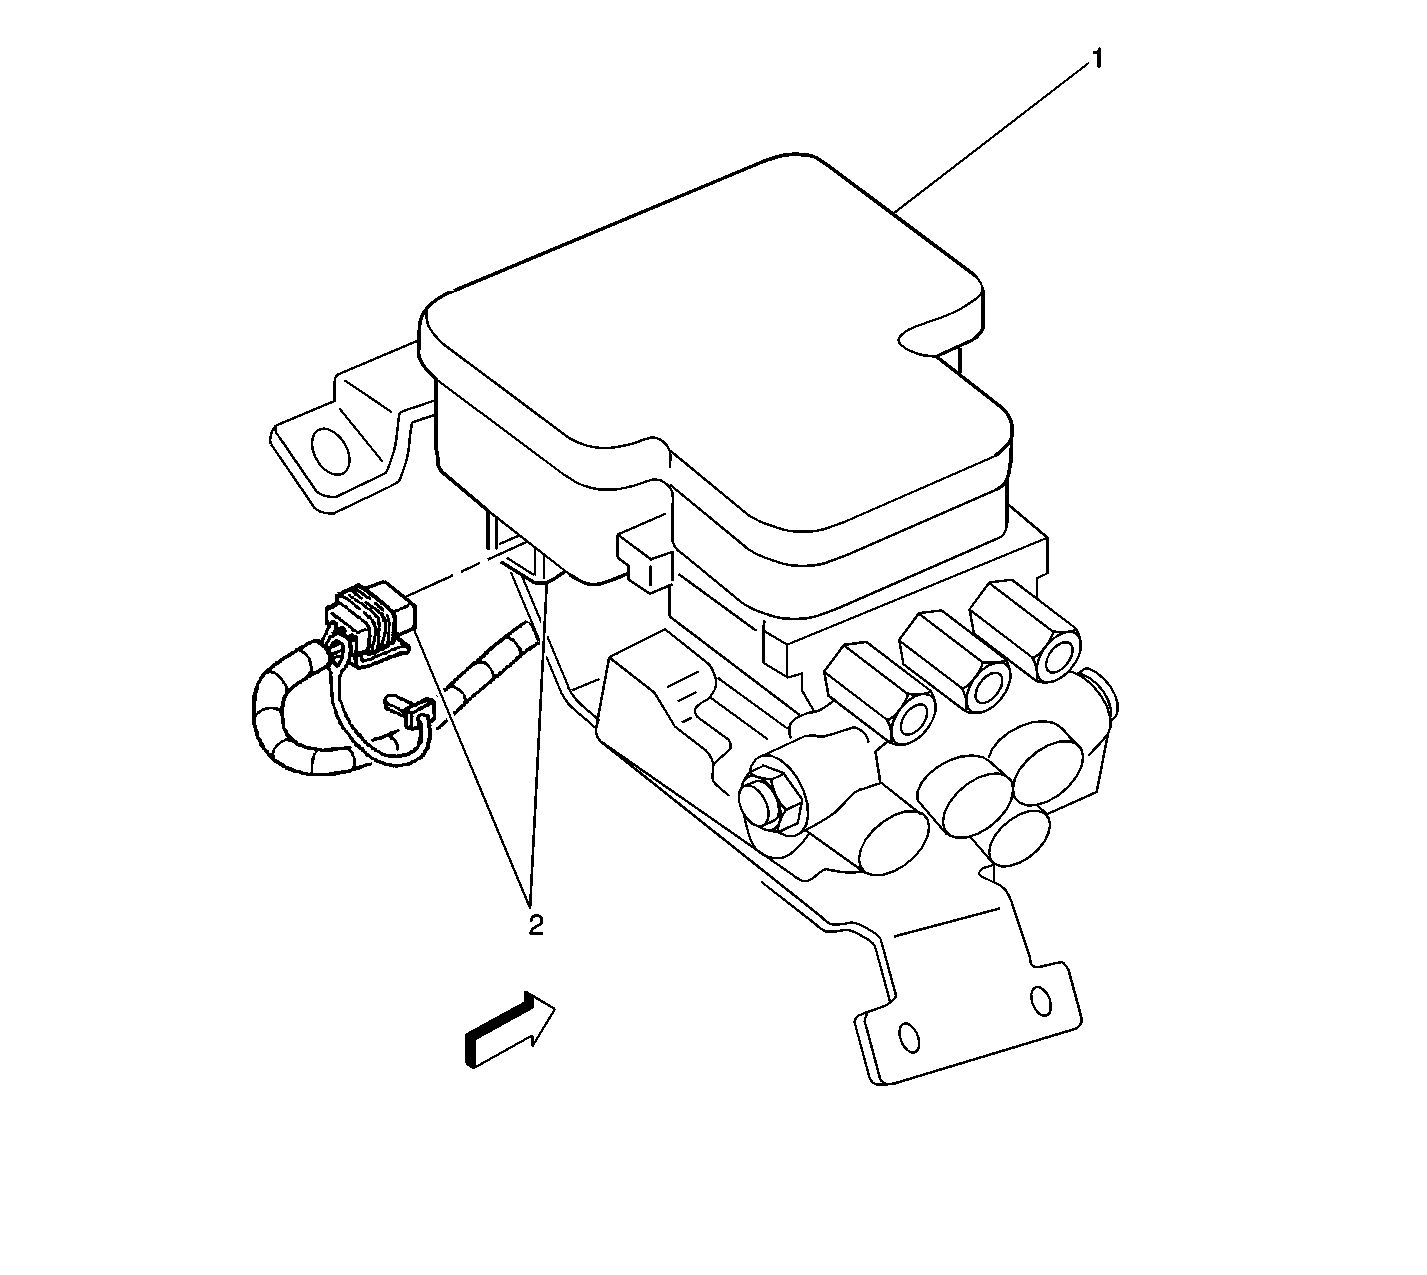
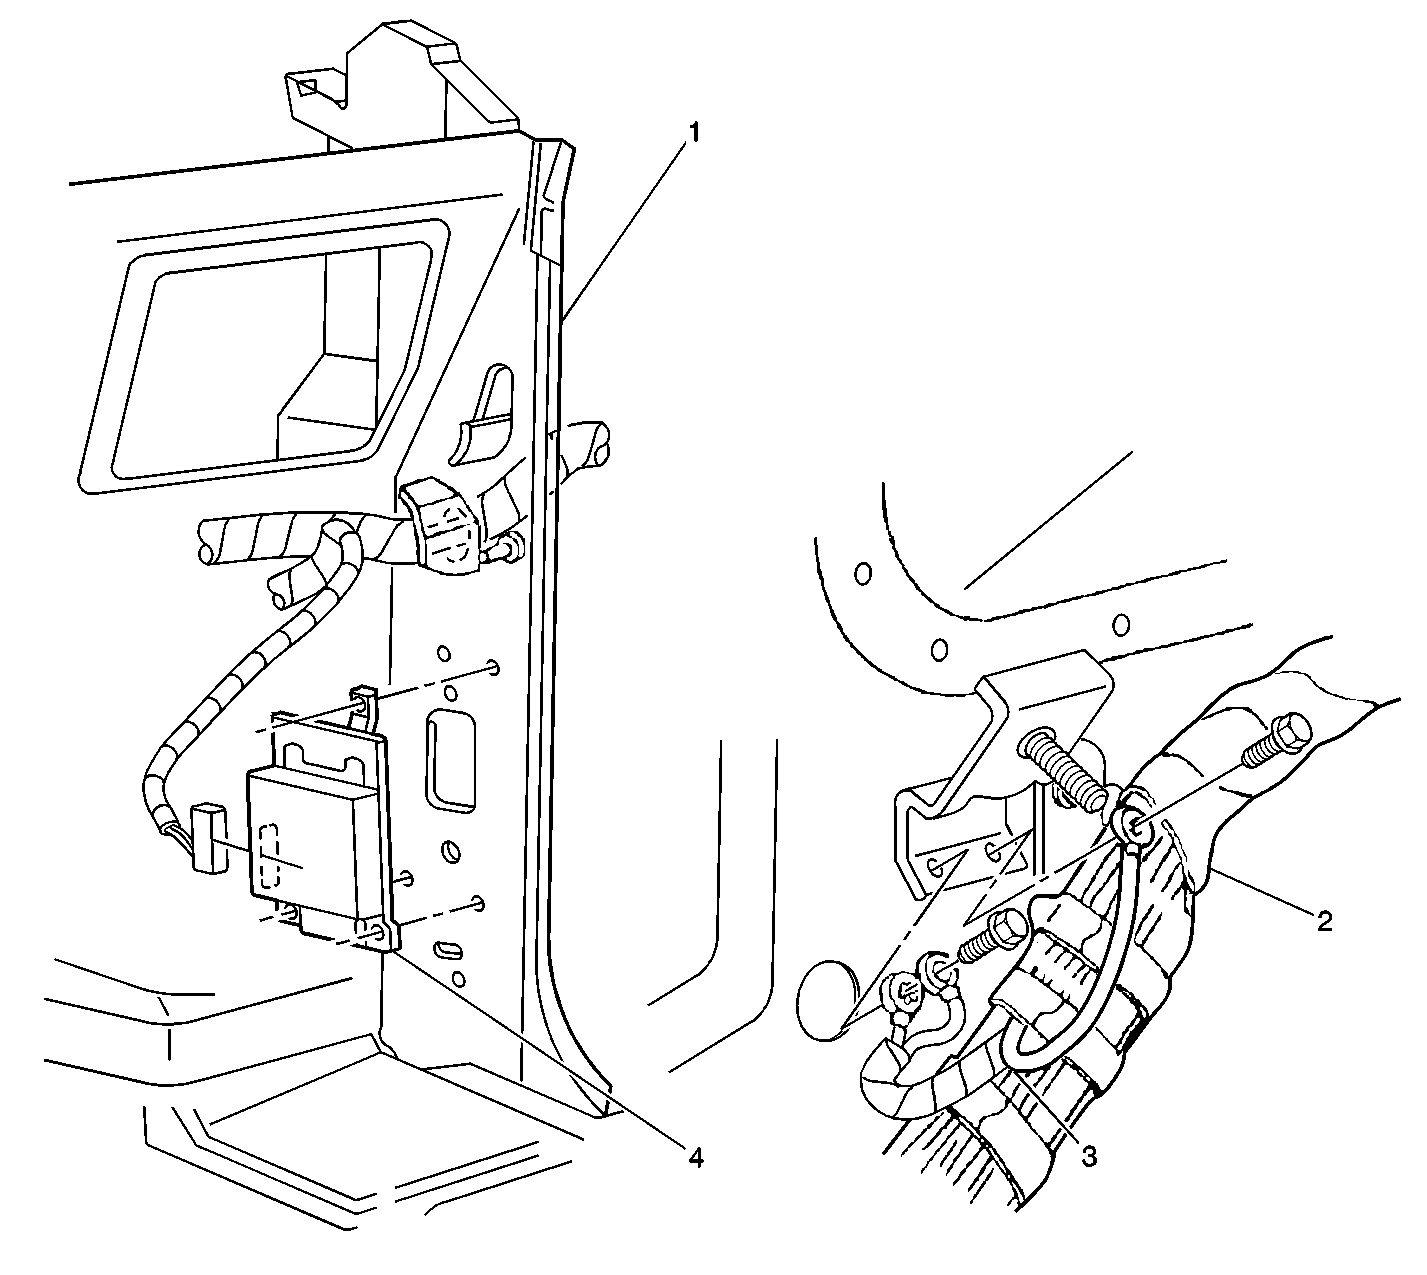
Electronic Brake Control Module
(Part of Brake Pressure Modulator Valve)
| LH front fenderwell between the Underhood Bussed Electrical
Center and Grommet P100
|
Figure 3: Brake Control Module Locator View
| --
|
Electronic
Brake Control Module (Part of Brake Pressure Modulator Valve) Connector C2
(2 Cavities)
| Body harness connector on LH of Electronic Brake Control Module/Brake
Pressure Modulator Valve
|
Figure 1: Brake Control Module Connector C2 Locator View
| Page 202-4 in Connector
End Views in Electrical Diagnosis
|
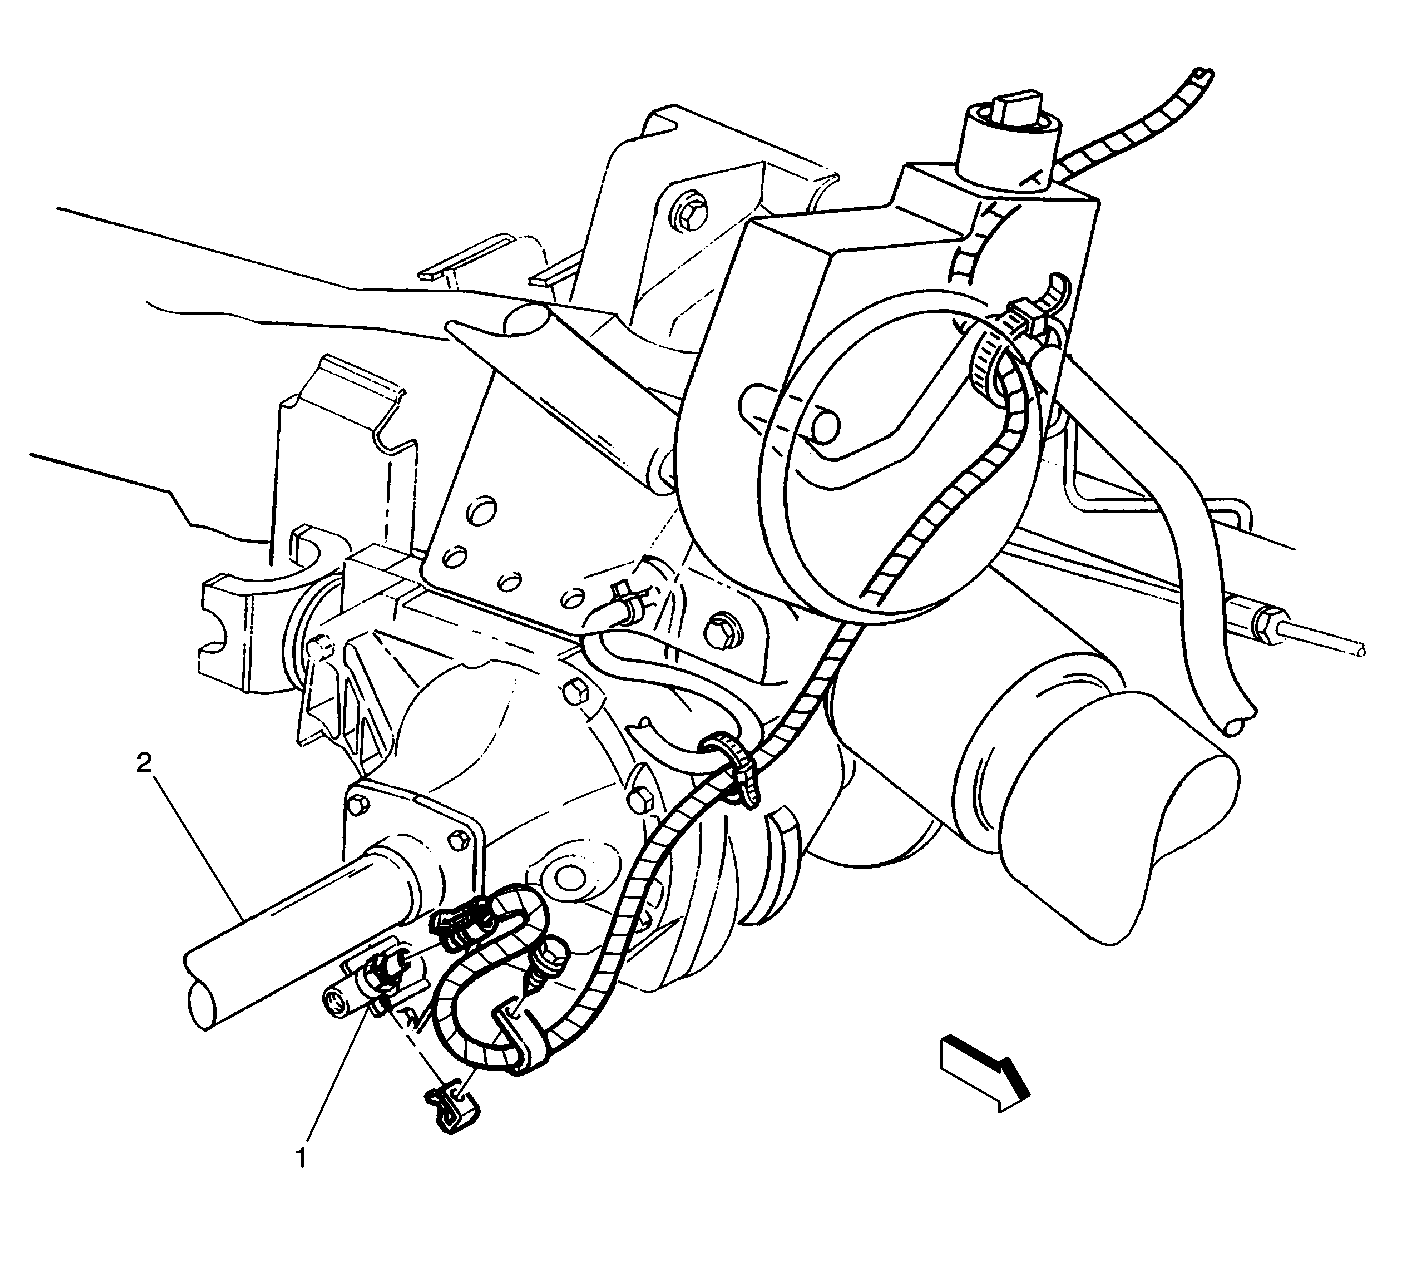
Front Axle Switch
| Front axle, right of differential
|
Figure 3: Front Axle Switch Locator View
| --
|
ILLUM Fuse 5 (IP Fuse Block)
| In the
IP Fuse Block
| IP Fuse Block Details in Power Distribution in Engine Electrical
| --
|
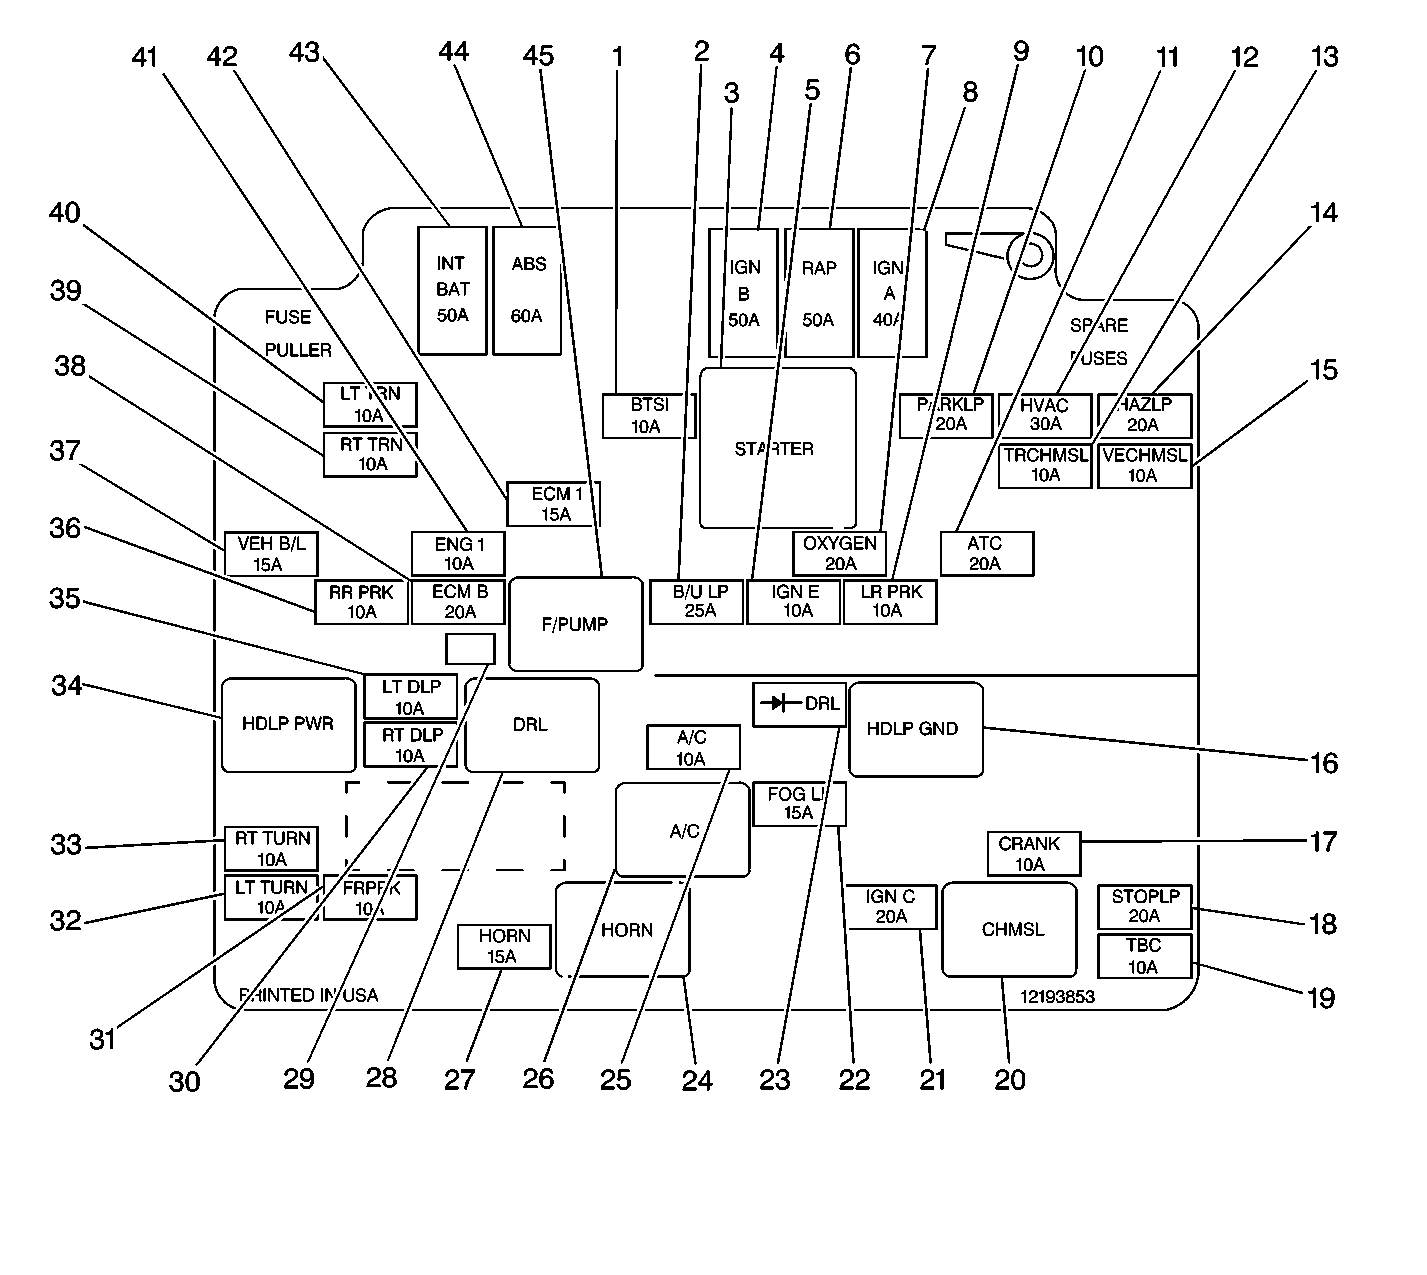
IP Fuse Block
| LH side of the IP near the left front side door jamb switch
| Figure 8 in Electrical
Component Location Views in Electrical Diagnosis
| --
|
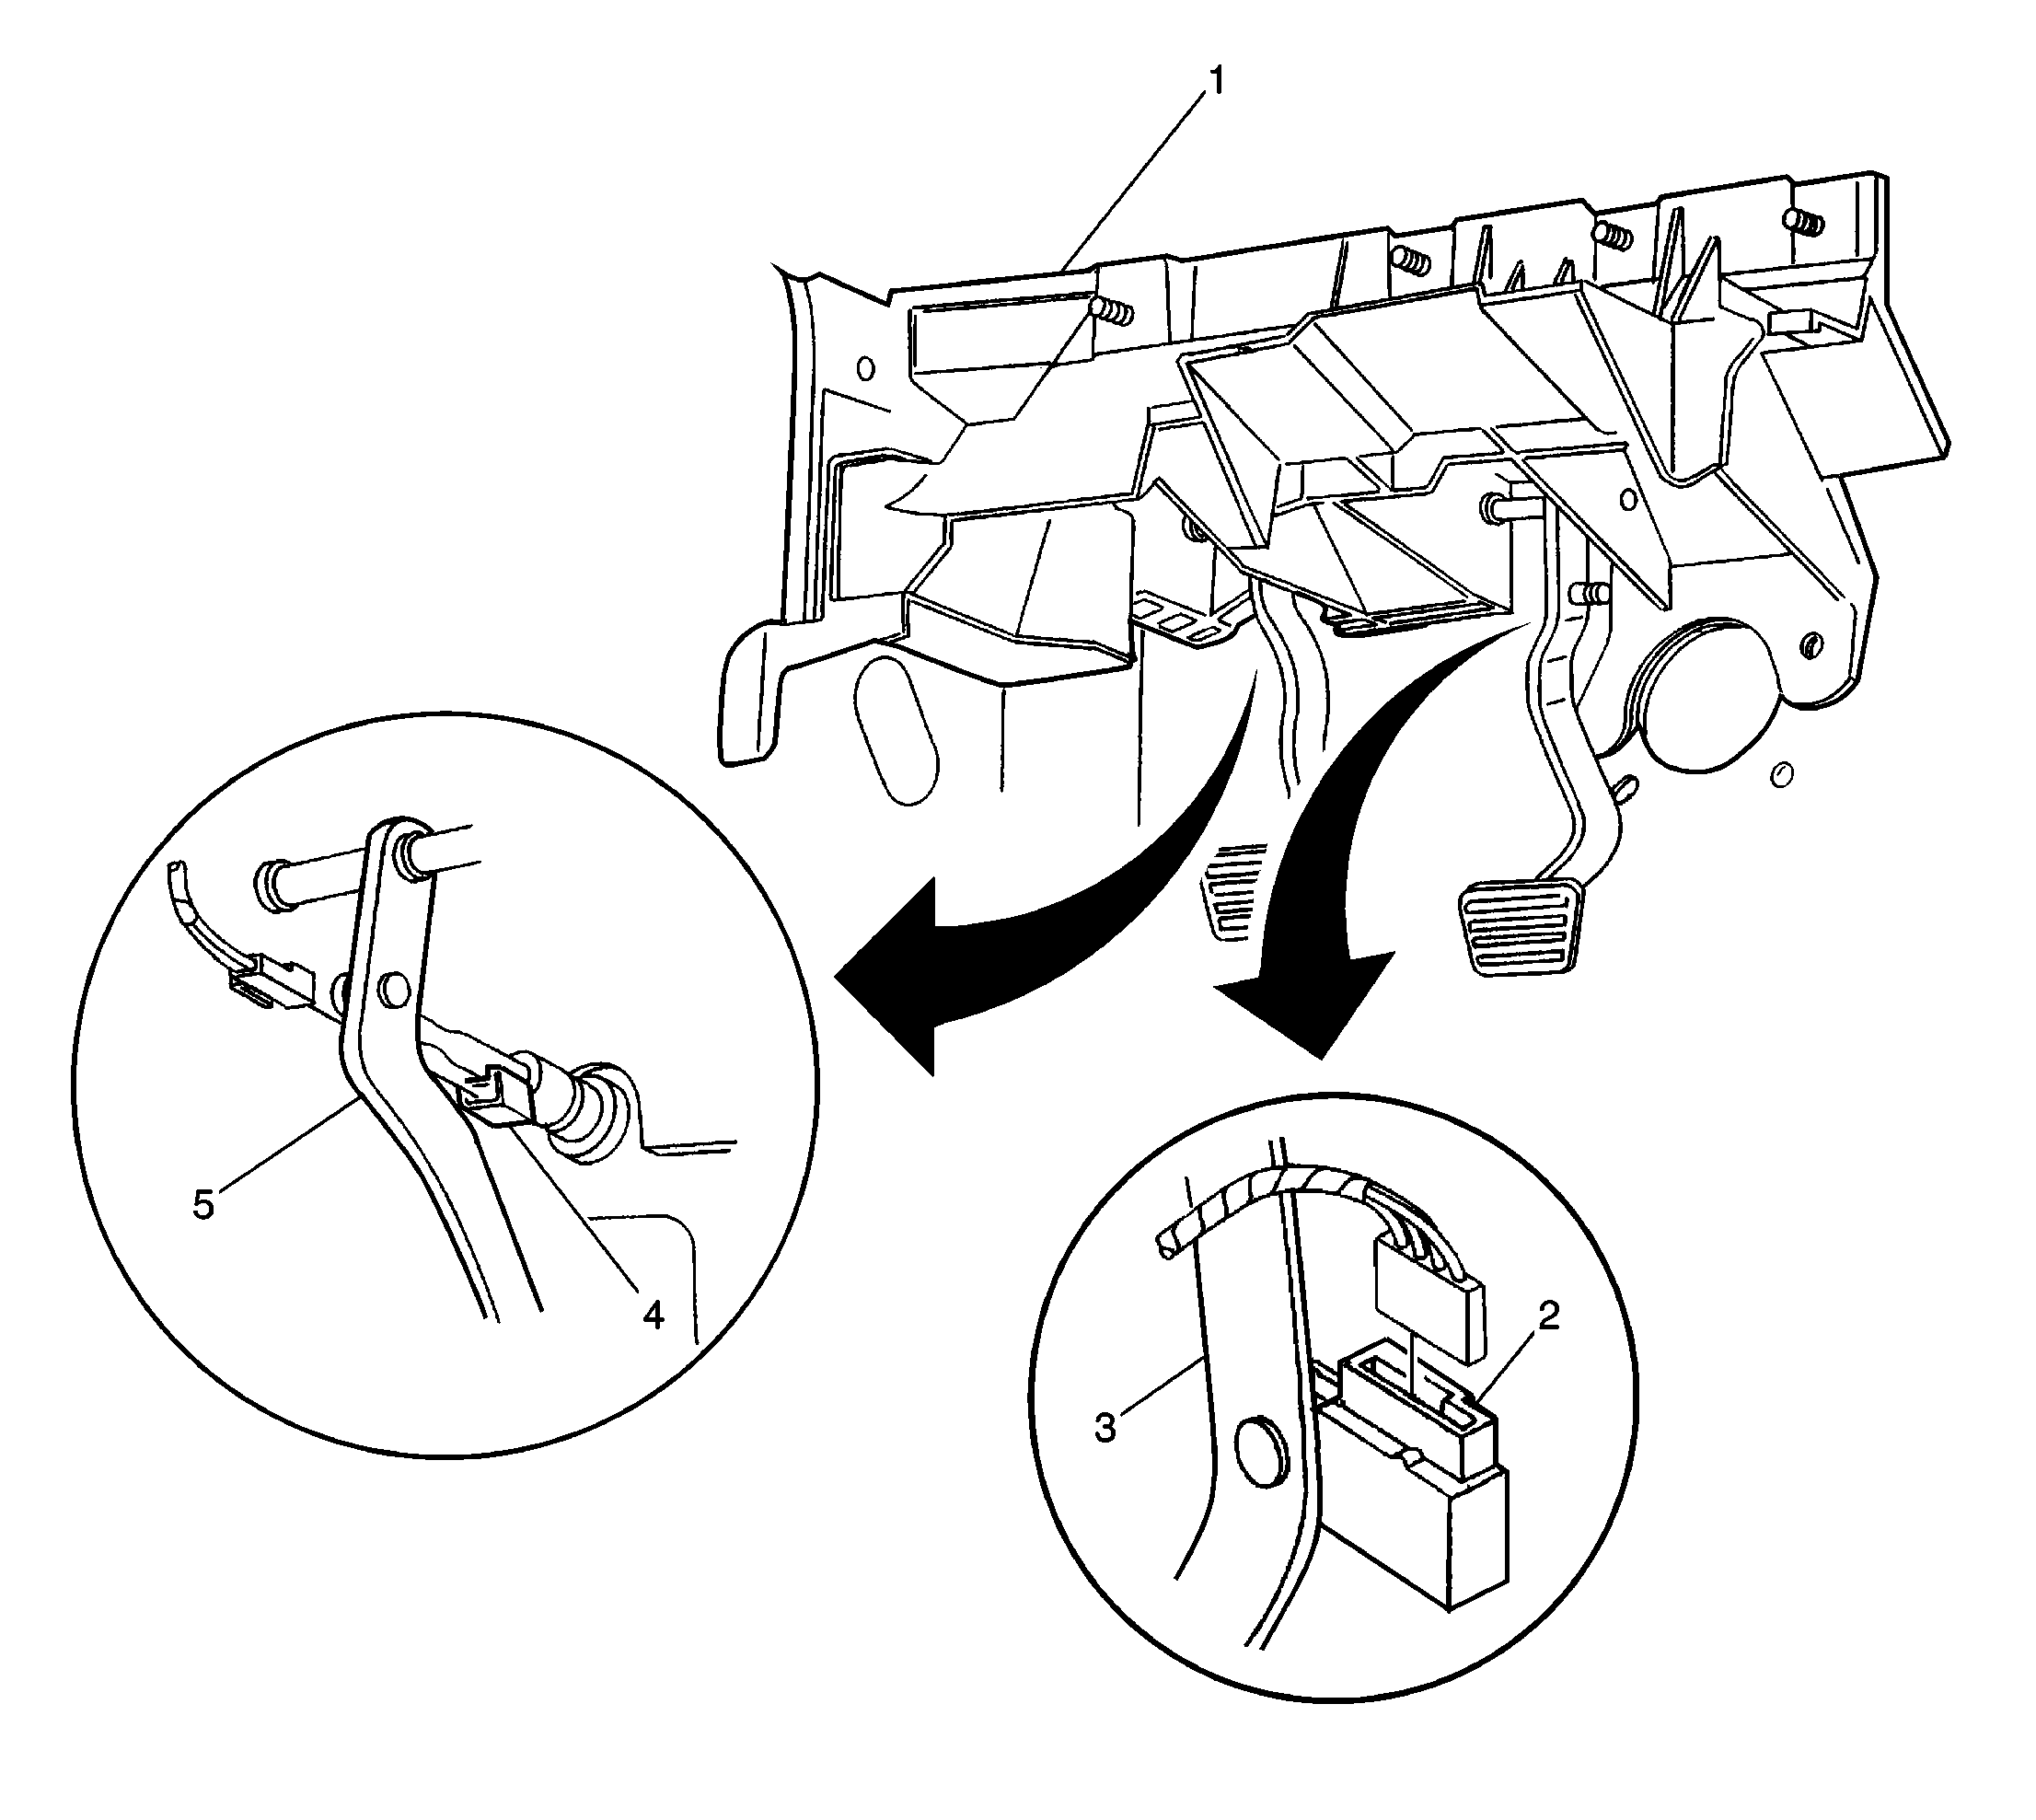
Stop Lamp Switch
| Mounted on brake pedal
|
Figure1: Floor Pedals Locator View
| Page 202-11 in Connector End Views in
Electrical Diagnosis
|
Transfer Case Control Module (TCCM) (NP1)
| Behind Center of Instrument
Panel
|
Figure 5: Shift Control Module Locator View
| Page 202-12 in Connector End Views in
Electrical Diagnosis
|
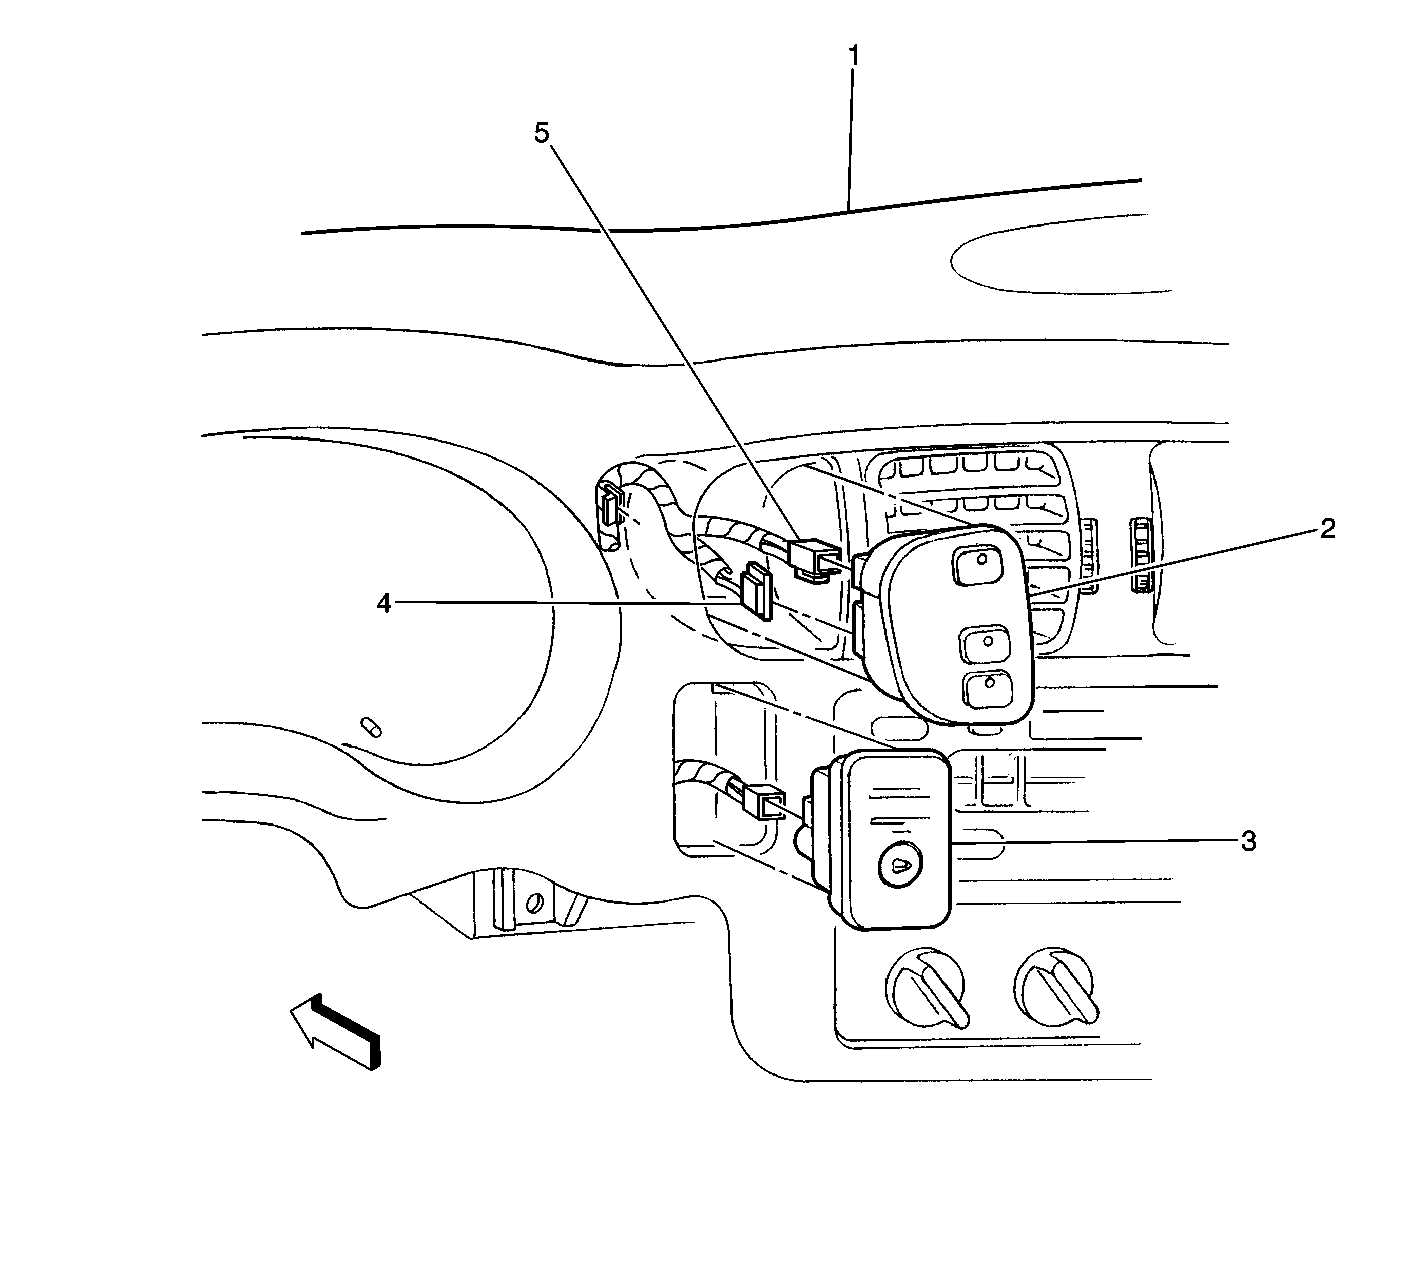
Transfer Case Select Switch
| Front center of instrument panel above
and to the left of the radio
|
Figure 4: Instrument Panel Center Switch Locator View
| --
|
Transfer Case Select Switch (W/ Electric Shift 4WD) Connector C1 (8
Cavities)
| Front center of instrument panel above and to the left of the radio
|
Figure 4: Instrument Panel Center Switch Locator View
| Page 202-12 in Connector End Views in Electrical Diagnosis
|
Transfer Case Select Switch (W/ Electric Shift 4WD) Connector C2 (4
Cavities)
| Front center of instrument panel above and to the left of the radio
|
Figure 4: Instrument Panel Center Switch Locator View
| Page 202-12 in Connector End Views in Electrical Diagnosis
|
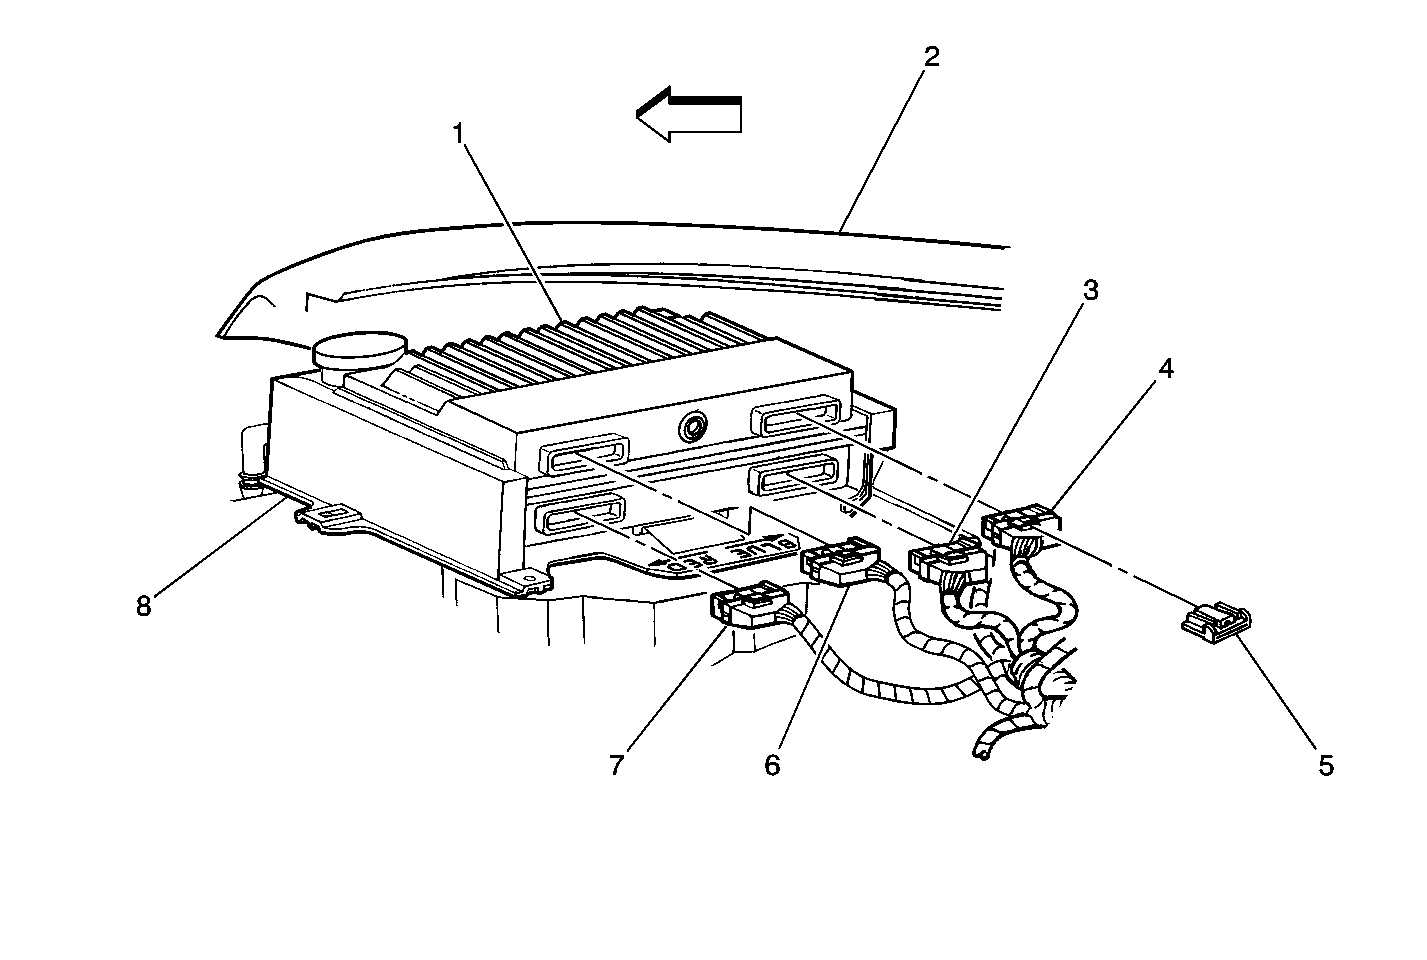
Truck Body Control Module
| Lower rear of IP on the heater assembly
| Figure 8 in Electrical
Component Location Views in Electrical Diagnosis
| --
|
Truck Body Control Module
Connector C2 (24 Cavities)
| Lower rear of IP on the heater assembly
| --
| Page 202-15 in Connector
End Views in Electrical Diagnosis
|
Underhood Bussed Electrical Center (UBEC)
| Over left
front fender well
| --
| --
|
Underhood Bussed Electrical Center (UBEC) Connector C1 (Body, 68 Cavities)
| Below
the Underhood Bussed Electrical Center
| --
| --
|
Vehicle Control Module (VCM) (4.3L Engine)
| RH side of engine compartment
|
VCM
| --
|
Vehicle Control Module (VCM) (4.3L Engine) Connector C4 (24 Cavities)
| RH side of engine
compartment
|
VCM
|
VCM Connector End Views in Engine Controls - 4.3L in Engine
|
C101 (Engine Harness to Body Harness)
(4.3L Engine, 10 Cavities)
| RH engine compartment, near VCM
| --
| Page 202-18 in Connector End Views in
Electrical Diagnosis
|
C108 (Electric Shift Transfer Case extension harness
to Body Harness) (7 Cavities)
| LH rear engine compartment near cowl penetration P100
|
Figure 2: Transfer Case In-Line Connector Locator View

| Page 202-22 in Connector End Views in Electrical Diagnosis
|
C114 (Body harness to front axle switch extension harness) (2 Cavities)
| LH center
of engine compartment, near the electronic brake control module)
|
Figure 6: LH Front Fender Area Locator View
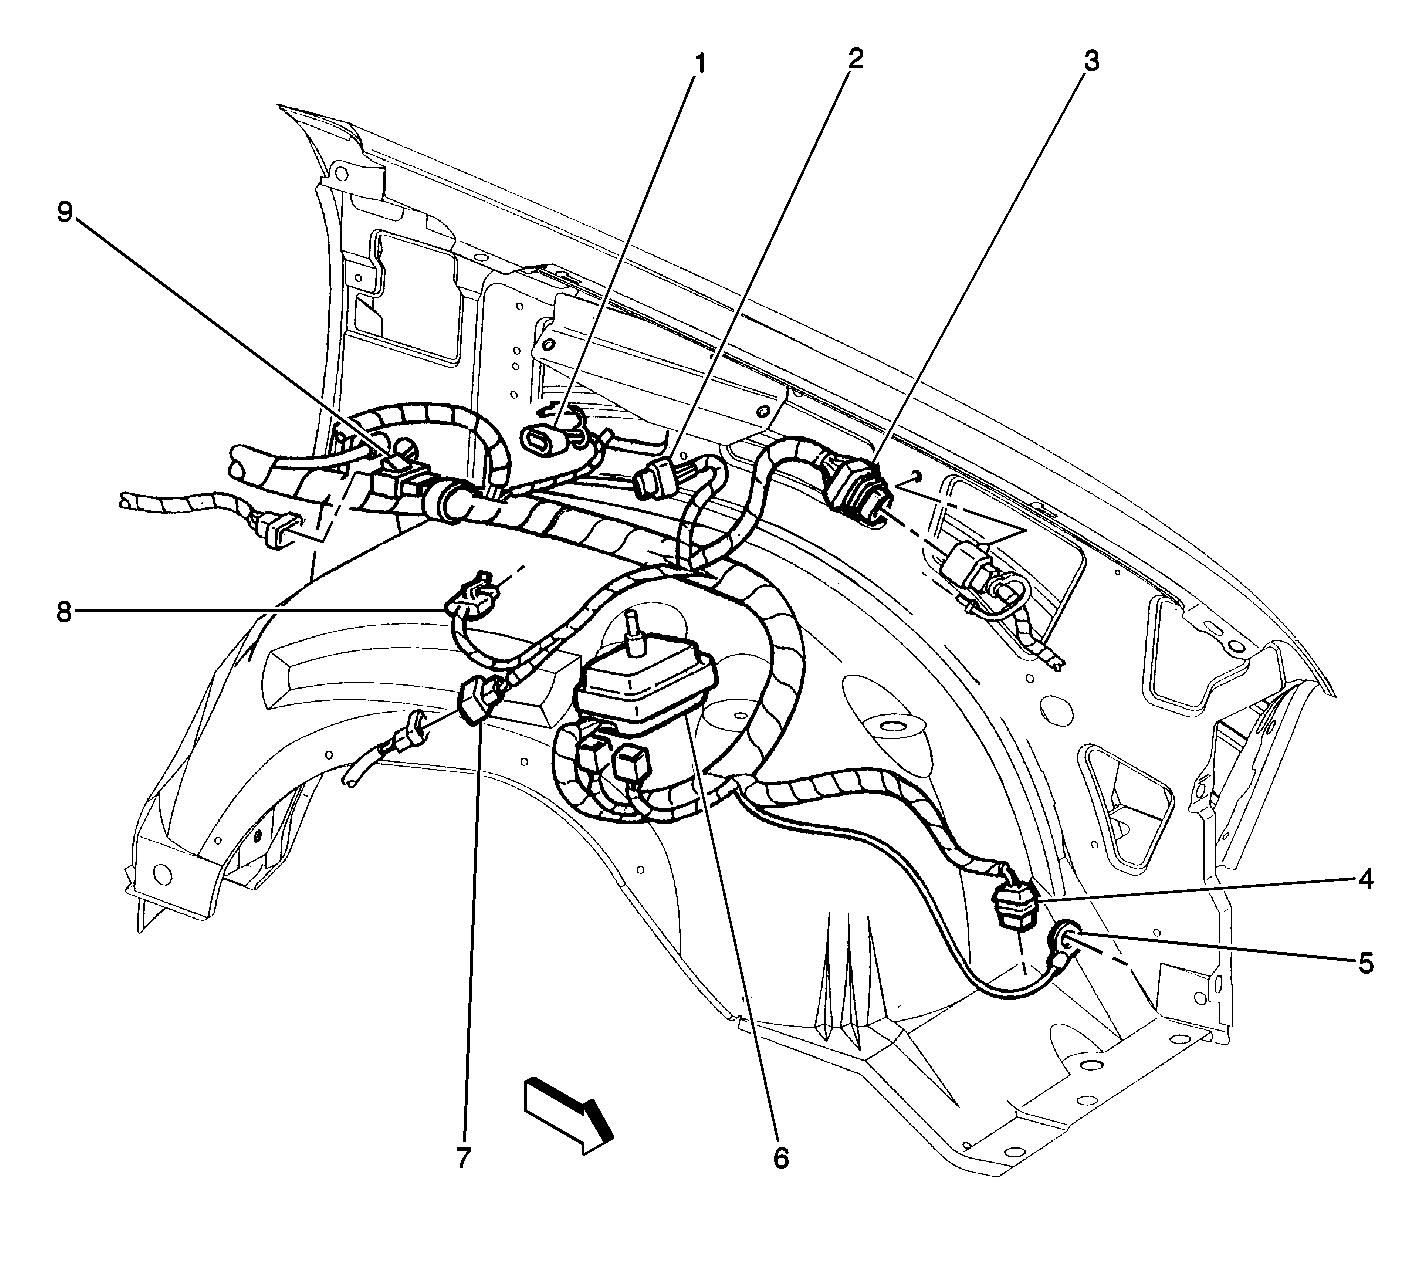
| Page 202-24 in Connector End Views in Electrical Diagnosis
|
C203 (Body Harness to IP Harness) (116 Cavities)
| RH side of dash
|
Figure 5: Shift Control Module Locator View
| Page 202-26 in Connector End Views in Electrical Diagnosis
|
G203 Circuit 1050, Body Harness)
| RH Dash panel, between IP Body Connector C203 and Splice
Packs
|
Figure 5: Shift Control Module Locator View
| --
|
G204 Circuit 1050, Body Harness)
| RH Dash
panel, between IP Body Connector C203 and Splice Packs
|
Figure 5: Shift Control Module Locator View
| --
|
G205 Circuit 1050, Body Harness)
| RH Dash panel, between IP Body Connector C203 and Splice
Packs
|
Figure 5: Shift Control Module Locator View
| --
|
P100 (IP Bulkhead Pass-Through)
| LH rear
of engine compartment, on cowl
| --
| --
|
S121 (Circuit 1695, Body Harness W/ 4WD)
| Between the breakouts
to the VCM and the blower motor relay, 13 cm from the breakout to the VCM
| --
| --
|
S205 (Circuit 1220, IP Harness)
| Between the breakouts for the radio and Truck Body Control
Module Connector C3, 8 cm from the breakout to the radio
| --
| --
|
S208 (Circuit
40, IP Harness)
| IP Harness lower center, between the breakouts for the radio and RH
courtesy lamps, 4 cm from the breakout to the courtesy lamp
| --
| --
|
SP200 (Circuits
41, 241, 341, 817 Splice Pack, Body Harness)
| Strapped to the body harness in the center
front of dash area, to the right of SP204
| --
| --
|
SP203 (Circuit 1050 Splice
Pack, IP Harness)
| On the IP Assembly, in front of the IP ashtray assembly
| --
| --
|
SP204 (Circuits
584, 1414, 1415 Splice Pack, Body Harness)
| Strapped to the body harness in the center
front of dash area, to the left of SP200
| --
| --
|
