Important: The steering gear has end limiter valves (end limiters) which provide
an increase in steering effort at a point within 1/3 turn of the axle stop
contact. This is normal operation.
- Place a container under the power steering hoses at the power steering
hose bulk head in order to catch the fluid when disconnecting or connecting
the hoses.
Clean the surface of the hoses before disconnecting the hoses.
- Use the J-42971 (Hydraulic Line Seperator) to disconnect the pressure
hose snap-to-connect fittings at the power steering hose bulk head.
Important: Lubricate the tool end in power steering fluid to ensure smooth engagement
with the quik disconnectors.
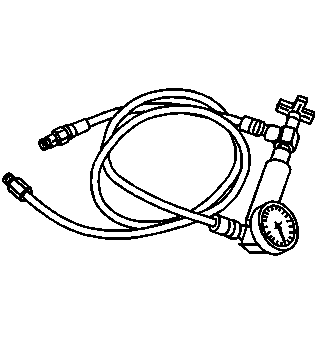
- Connect the analyzer hoses to the adapters.
- Bleed the power steering system if the analyzer has never been
used. Refer to
Power Steering System Bleeding
.
Ensure that the analyzer gate valve remains open during the bleeding
procedure.
Important: Throughout the following testing procedure, the letters in parentheses
indicate specific pressures and flows.
Document the values of the pressures and the flows. Use the letters
in parentheses as references for comparing the values.
- Run the engine at idle speed with the gate valve open. Record the flow
(A) and the pressure (B).
| 5.1. | If the flow is below 2 gpm, then the pump may need repair.Continue
the test |
| 5.2. | If the pressure is above 200 psi, inspect the hoses for
restrictions. |
- Partially close the gate valve in order to build up to 700 psi.
Record the flow (C).
- Compare the values of flow (A) and flow (C).
If flow (C) drops more than 1 gpm under flow (A) then:
- Replace or rebuild the pump. Refer to
Power Steering Pump Assemble
.
- Replace the following components:
- Complete the following steps in order to obtain the pressure value
(D):
| 10.1. | Close the gate valve for not more than five seconds. partially
open the gate valve. |
| 10.2. | Close and partially open the valve two more times. Observe and
record the pressure (D) each time that the gate is closed. |
- Compare the pressures (D) to the specified pressures.
| • | If the recorded pressures are 100 psi lower than specifications,
than replace the pump flow control valve. |
| • | If the pressures (D) are greater than the low specifications and
vary from each other by more than 100 psi (1,450 BAR) than
remove and clean the pump flow control valve. |
| • | Inspect the pump flow control valve bore for dirt or foreign materials.
clean the pump flow control valve bore. |
| • | Inspect the system fluid for contamination. If the fluid is contaminated,
dissemble and clean the steering gear and the pump before assembly. |
- Increase the engine speed from idle to approximately 1500 RPM.
Record the flow (E).
- Compare the values of flow (A ) and flow (E). Complete the folowing
steps if flow (E) varies by more than 1 gpm from flow (A).
| 13.1. | Remove and clean the pump flow control valve. |
| 13.2. | Inspect the pump flow control valve bore for dirt or foreign materials.
Clean the pump flow control bore. |
| 13.3. | Inspect the fluid for contamination. If the fluid is contaminated,
dissemble and clean the steering gear and the pump before assembly |
- Have an assistant lightly turn the steering wheel into the left
steering stop and then the right steering stop.
Caution: This test can be dangerous if not performed correctly. Keep your fingers
clear of steering stops and spacer block during this test. Make sure that
the spacer block contacts the steering stop squarely. Contact that is not
square could break the steering stop or dangerously throw or eject the spacer
block.
Notice: Do not hold the steering wheel in the full turn position longer than
five seconds. To do so may damage the power steering pump.
Important: Use a non-hardened 1.3 cm (0.5 in) steel spacer on the
steering gear.
- Use a long handle to hold the spacer in place in front of the steering
stops. this action will prevent pressure relief poppets from tripping.
- Record the pressure and the flow (F).
Verify that the following conditions exist:
| • | The pressures measured at the steering stops are close in value
to the maximum pump output (D). |
| • | The flow drops below 1 gpm. |
| • | If the above conditions do not exist, the steering gear is leaking internally.
Repair the steering gear. |
- Perform the following actions simultaneously.
| • | Have an assistant turn the steering wheel slightly in both directions
and then quickly release the wheel. |
| • | Observe the pressure gage. |
| • | Under normal conditions, the needle will move from the normal back pressure
reading and snap back when the wheel is released. A slow or sticking needle
indicates a sticking rotary valve in the steering gear. |
- Complete the following steps if the pressure gage needle moves
slowly or sticks:
| 18.1. | Remove the rotary valve. |
| 18.2. | Disassemble and clean the rotary valve |
- If contamination exists in the system oil, dissemble and clean
or replace the pump. Refer to
Power Steering Pump Assemble
.

