For 1990-2009 cars only
Special Tools
| • | EN 46330 Timing Belt Tensioner Retaining Pin |
| • | EN 46330 Angle Meter |
Removal Procedure
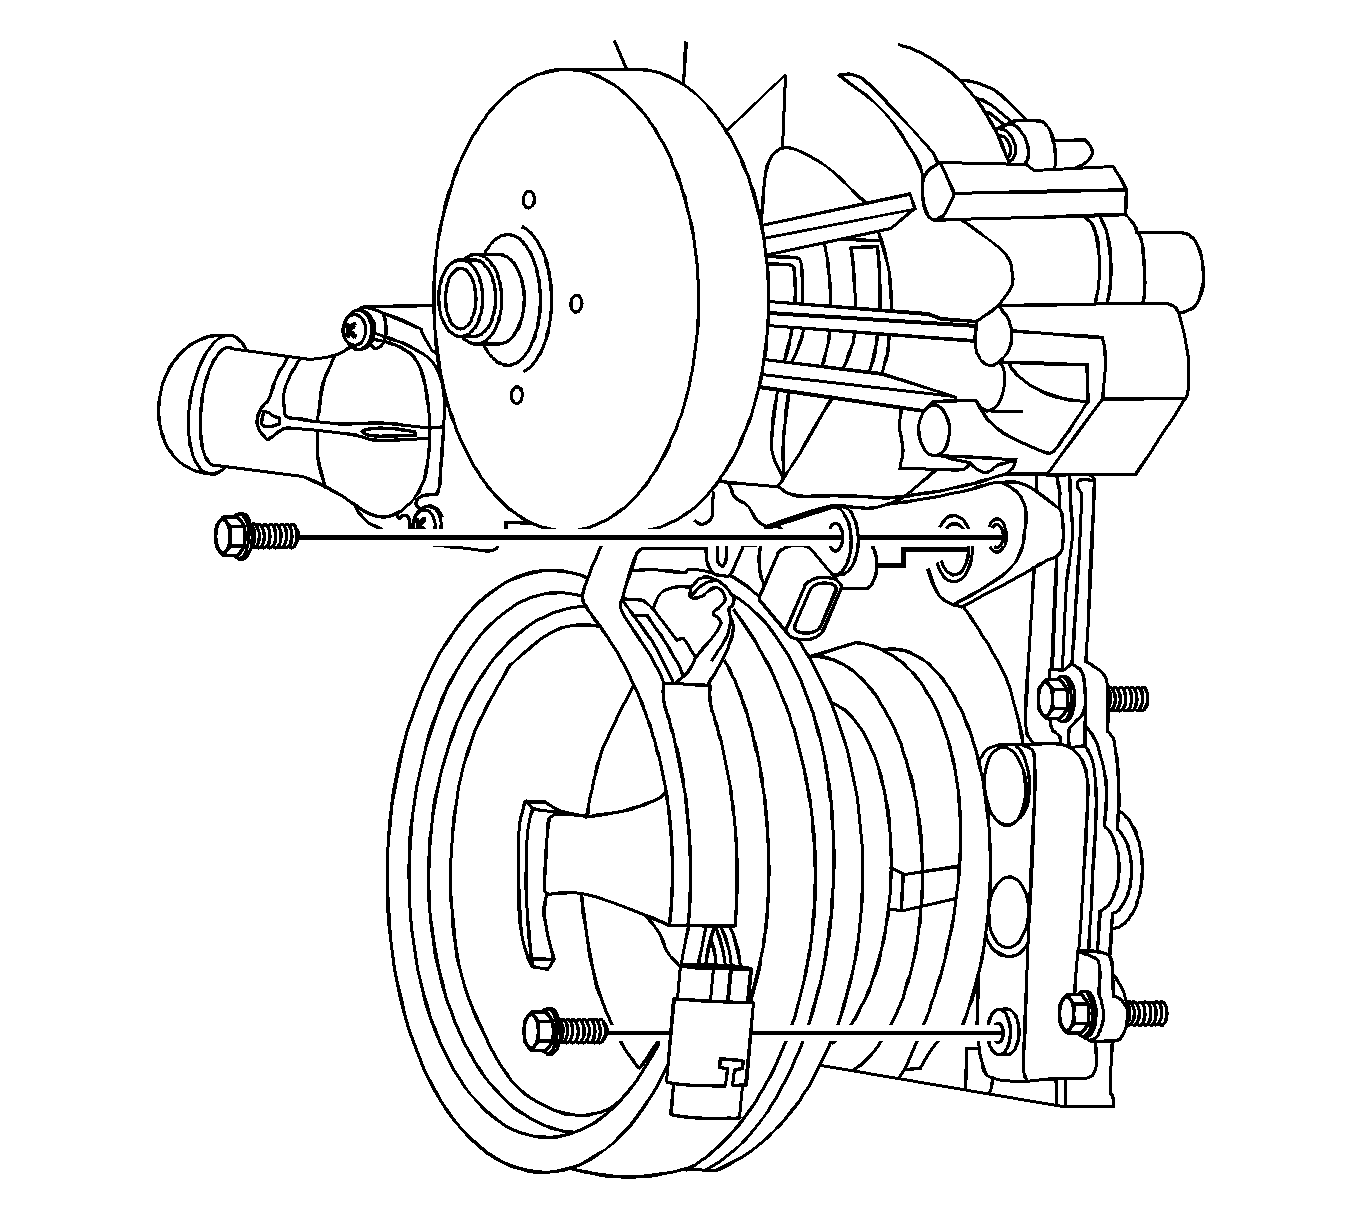
- Remove the condenser. Refer to Air Conditioning Condenser Replacement.
- Remove the engine front cover. Refer to Engine Front Cover Replacement.
- Remove all of the valve lifters. Refer to Valve Lifter Replacement.
- Remove the camshaft sensor bolt and sensor.
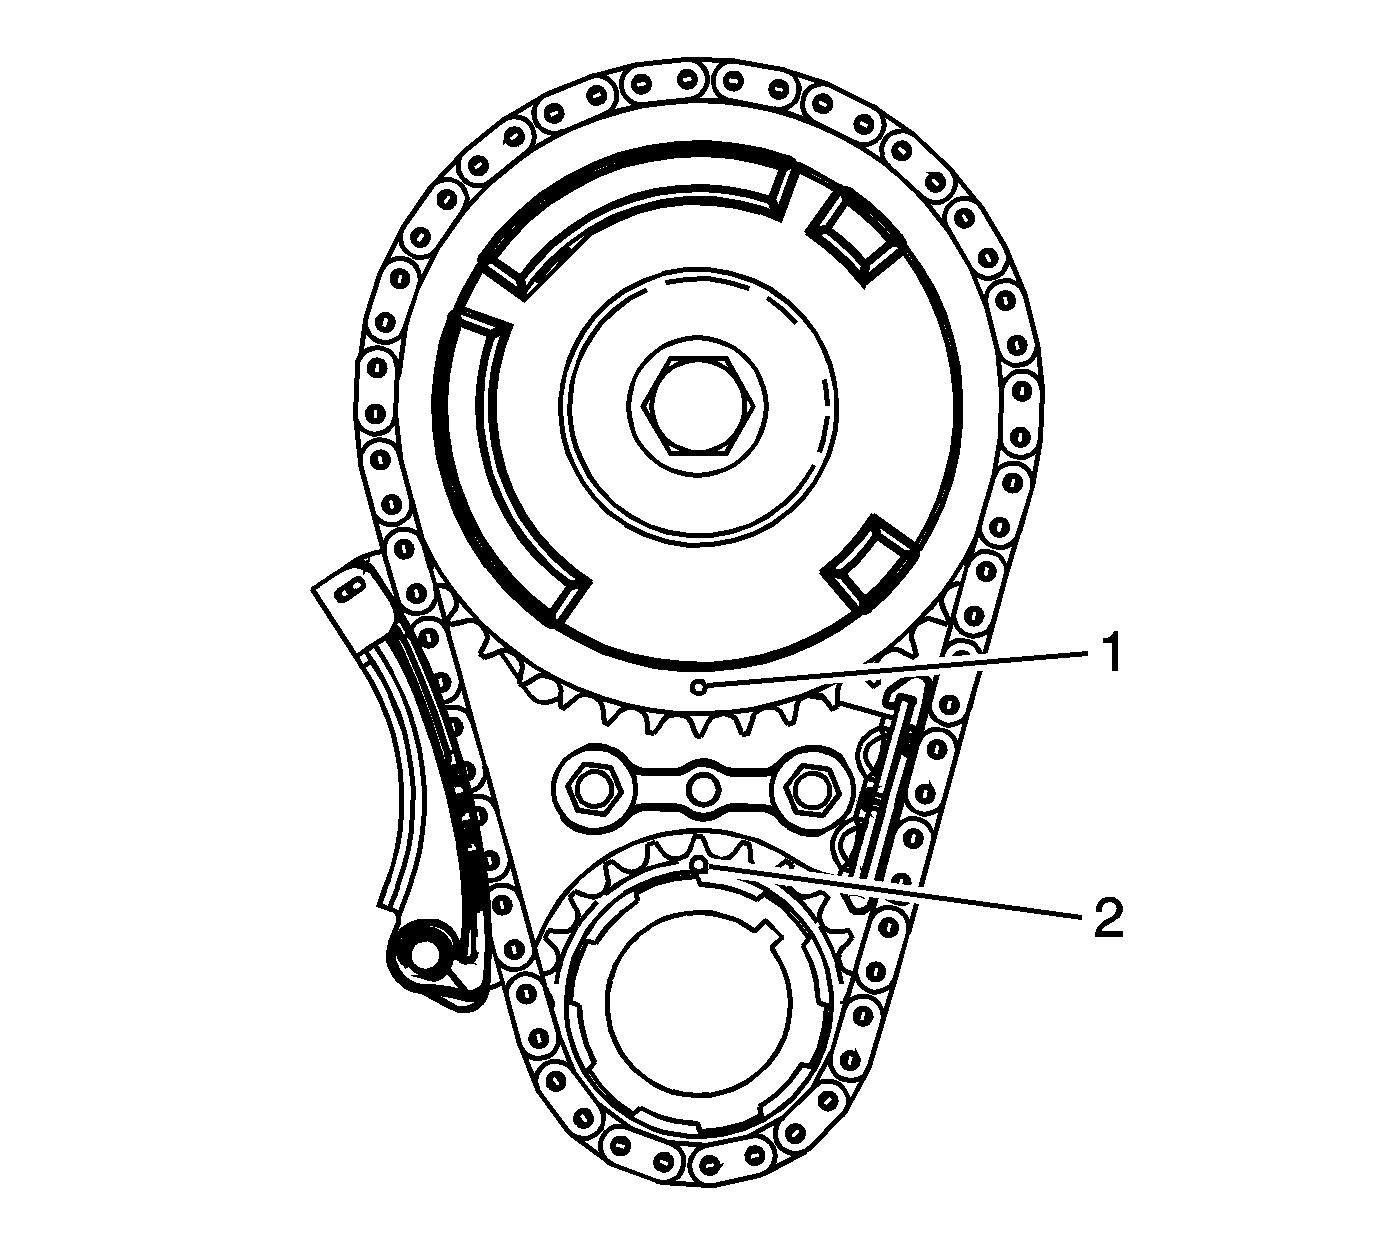
- Rotate the crankshaft until the timing marks on the crankshaft and camshaft sprockets are aligned.
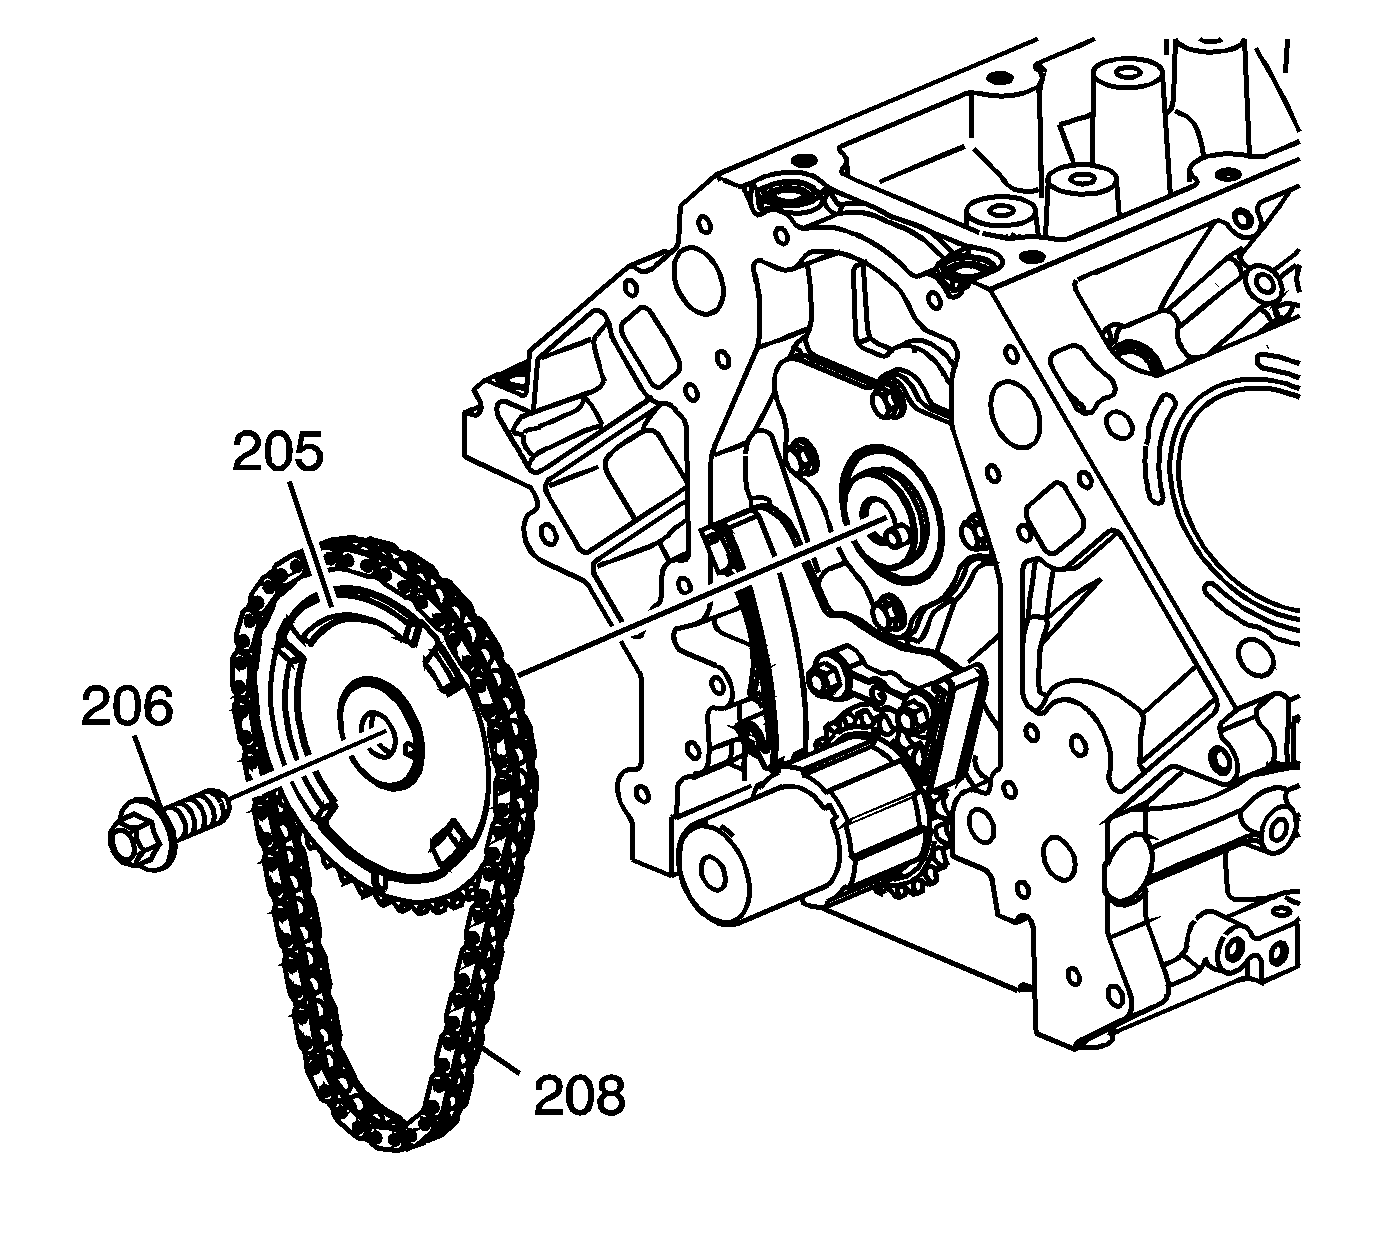
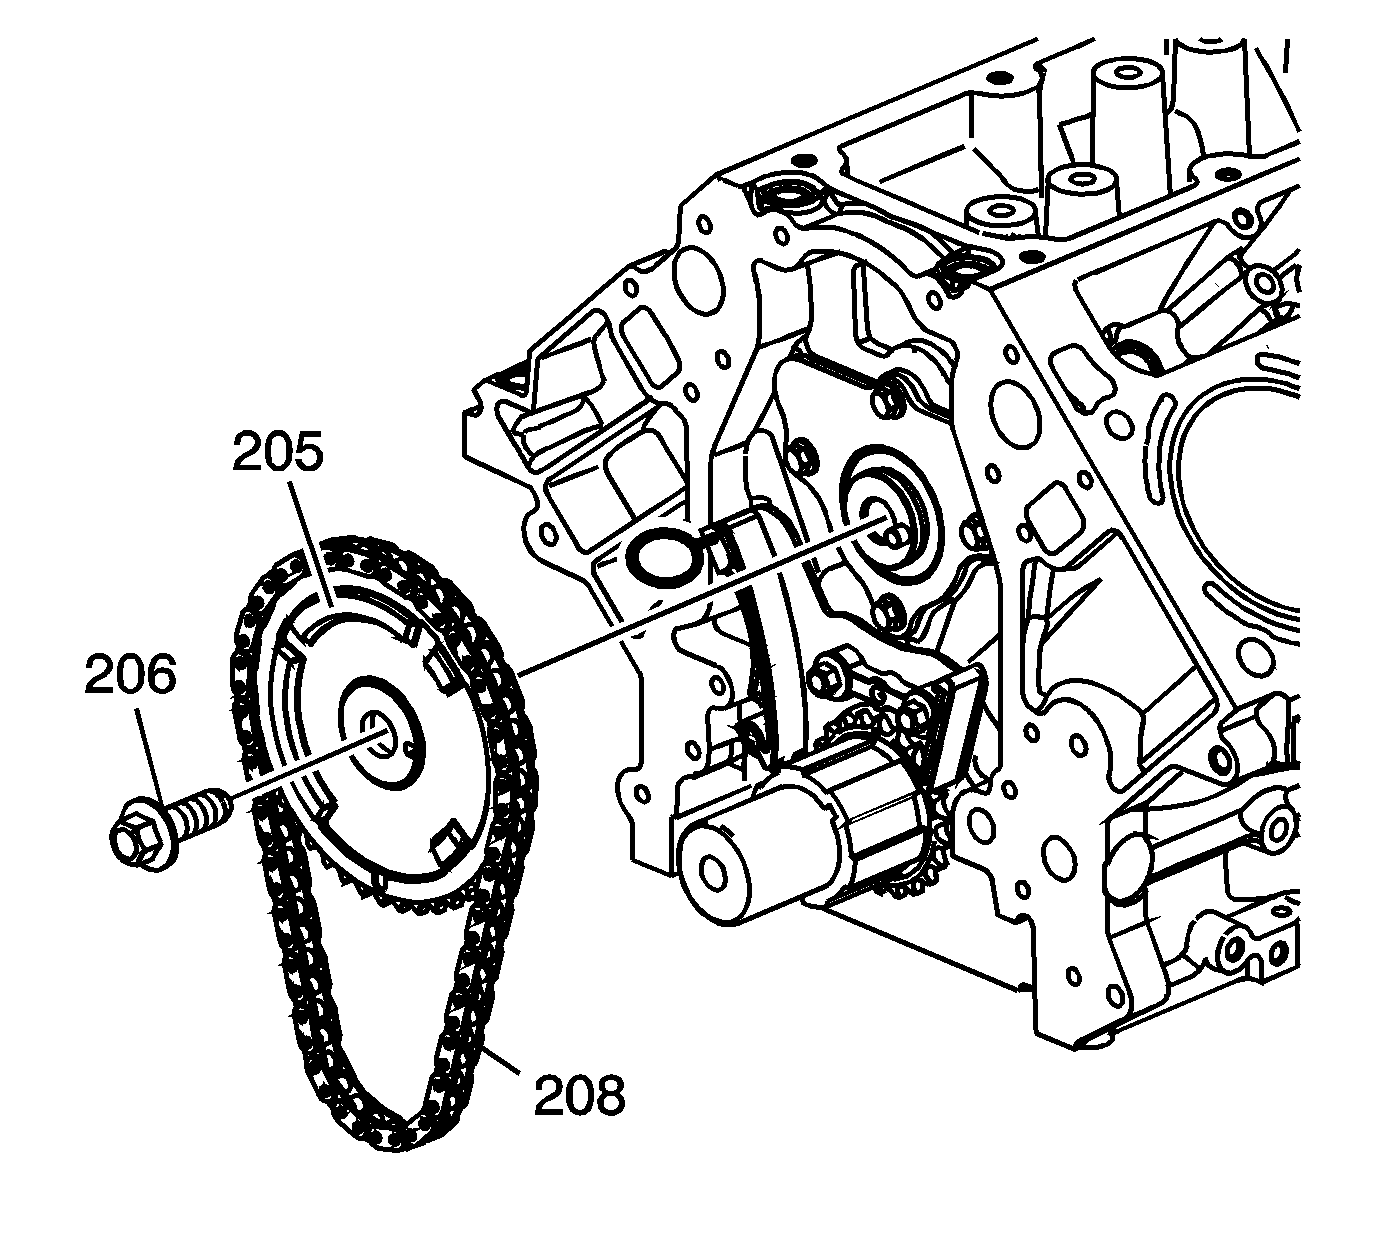
- Remove the camshaft sprocket bolt (206).
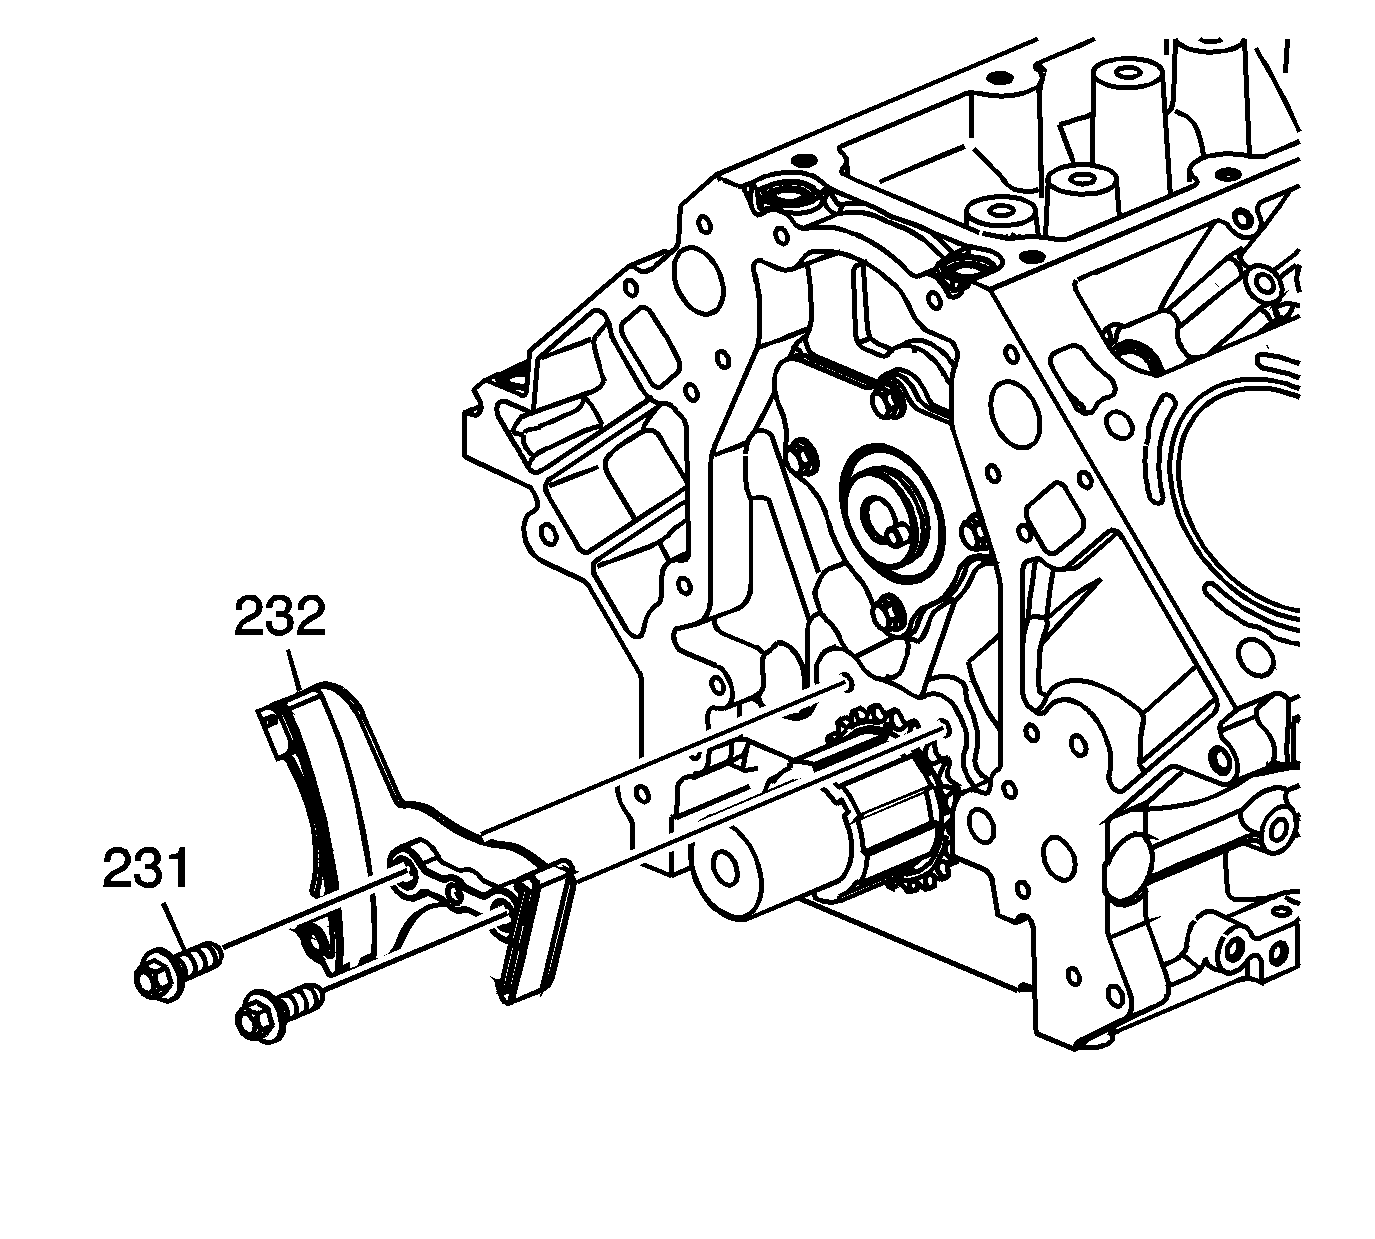
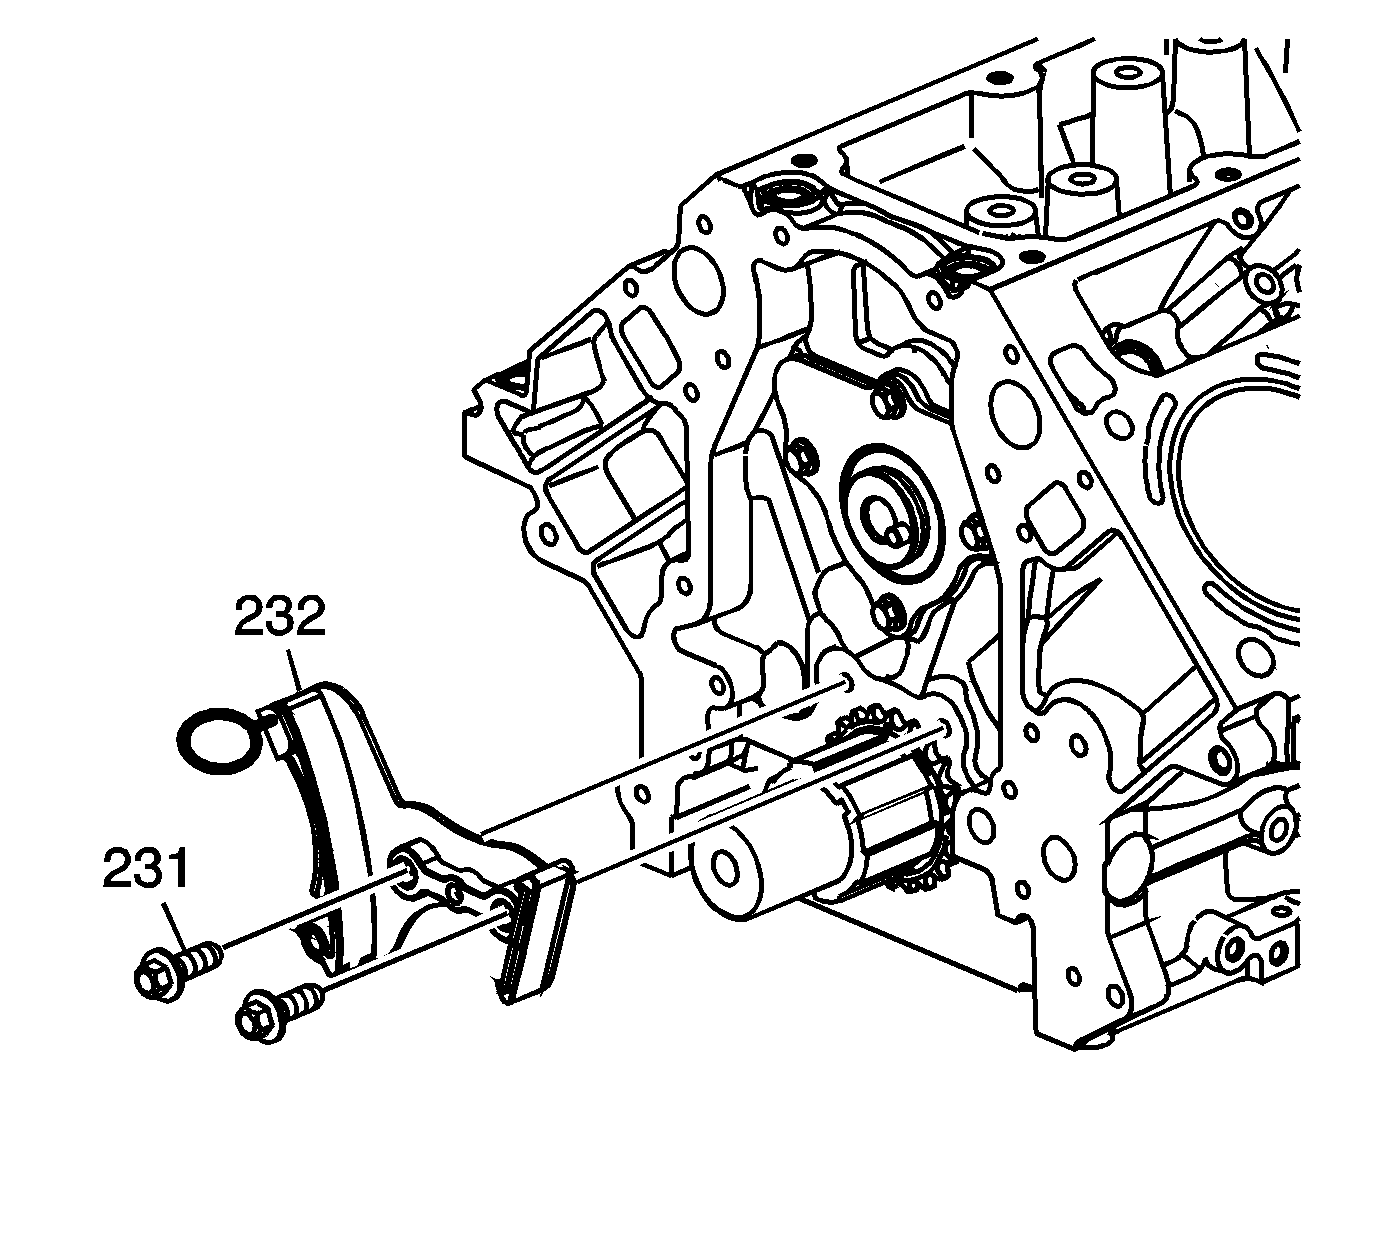
- Remove the bolts (231) and timing chain tensioner (232).
- Remove the camshaft sprocket and reposition the timing chain.
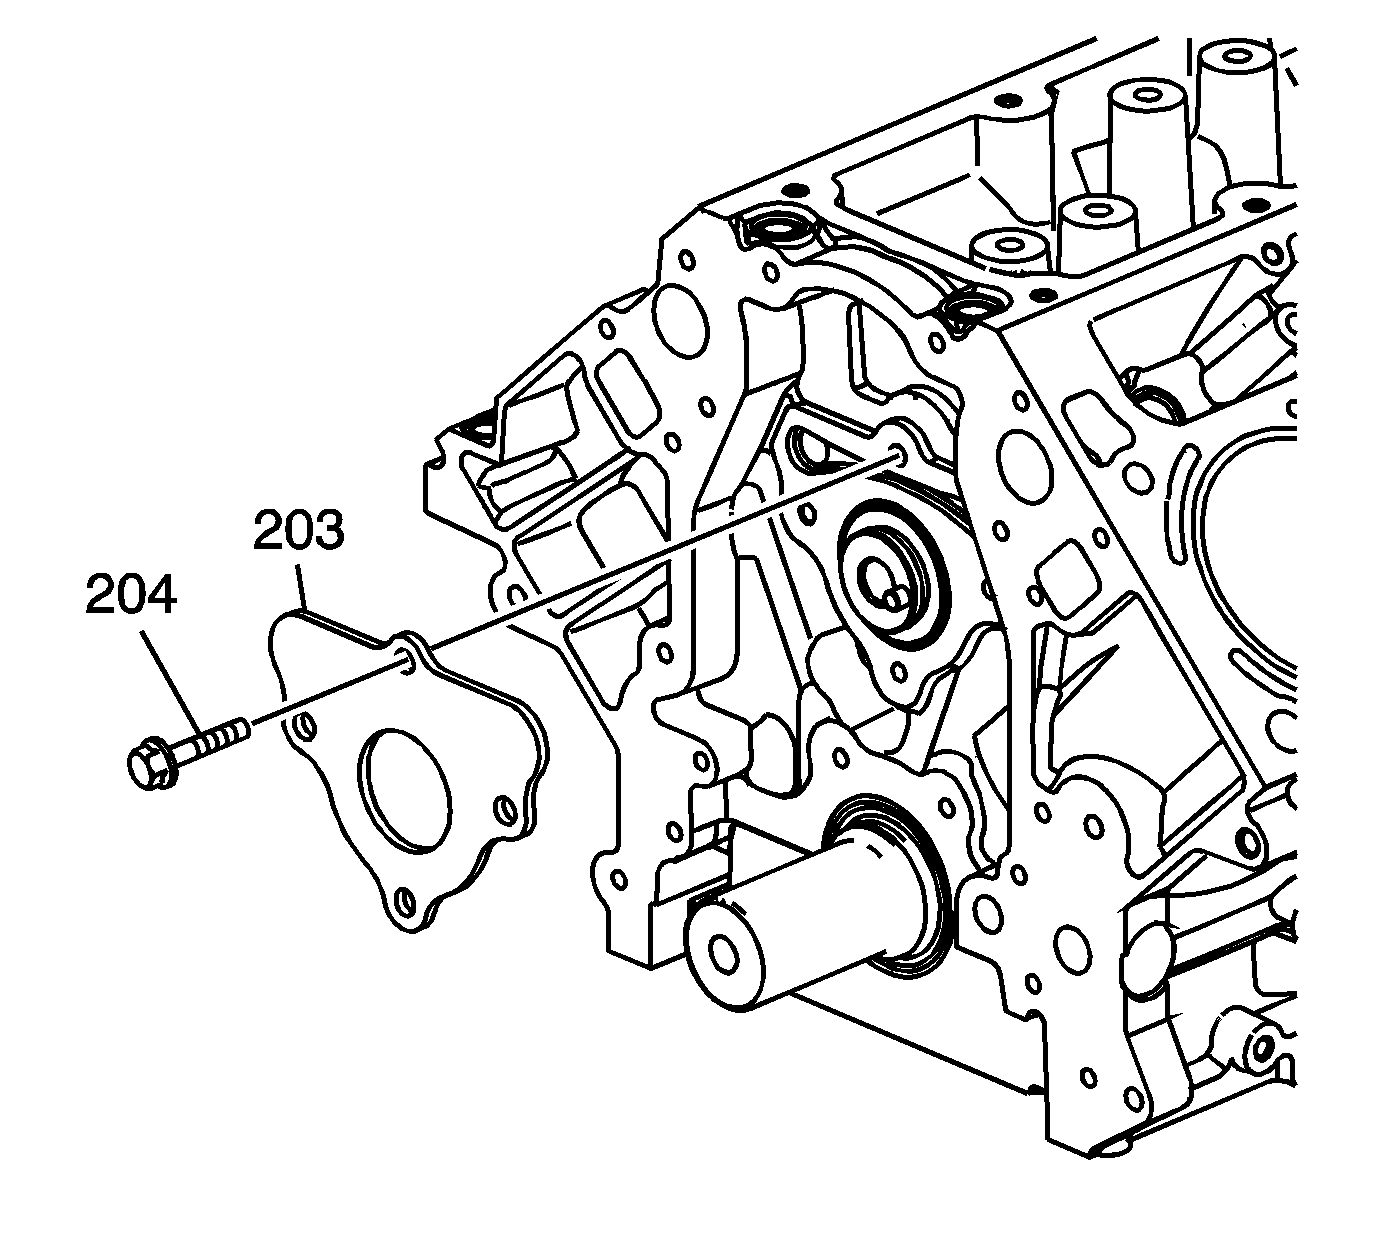
- Remove the camshaft retainer bolts (204) and retainer (203).
- Install a bolt into the camshaft.
- Using the bolt as a handle, carefully rotate and pull the camshaft out of the engine block.
- Clean and inspect the camshaft and bearings. Refer to Camshaft and Bearings Cleaning and Inspection.
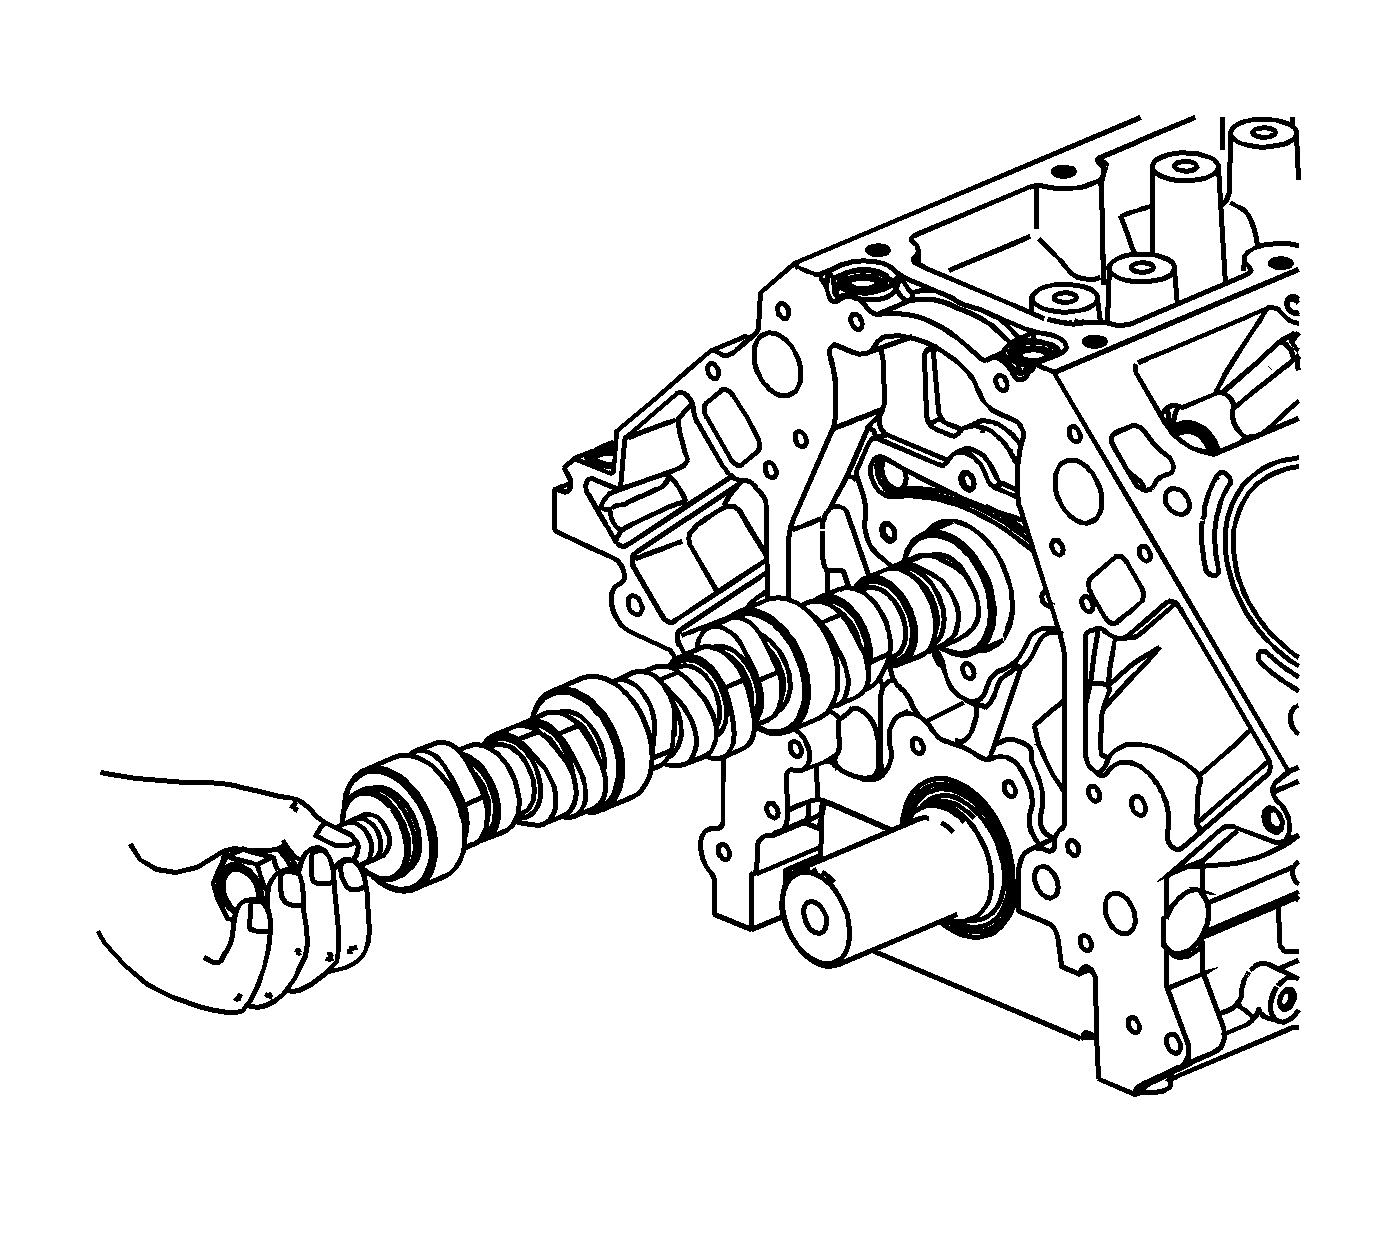
Caution: All camshaft journals are the same diameter, so care must be used in removing or installing the camshaft to avoid damage to the camshaft bearings.
Installation Procedure
- Lubricate the camshaft journals and the bearings with clean engine oil.
- Using the bolt as a handle, carefully install the camshaft into the engine block.
- Remove the bolt from the front of the camshaft.
- Install the camshaft retainer (203) and bolts (204).
- Tighten the camshaft retainer bolts.
- Compress the timing chain tensioner guide and install the EN 46330 .
- Install the timing chain tensioner (232) and bolts (231).
- If necessary, rotate the camshaft or crankshaft sprockets in order to align the timing marks.
- Install the camshaft sprocket (205) and the timing chain (208).
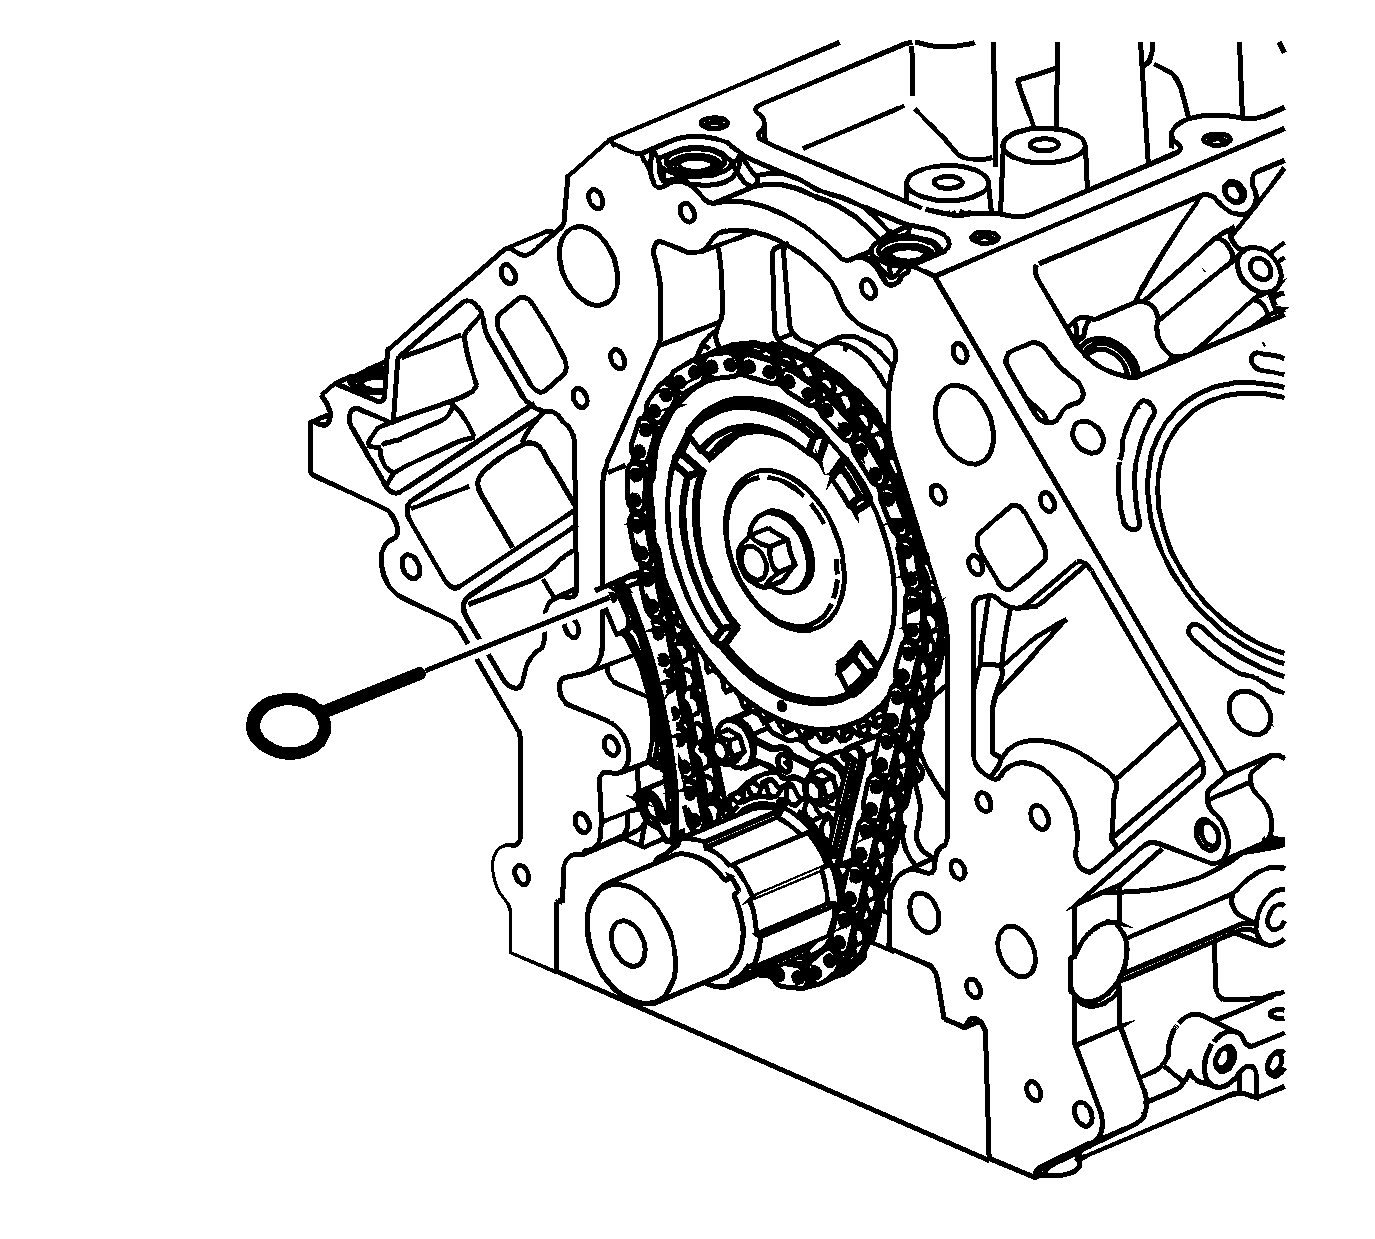
- Install a NEW camshaft sprocket bolt (206).
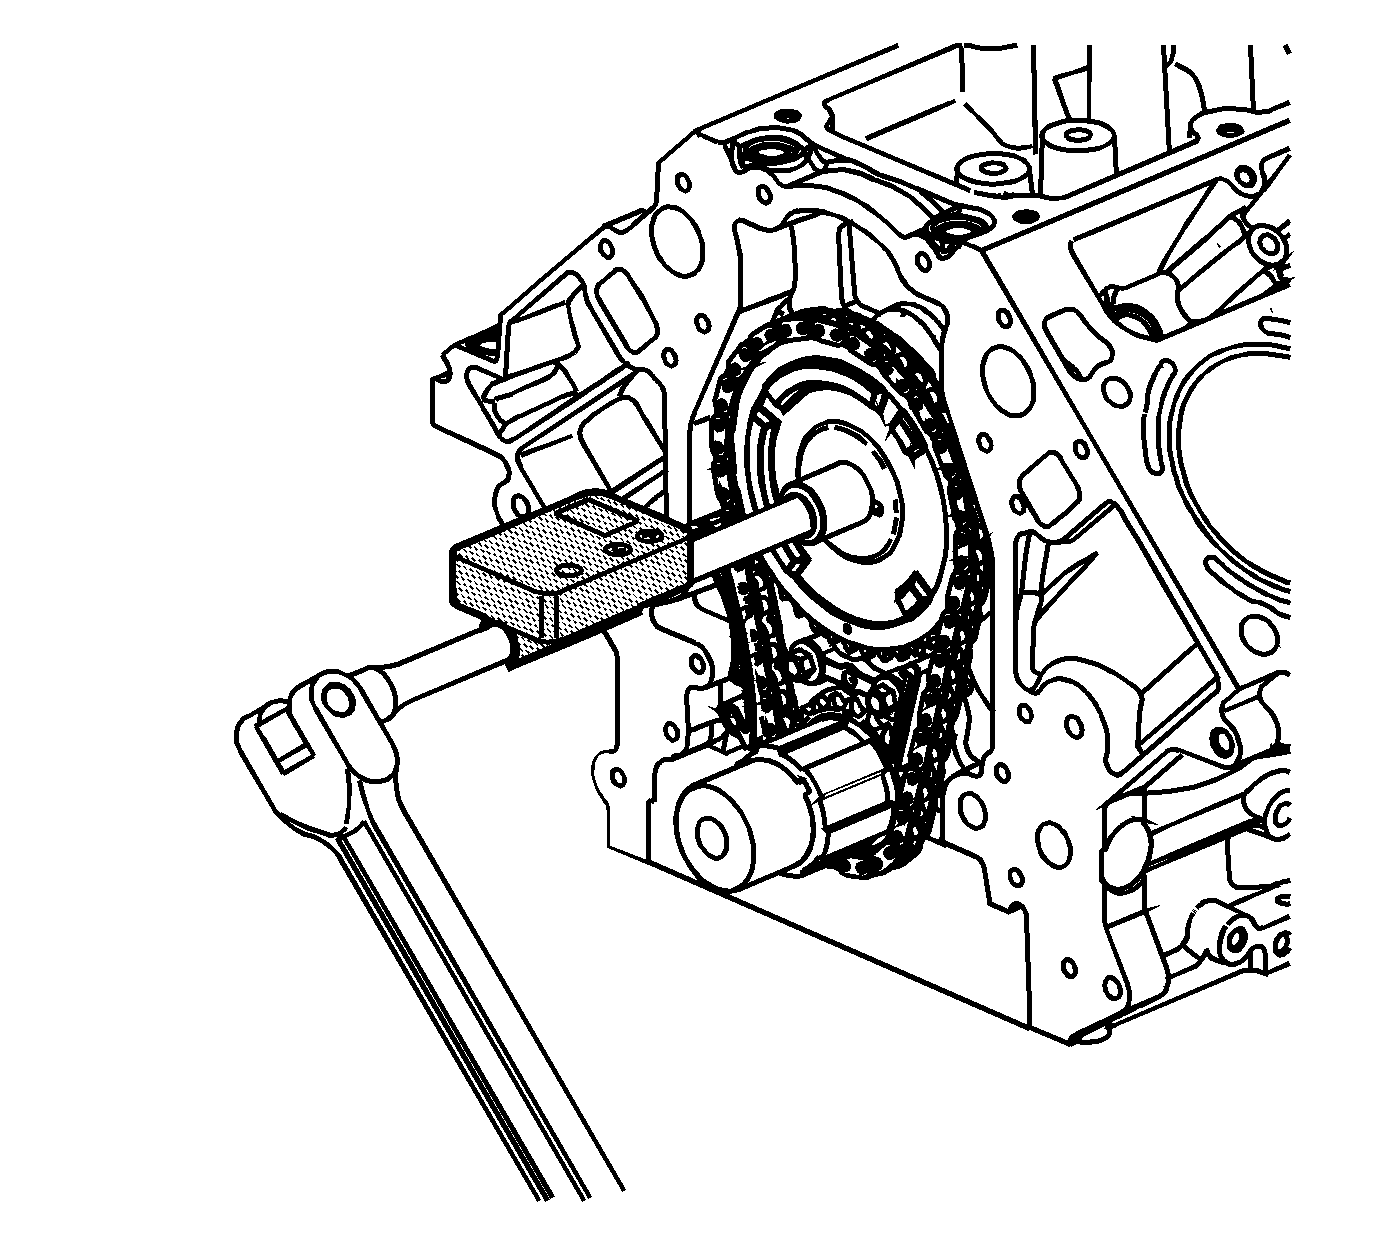
- Tighten the camshaft sprocket bolt.
- Tighten the camshaft sprocket bolt a first pass to 75 N·m (55 lb ft).
- Tighten the camshaft sprocket bolt a final pass, an additional 50 degrees using the J 45059 .
- Remove the EN 46330 .
- Inspect the camshaft sensor O-ring seal. If the O-ring seal is not cut or damaged, it may be reused.
- Lubricate the O-ring seal with clean engine oil.
- Install the camshaft sensor and bolt.
- Install the valve lifters. Refer to Valve Lifter Replacement.
- Install the engine front cover. Refer to Engine Front Cover Replacement.
- Install the condenser. Refer to Air Conditioning Condenser Replacement.

Note: If camshaft replacement is required, the valve lifters must also be replaced.
Caution: All camshaft journals are the same diameter, so care must be used in removing or installing the camshaft to avoid damage to the camshaft bearings.

Note: Install the retainer with the sealing gasket facing the engine block.
The gasket surface on the engine block should be clean and free of dirt and/or debris.Caution: Refer to Fastener Caution in the Preface section.
Tighten
| • | Tighten the first design hex head bolts (3) to 25 N·m (18 lb ft). |
| • | Tighten the second design TORX® head bolts (4) to 15 N·m (11 lb ft). |
Tighten
Tighten the timing chain tensioner bolts to 25 N·m (18 lb ft).

Note:
| • | Properly locate the camshaft sprocket locating pin with the camshaft sprocket alignment hole. |
| • | The sprocket teeth and timing chain must mesh. |
| • | The camshaft and the crankshaft sprocket alignment marks MUST be aligned properly. Locate the camshaft sprocket alignment mark (1) in the 6 o'clock position and the crankshaft sprocket (2) should be located in the 12 o'clock position. |
Tighten

Tighten
Tighten the bolt to 25 N·m (18 lb ft).
