Tools Required
| • | Urethane Adhesive Kit or Equivalent |
| • | Isopropyl Alcohol or Equivalent |
| • | Cartridge-type Caulking Gun |
Removal Procedure
- Remove both right and left sides of the reveal molding. Refer to
Windshield Side Reveal Molding Replacement
.

Caution: When working with any type of glass or sheet metal with exposed or rough
edges, wear approved safety glasses and gloves in order to reduce
the chance of personal injury.
Important: The windshield reveal molding fills the cavities between the body and windshield.
If the reveal molding is stretched or damaged it and cannot be reused it must be
replaced.
- Remove the upper windshield reveal molding.
| 2.1. | Use a flat-bladed tool in order to carefully pry the end of the upper
reveal molding out about 76 mm (3 in). |
| 2.2. | Grasp the corner of the windshield reveal molding by hand or use a suitable
tool to slowly pull the reveal molding away from the windshield. |
| 2.3. | If the windshield reveal molding will not release, use a utility knife
to aid in the releasing of the molding. |
Installation Procedure
- Clean the top edge of the windshield surface with a 50/50 mixture of
isopropyl alcohol and water by volume on a dampened lint - free cloth.
- The new reveal molding should be fitted to the windshield prior to installation.
Caution: When replacing stationary windows, use Urethane Adhesive Kit GM P/N 12346392
(Canadian P/N 10952983), or a urethane adhesive system meeting GM Specification
GM3651G, to maintain original installation integrity. Failure to use the urethane
adhesive kit will result in poor retention of the window which may allow unrestrained
occupants to be ejected from the vehicle resulting in personal injury.
- Verify all primers and urethane adhesive are within expiration
dates.

Important: Use care when applying the prep (clear #1) to the windshield. This primer
dries almost instantly, and may stain the viewing area of the windshield if not
applied evenly.
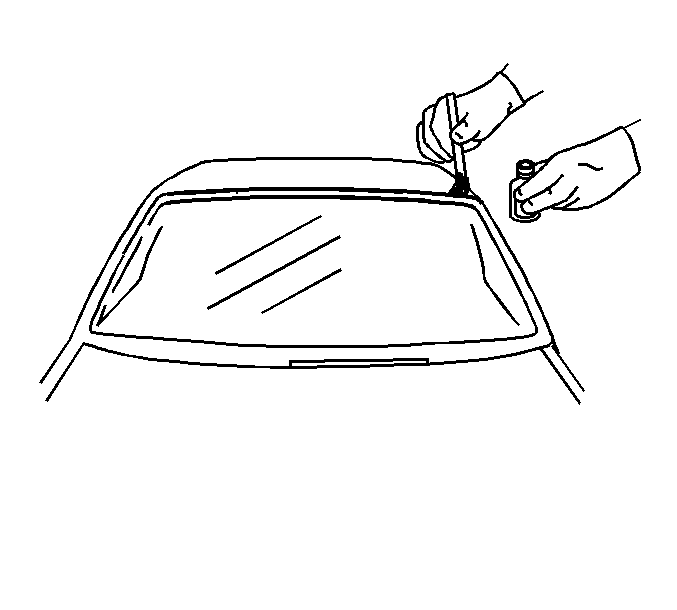
- Use a new dauber in order to apply glass prep (clear #1) to the channel
area approximately 13 mm (1/2 in) to the upper edge of the windshield.
- Wipe the glass primed area immediately with a clean lint-free cloth.
- Shake the glass primer (black #2) for at least one minute.
Using a new dauber in order to apply glass primer (black #2) to the
top edge of the windshield.

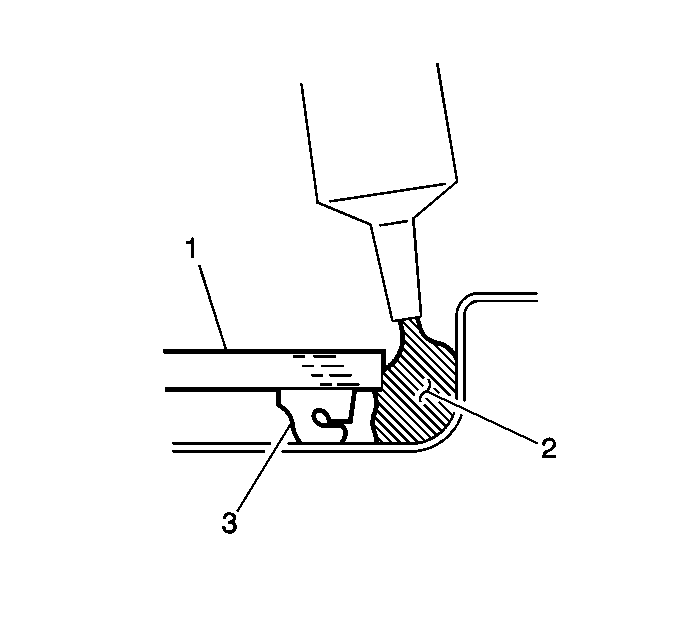
- Apply a small bead of urethane adhesive (2)
between the windshield (1) and the pinchweld.

- Install the upper reveal molding.
| 8.1. | Start from the center and hand-press the reveal molding into place over
the edge of the windshield. |
| 8.3. | Run warm water over the reveal molding in order to speed the setup time
of the urethane adhesive. |
Tape should be applied in order to retain the reveal molding to the windshield,
this will maintain a flush fit with the body.
The tape is to be removed after 6 hours.


