GM Service Manual Online
For 1990-2009 cars only

Front Wheel Opening Flare Replacement Base

Removal Procedure

  1. Open the hood.

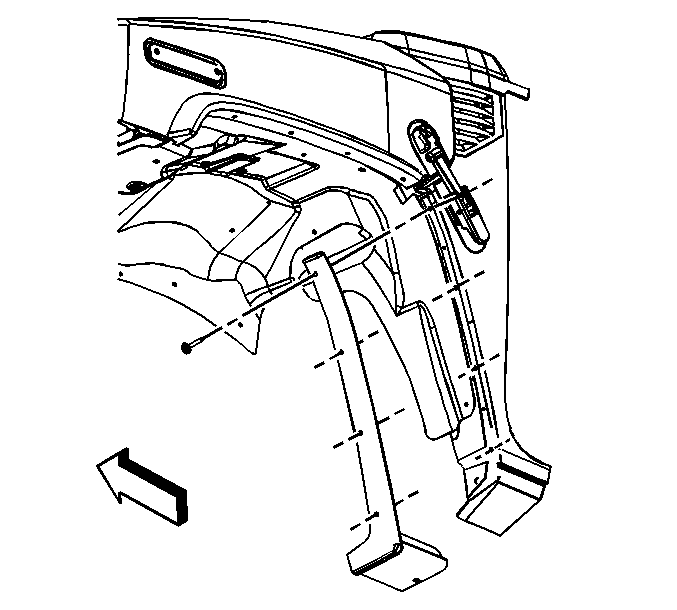
  2. Object Number: 826357  Size: SH
  3. Remove the retaining screws from the wheel flare and the wheel liner.

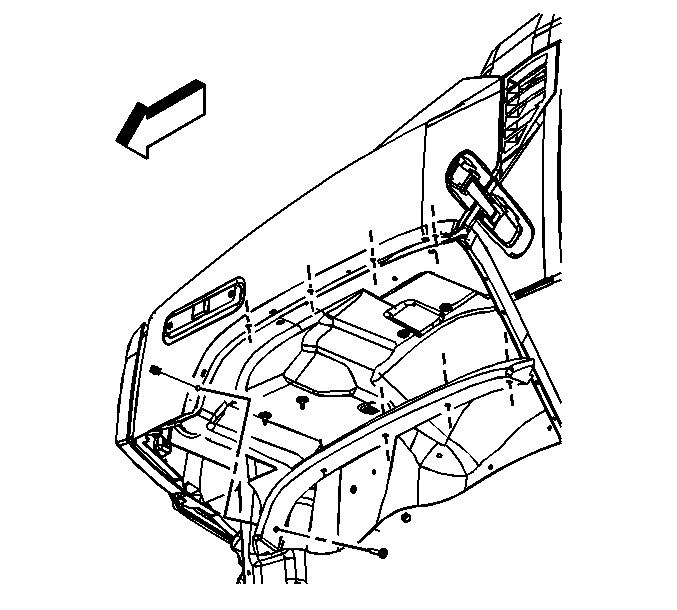
  4. Object Number: 826361  Size: SH
  5. Remove the push-pin retainers from the rocker protection molding.
  6. Remove the wheel flare from the vehicle.
Installation Procedure


    Object Number: 826357  Size: SH
  1. Position the wheel flare to the vehicle.

  2. Object Number: 826361  Size: SH
  3. Install the push-pin retainers to the rocker protection molding.
  4. Caution: Refer to Fastener Caution in the Preface section.

  5. Install the retaining screws to the wheel flare and the wheel liner.
  6. Tighten
    Tighten the screws to 3 N·m (26 lb in).

  7. Close and secure the hood.

Front Wheel Opening Flare Replacement WS2, BVX, Upper
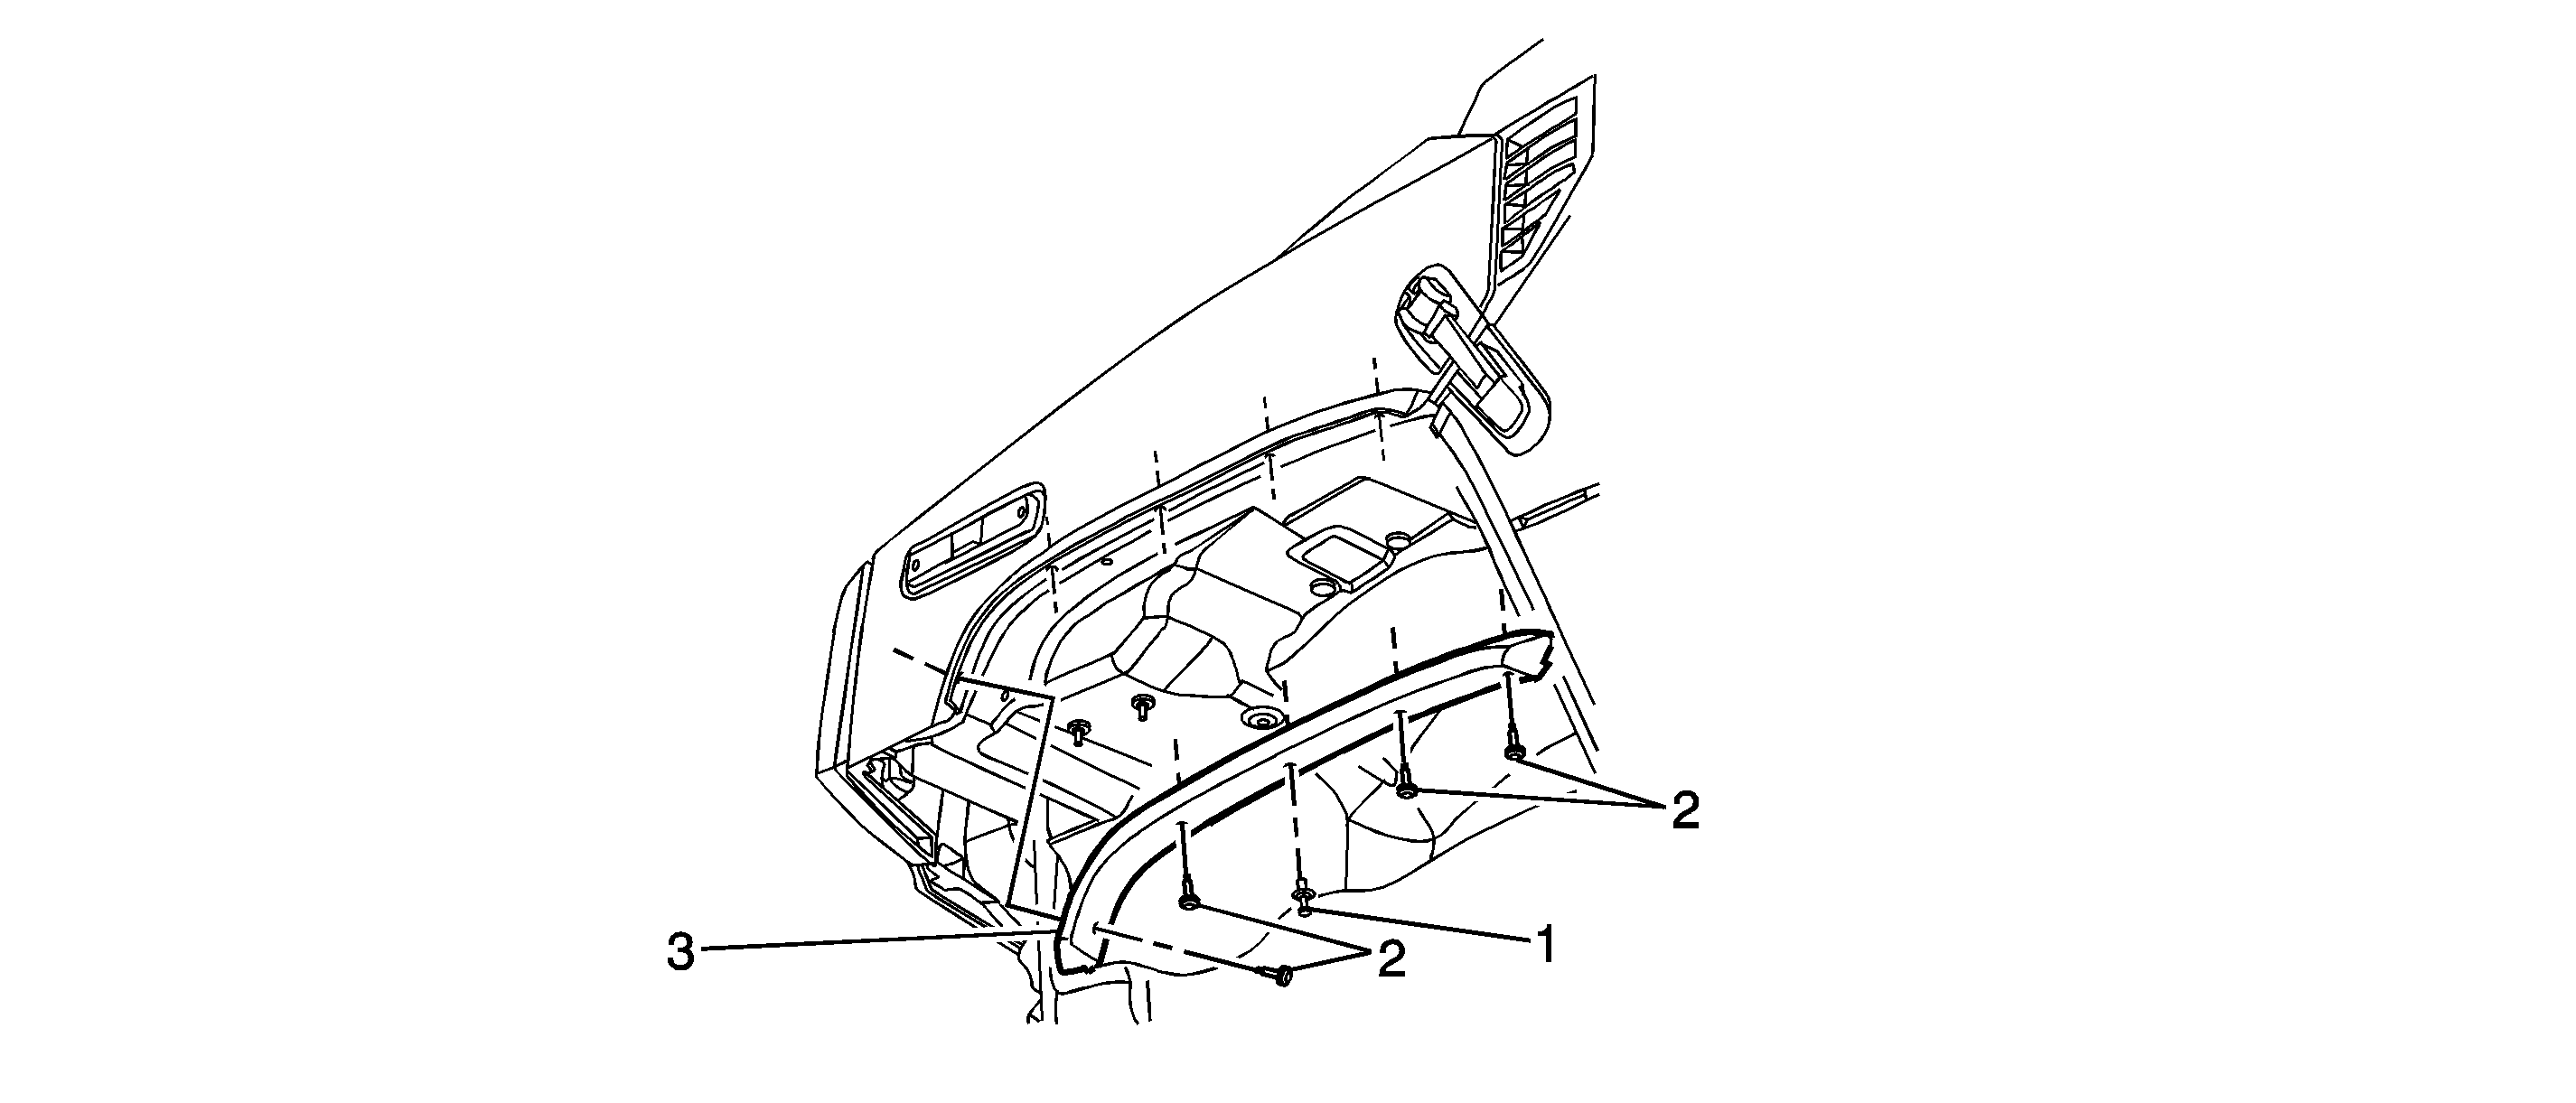

Object Number: 1677423  Size: SF

Callout

Component Name

Preliminary Procedure

  1. Open and support the hood for upper wheel flare molding installation.
  2. Insert the u-nuts onto the fender retaining holes except for the middle hole.

1

Push Pin Retainer

Tip
Position the flare molding to the wheelhouse and install the push pin retainer in order to hold the flare to the wheelhouse.

2

Front Fender Flare Assembly Screw (Qty: 4)

Caution: Refer to Fastener Caution in the Preface section.

Tip

  1. Install the screws and finger tighten only.
  2. Release the adhesive tape backing from the flare assembly.
  3. Using hand pressure, push the flare assembly into the body and secure the screws.

Tighten
1.8 N·m (16 lb in)

3

Front Fender Flare Assembly

Tip
Check to ensure the wheel liner does not pucker when securing the screws.

Front Wheel Opening Flare Replacement WS2, BVX, Lower
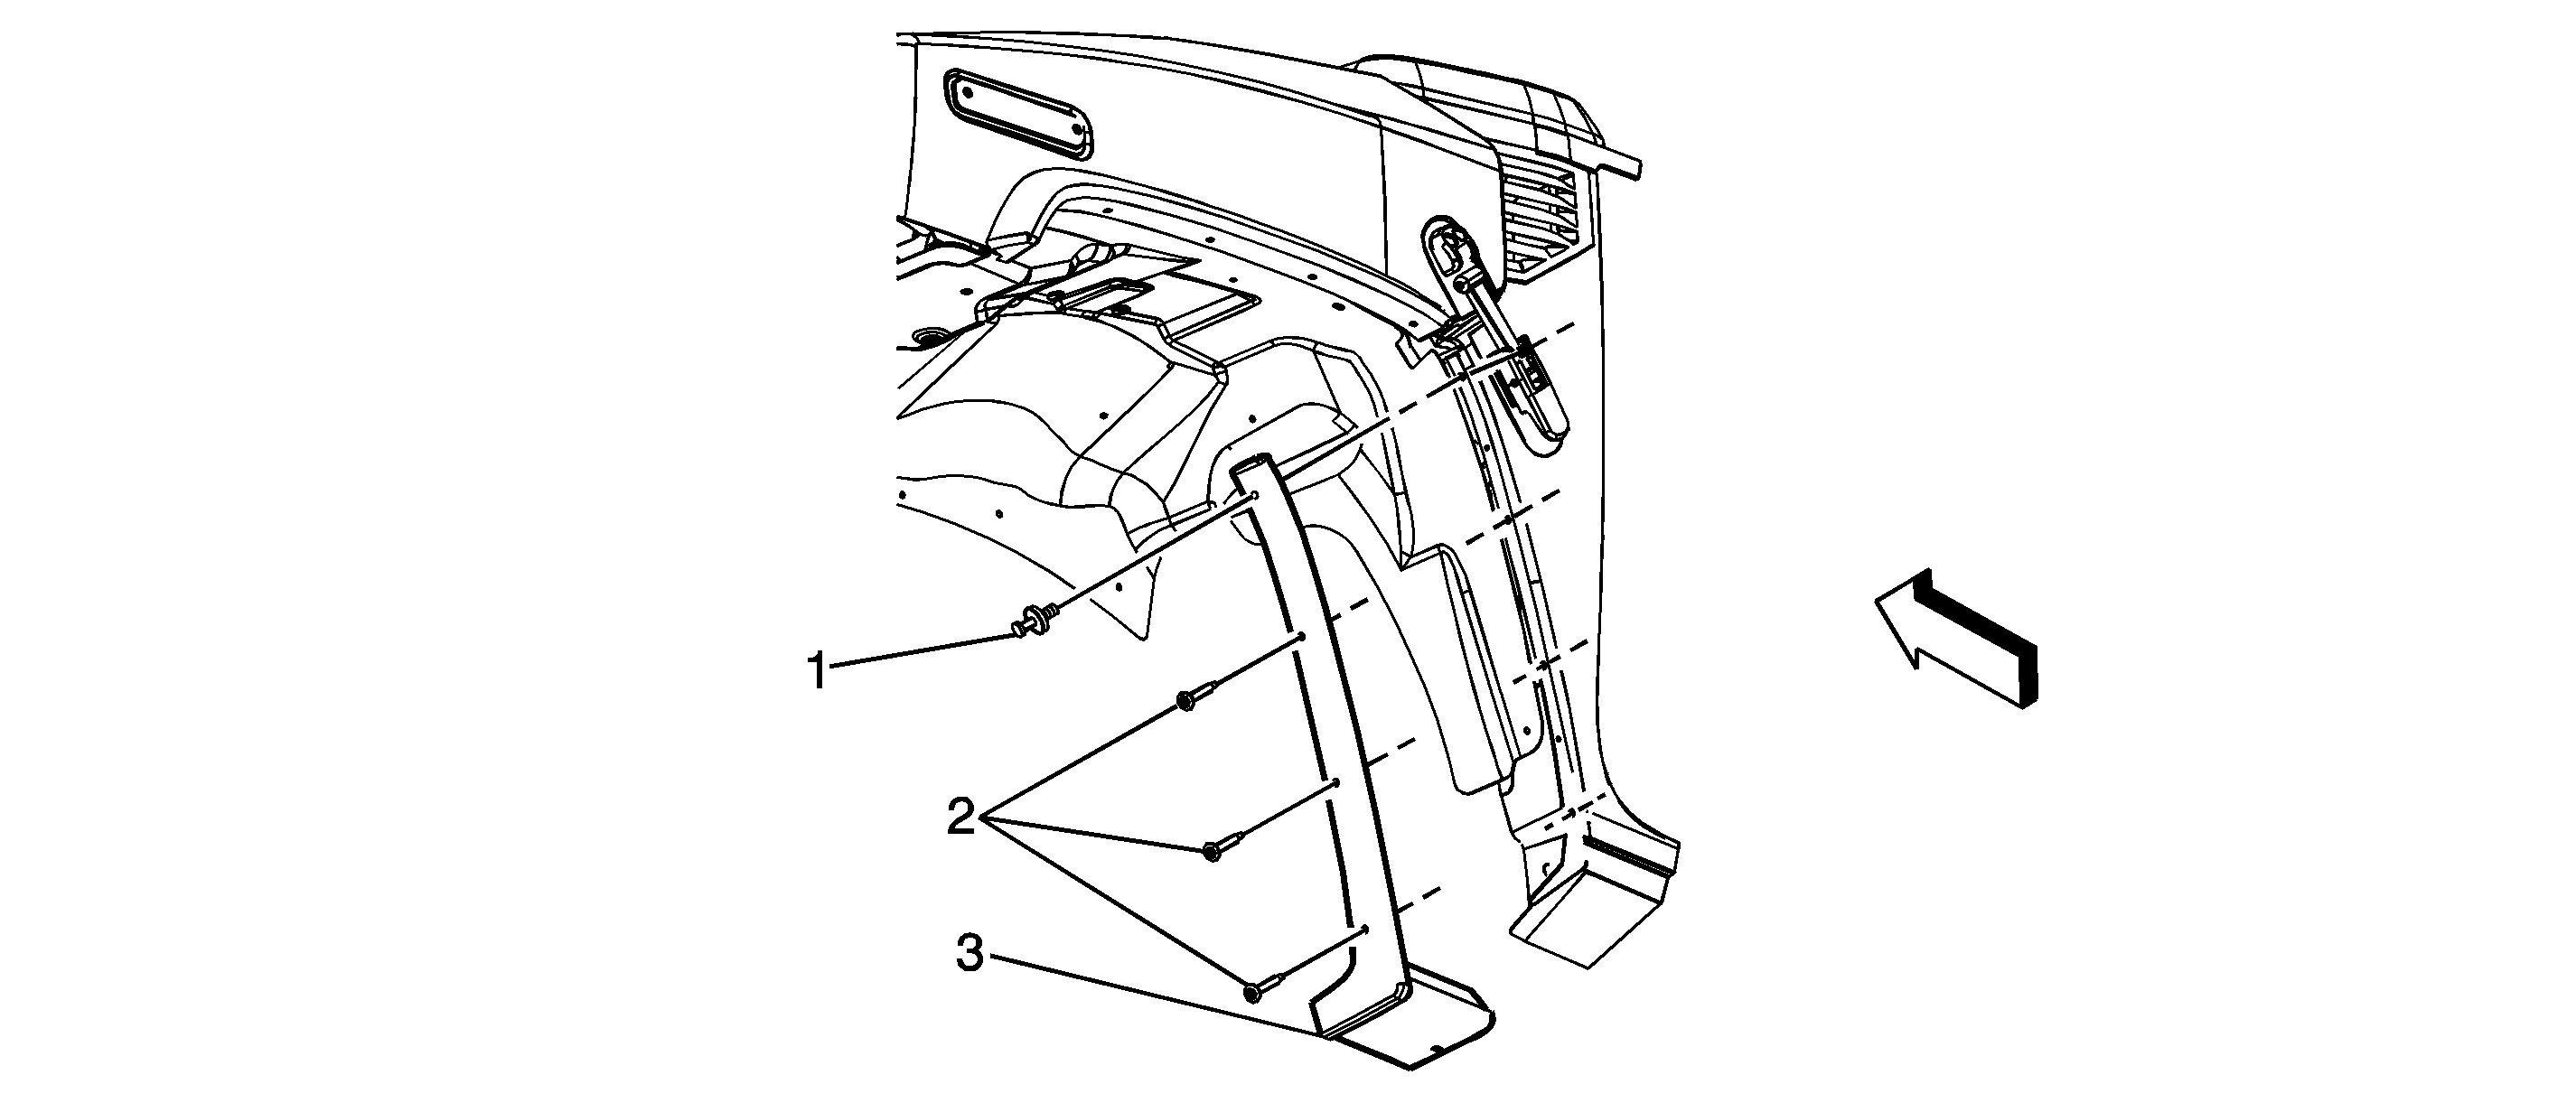

Object Number: 1677422  Size: SF

Callout

Component Name

1

Front Fender Lower Flare Assembly Retainer

Tip
Install the retainer in order to hold the lower flare assembly into position prior to the screw installation.

2

Front Fender Lower Flare Assembly Screw (Qty: 3)

Caution: Refer to Fastener Caution in the Preface section.

Tip

  1. Install the screws and finger tighten only.
  2. Release the adhesive tape backing from the lower flare assembly.
  3. Using hand pressure, push the lower flare assembly into the body and secure the screws.

Tighten
1.8 N·m (16 lb in)

3

Front Fender Lower Flare Assembly

Tip
Install the push pin in the lower flare where it overlaps the front edge of the lower rocker molding and secure.