For 1990-2009 cars only
Special Tools
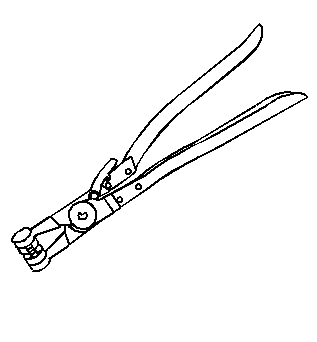
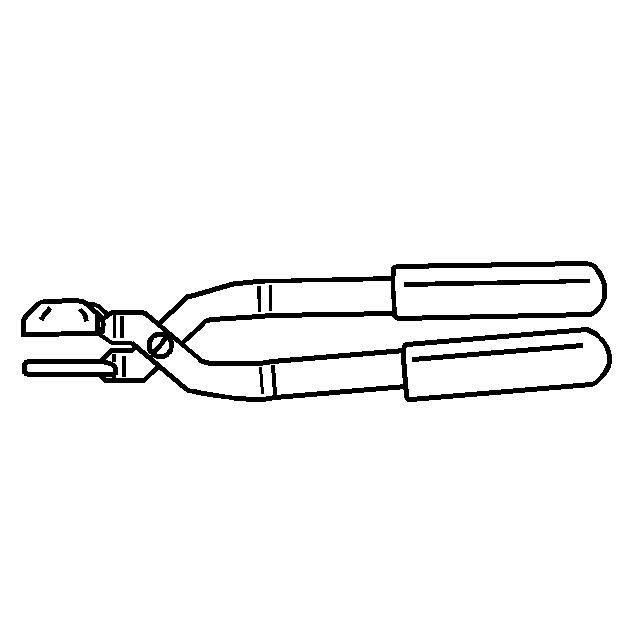
| • | J 38185 Hose Clamp Pliers |
| • | J 39529 Wiper Linkage Installer |
Removal Procedure
- Drain the cooling system. Refer to Cooling System Draining and Filling .
- Remove the headlamp harness. Refer to Sealed Beam Headlamp Replacement .
- Remove the hood. Refer to Hood Layer Removal .
- Remove the front bumper. Refer to Front Bumper Replacement .
- Remove the air cleaner. Refer to the appropriate procedure:
- Remove the charged air cooler hoses. Refer to the appropriate procedure:
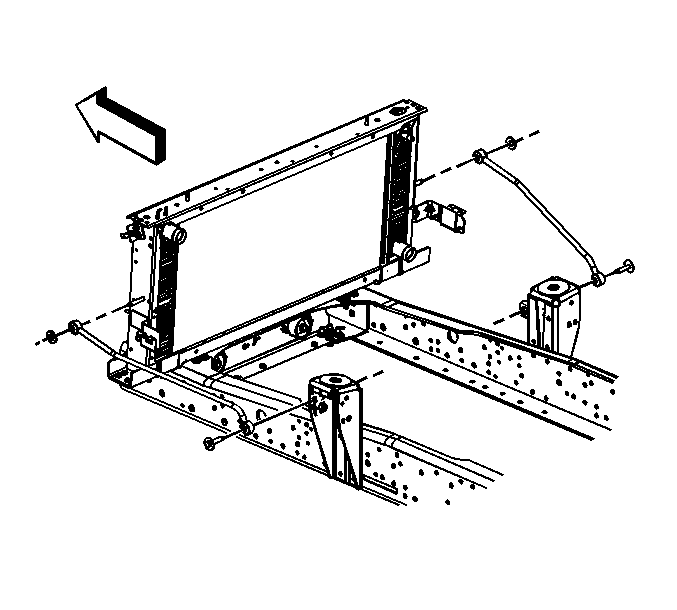
- Remove the radiator support brace bolt and nut from the right and left shock bracket.
- Remove the surge tank. Refer to Radiator Surge Tank Replacement .
- Remove the surge tank hose from the fan shroud.
- Remove the outlet heater hose clamp from the radiator using the J 38185 .
- Remove the outlet heater hose.
- Remove the clamp at the radiator inlet using the J 38185 .
- Remove the radiator inlet hose from the radiator.
- Remove the clamp at the radiator outlet using the J 38185 .
- Remove the radiator outlet hose retainers from the fan shroud.
- Remove the radiator outlet hose from the radiator.
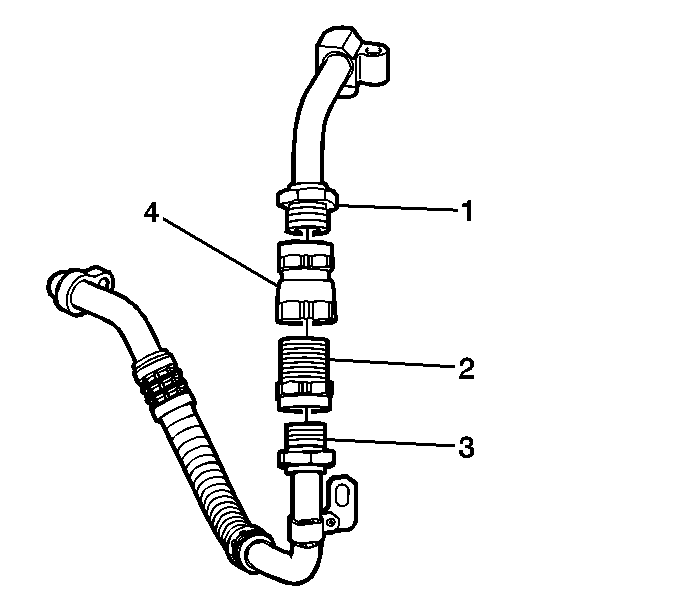
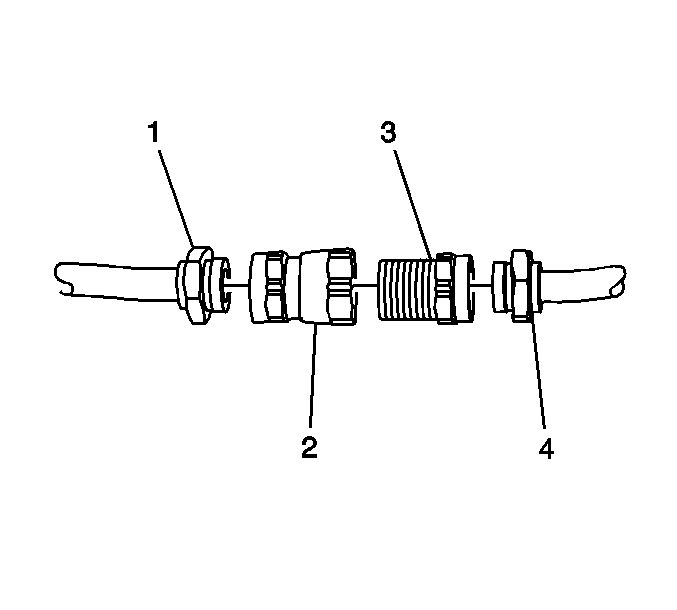
- Disconnect the evaporator hose coupling (3) from (2).
- Remove the drive belt. Refer to the appropriate procedure:
- Disconnect the compressor clutch electrical connector.
- Disconnect the high pressure switch electrical connector.
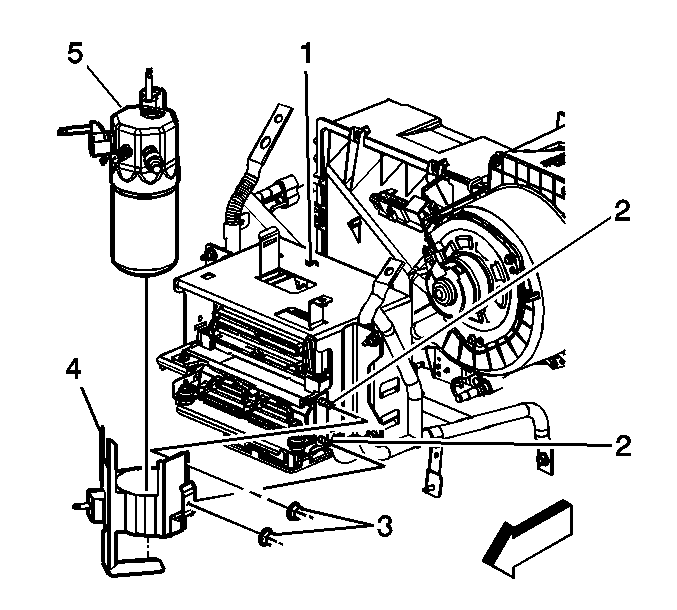
- Remove the compressor mounting bolts (1).
- Remove the A/C coupling (4) from (2).
- Remove the retaining nuts (3) from the accumulator retaining bracket.
- Disconnect the low pressure sensor electrical connector.
- Remove the accumulator (5) from the bracket.
- Secure the A/C compressor and the accumulator to the radiator support.
- Disconnect the auxiliary engine oil cooler hoses. Refer to Engine Oil Cooler Hose/Pipe Replacement .
- Disconnect the transmission oil cooler lines.
- Disconnect the auxiliary transmission oil cooler lines from the auxiliary cooler.
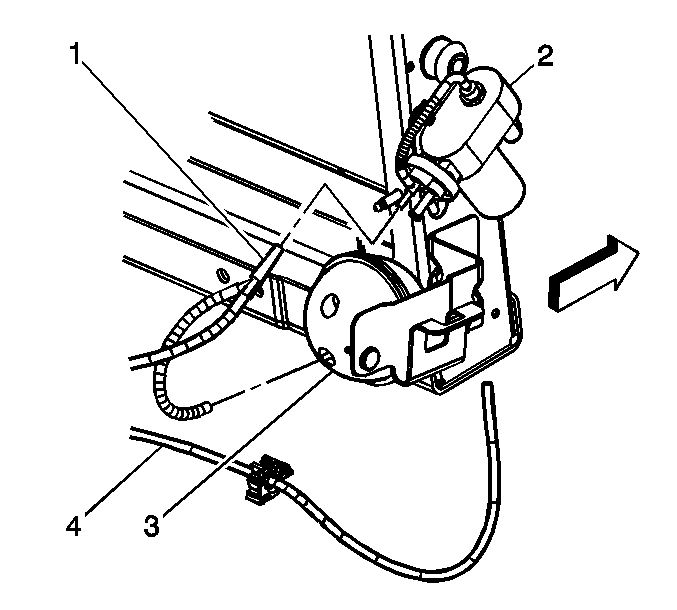
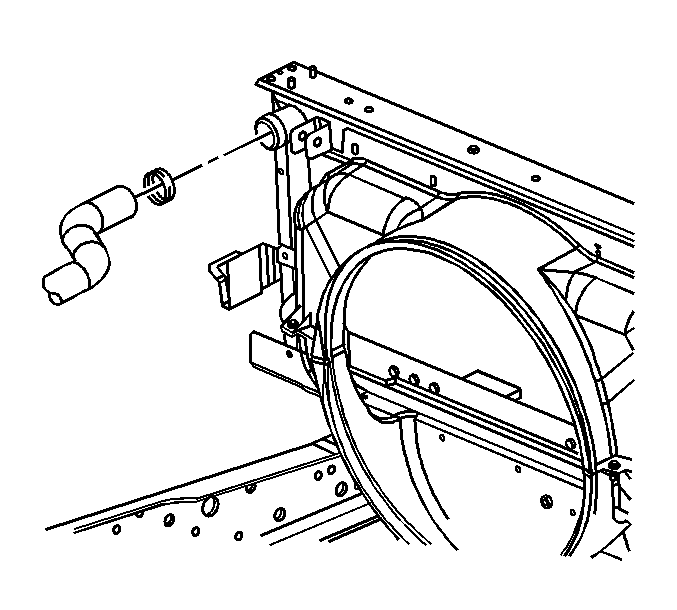
- Disconnect the vacuum hose from the vacuum hose connection (1).
- Disconnect the electrical connector for the cooling layer.
- Remove the relay mounted on the fan shroud.
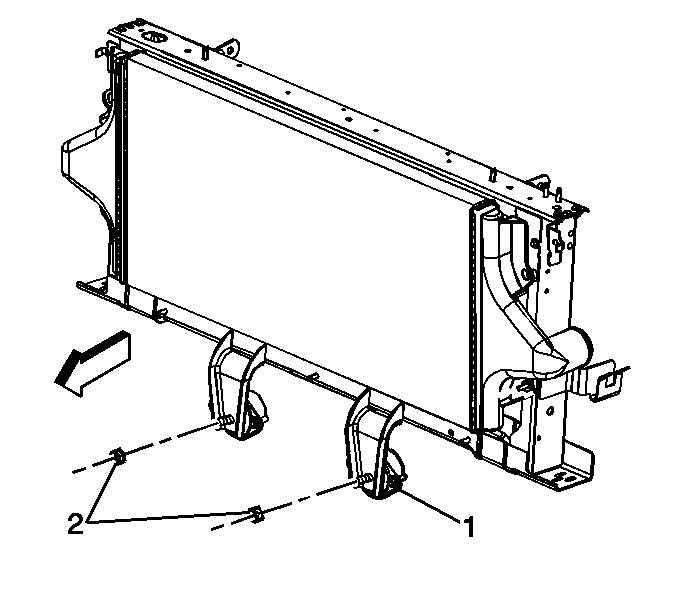
- Remove the lower radiator support nuts (2).
- Remove the cooling layer using a suitable lifting device.
| • | Air Cleaner Element Replacement for the 6.6L engine |
| • | Air Cleaner Replacement for the 7.2L Caterpillar engine |
| • | Air Cleaner Replacement for the 7.8L engine |
| • | Air Cleaner Replacement for the 8.1L engine |
| • | Charge Air Cooler Replacement for the 6.6L engine |
| • | Charge Air Cooler Replacement for the 7.2L Caterpillar engine |
| • | Charge Air Cooler Replacement for the 7.8L engine |
| • | Drive Belt Replacement for the 6.6L engine |
| • | Drive Belt Replacement for the 7.2L (Caterpillar) engine |
| • | Drive Belt Replacement for the 7.8L engine |
| • | Drive Belt Replacement for the 8.1L engine |