For 1990-2009 cars only
Removal Procedure
Warning: Refer to Fuel and Evaporative Emission Pipe Warning in the Preface section.
- Remove the fuel fill cap.
- Remove the engine cover. Refer to Engine Cover Replacement.
- Remove the air cleaner layer. Refer to Air Cleaner Replacement.
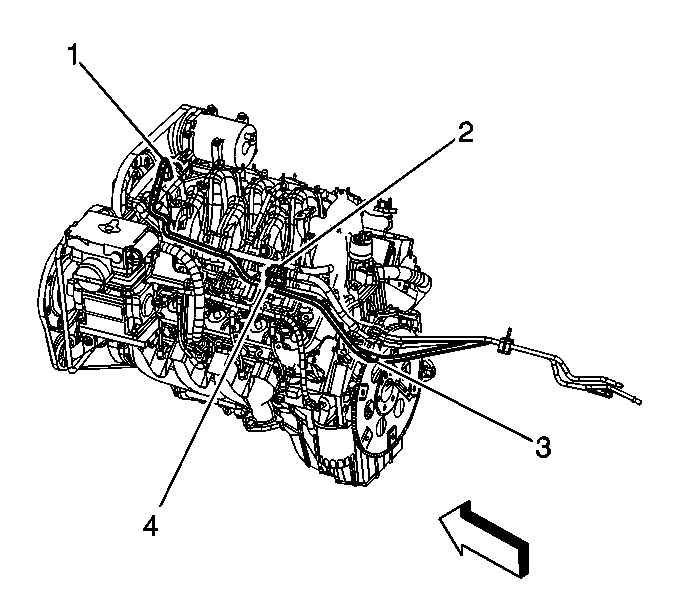
- Disconnect the EVAP purge pipe (1) from the EVAP canister purge valve.
- Disconnect the EVAP purge pipe from the clip (3) at the rear of the engine.
- Disconnect the EVAP purge pipe from the clip (1) at the bracket behind the right head.
- Raise the vehicle. Refer to Lifting and Jacking the Vehicle.
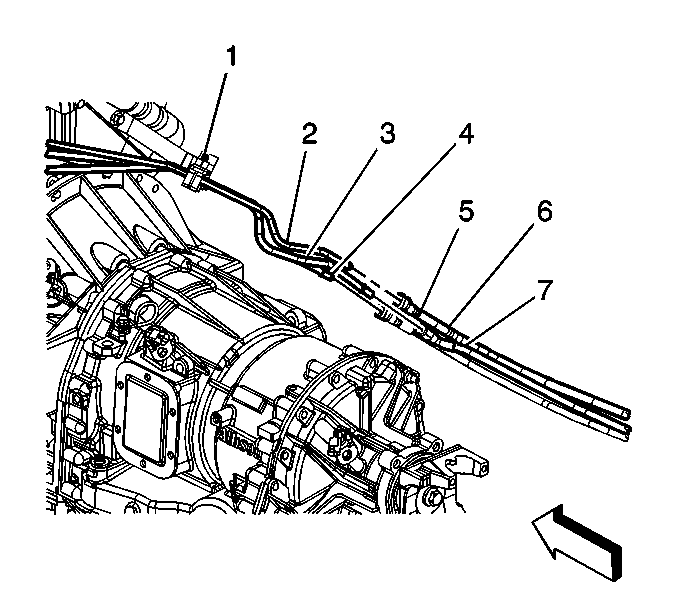
- Disconnect the EVAP purge pipe (3) from the chassis purge pipe (7). Refer to Plastic Collar Quick Connect Fitting Service.
- Carefully remove the engine EVAP purge pipe from the vehicle.
Note:
• Clean all the evaporative emission (EVAP) pipe connections and the surrounding areas before disconnecting the pipes in order to avoid possible contamination of the EVAP system. • Cap all EVAP pipes to avoid possible contamination of the EVAP system.


Installation Procedure
- Position the engine purge pipe between the engine and the chassis purge pipe.
- Connect the EVAP purge pipe (3) to the chassis purge pipe (7). Refer to Plastic Collar Quick Connect Fitting Service.
- Lower the vehicle.
- Connect the EVAP purge pipe to the clip (1) at the bracket behind the right head.
- Connect the EVAP purge pipe to the clip (3) at the rear of the engine.
- Connect the EVAP purge pipe (1) to the EVAP canister purge valve.
- Connect the fuel feed pipe (2) and/or fuel return pipe (4) to the fuel rail.
- Install the air cleaner layer. Refer to Air Cleaner Replacement.
- Install the engine cover. Refer to Engine Cover Replacement.
- Tighten the fuel fill cap.


