Steering Gear Housing Plug Replacement - Off Vehicle P32
Disassembly Procedure
- Rotate the stub shaft back and forth in order to drain the fluid.
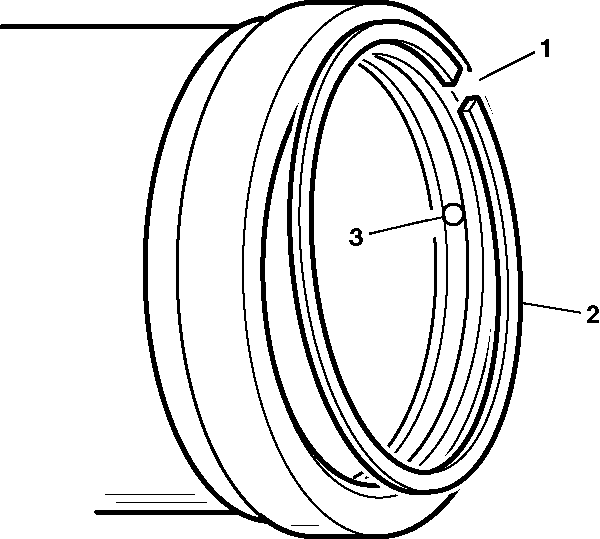
- Insert a punch into the housing access hole in order to unseat the retaining ring (1).
- Remove the plug (2).
- Remove the O-ring seal (3).
Assembly Procedure
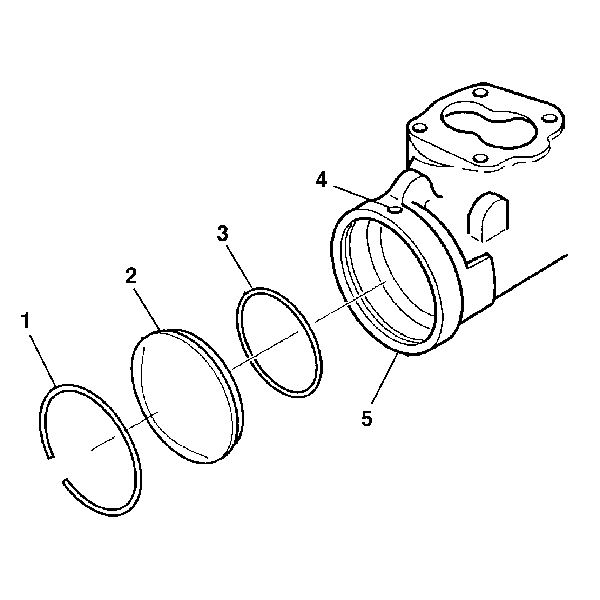
- Lubricate the O-ring seal (3) with power steering fluid.
- Install the O-ring seal (3) into the steering gear housing (5).
- Install the plug (2).
- Install the retaining ring (1). Ensure that the retaining ring open end is approximately 25 mm (1 inch) from the access hole in the steering gear housing (5).

Steering Gear Housing Plug Replacement - Off Vehicle Saginaw - 710 Model
Disassembly Procedure
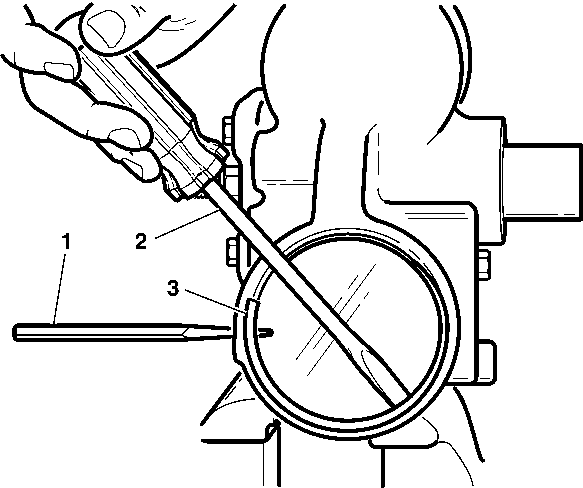
- Unseat the retaining ring (3) from the primary and secondary cylinders using a needle nose punch (1) and a screwdriver.
- Pry the retaining ring (3) out of the housing groove using a screwdriver (2).
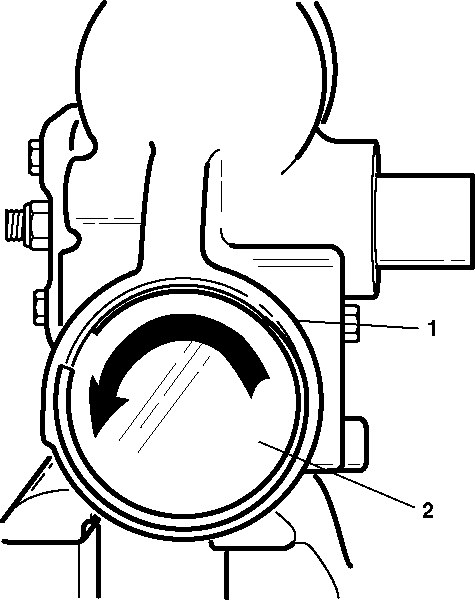
- Turn the housing end plug (2) counterclockwise until the housing end plug (2) is forced out of the cylinder (1).
- In order to remove the housing O-ring seal, turn the stub shaft counterclockwise until the primary rack piston (1) covers the crossover hole (2).
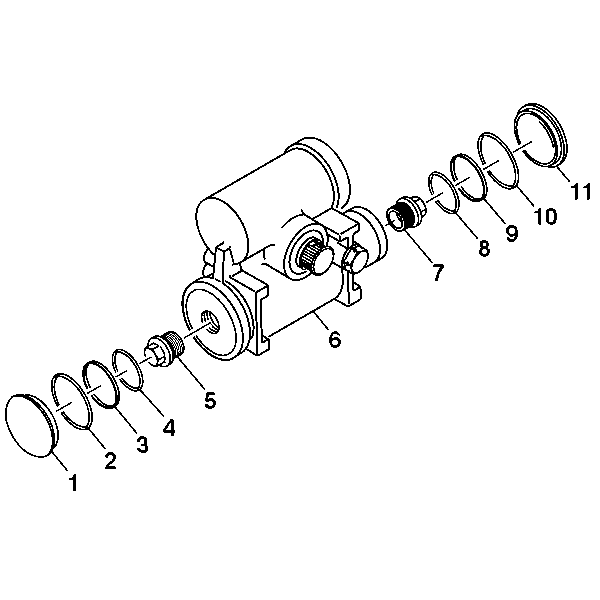
- Remove and discard the housing O-ring seals (2) and (10).
- Remove the rack piston rings (3) and (9).
- Remove and discard the rack piston O-ring seals (4) and (8).
- Remove the rack piston plugs (5) and (7) from the rack piston by turning the rack piston plugs (5) and (7) counterclockwise.
Important: Observe the head of the rack piston plugs (5) and (7). If the head of the rack piston is an aluminum square drive head, firmly tap the head using a hammer and a brass drift. If the head of the rack piston is a steel hexagon head, remove the rack piston plugs (5) and (7) with a 1 inch socket.
Assembly Procedure
- Install the rack piston plugs (5) and (7).
- Lubricate and install the new rack piston O-ring seals (4) and (8).
- Lubricate and install the rack piston rings (3) and (9).
- Lubricate and install the new the housing O-ring seals (2) and (10).
- Install the housing end plugs (1) and (11).
- Install the housing end plug retaining ring (2). The ring gap (1) does not line up with the steering gear housing hole (3).

Notice: Use the correct fastener in the correct location. Replacement fasteners must be the correct part number for that application. Fasteners requiring replacement or fasteners requiring the use of thread locking compound or sealant are identified in the service procedure. Do not use paints, lubricants, or corrosion inhibitors on fasteners or fastener joint surfaces unless specified. These coatings affect fastener torque and joint clamping force and may damage the fastener. Use the correct tightening sequence and specifications when installing fasteners in order to avoid damage to parts and systems.
Tighten
Tighten the rack piston plugs to 150 N·m (111 lb ft).
