For 1990-2009 cars only
Removal Procedure
- Remove the liftgate window garnish molding. Refer to Rear Window Garnish Molding Replacement.
- Remove the liftgate trim panel. Refer to Liftgate Trim Panel Replacement.
- Disconnect the outside handle rod from the bellcrank.
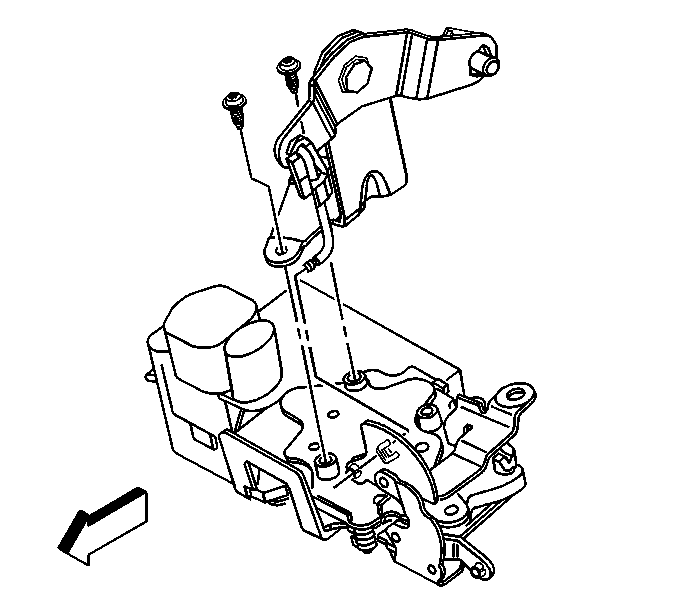
- Disconnect the bellcrank rod from the latch/lock assembly.
- Remove the screws that retain the bellcrank to the latch/lock.
- Remove the bellcrank from the latch/lock.
- Disconnect the electrical connector from the latch assembly.
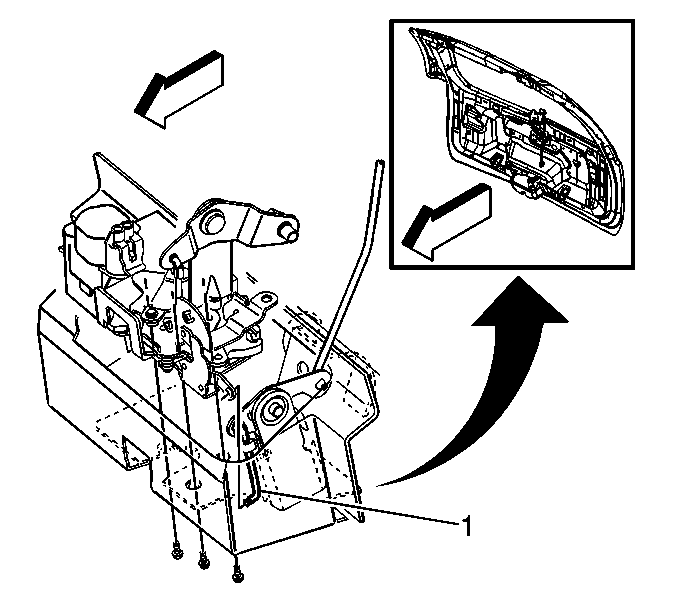
- Disconnect the lock cylinder bellcrank rod (1) from the latch assembly.
- Remove the screws that retain the latch/lock assembly to the liftgate.
- Remove the latch/lock assembly from the liftgate.


Installation Procedure
- Position the latch/lock assembly to the liftgate.
- Install the screws that retain the latch/lock assembly to the liftgate and tighten to 10 N·m (89 lb in).
- Connect the lock cylinder bellcrank rod (1) to the latch/lock assembly.
- Connect the electrical connector to the latch/lock assembly.
- Position the bellcrank to the latch/lock assembly.
- Install the screws that retain the bellcrank to the latch/lock assembly and tighten to 0.7 N·m (6 lb in).
- Connect the bellcrank rod to the latch/lock assembly.
- Connect the outside handle rod to the bellcrank.
- Install the liftgate trim panel. Refer to Liftgate Trim Panel Replacement.
- Install the liftgate window garnish molding. Refer to Rear Window Garnish Molding Replacement.

Caution: Refer to Fastener Caution in the Preface section.


