For 1990-2009 cars only
Removal Procedure
- Remove the front seat belt assembly. Refer to Front Seat Belt Replacement.
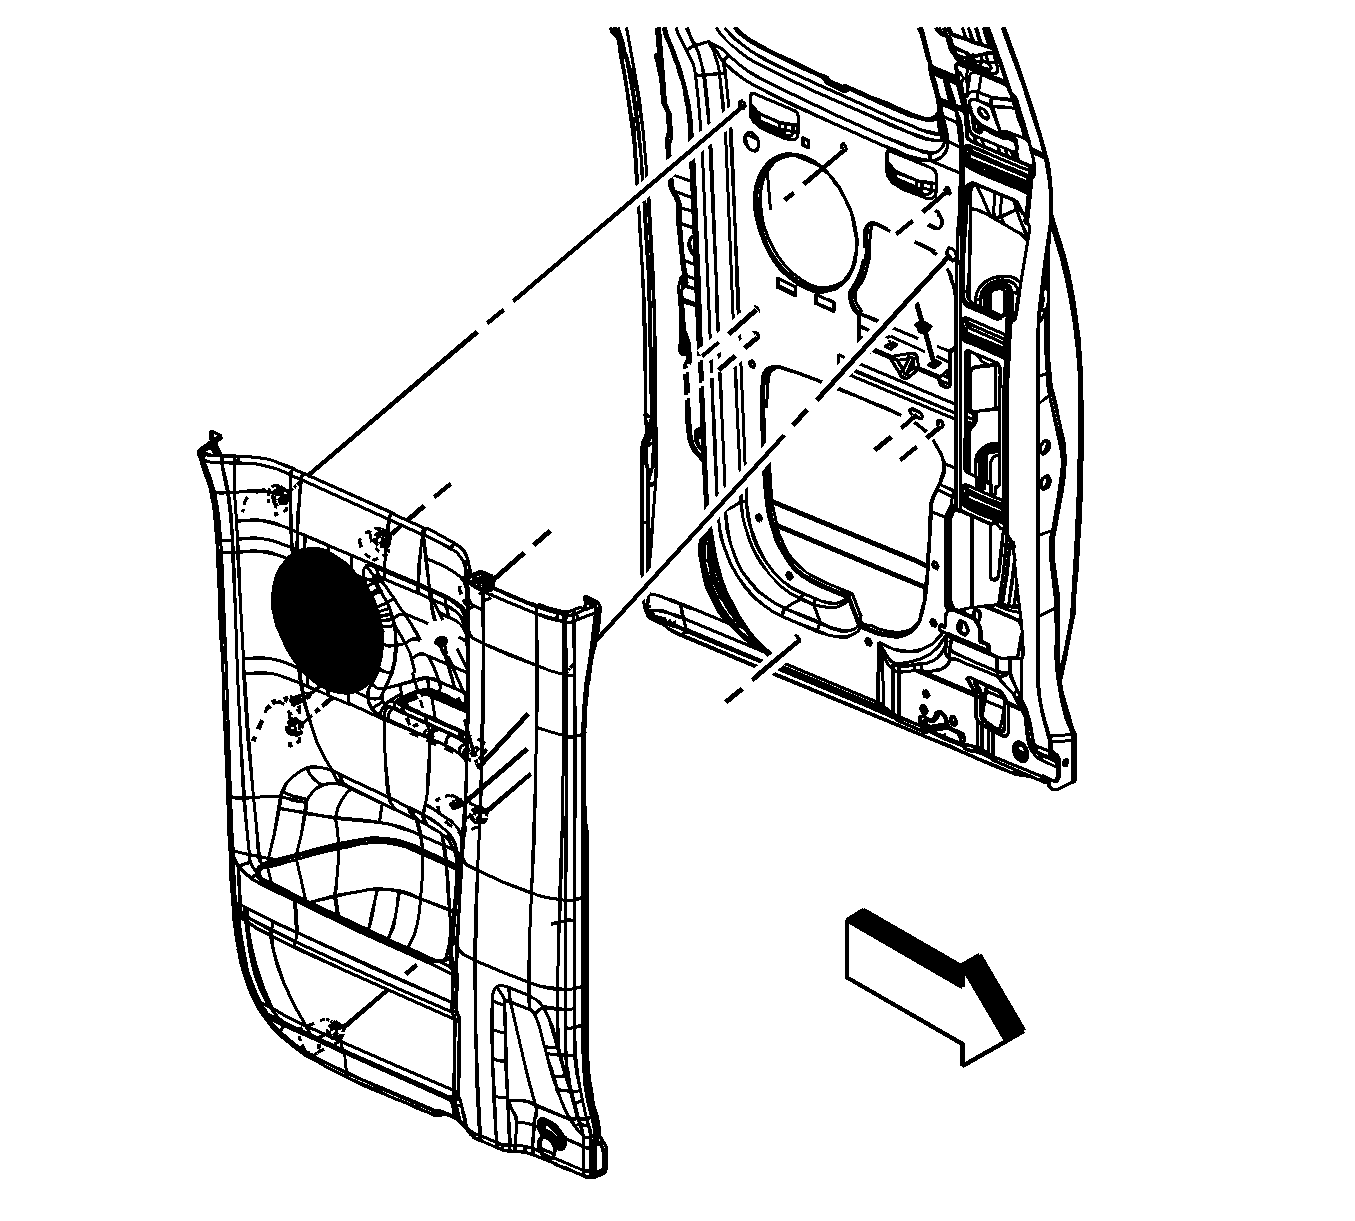
- Remove the 2 retaining screws from the armrest.
- Gently pull the lower side access door trim panel away from the door.
- Remove any fasteners from the door and reinsert them in the lower side access door trim panel before installing the panel on the door.
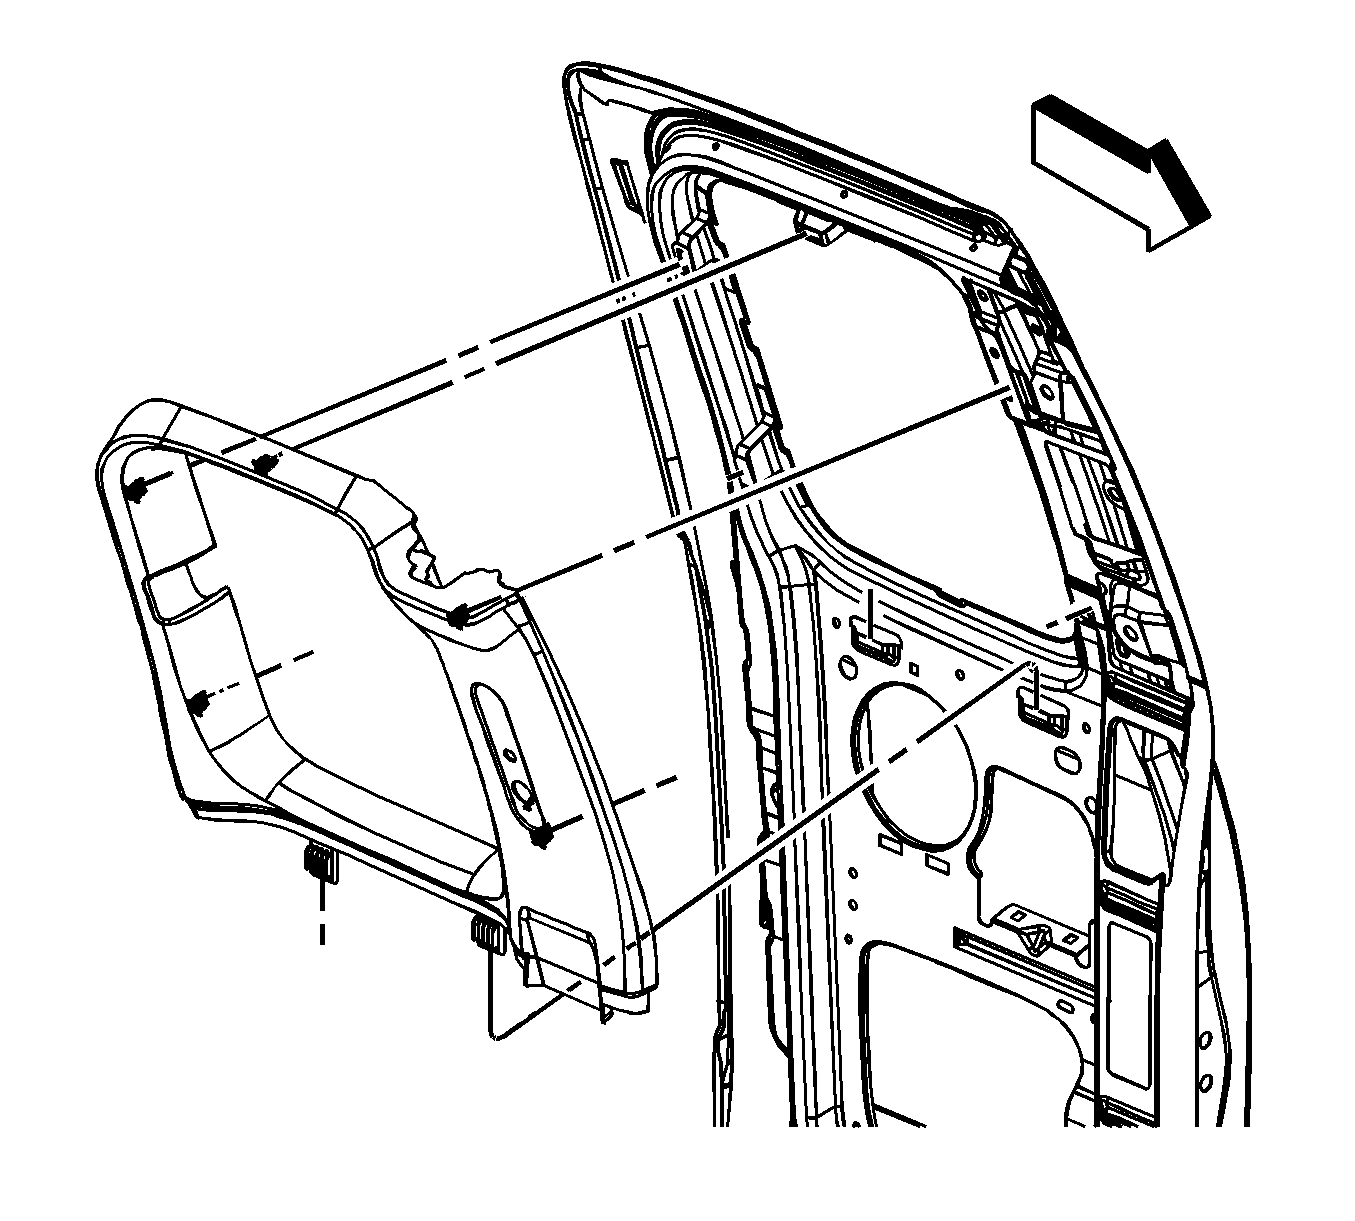
- Grasp the upper side access door trim panel and pull panel away from the door to release the fasteners.
- Remove any fasteners from the door and reinsert them in the upper side access door trim panel before installing the panel on the door.


Installation Procedure
- Install the upper side access door trim panel to the door, ensuring that all the retaining tabs are fully seated.
- Install the lower side access door trim panel to the door, ensuring that all the retaining tabs are fully seated.
- Install the 2 retaining screws in the armrest. Tighten the rear side access door armrest screws to 2 N·m (18 lb in).
- Install the front seat belt assembly. Refer to Front Seat Belt Replacement.

Caution: Refer to Fastener Caution in the Preface section.

