For 1990-2009 cars only
Tools Required
DW110-070 Crossmember Support Fixture
Removal Procedure
- Raise and suitably support the vehicle. Refer to Lifting and Jacking the Vehicle .
- Remove the front wheels. Refer to Tire and Wheel Removal and Installation .
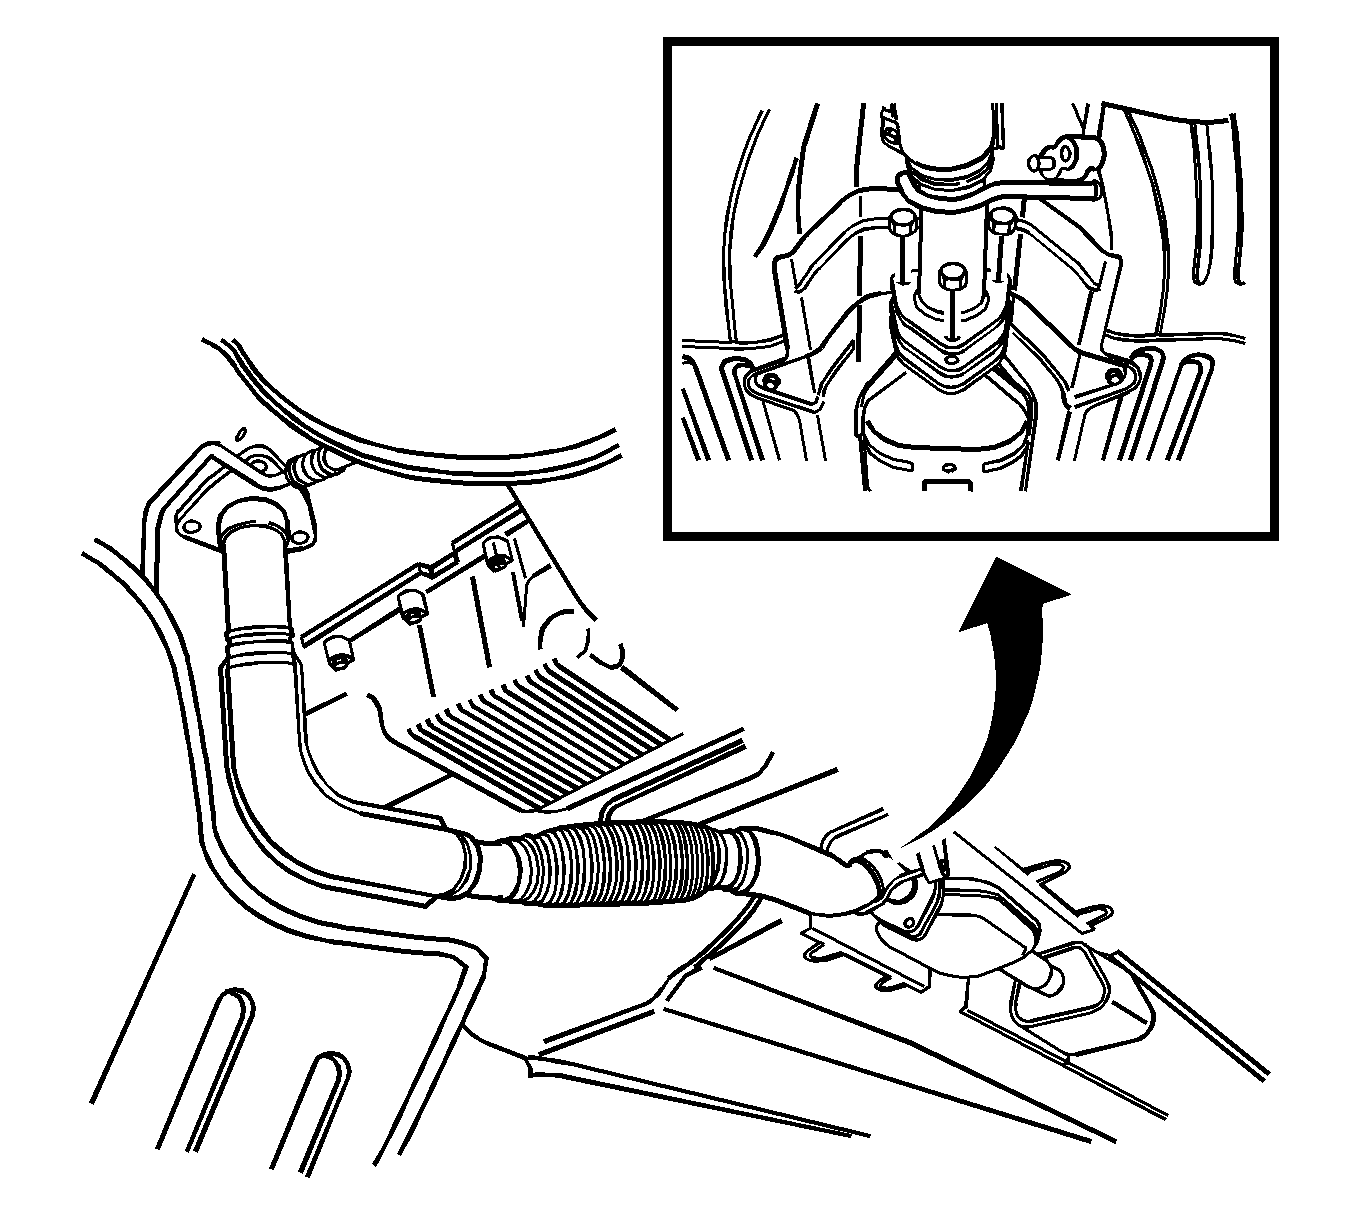
- Remove the exhaust pipe forward of the catalytic converter. Refer to Front Pipe Replacement .
- Disconnect the stabilizer link from the stabilizer shaft. Refer to Stabilizer Shaft Link Replacement .
- Disconnect the ball joint from the knuckle. Refer to Steering Knuckle Replacement .
- Remove the rack and pinion assembly. Refer to Steering Gear Replacement .
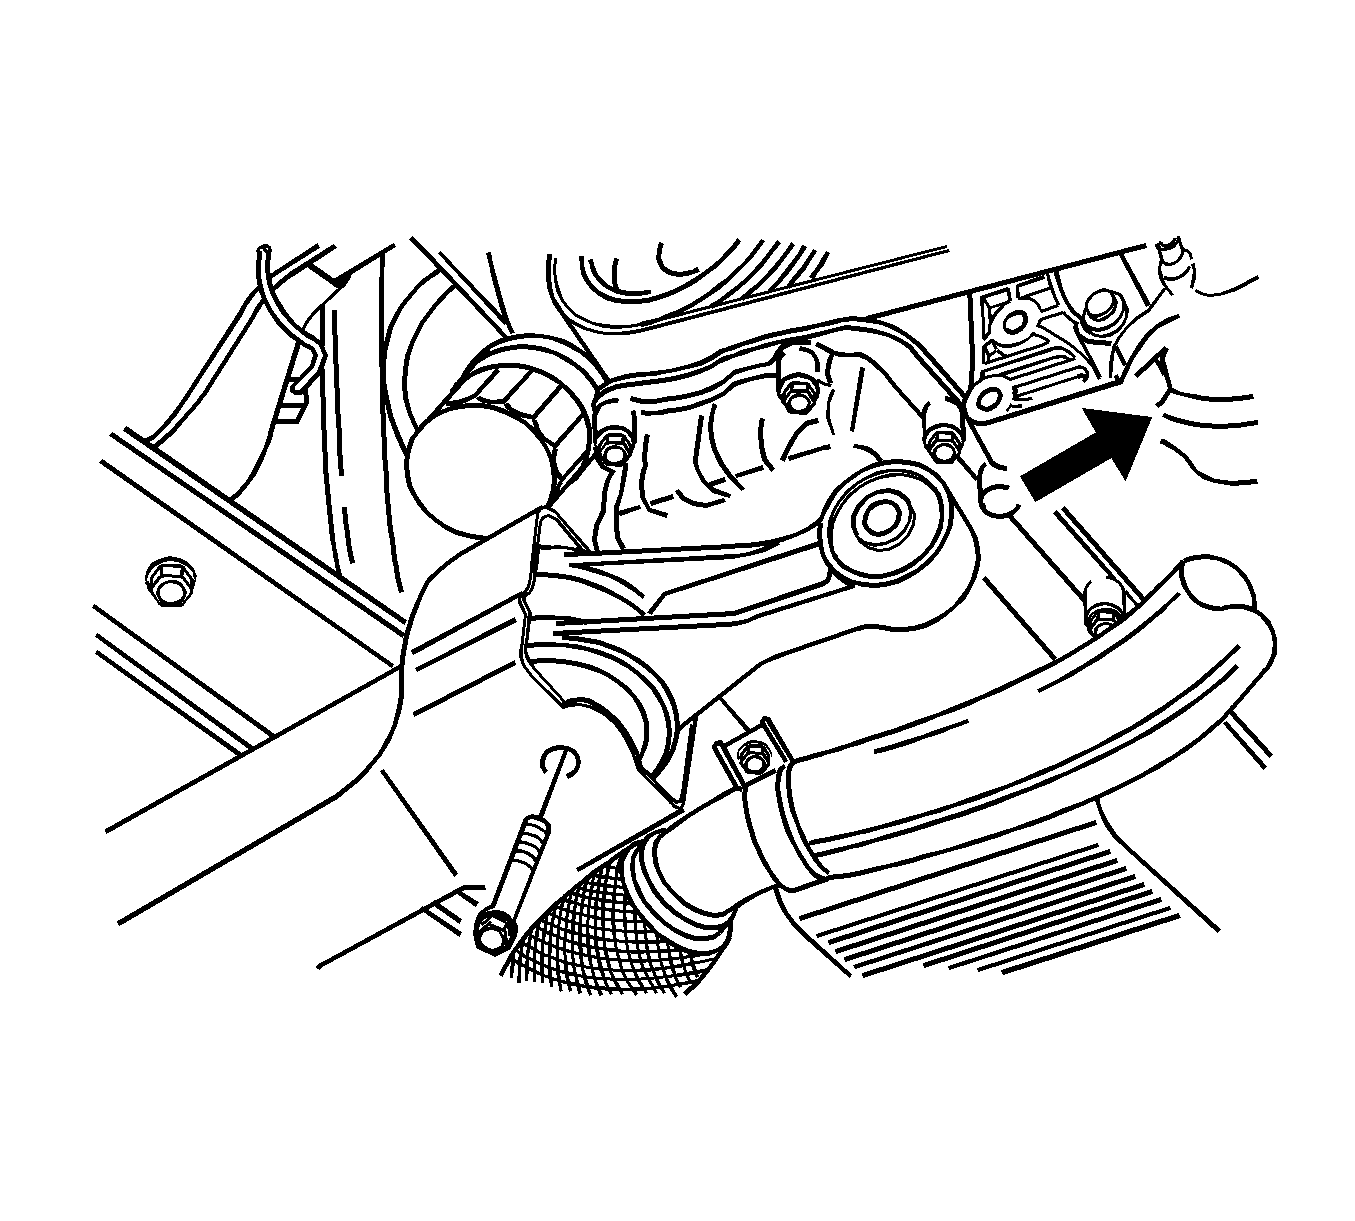
- Remove the engine mounting reaction lower rod.
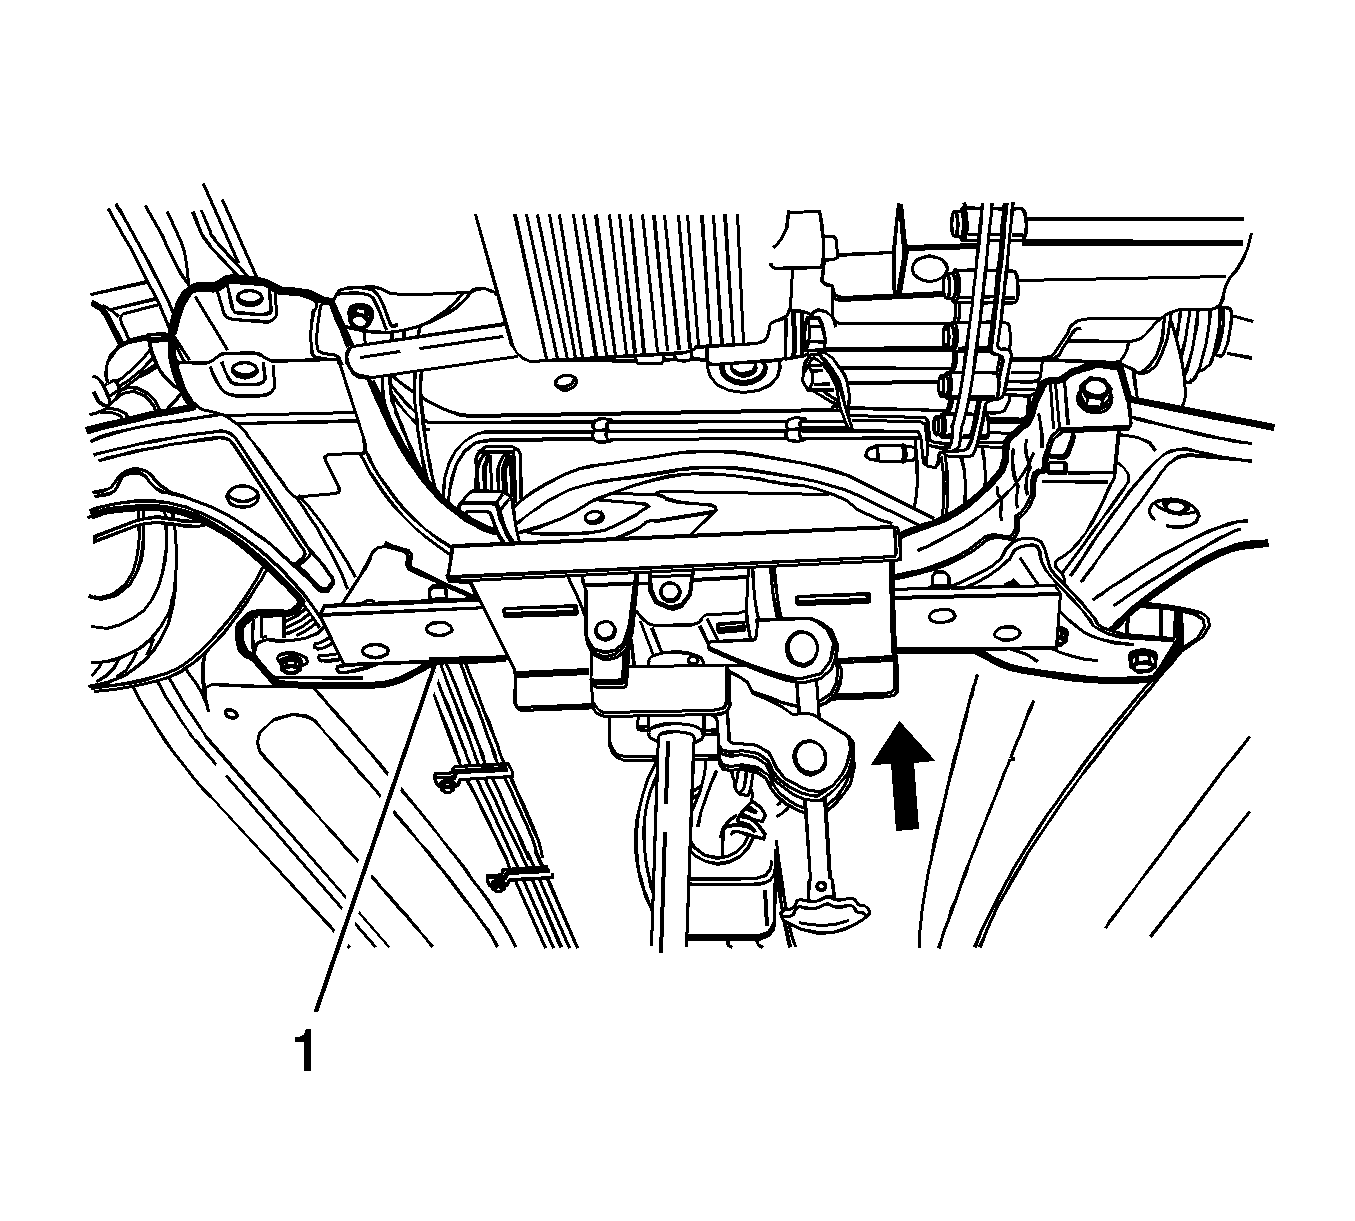
- Attach the DW110-070 on the transaxle jack.
- Support the crossmember with the DW110-070 (1).
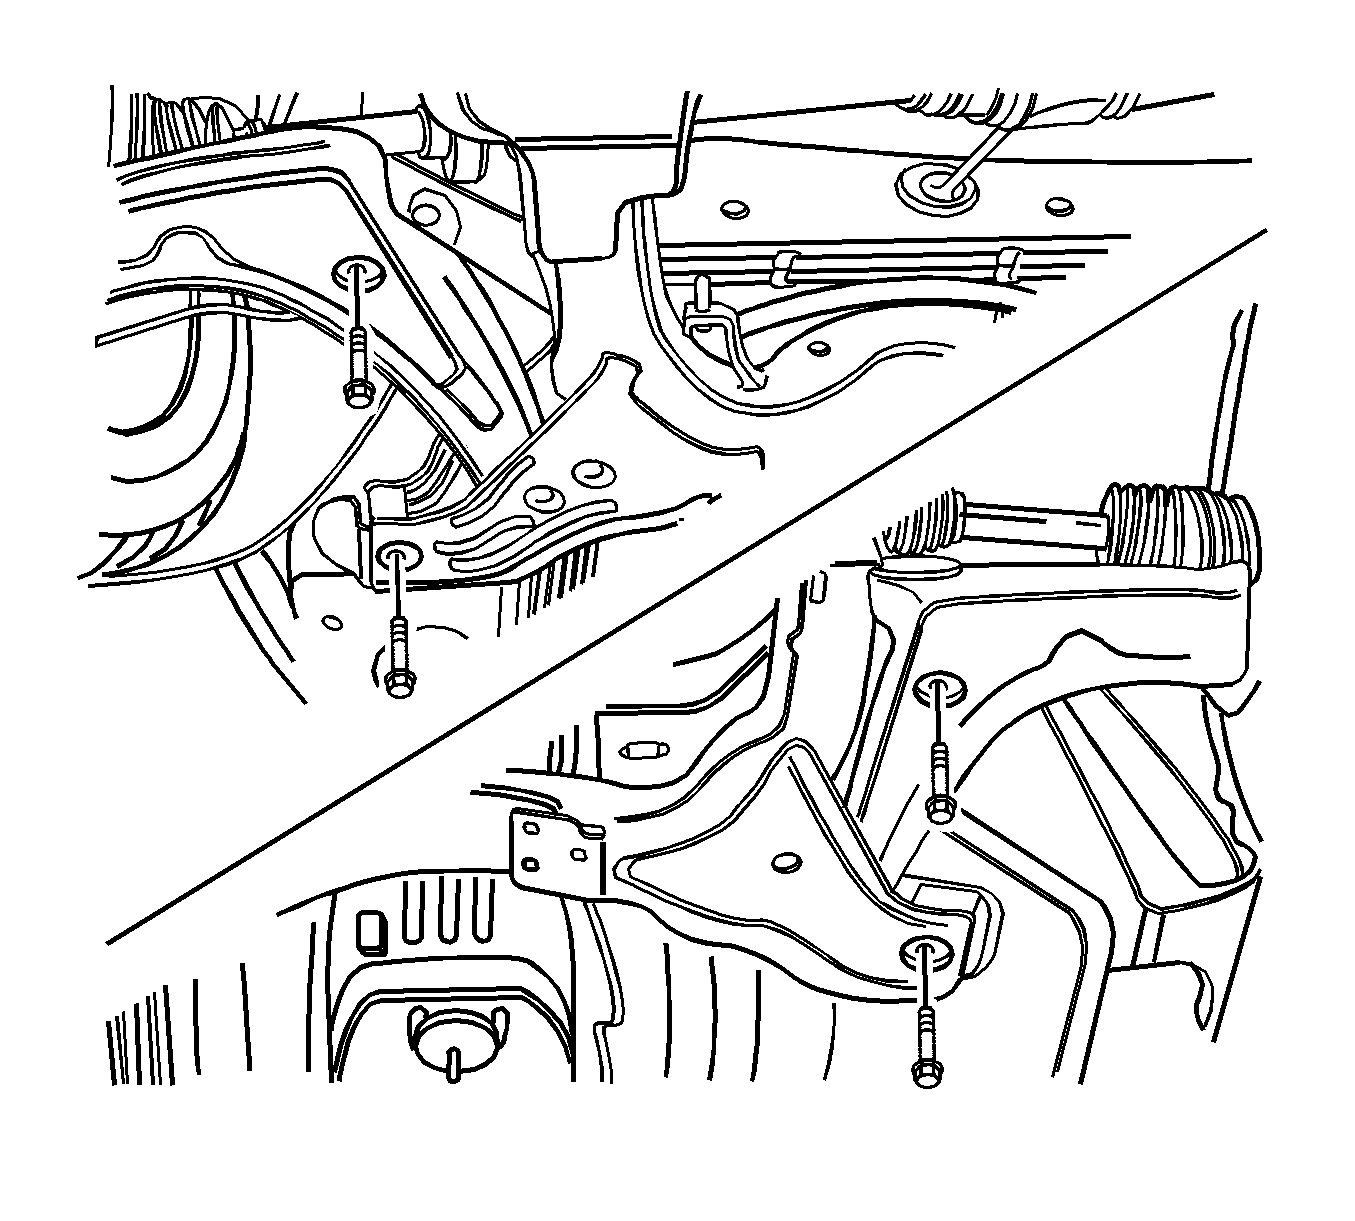
- Remove the crossmember-to-body front bolts.
- Remove the crossmember-to-body rear bolts.
- Remove the crossmember assembly from the vehicle.


Installation Procedure
- Install the crossmember assembly to the vehicle.
- Install the crossmember-to-body rear bolt.
- Install the crossmember-to-body front bolt.
- Install the engine mounting reaction lower rod.
- Install the rack and pinion assembly.
- Connect the ball joint to the knuckle.
- Connect the stabilizer link to the stabilizer shaft.
- Install the exhaust pipe to the catalytic converter.
- Install the front wheels. Refer to Tire and Wheel Removal and Installation .

Notice: Refer to Fastener Notice in the Preface section.
Tighten
Tighten the crossmember-to-body rear bolt to 196 N·m (145 lb ft).
Tighten
Tighten the crossmember-to-body front bolt to 196 N·m (145 lb ft).


