For 1990-2009 cars only
Removal Procedure
- Relieve fuel system pressure. Refer to Fuel Pressure Relief .
- Drain the fuel tank. Refer to Fuel Tank Draining .
- Remove the fuel tank. Refer to Fuel Tank Replacement .
- Remove the fuel sender assembly. Refer to Fuel Sender Assembly Replacement .
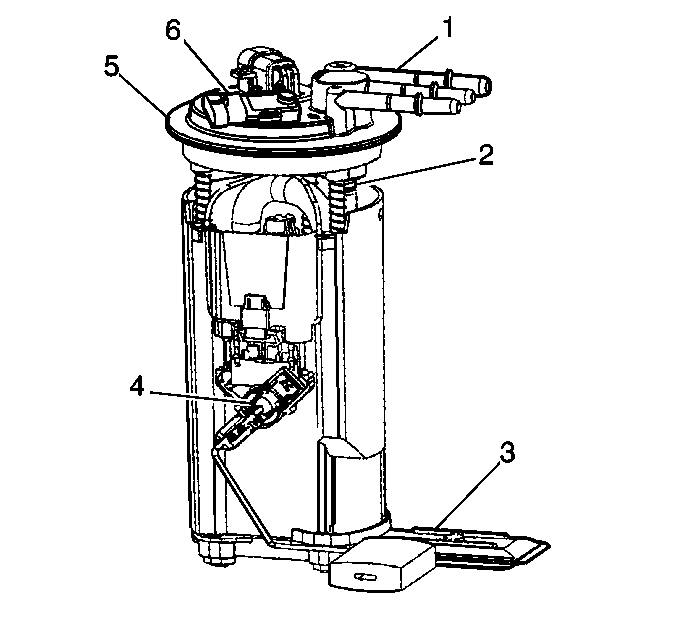
- Note strainer (3) position for future reference.
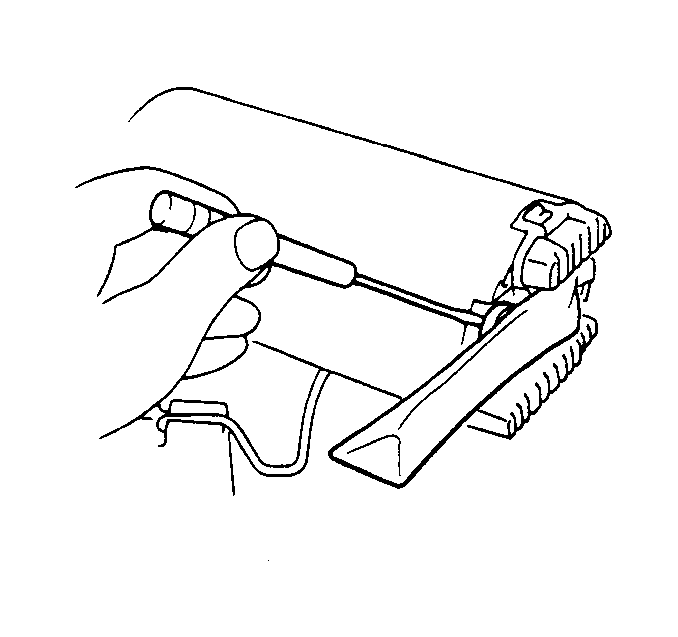
- Support the reservoir with one hand and grasp the strainer with the other hand.
- Use a screwdriver to pry the strainer ferrule off the reservoir.
- Discard the strainer.


Installation Procedure
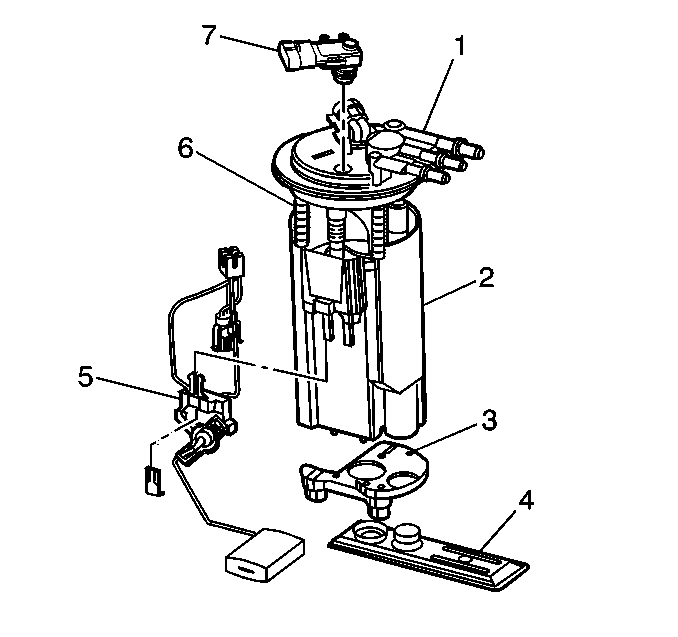
- Install the new strainer to the reservoir.
- Support the reservoir with one hand and grasp the strainer (4) with the other hand twisting the strainer into position.
- Reinstall the fuel sender assembly. Refer to Fuel Sender Assembly Replacement .
- Install the fuel tank. Refer to Fuel Tank Replacement .
- Add fuel and reinstall the fuel fill cap.
- Reconnect the negative battery cable. Refer to Battery Negative Cable Disconnection and Connection in engine electrical.
- Check for fuel leaks.

| 7.1. | Turn the ignition switch ON for 2 seconds. |
| 7.2. | Turn the ignition switch OFF for 10 seconds. |
| 7.3. | Turn the ignition switch ON. |
| 7.4. | Check for fuel leaks. |
