Creaking Type Sound from Right Rear Wheel Opening Area (Reposition Sheet Metal)

| Subject: | Creaking Type Sound from Right Rear Wheel Opening Area (Reposition Sheet Metal) |
| Models: | 1999-2001 Chevrolet Tracker |
| 4-Door Models Only |
This bulletin is being revised to add model years. Please discard Corporate Bulletin Number 99-08-59-002 (Section 08 -- Body and Accessories).
Condition
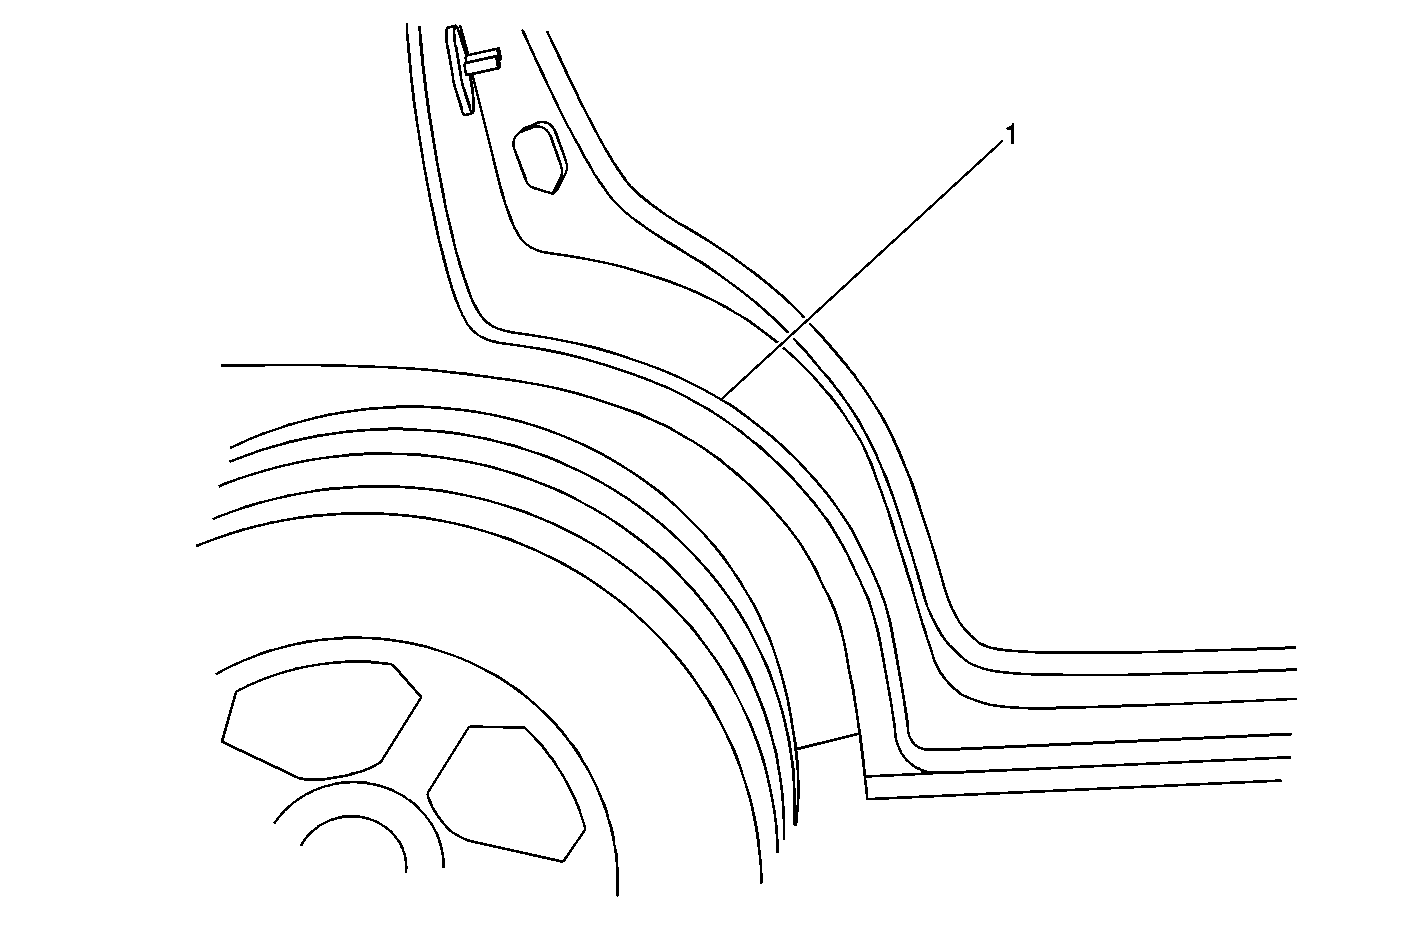
Figure 1

Some customers may comment that there is a creaking type sound coming from the right rear wheel opening or the dog leg area (Figure 1, location 1) when driving slowly or in parking lot type maneuvers.
Cause
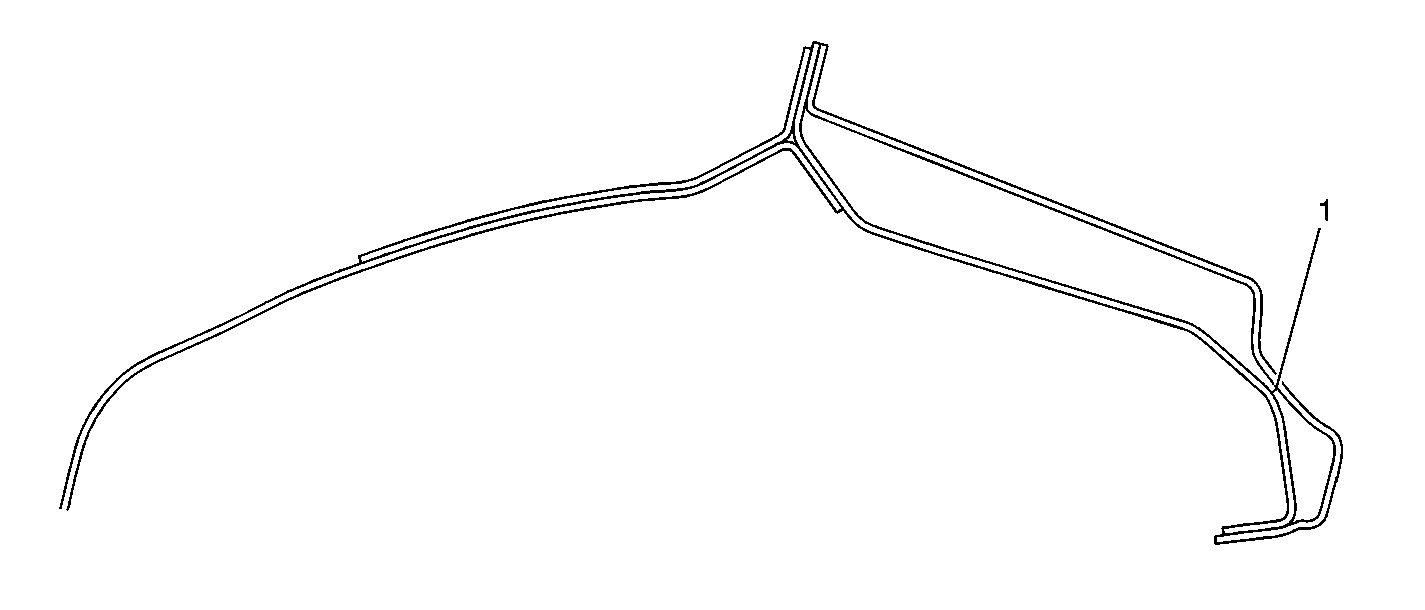
Figure 2

The INNER body side sheet metal panel may be coming in contact with the OUTER body side sheet metal approximately 160 mm (6 ¼ in) below the door striker, located in the lower "C" pillar. The area of contact (Figure 2, location 1), which is shown in the section view, is not visible from the outside or from underneath the vehicle.
Correction
Reposition the inner body side sheet metal away from the outer body side sheet metal, using the following service procedure:
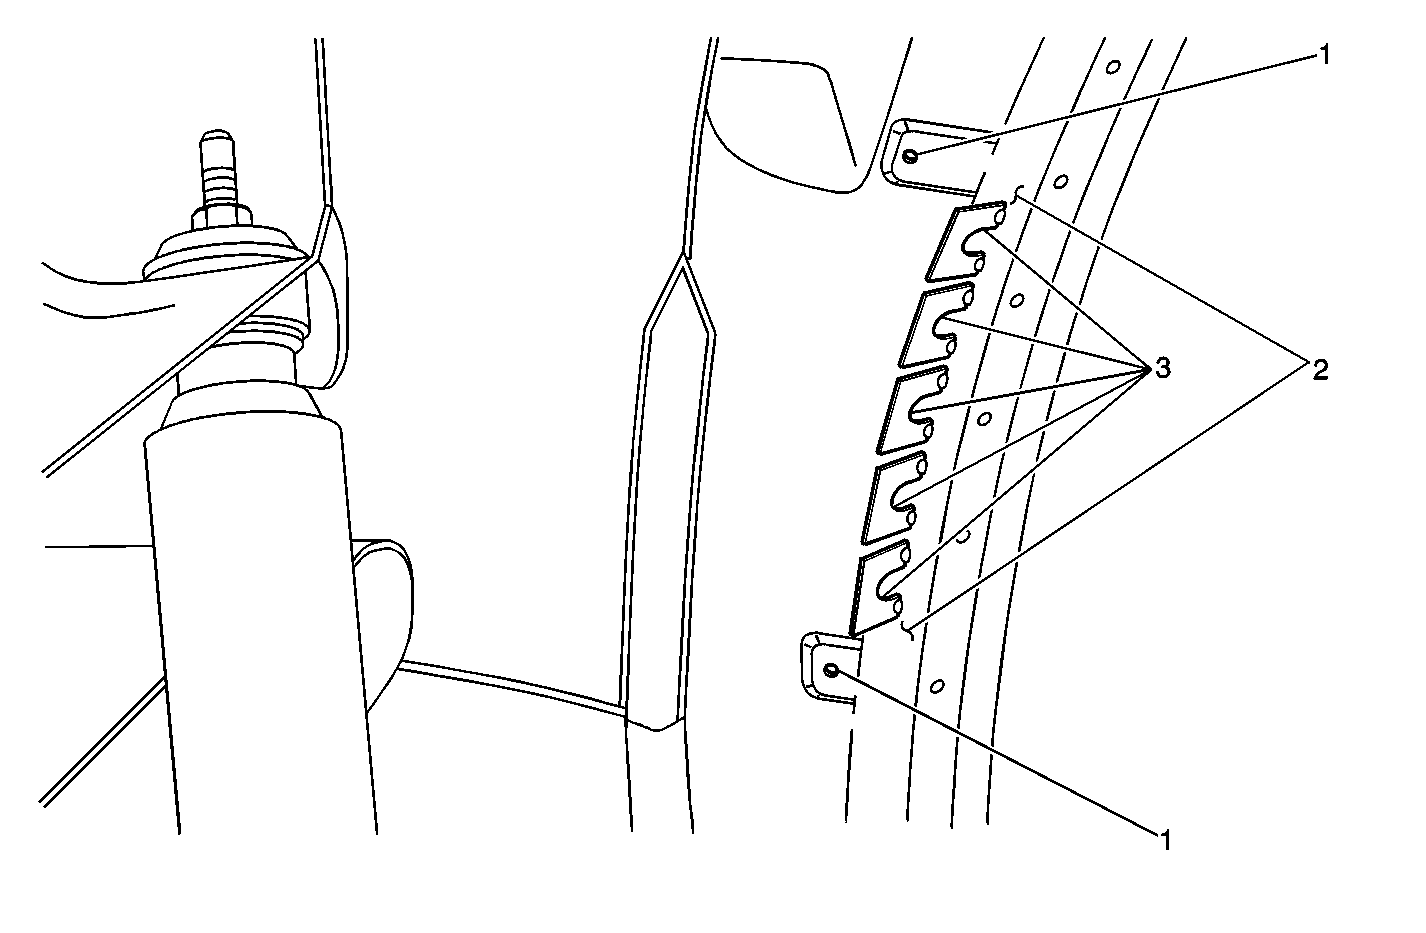
Figure 3

- Disconnect the negative battery cable.
- Raise the vehicle on a suitable hoist and remove the right rear tire and wheel assembly.
- Remove the fasteners and the two piece plastic inner fender liner.
- Cover the brake drum and hub assembly with a protective welding blanket.
- Prepare the sheet metal for welding by removing any paint, undercoatings, grease or dirt from the area shown (Figure 3, location 2) between the two holes (Figure 3, location 1) that are used to attach the inner fender liner.
- Position and weld the open ends of four or five metal wheel alignment shims (Figure 3, location 3) to the prepared surface area as shown. Metal washers can be substituted if shims are not available.
- Using a slide hammer attached first to the lower most shim, pull the inner sheet metal away from the exterior sheet metal. It should not be necessary to pull the inner sheet metal away from the outer sheet metal by more than 5 mm (3/16 in).
- Repeat Step 7 on the next shim in line until all shims have been done.
- Using a grinder, remove the shims and any weld slag from the inner sheet metal.
- Prepare the surface and apply the recommended primer. For additional information, see GM Refinish Material Booklet GM4901M-D-2001 (English) or GM4901M-D-F-2001 (French).
- Apply 3M® #8883 Underseal™ Rubberized Undercoating, or equivalent, to the primed area.
- Using the appropriate piece of tubing, apply 3M® #8992 Rust Fighter-1 (Internal Coating Compound), or equivalent, to the backside of the inner sheet metal by spraying through the two holes (Figure 3, location 1) used to attach the inner fender liner.
- Remove the welding blanket and the water soaked towel.
- Install the two piece inner fender liner.
- Install the tire and wheel assembly.
- Lower the hoist and reconnect the negative battery cable.
Notice: To avoid damage to the EXTERIOR paint in the next step, place a cold water soaked towel on the exterior dog leg paint surface directly behind the area (Figure 3, location 2) prepared for welding in Step 5.
Tighten
Tighten the wheel nuts to 95 N·m (69 lb ft).
Warranty Information
For vehicles repaired under warranty, use:
Labor Operation | Description | Labor Time |
|---|---|---|
A9301 | Floor Pan Repair - Rear | 0.7 hr |
