Tools Required
| • | J 6133-A Bearing Race Installer |
| • | J 25273 Differential Pinion Seal Installer |
| • | J 8614-01 Pinion Flange Holder |
Installation Procedure
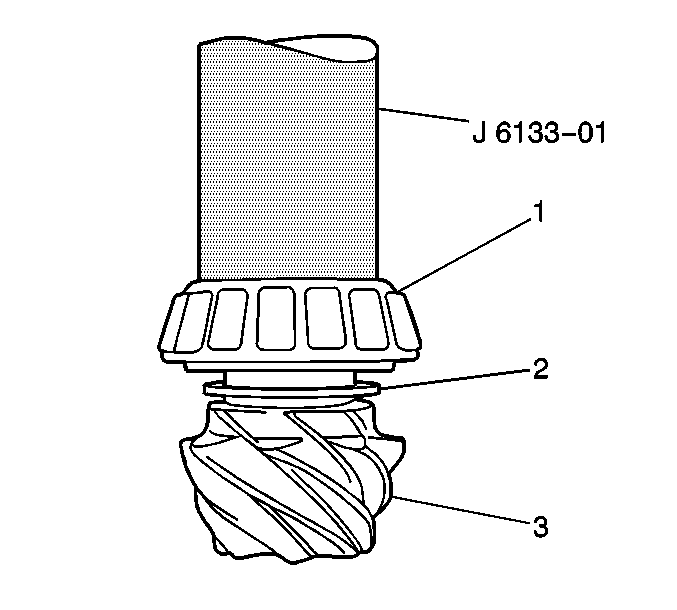
- Install a pinion selective shim (2) onto the pinion gear shaft.
- Install the pinion bearing (1) onto the pinion gear shaft. Use the J 6133-A .
- Place the pinion gear (3) on a hydraulic press.
- Install the inner pinion bearing on the pinion gear shift shaft with the tapered side facing away from the pinion gear.
- Place the J 6133-A .
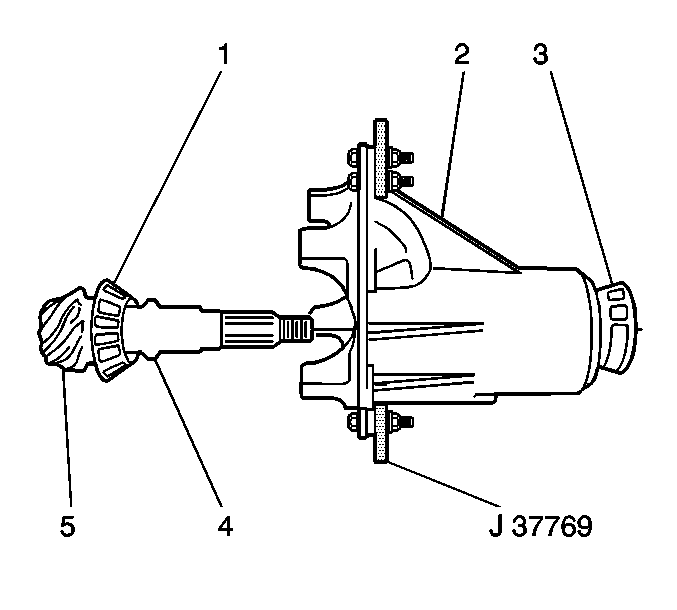
- Install a new collapsible spacer (4) onto the pinion gear shaft with the short shank toward the pinion gear using theJ 37769 .
- Install the outer pinion bearing (3) and the pinion gear (5) into the differential carrier (2).
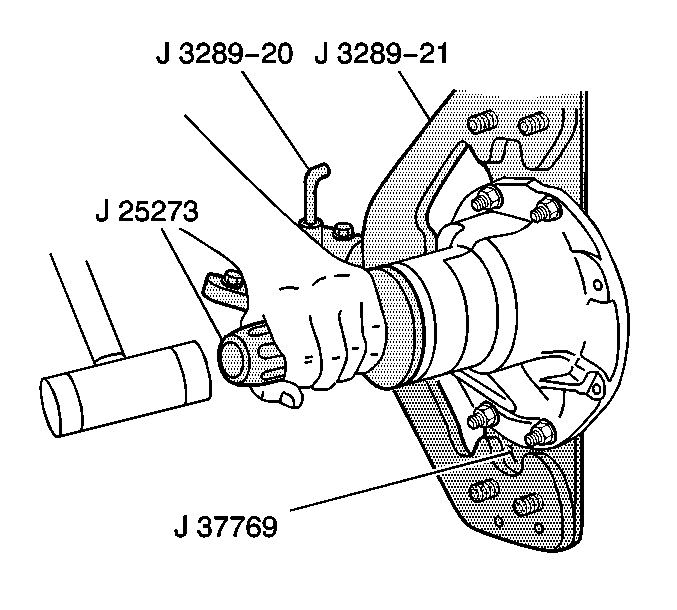
- Install a new pinion oil seal into the differential carrier using the J 25273 .
- Apply wheel bearing lubricant GM P/N 1051344 (Canadian P/N 993037), or equivalent, to the new pinion oil seal lip.
- Adjust the pinion bearing preload using the J 8614-01
- Between each increments of tightening, remove the J 8614-01 .
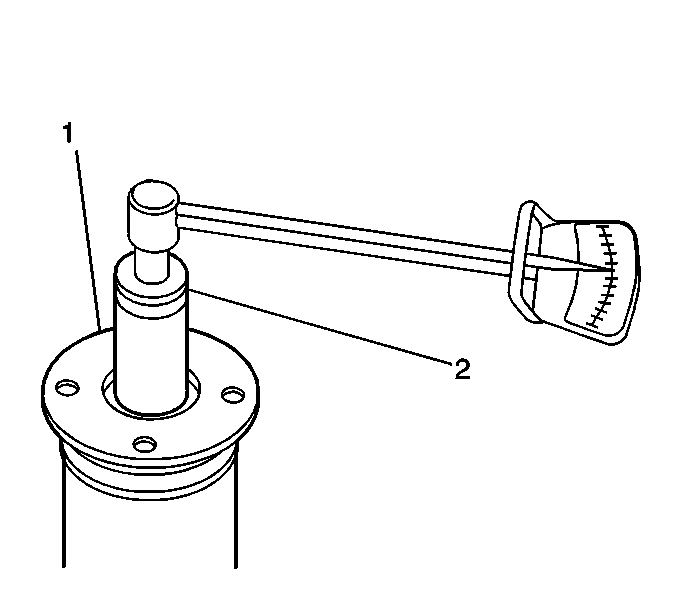
- Measure the bearing preload using a torque wrench and a 27 mm socket (2).
- The pinion gear should require 1.2 N·m (11 lb in) in order to rotate.
- If the pinion bearing preload is less than specified, repeat the adjustment procedure until proper pinion bearing preload has been attained.
- Install the pinion flange nut.
- Install the side bearing races onto the differential side bearings.
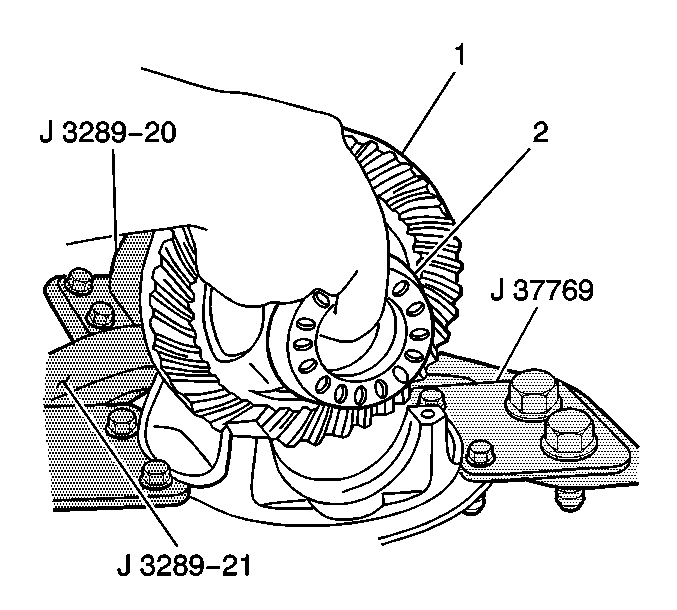
- Install the differential assembly into the differential carrier.
- Install both side bearing adjusters (2) on the side bearing races.
- Install both side bearing caps onto differential carrier, secure with the four side bearing cap bolts.
Notice: Use the correct fastener in the correct location. Replacement fasteners must be the correct part number for that application. Fasteners requiring replacement or fasteners requiring the use of thread locking compound or sealant are identified in the service procedure. Do not use paints, lubricants, or corrosion inhibitors on fasteners or fastener joint surfaces unless specified. These coatings affect fastener torque and joint clamping force and may damage the fastener. Use the correct tightening sequence and specifications when installing fasteners in order to avoid damage to parts and systems.
Important: Do not overtighten the pinion flange nut when adjusting the bearing preload. Tighten the pinion flange nut gradually while taking frequent pinion bearing preload measurements with a torque wrench. If overtightening exists the collapsible spacer will crush requiring a new collapsible spacer before pinion bearing preload can be properly adjusted.
Tighten
Tighten the nut gradually in increments of 5 N·m (44 lb in).
Tighten
Tighten differential side bearing cap bolts to 15 N·m (11 lb ft).
