For 1990-2009 cars only
Removal Procedure
- Disconnect the battery negative cable. Refer to Battery Replacement in Engine Electrical.
- Drain the engine coolant. Refer to Cooling System Draining and Filling in Engine Cooling.
- Remove the accessory mounting bracket. Refer to Accessory Mounting Brackets Replacement .
- Remove the exhaust manifold. Refer to Exhaust Manifold Replacement .
- Remove the valve rocker arm cover. Refer to Valve Rocker Arm Cover Replacement .
- Remove the valve rocker arms and push rods. Refer to Valve Rocker Arm and Push Rod Replacement .
- Disconnect the fuel pipes from the fuel rail. Refer to Fuel Injection Fuel Rail Assembly Replacement in Engine Controls.
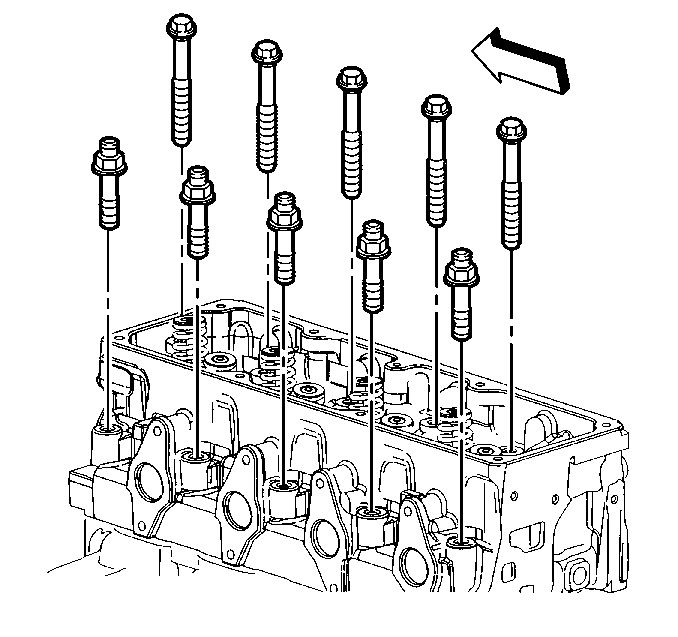
- Remove the cylinder head. Refer to Cylinder Head Removal .
- Clean all sealing surfaces. Refer to Cylinder Head Cleaning and Inspection .

Important: The intake manifold can remain on the cylinder head. Refer to Intake Manifold Removal if intake manifold removal is required.
Installation Procedure
- Refer to Intake Manifold Installation if the intake manifold was removed.
- Install the cylinder head. Refer to Cylinder Head Installation .
- Connect the fuel pipes. Refer to Fuel Injection Fuel Rail Assembly Replacement in Engine Controls.
- Install the valve rocker arms and push rods. Refer to Valve Rocker Arm and Push Rod Replacement .
- Install the valve rocker arm cover. Refer to Valve Rocker Arm Cover Replacement .
- Install the exhaust manifold. Refer to Exhaust Manifold Replacement .
- Install the accessory mounting bracket. Refer to Accessory Mounting Brackets Replacement .
- Fill the engine coolant. Refer to Cooling System Draining and Filling in Engine Cooling.
- Connect the battery negative cable. Refer to Battery Replacement in Engine Electrical.

