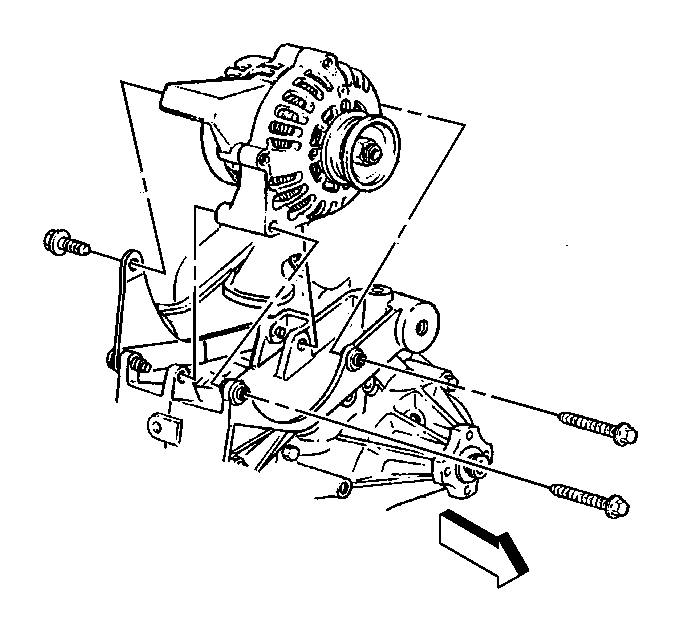
Generator Replacement 2.2L
Removal Procedure
- Disconnect the negative battery cable. Refer to General Information.
- Working through the wheel well, remove the generator rear brace from the engine.
- Remove the accessory drive belt. Refer to Drive Belt Replacement
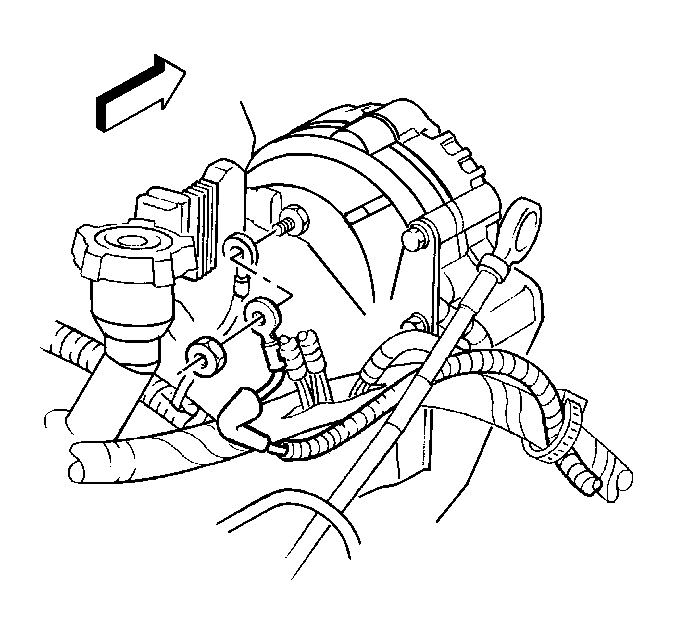
- Disconnect the generator electrical connector.
- Remove the BAT feed terminal nut.
- Remove the BAT feed terminal wire.
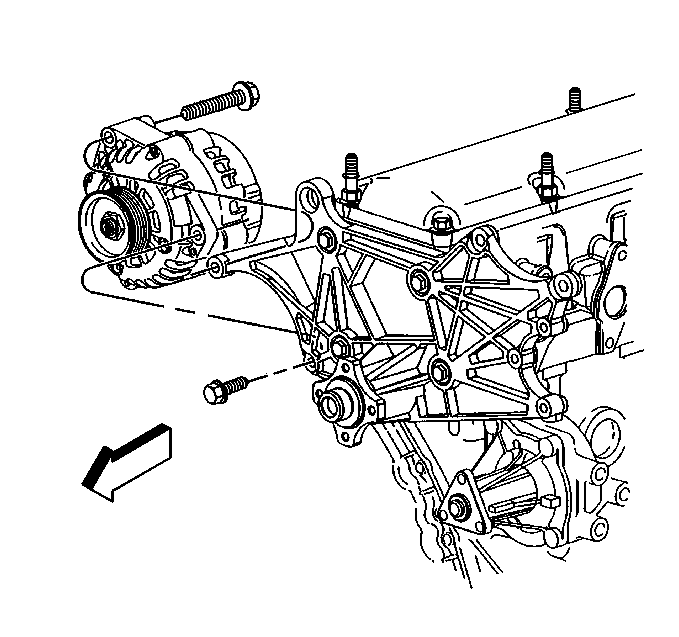
- Remove the generator mounting bolts.
- Remove the generator from the vehicle.
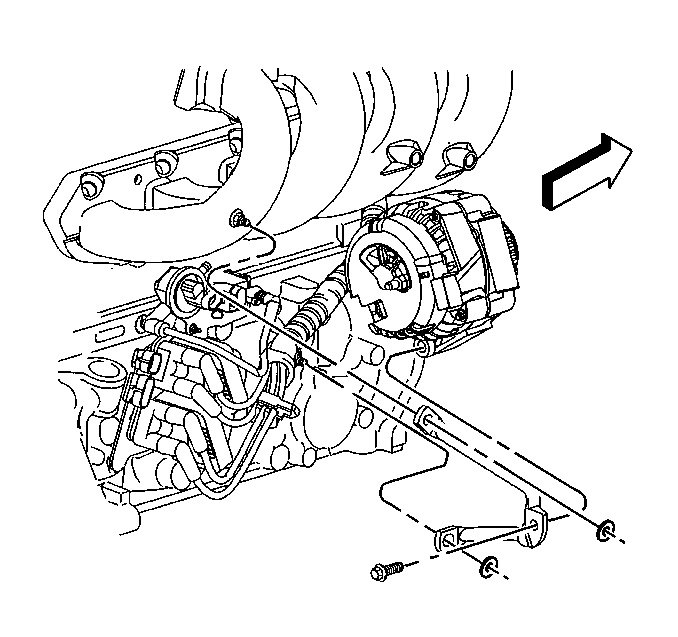
| • | Remove the generator brace to the engine block bolt. |
| • | Remove the generator brace to the intake manifold nuts. |
Installation Procedure
- Install the generator to the vehicle.
- Install the generator attaching bolts.
- Tighten the left generator bolt to 30 N·m (22 lb ft).
- Tighten the right generator bolt to 43 N·m (32 lb ft).
- Connect the BAT feed wire to the generator.
- Connect the electrical connector to the generator.
- Install the generator rear brace to the engine, working through the wheel well.
- Install the generator rear brace attaching bolt and nuts.
- Install the accessory drive belt. Refer to Drive Belt Replacement
- Connect the negative battery cable.
Tighten
Refer to General Information.
Tighten
Tighten the BAT feed terminal nut to 8 N·m (71 lb in).
Tighten
Tighten the generator brace nuts and bolt to 30 N·m (22 lb ft).
Generator Replacement 4.3L
Removal Procedure
Caution: This vehicle is equipped with a Supplemental Inflatable Restraint (SIR) System. Failure to follow the correct procedure could cause the following conditions:
• Air bag deployment • Personal injury • Unnecessary SIR system repairs • Refer to SIR Component Views in order to determine if you are performing service on or near the SIR components or the SIR wiring. • If you are performing service on or near the SIR components or the SIR wiring, disable the SIR system. Refer to Disabling the SIR System.
- Disconnect the negative battery cable. Refer to General Information.
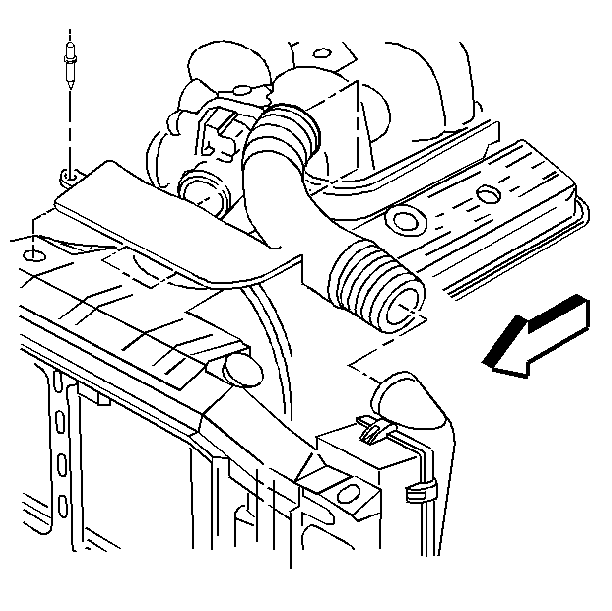
- Remove the air inlet duct.
- Remove the brace bolt from the back of the generator.
- Remove the generator brace nut from the exhaust manifold stud.
- Remove the generator brace.
- Remove the battery feed terminal nut from the back of the generator (under the boot).
- Disconnect the battery feed wire.
- Disconnect the voltage regulator connector.
- Remove the accessory drive belt. Refer to Drive Belt Replacement
- Remove the two generator mounting bolts.
- Remove the generator from the mounting bracket.
Installation Procedure
- Install the generator to the mounting bracket with the two generator mounting bolts.
- Install the brace to the back of the generator with the bolt.
- Install the brace nut to the exhaust manifold stud.
- Connect the generator BAT terminal wire. Make sure the insulating boot is covering the terminal nut.
- Connect the voltage regulator connector.
- Install the accessory drive belt.
- Install the air inlet duct.
- Connect the negative battery cable.
| 4.1. | Tighten the front generator bolt to 50 N·m (36 lb ft). |
| 4.2. | Tighten the rear generator bolt 25 N·m (18 lb ft). |
| 4.3. | Tighten the brace bolt 25 N·m (18 lb ft). |
| 4.4. | Tighten the brace nut 30 N·m (22 lb ft). |
| 4.5. | Tighten the nut on the generator BAT terminal to 8 N·m (71 lb in). |
Refer to Fastener Tightening Notice in General Information.
