| Subject: | EI08221 - 3.5L, 3.9L, LZ9, LZE, LZ4, LZ8 Engine Oil Leak at Front [Accessory Drive End] or Rear [Transmission End] of Engine (Engineering Information) |
| Models: | 2007 Chevrolet Impala, Monte Carlo |
| with 3.5L or 3.9L Engine (VINs 1, K, N, or R) |
| Attention: | Proceed with this bulletin ONLY if the customer has commented about this concern AND the EI number is listed in GMVIS. If the customer has not commented about this condition or the EI does not show in GMVIS, disregard the bulletin and proceed with
diagnostics found in published service information. THIS IS NOT A RECALL - refer to Service Bulletin 04-00-89-053B for more details on the use of Engineering Information bulletins. |
This bulletin is being revised to update the diagnostic procedure. Please discard Corporate Bulletin Number 08-06-01-016 (Section 06 -- Engine).
Condition
Some customers may comment on a oil leak coming from the engine.
Cause
GM Engineering has noticed an increase in replacements of the engine oil pan gasket, front crank seal and rear main seal. Engineering would like to better understand what is causing these gaskets/seals to be replaced. If a customer brings their vehicle
in for a complaint of an engine oil leak, complete the following diagnostic steps, take digital photos if possible, and note all information on the repair order:
- Verify that the VIN and mileage are accurately recorded on the repair order.
- What is the remaining oil life?
- How did the customer notice the concern (i.e. was informed at time of oil change, noticed spots on driveway/garage, etc.)?
- Describe the location on the engine in which the concern is noticed and the extent of the leak (seepage or oil dripping). If possible, take a digital picture of the area of concern.
Important: If the engine oil life is less than 25%, it will be necessary to change the oil before adding dye.
- Add fluorescent dye to the engine oil. Completely clean the oil pan and surrounding area.
- Run the vehicle for a minimum of 20 minutes to circulate the dye through the system.
- Use the J 28428-E or equivalent (Black Light and Dye Method) to identify the source of the leak. If the leak is not yet visible, the vehicle should be driven for a minimum of 40-80 km (25-50 mi).
- If the source of the leak is:
| - | at the front (accessory drive end) of the engine, proceed to Step 9. |
| - | at the rear (transmission end) of the engine, proceed to Step 10. |
| - | all other engine locations, proceed to Step 12. |
- For leaks in the front (accessory drive end) of engine:
| 9.1. | Remove the crankshaft balancer to determine the exact origin of the leak. DO NOT remove the oil pan or front crank seal. |
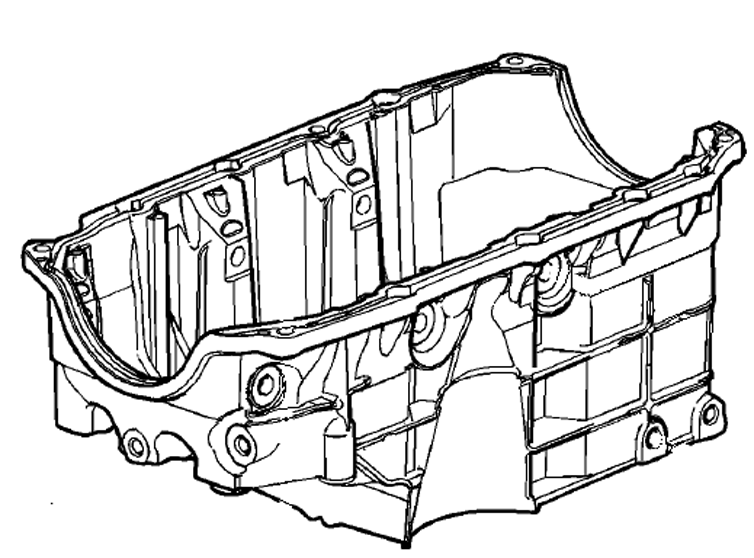
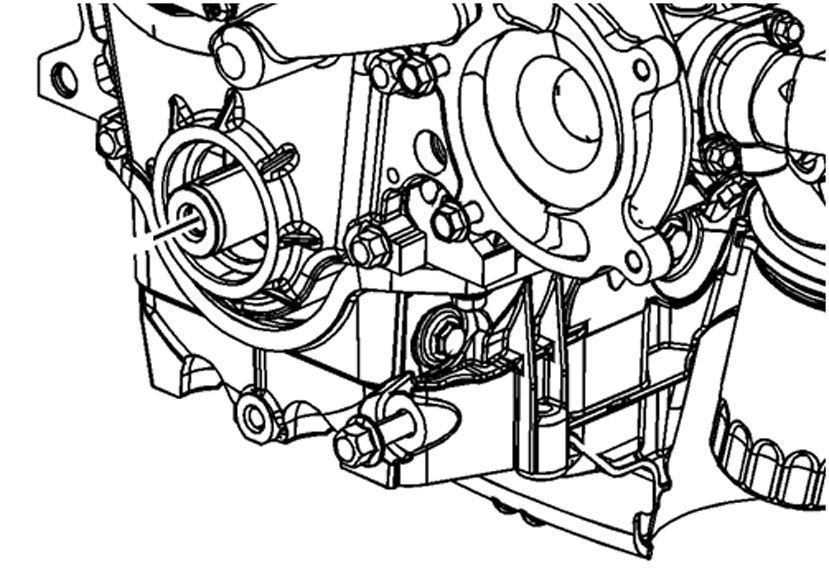
| 9.2. | Using the diagrams included with the bulletin, indicate the exact location of the leak if the source is the front crank seal or oil pan gasket. If possible, take a digital photograph of the source of the leak. |
| 9.2.1. | If the source of the leak is the oil pan and/or gasket, use a paint pen to mark the exact location of the leak on the oil pan. Proceed with Step 9.3. |
| 9.2.2. | If the source of the leak is other than the front crank seal or oil pan/gasket, proceed with Step 12. |
| 9.3. | DO NOT MAKE ANY REPAIRS -- proceed to Step 11. |
- For leak at the rear (transmission end) of the engine:
| 10.1. | Remove the transmission and flywheel to determine the exact origin of the leak. DO NOT remove the oil pan or rear main seal. |
| 10.2. | Using the diagrams included with the bulletin, indicate the exact location of the leak, if the source is the rear main seal or oil pan gasket. If possible, take a digital photograph of the source of the leak. |
| 10.2.1. | If the source of the leak is the oil pan and/or gasket, use a paint pen to mark the exact location of the leak on the oil pan. Proceed with Step 10.3. |
| 10.2.2. | If the source of the leak is other than the rear main seal or oil pan/gasket, proceed with Step 12. |
| 10.3. | DO NOT MAKE ANY REPAIRS -- proceed to Step 11. |
- Contact engineer -- Christina Connor at 248-676-1792
. If Christina is not available, leave a message with the following information. If Christina is unable to respond within one hour, proceed with Step 12.
| - | Tech name, date and time of call. |
| - | Dealer name, dealer code and phone number |
| - | Complete VIN and repair order number |
- Document on the repair order, the source of the oil leak. Repair the engine oil leak and proceed to Step 13. For leaks caused by the engine oil pan and/or gasket, follow Steps 12.1 through 12.3.
| | Important: DO NOT remove the oil pan gasket separately and reposition it with the oil pan. Be extremely careful not to contaminate the oil pan gasket with the residual oil from the engine.
|
| 12.1. | Carefully remove the oil pan, making sure to keep the gasket with the pan during removal. |
| 12.2. | Inspect the oil pan sealing surfaces on the engine and oil pan. Note the amount (size/thickness) and location of the RTV that may be seen on the sealing surfaces. |
| 12.3. | Proceed to Step 13. |
Important: Be sure the complete VIN, mileage and repair order number are listed on all documentation.
- Fax the front and back of the completed repair order and a copy of the diagram(s) identifying the source of the leak to: 248-685-6140, Attention: Christina Connor
E-mail digital photos of the leak (within 24 hours of the vehicle being repaired)
to: [email protected]
Warranty Information
For vehicles repaired under warranty, in which the oil leak was caused by the front crank seal, oil pan and/or gasket, or rear main seal, submit the claim using the labor operations/times listed in this bulletin. If the source of the leak was not due to
the front crank seal, oil pan and/or gasket, or rear main seal, use the appropriate :
Labor Operation
| Description
| Labor Time
|
J7532
| Engine Oil Leak Analysis -- Engineering Information
| 0.6 hr
|
Add:
| Oil change prior to leak testing
| 0.3 hr
|
Extended test drive
| 0.9 hr
|
Repair leak at rear of engine
| 6.1 hrs
|
Repair leak at front of engine
| 2.6 hrs
|
Refer to E2020 for appropriate alignment times
| Use Published Labor Operation Time
|
LEAK ANALYSIS DIAGRAMS
Oil Pan

Rear Main Seal

Front Crank Seal


