Front Side Door Outside Handle Replacement Monte Carlo
Removal Procedure
Important: The outside handles have adjustable lock rod. This allows for adjustment of the amount of travel needed to operate the outside handle.
When servicing a vehicle with adjustable outside handle-to-lock rods, it is important that all free play between the outside handle and the lock be removed. Do not operate the outside handle before these adjustments are made. Before removing the door handle, apply a double layer of masking tape around the perimeter of the painted surfaces.- Position the window completely up.
- Remove the front door trim panel. Refer to Front Side Door Trim Panel Replacement .
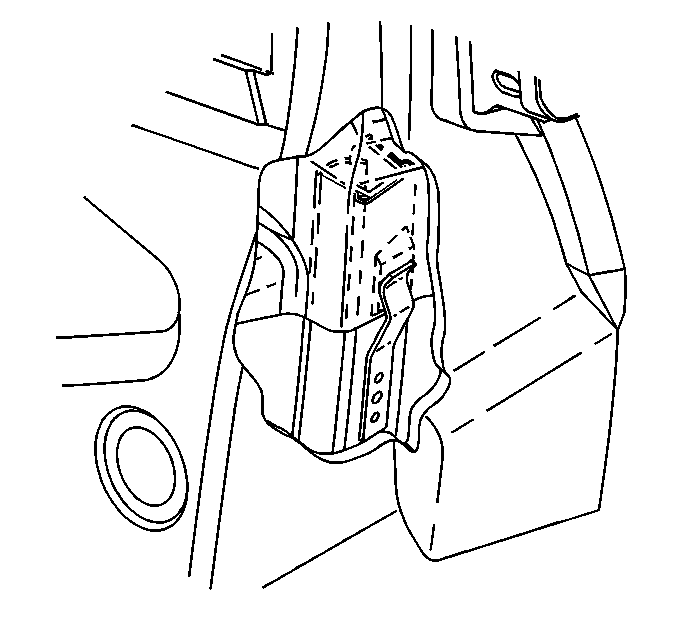
- Remove the front door water deflector. Refer to Front Side Door Water Deflector Replacement .
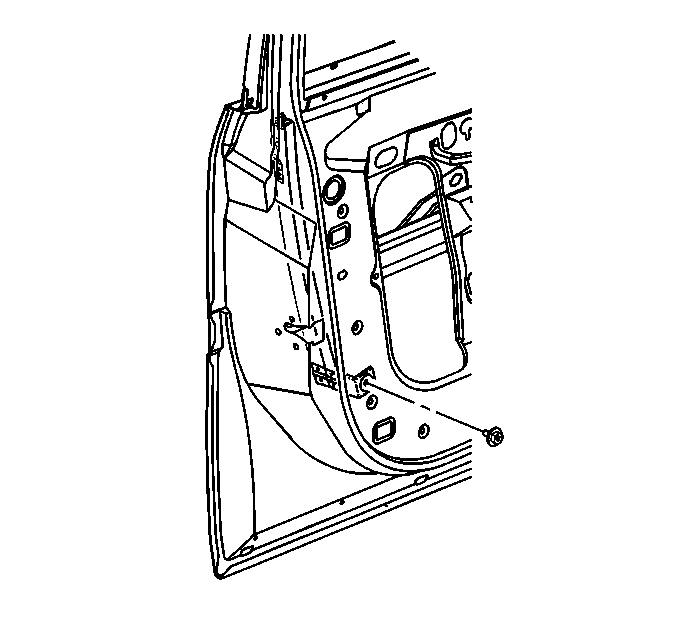
- Remove the front door rear window channel bolt.
- Remove the front door rear window channel from the front door slot by pulling downward to disengage the retainer clip.
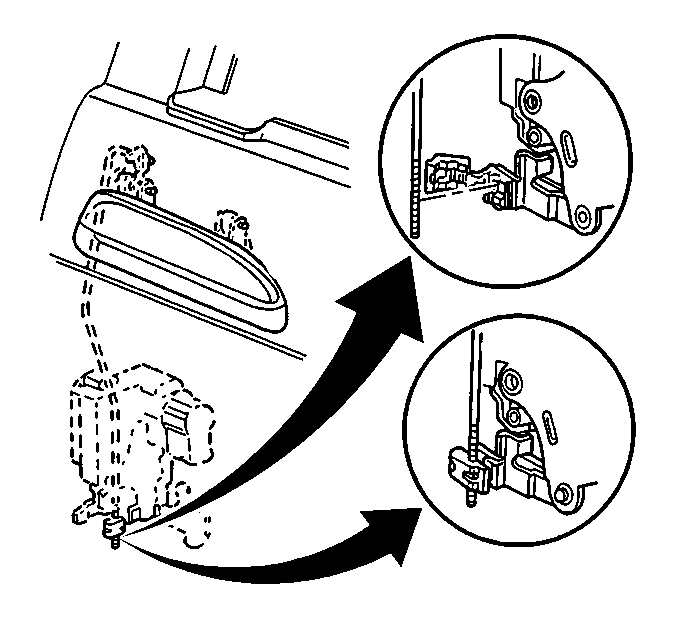
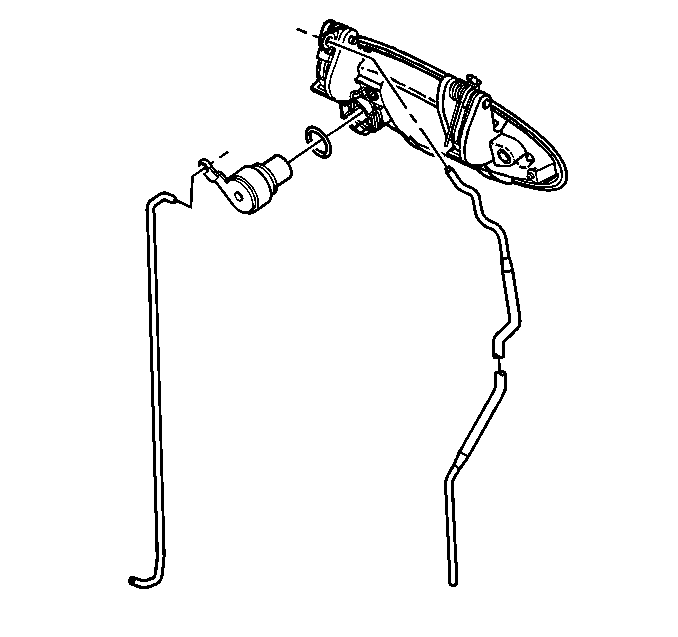
- Remove the outside door handle rod-to-lock clip from the lock.
- Remove the front door outside handle lockcylinder. Refer to Door Lock Cylinder Replacement .
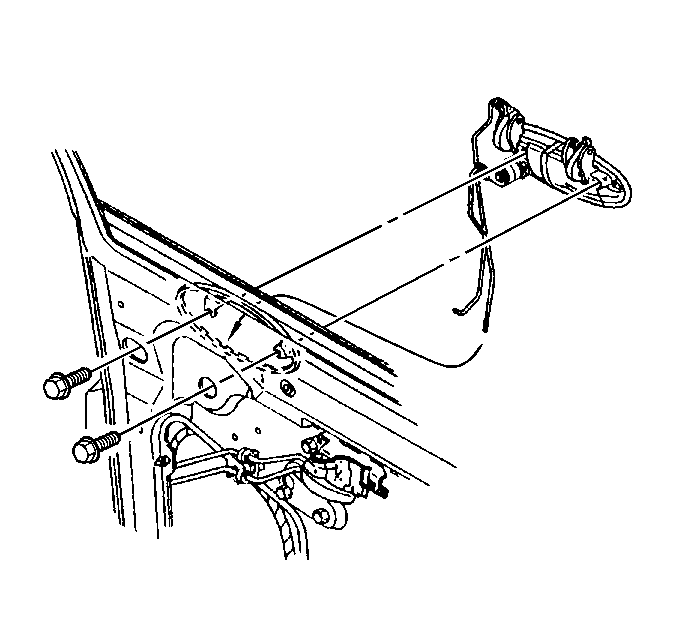
- Remove the hole plug to access to one of the two bolts that attach the outer door handle.
- Remove the front door outside door handle from the door.
- Remove the front door outside door handle rod from the handle.
Installation Procedure
- Install the lockcylinder retainer clip to door handle.
- Install the front door handle rod to the door handle.
- Install the front outside door handle to the door.
- Install the front door outside door handle bolts.
- Install the front door outside handle lockcylinder. Refer to Door Lock Cylinder Replacement .
- Install a NEW outside handle rod-to-lock clip onto the door lock lever.
- Install the front door rear window channel to the front door, ensuring that the up clip is engaged to the upper channel.
- Install the front door rear window channel bolt.
- Install the front door rear window channel bolt.
- Install the access hole plug.
- Install the front door water deflector. Refer to Front Side Door Water Deflector Replacement .
- Install the front door trim panel. Refer to Front Side Door Trim Panel Replacement .


Notice: Use the correct fastener in the correct location. Replacement fasteners must be the correct part number for that application. Fasteners requiring replacement or fasteners requiring the use of thread locking compound or sealant are identified in the service procedure. Do not use paints, lubricants, or corrosion inhibitors on fasteners or fastener joint surfaces unless specified. These coatings affect fastener torque and joint clamping force and may damage the fastener. Use the correct tightening sequence and specifications when installing fasteners in order to avoid damage to parts and systems.
Tighten
Tighten the front door outside door handle bolts to 10 N·m
(89 lb in).
| • | Position the outside door handle rod in the clip to eliminate any free play in the outside door handle. |
| • | Install the clip cover over the threaded outside door handle rod. |


Notice: Use the correct fastener in the correct location. Replacement fasteners must be the correct part number for that application. Fasteners requiring replacement or fasteners requiring the use of thread locking compound or sealant are identified in the service procedure. Do not use paints, lubricants, or corrosion inhibitors on fasteners or fastener joint surfaces unless specified. These coatings affect fastener torque and joint clamping force and may damage the fastener. Use the correct tightening sequence and specifications when installing fasteners in order to avoid damage to parts and systems.
Tighten
Tighten the front door rear window channel bolt to 10 N·m
(89 lb in).
Front Side Door Outside Handle Replacement Impala
Removal Procedure
- Raise the window to the full up position.
- Remove the front door trim panel. Refer to Front Side Door Trim Panel Replacement .
- Remove the front water deflector, as necessary. Refer to Front Side Door Water Deflector Replacement .
- Apply masking tape around the outside handle.
- Open the outside door handle rod to lock clip located on the door lock.
- Remove the lock cylinder rod from the outside door handle. Refer to Door Lock Cylinder Replacement .
- Remove the door handle bolt access tape from the inner door panel.
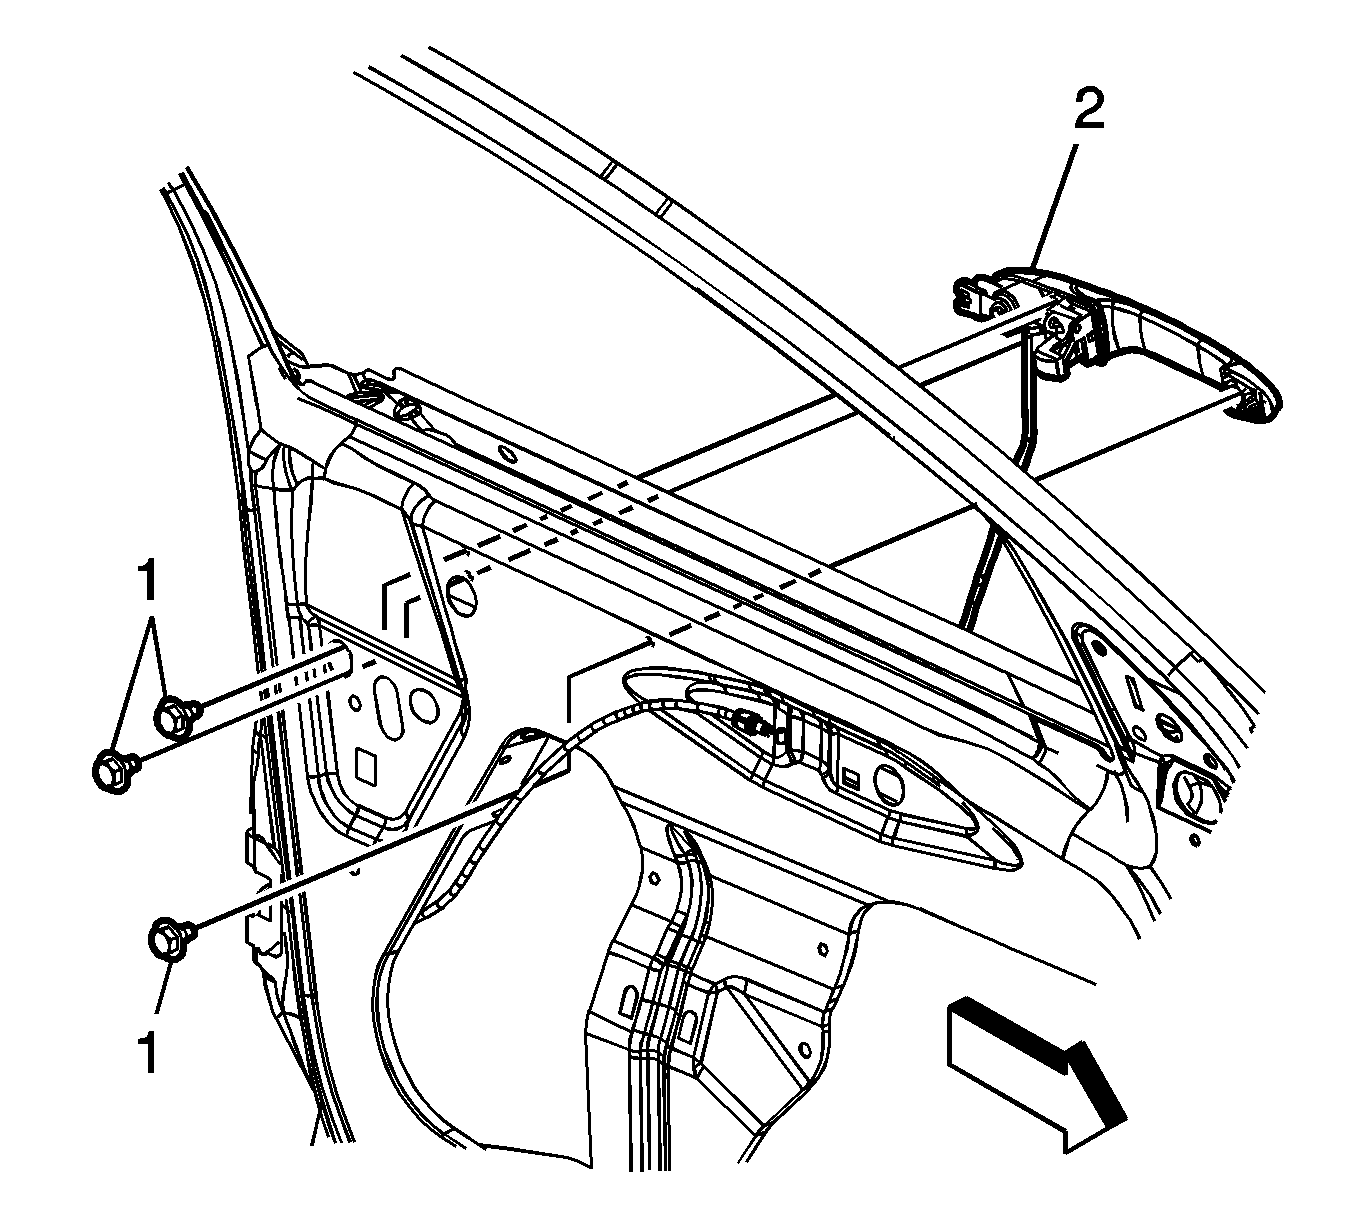
- Remove the bolts (1) from the outside handle.
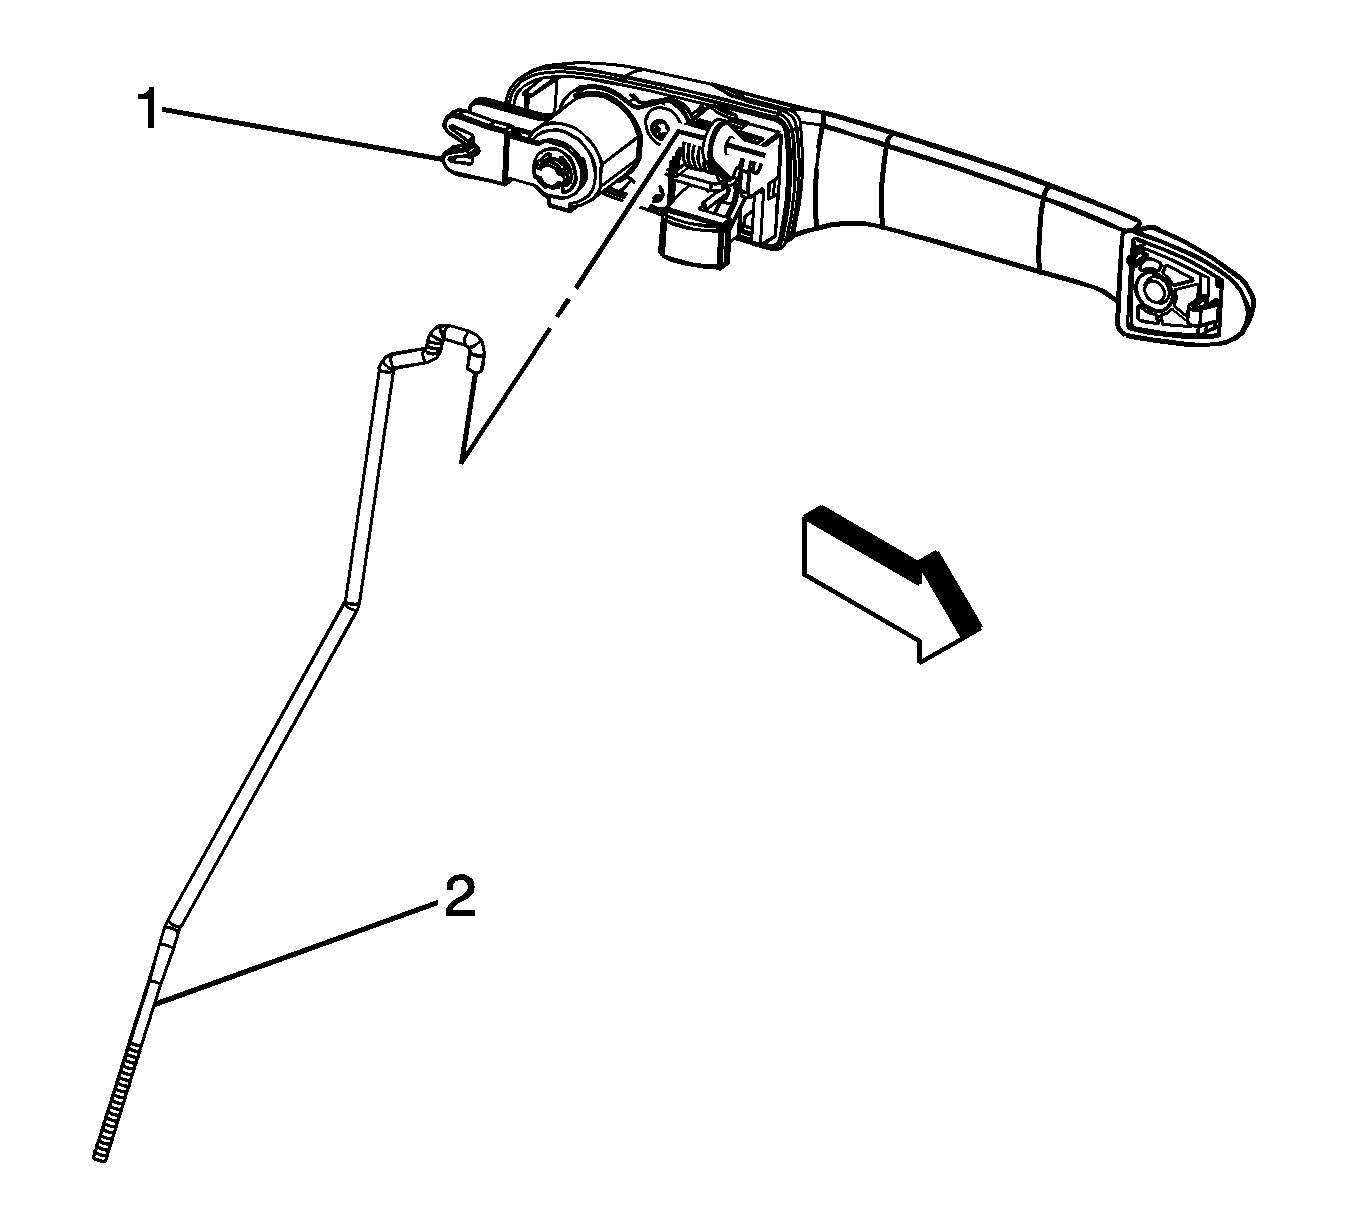
- Remove the outside handle (1) and the rod (2) from the door.
Important: The outside handles have adjustable outside handle lock rods. This allows for adjustment of the amount of travel needed in order to operate the outside handle.
When servicing a vehicle with adjustable outside handle lock rods, remove all free play between the outside handle and the lock. Also, do not operate the outside handle before these connections are made.Notice: To avoid paint damage, protect the area surrounding the part which you are removing or installing.

Installation Procedure
- Install the outside handle (1) and the rod (2) to the door.
- Install the outside handle bolts (1) to the door.
- Install the outside handle bolt access tape to the inner door panel.
- Install the lock cylinder rod to the outside door handle. Refer to Door Lock Cylinder Replacement .
- Install the outside handle rod into the clip
- Close the clip cover over the outside handle rod.
- Inspect the outside handle for proper operation.
- Remove the masking tape.
- Install the front door water deflector. Refer to Front Side Door Water Deflector Replacement .
- Install the front door trim panel. Refer to Front Side Door Trim Panel Replacement .

Notice: Refer to Fastener Notice in the Preface section.

Tighten
Tighten the bolts to 10 N·m (89 lb in).

