Engine Front Cover Replacement First Design
Tools Required
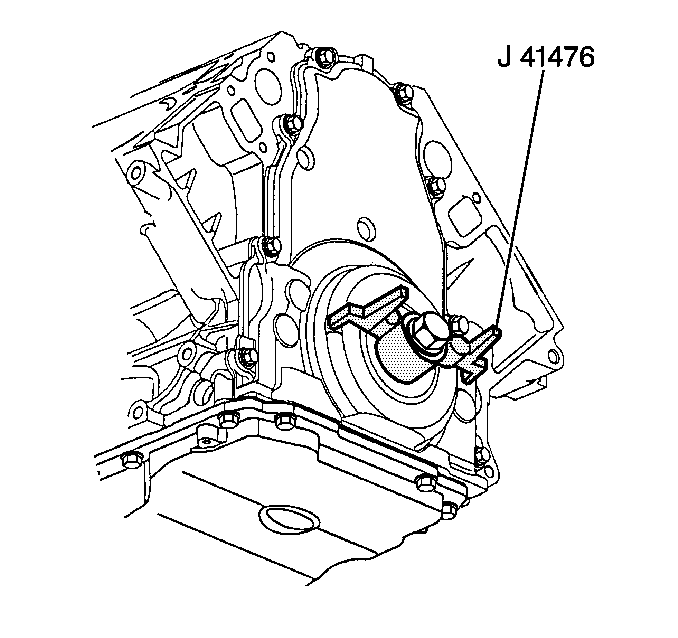
J 41476 Front and Rear Cover Alignment Tool (at crankshaft seal area)
Removal Procedure
- Remove the generator. Refer to Generator Replacement .
- Remove the power steering pump. Refer to Power Steering Pump Replacement .
- Remove the coolant pump manifold. Refer to Coolant Pump Manifold Replacement .
- Remove the crankshaft balancer. Refer to Crankshaft Balancer Replacement .
- Remove the belt tensioner bolt and reposition the tensioner (which blocks the front cover bolt).
- Remove the oil pan-to-front cover bolts.
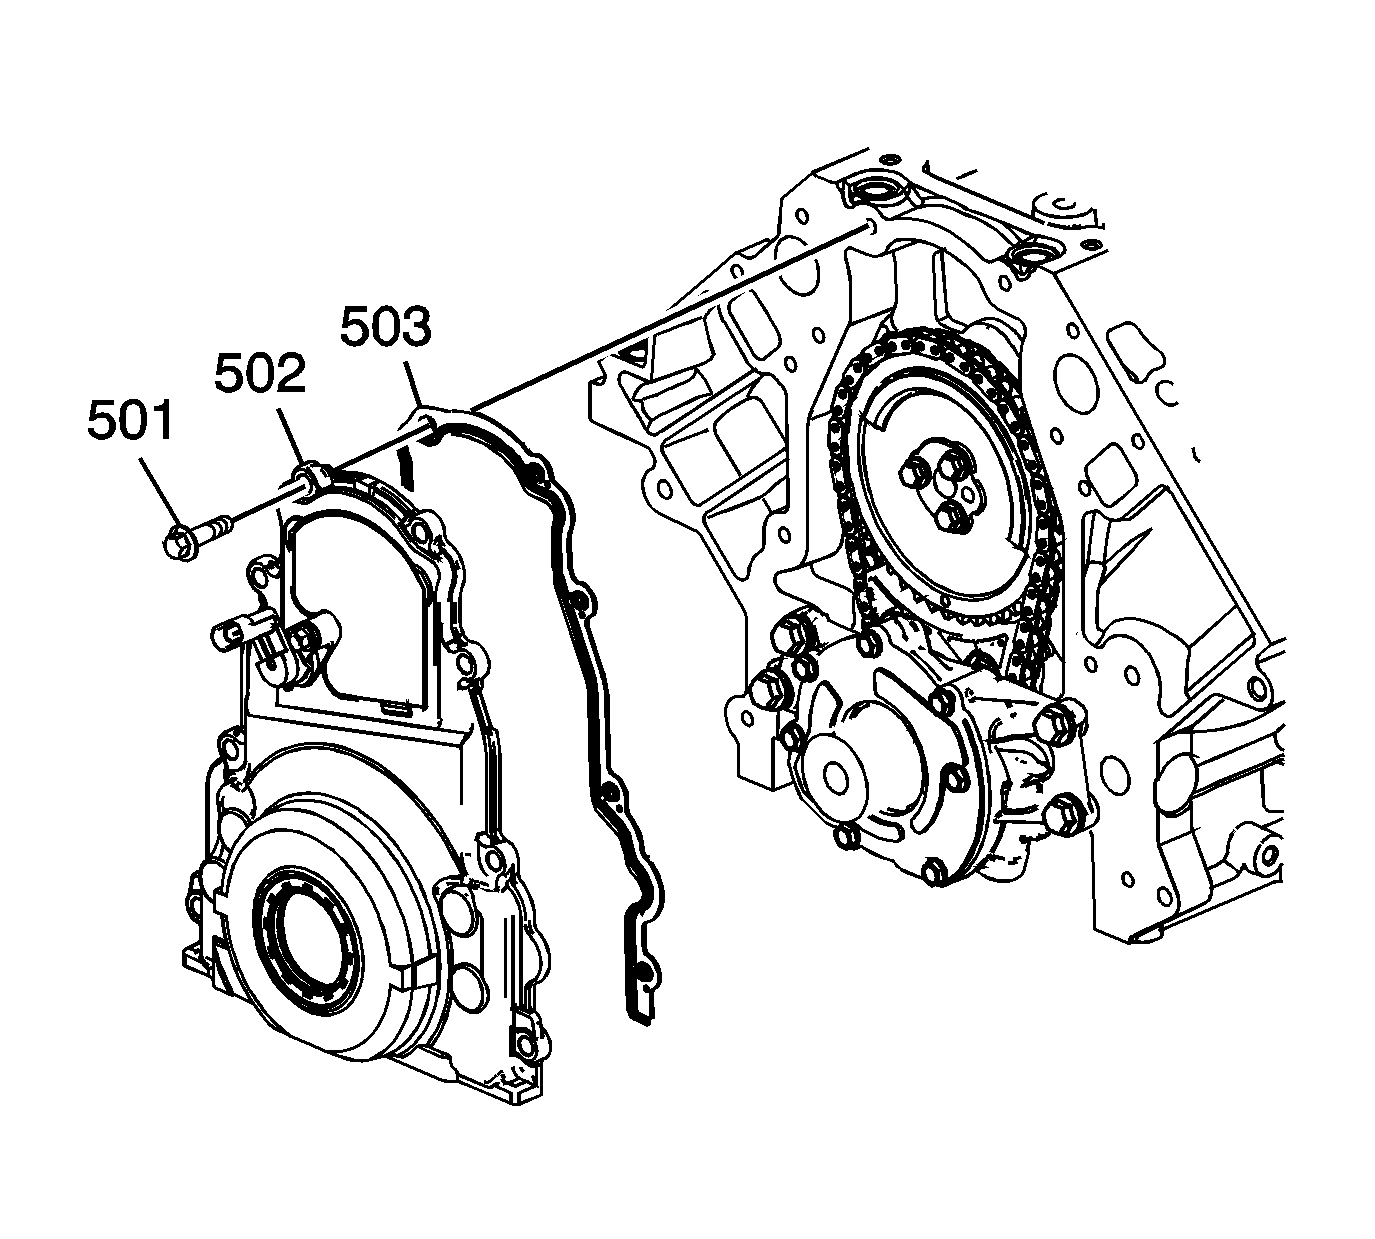
- Remove the front cover bolts (501).
- Remove the front cover (502) and gasket (503).
- Discard the front cover gasket.
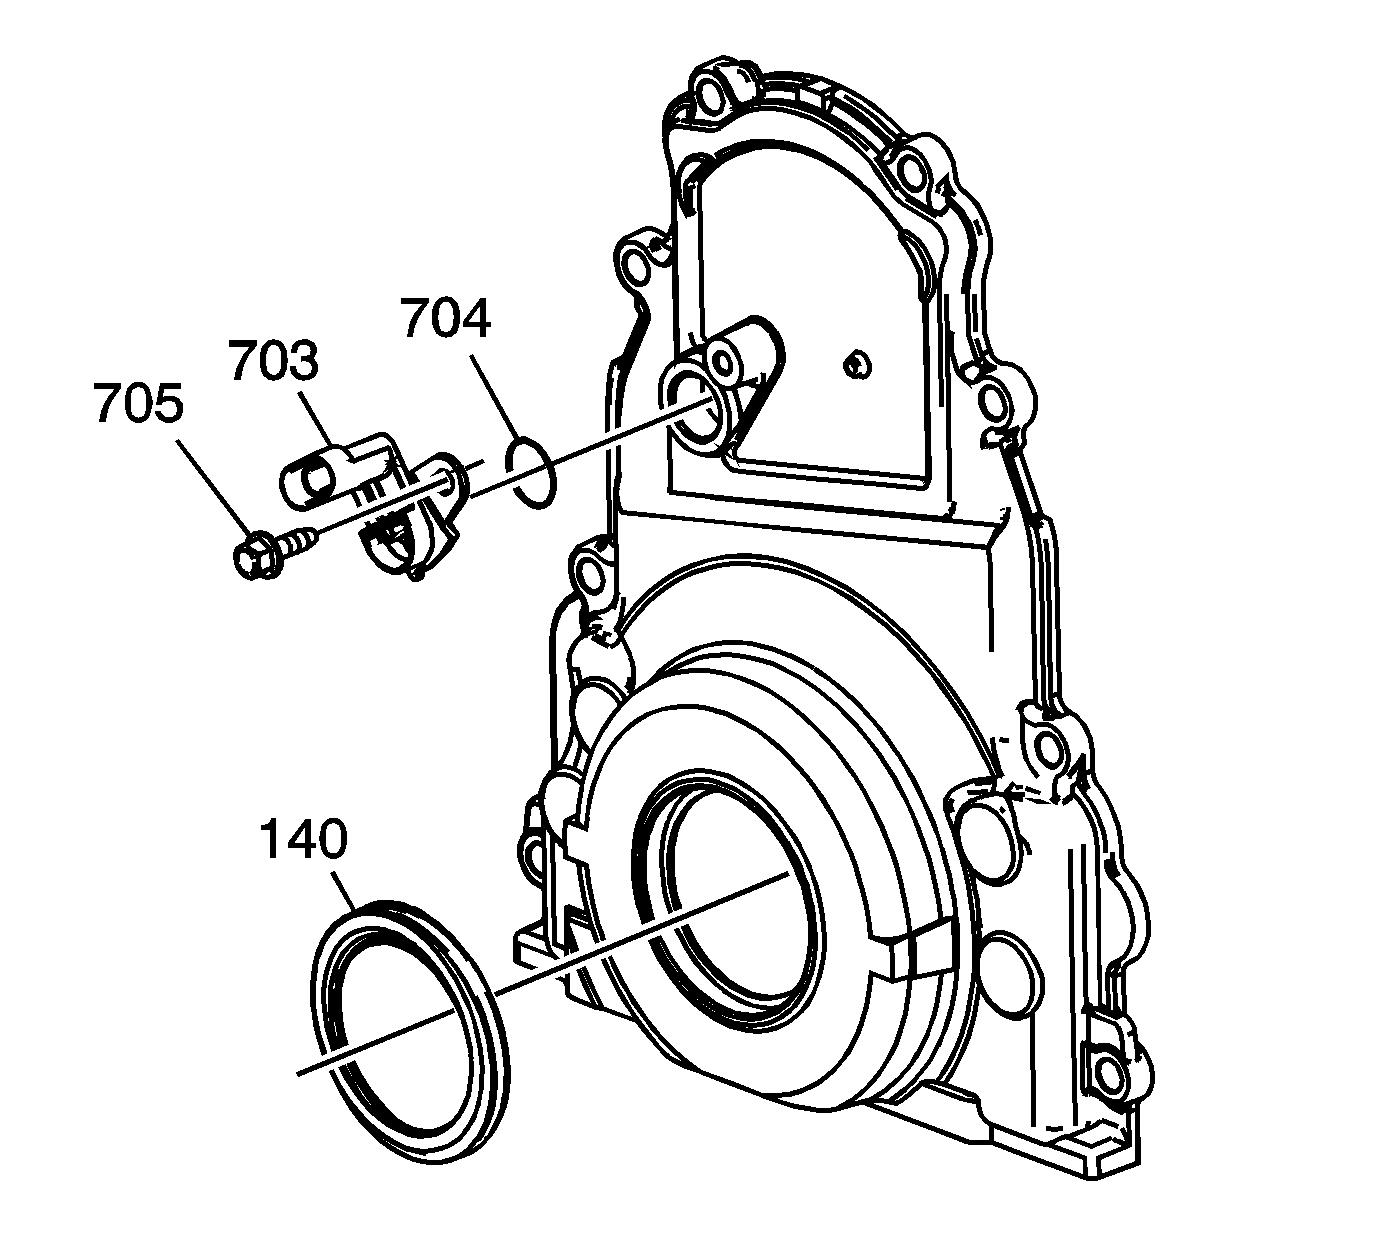
- Remove the oil seal (140), if necessary.
- Remove the camshaft position (CMP) sensor bolt (705) and sensor (703), if necessary.
- Remove the O-ring seal (704) from the sensor, if necessary.
- Clean and inspect the engine front cover. Refer to Engine Front Cover Cleaning and Inspection .


Installation Procedure
Important:
• Do not reuse the crankshaft oil seal or front cover gasket. • Do not apply any type of sealant to the front cover gasket (unless specified). • The special tool in this procedure is used to properly center the front crankshaft front oil seal. - All gasket surfaces should be free of oil or other foreign material during assembly. - The crankshaft front oil seal MUST be centered in relation to the crankshaft. - An improperly aligned front cover may cause premature front oil seal wear and/or engine oil leaks.
- Apply a 5 mm (0.20 in) bead of sealant or equivalent 20 mm (0.80 in) long to the oil pan to engine block junction. Refer to Adhesives, Fluids, Lubricants, and Sealers for the correct part number.
- Install the front cover gasket (503) and cover (502).
- Install the front cover bolts until snug (502). Do not overtighten.
- Install the oil pan-to-front cover bolts until snug. Do not over tighten.
- Install the J 41476 to the front cover.
- Align the tapered legs of the J 41476 with the machined alignment surfaces on the front cover.
- Install the crankshaft balancer bolt until snug. Do not overtighten.
- Remove the J 41476 .
- Install a NEW crankshaft front oil seal (140). Refer to Crankshaft Front Oil Seal Replacement .
- Install the coolant pump manifold. Refer to Coolant Pump Manifold Replacement .
- Inspect the CMP sensor O-ring seal (704) for cuts or damage. If the seal is not cut or damaged, it may be reused.
- Lubricate the O-ring seal with clean engine oil.
- Install the O-ring seal (704) onto the CMP sensor.
- Install the CMP sensor (703) and bolt (705) from the front cover.
- Position the belt tensioner and install the bolt.
- Install the power steering pump. Refer to Power Steering Pump Replacement .
- Install the generator. Refer to Generator Replacement .


Notice: Refer to Fastener Notice in the Preface section.
Tighten
| • | Tighten the oil pan to front cover bolts to 25 N·m (18 lb ft). |
| • | Tighten the engine front cover bolts to 25 N·m (18 lb ft). |

Tighten
Tighten the bolt to 12 N·m (106 lb in).
Tighten
Tighten the bolt to 50 N·m (37 lb ft).
