Step
| Action
| Value(s)
| Yes
| No
|
1
| Was the Powertrain
OBD System Check performed?
| --
|
Go to Step 2
| Go to the
Powertrain On Board Diagnostic (OBD) System Check
|
2
|
Important: Visually/Physically inspect for the following conditions:
| • | Loose or missing fuel fill cap. |
Is
DTC P1676 Evaporative Emission (EVAP) Purge Solenoid Control Circuit
or
DTC P1665 Evaporative Emission (EVAP) Vent Solenoid Control Circuit
also set?
| --
| Go to the DTC first
|
Go to Step
3
|
3
|
- Ignition Switch OFF.
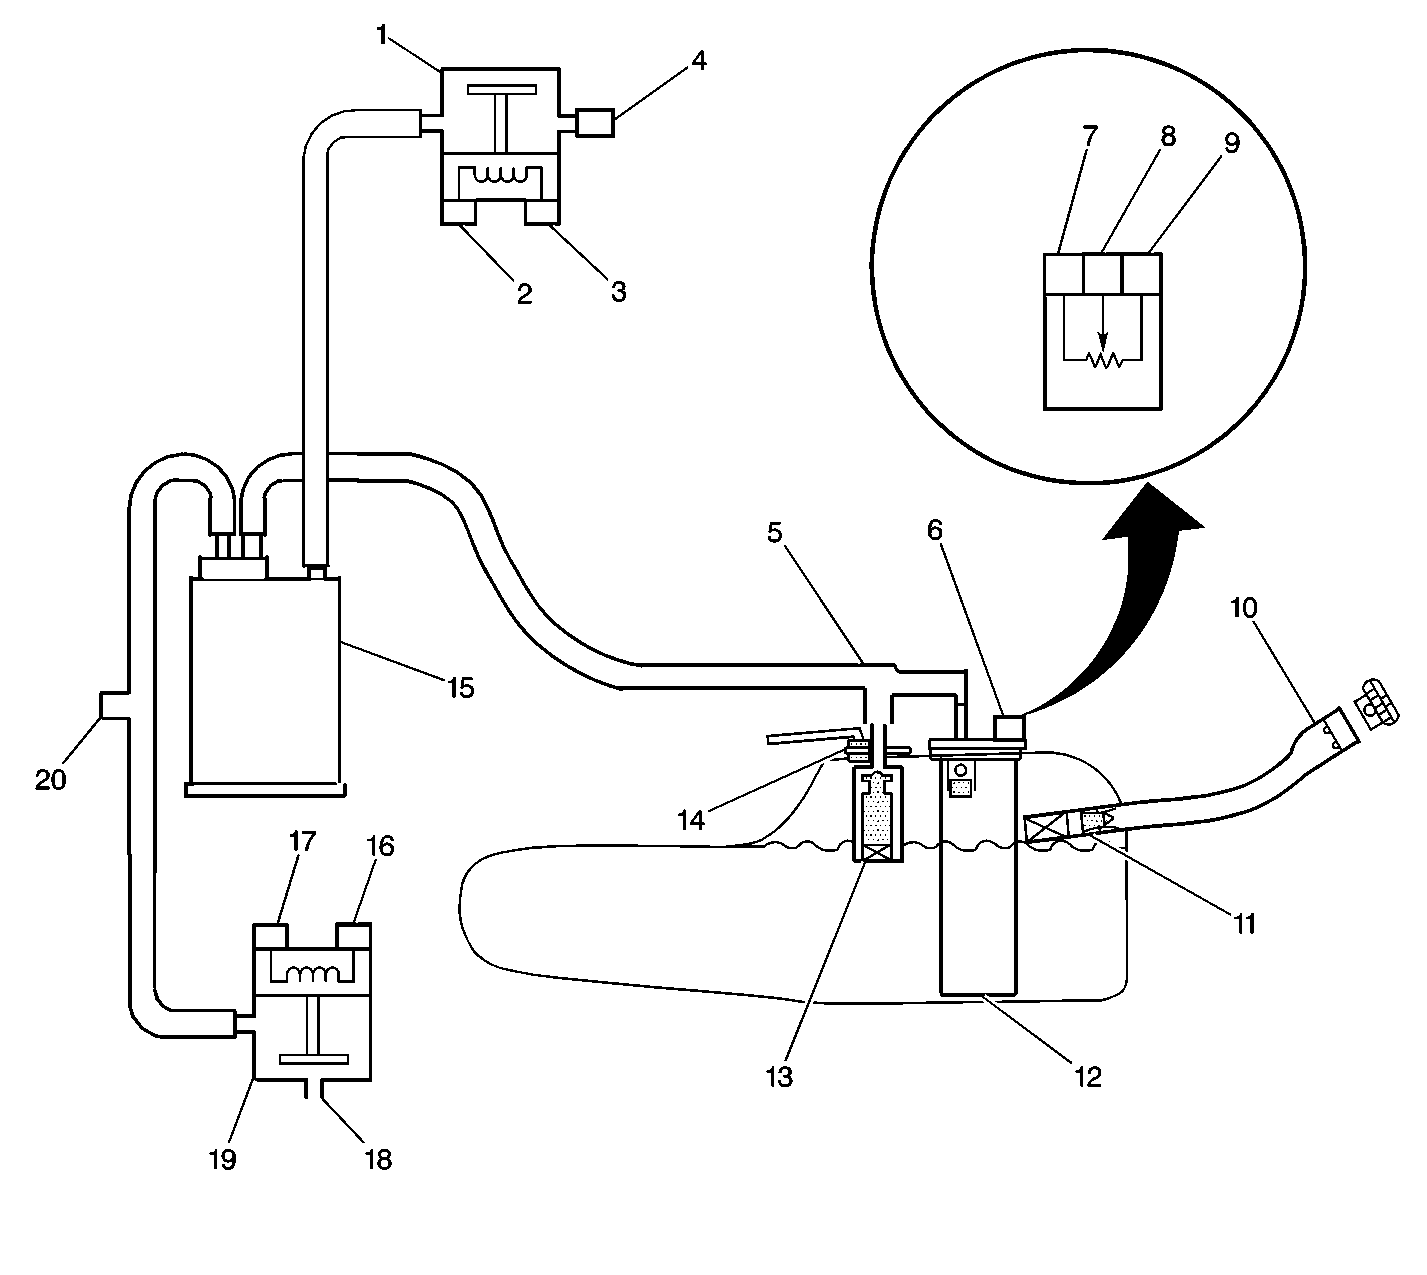
- Remove the canister purge line from the EVAP Canister purge valve/solenoid.
- Ignition Switch ON, Engine OFF.
- Observe Fuel Tank Pressure on the Scan Tool.
Is the Fuel Tank Pressure near the specified value?
| 0 in H2O
|
Go to Step 4
|
Go to Step
9
|
4
|
Important: Before continuing with diagnosis, zero the EVAP Pressure and Vacuum
(inches of H2O) Gauges on the J 41413
EVAP Pressure/Seal Diagnostic station.
Important: Do not exceed the pressure in the specified value.
- Ignition Switch OFF.
- Reconnect all EVAP hardware that was previously disconnected.
- Install theJ 41415-40
Fuel Tank Cap Adapter to the fuel fill neck and fuel fill cap.
- Connect the EVAP station to the fuel tank cap adaptor.
- Ignition Switch ON, Engine OFF.
- Capture Fail Record data for DTC P0440 and clear DTCs.
- Using the scan tool, EVAP vent valve/solenoid, Command the vent
valve "ON" (closed) to seal the system.
- Attempt to pressurize the system to the specified value by slowly
turning the EVAP Service Station rotary switch to the "pressure" position
(monitor the pressure with the gauge on the cart with the rotary switch
in the "Off/Hold" position).
Can specified value be achieved?
| 5 in. H2O
|
Go to Step 5
| Go to
DTC P0440 Evaporative Emission (EVAP) System
DTC P0440 EVAP
System
|
5
|
- Maintain the Fuel Tank Pressure at the specified value (monitor
the pressure with the gauge on the cart with the rotary switch in the "Off/Hold"
position).
- Observe fuel pressure on the scan tool.
Is the fuel tank pressure near the specified value?
| 5 in H2O
|
Go to Step 6
|
Go to Step
11
|
6
|
- Command the Vent Valve/Solenoid Off (open) to relieve the pressure through
the Vent Valve.
Does the EVAP pressure gauge
decrease to near the second specified (lower) value within 2 minutes with
the rotary switch in the "Off/Hold" position?
| 5 in. H2O
|
Go to Step 7
| Go to
DTC P0446 Evaporative Emission (EVAP) Vent System Performance
DTC P0446 EVAP Canister Vent Blocked
|
7
|
- Connect the in. Hg vacuum gauge on the EVAP Service Station to
the purge valve/solenoid, canister side.
- Ignition Switch ON, Engine OFF.
- Using the scan tool, EVAP purge/seal, select the seal option to
seal the EVAP system.
- Start the engine and idle.
- Run the engine from 1200-1500 RPM and observe vacuum level.
Is vacuum level above the specified value?
| 0 in. Hg
|
Go to Step 8
|
Go to Step
12
|
8
|
- Using the scan tool, increase purge to 100%.
- Run the engine from 1200-1500 RPM and observe vacuum level.
Is vacuum level above the specified value?
| 15 in. Hg
|
Go to Step 14
|
Go to Step
13
|
9
|
- Ignition Switch OFF.
- Remove the EVAP Canister line from the fuel tank or EVAP canister.
- Ignition Switch ON, Engine OFF.
- Observe Fuel Tank Pressure on the Scan Tool.
Is the Fuel Tank Pressure near the specified value?
| 0 in H2O
|
Go to Step 10
| Go to
DTC P0453 Fuel Tank Pressure Sensor Circuit High Voltage
|
10
|
- Check for a kinked or restricted canister purge line between the
EVAP canister purge valve and EVAP canister.
- Repair the canister purge line as necessary.
Is action complete?
| 0 in. H2O
|
Go to Step 14
| --
|
11
|
- Visually/Physically inspect for the following conditions:
| • | Restricted fuel tank vapor line. |
| • | Restricted EVAP purge line. |
- If a problem is found, repair as necessary.
Was a problem found?
| --
|
Go to Step 14
| Go to
DTC P0452 Fuel Tank Pressure Sensor Circuit Low Voltage
|
12
|
- Check for no source vacuum to thr EVAP purge valve.
- If problem was found repair as necessary.
Was a problem found?
| --
|
Go to Step 14
| --
|
13
|
Important: Check for carbon release into the EVAP system. Refer to diagnostic Aids.
- Locate and repair cause of no source vacuum to the EVAP
purge valve.
Is the action complete?
| --
|
Go to Step 14
|
Go to Step 12
|
14
|
Important:: Do not exceed the pressure in the specified value.
- Reconnect all EVAP hardware that was previously disconnected.
- Ignition Switch On, Engine OFF.
- Using scan tool, purge/seal, select the seal option to seal the
EVAP system.
- Pressurize the system to the first specified (higher) value by
slowly turning the EVAP Service station rotary switch to the "pressure" position
(monitor the pressure with the gauge on the cart with the rotary switch
in the "Off/Hold" position).
Does the EVAP pressure decrease to less than the second specified (lower)
value within 2 minutes with the rotary switch in the "OFF/Hold" position?
| 15 in H2O
10 in H2O
| Go to
DTC P0442 Evaporative Emission (EVAP) System Small Leak Detected
| System OK
|