Tools Required
J 36850 Transjel® Transmission Assembly Lubricant
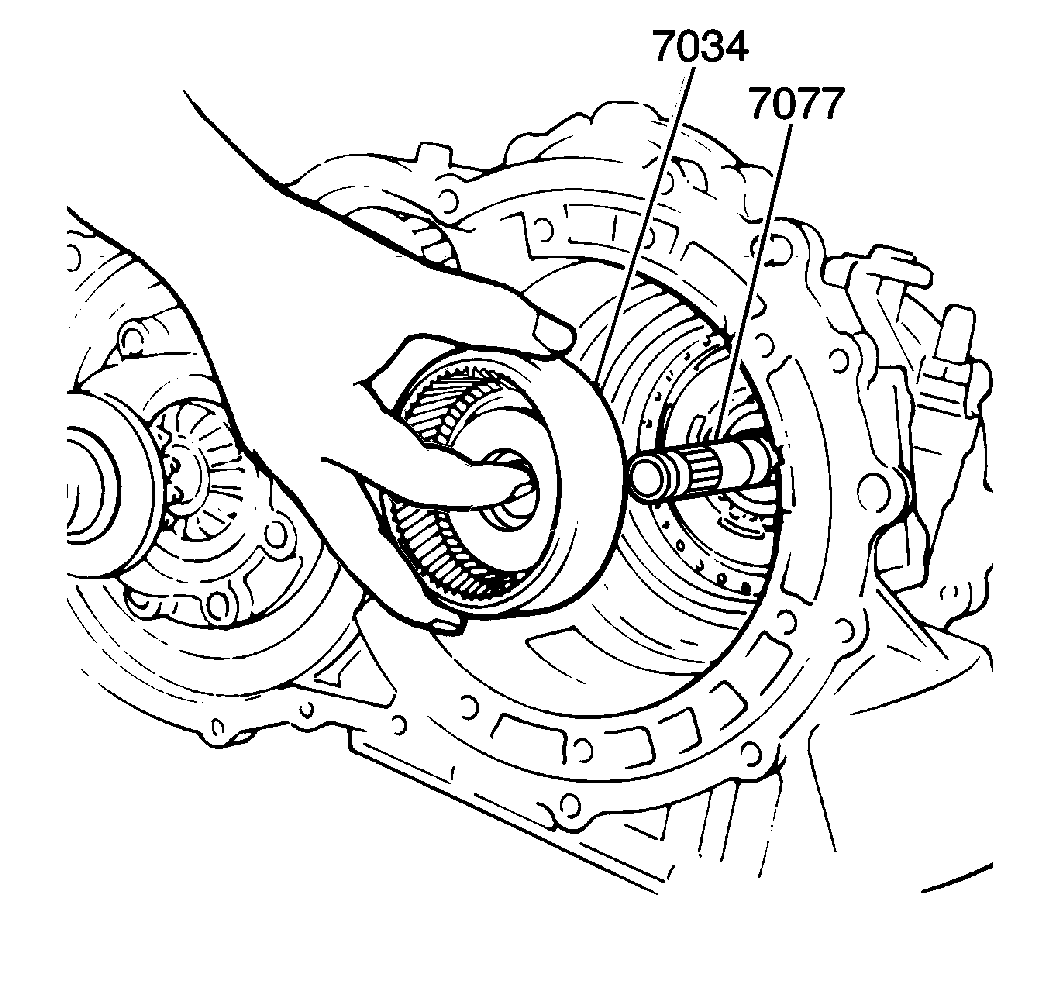
- Install the rear planetary ring gear assembly (7034) on the output shaft splines (7077).
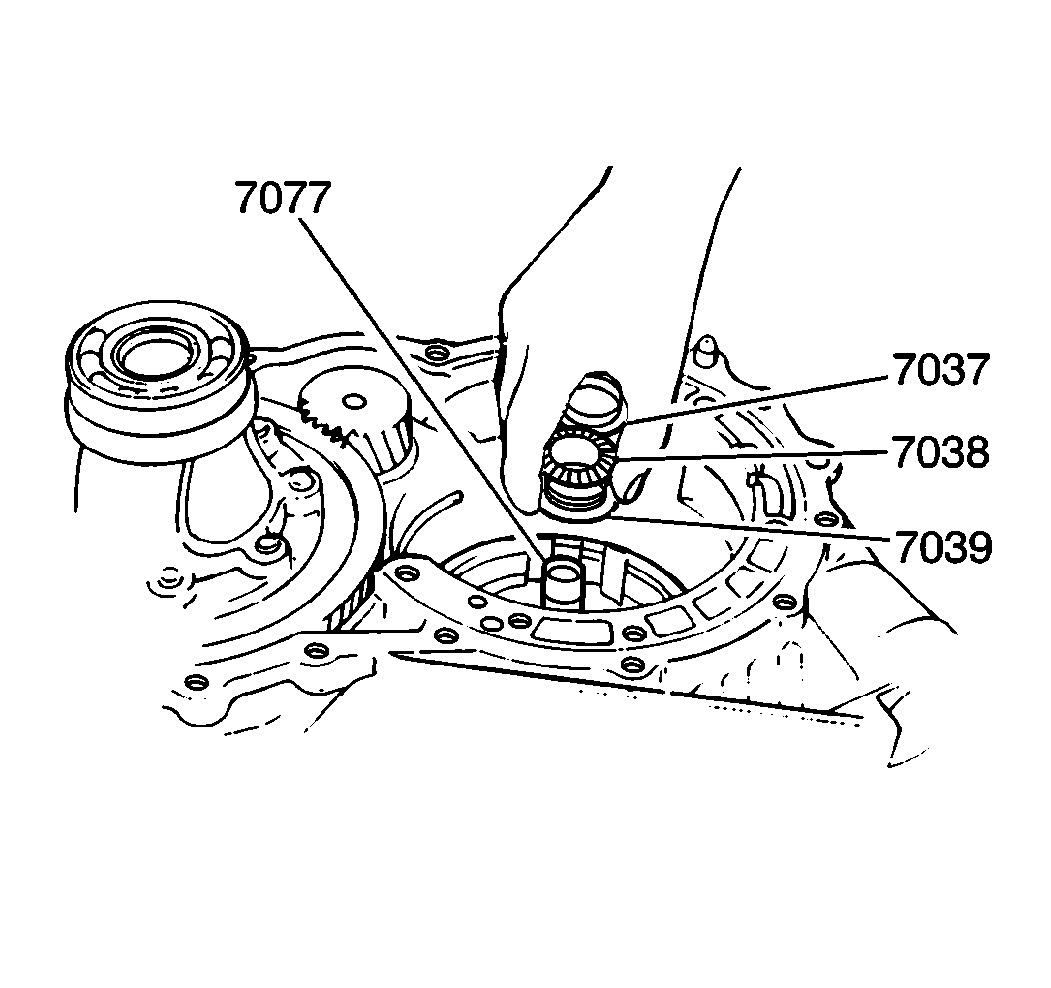
- Lubricate the rear planetary ring gear bearing (7038) and races (7037, 7039) with J 36850 .
- Insert the rear planetary ring gear bearing between the two races and install them, flange side up, onto the output shaft (7077).
- Install the inner (7040) and outer (7024) rear planetary thrust washers onto the rear planetary carrier assembly (7033).
- After confirming correct rotation, install the one-way clutch assembly (7029) on the rear planetary carrier (7033).
- Reach into the cavity of the transaxle case around the output shaft and align the inner teeth of the first-reverse brake clutch discs.
- Install the rear planetary carrier assembly (7033) above the rear planetary ring gear assembly. The splines on the rear planetary carrier should align the grooves between the teeth of the first-reverse brake clutch discs.
- Inspect the thrust washers and races for proper installation, by grasping the rear planetary carrier assembly (7033) and moving the assembly up and down gently by hand. If you assembled the carrier correctly, the carrier will make a clicking sound when moved up and down. If you do not hear a clicking sound, then the thrust washers and the races may be out of position. If so, remove the rear planetary carrier assembly and reposition the thrust washers and the races as necessary.
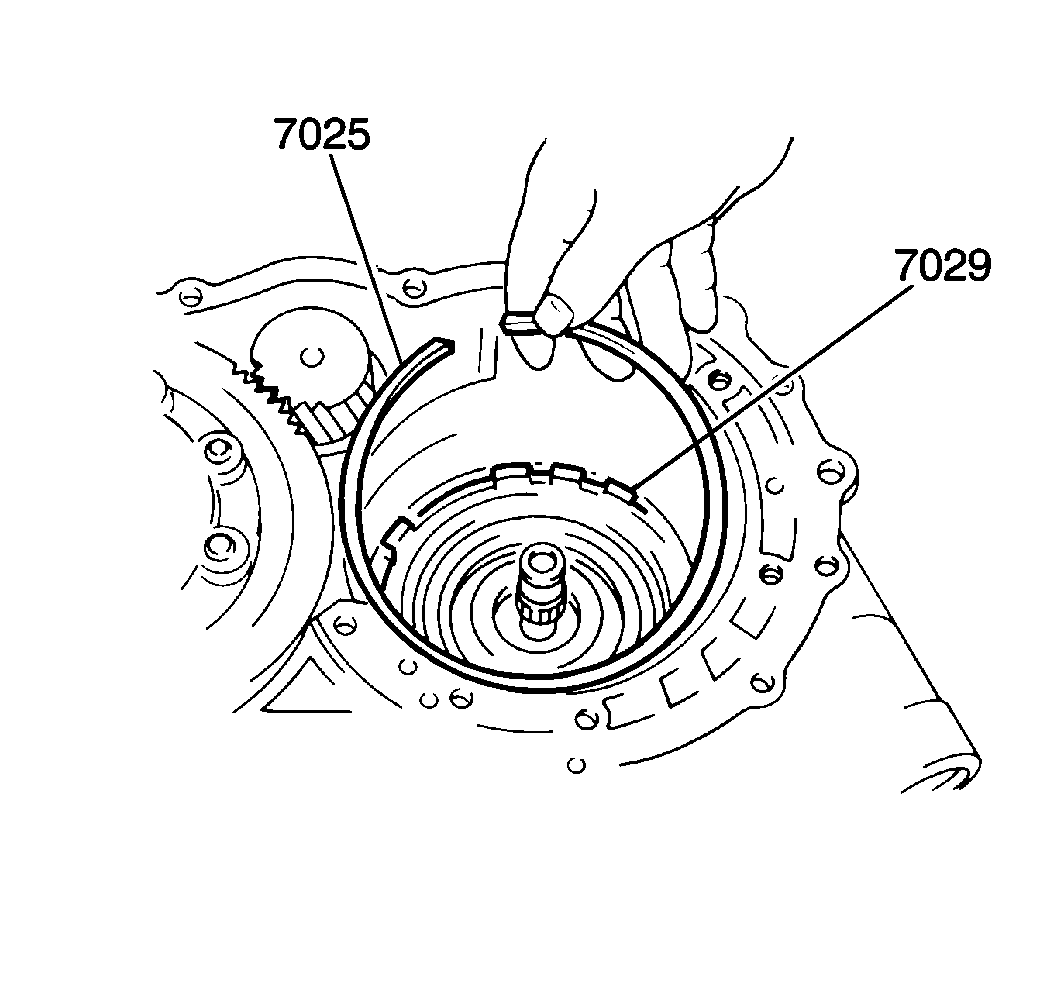
- Insert the number 1 inner one-way clutch race snap ring (7032) into the groove of the transaxle case.
- Insert the one-way clutch assembly (7029) into the transaxle case.
- Inspect the one-way clutch (7029) for correct installation by turning the rear planetary carrier (7033) by hand. If the rear planetary carrier turns freely in a clockwise direction, then you have installed the one-way clutch correctly. If the rear planetary carrier turns freely in a counterclockwise direction, then you have installed the one-way clutch assembly upside down. Remove the one-way clutch and reinstall the clutch correctly. Then repeat this step in order to verify the correct installation.
- Install the outer one-way clutch race snap ring (7025) by hand. Seat the snap ring ends between the lugs so that the snap ring is fully accessible.
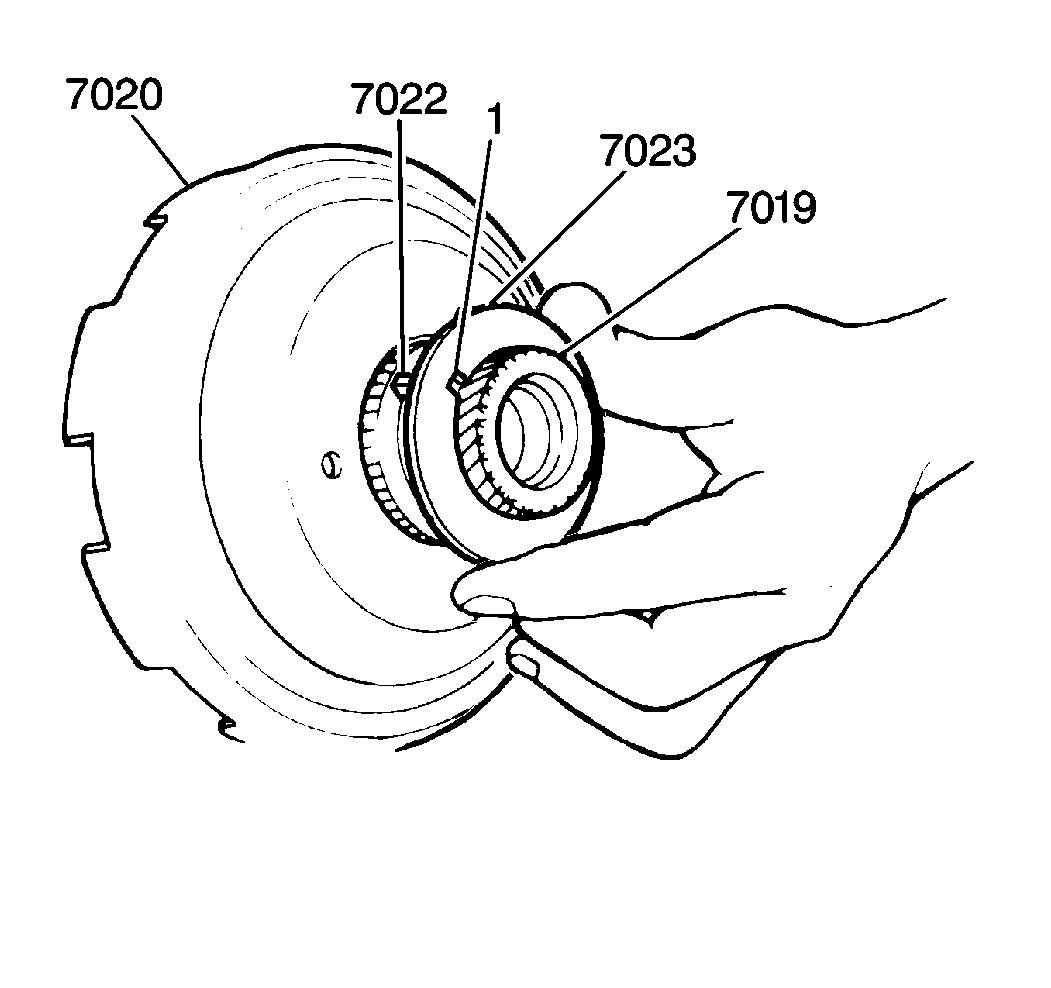
- Lubricate the sun gear pin and the thrust washer with J 36850 so that the sun gear pin and the thrust washer will adhere to the rear of the sun gear input drum.
- Install the sun gear pin (7022) and the planetary thrust washer (7023) onto the sun gear (7019), which is located at the rear of the sun gear input drum (7020). Fit the sun gear pin into the notch in the planetary thrust washer so that the thrust washer will turn with the sun gear input drum. The thrust washer notch is shown in the illustration as number 1.
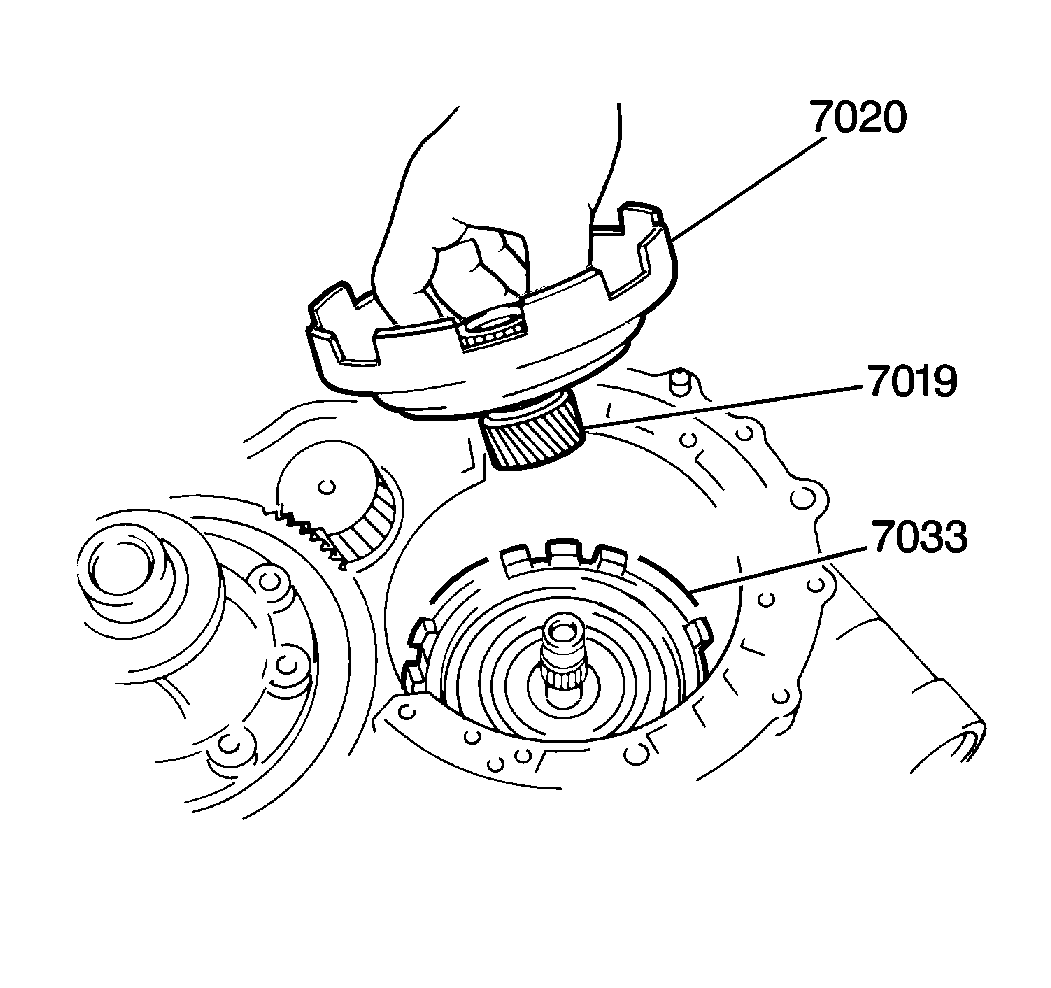
- Insert the sun gear input drum assembly (7020) into the rear planetary carrier assembly (7033).
- Inspect the thrust washers for proper installation by grasping the sun gear (7019) and moving the sun gear input drum assembly up and down gently by hand. If installed correctly, the sun gear input drum will make a clicking sound when moved up and down. If you do not hear a clicking sound, then the thrust washers may be out of position. If so, remove the sun gear input drum assembly, and reposition the thrust washers as necessary.
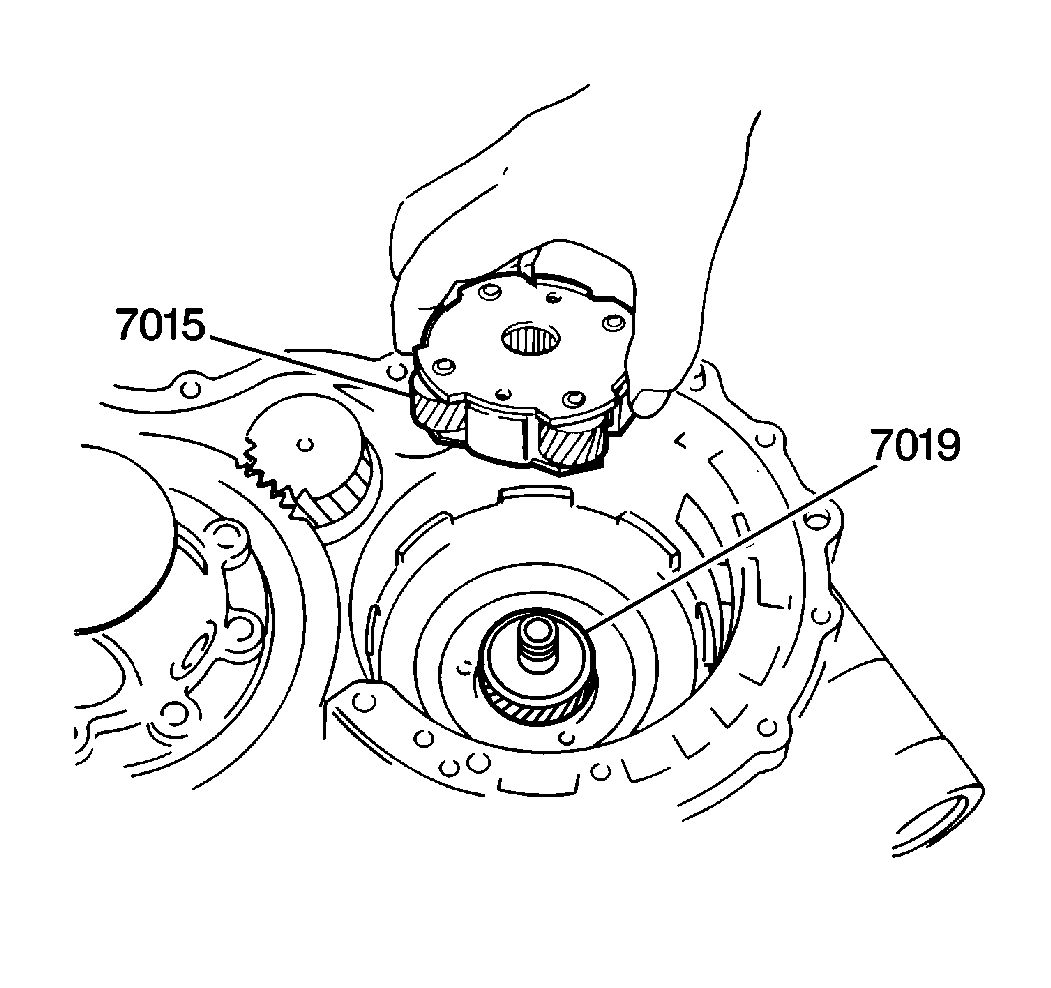
- Install the front planetary carrier bearing (7017) and race (7016) over the output shaft (7077) on top of the sun gear (7019). Confirm that the flange on the race is pointed downward.
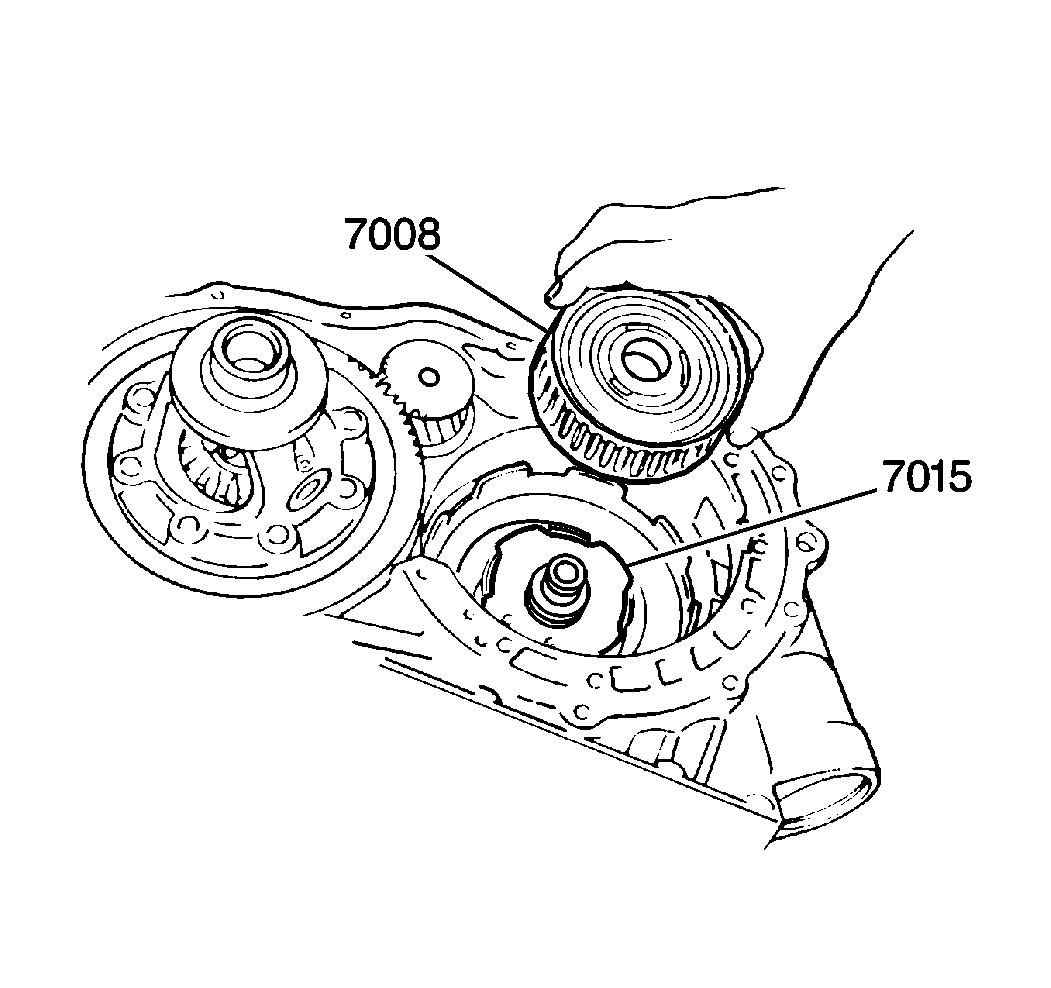
- Install the front planetary carrier assembly (7015) by slowly meshing the carrier with the sun gear (7019).
- Inspect the front planetary carrier bearing and race for proper installation by grasping the front planetary carrier assembly and moving the assembly up and down gently by hand. If installed correctly, the front planetary carrier assembly will make a clicking sound when moved up and down. If you do not hear a clicking sound, then the front planetary carrier bearing and race may be out of position. If so, remove the front planetary carrier assembly, and reposition the bearing and race as necessary.
- Install the front planetary ring gear assembly over the output shaft (7077) in the following order:
- Install the front planetary ring gear assembly (7008) on top of the front planetary carrier assembly (7015).
- Inspect the front planetary ring gear bearing and races for proper installation by grasping the front planetary ring gear assembly and moving the assembly up and down gently by hand. If you installed the assembly correctly, the front planetary ring gear assembly will make a clicking sound when moved up and down. If you do not hear a clicking sound, then the front planetary bearing and races may be out of position. If so, remove the front planetary ring gear assembly and reposition the bearing and races as necessary.
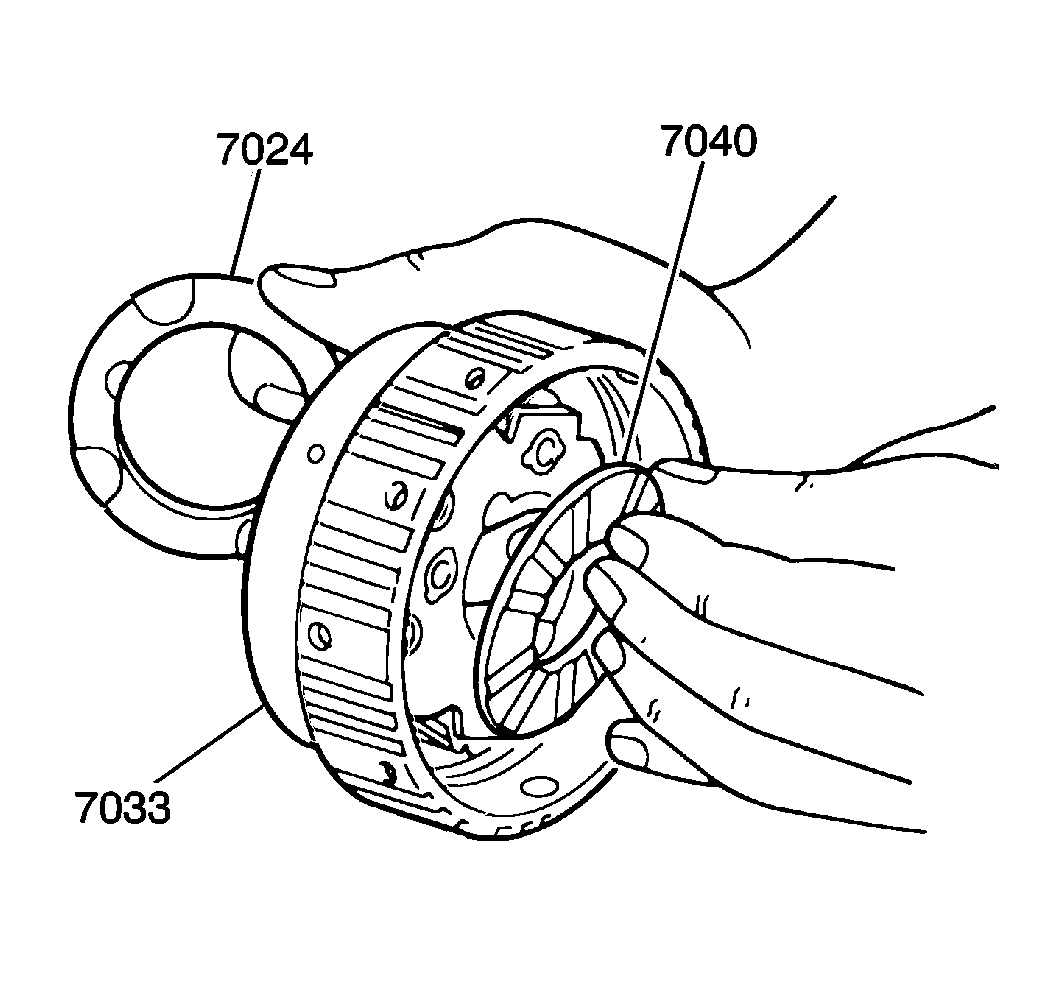
Important: Lubricate both thrust washers with J 36850 so that the washers will adhere to the planetary carrier. The raised features on the thrust washers must match the impressions on the planetary carrier. Place one washer on either side of the carrier.
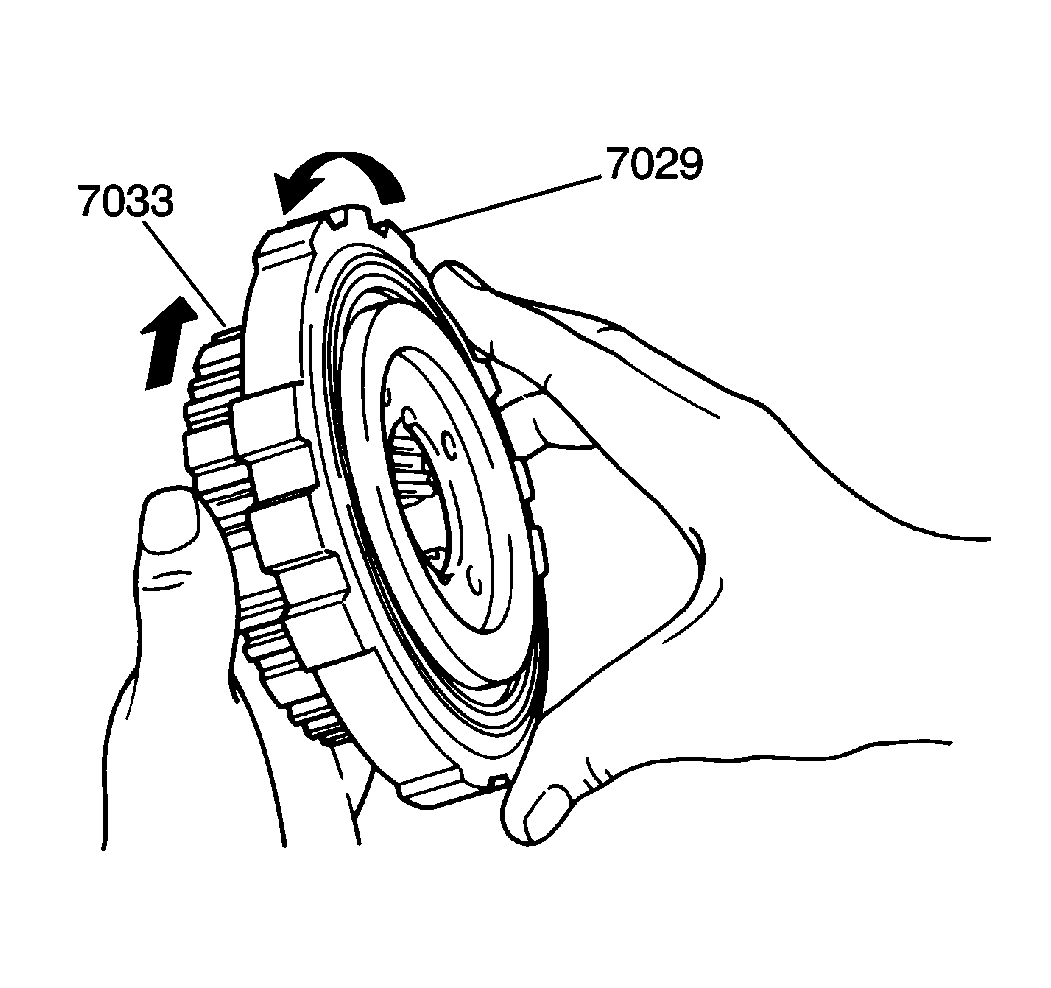
Important: Before you install the clutch assembly, rotate the assembly by hand. The rear planetary carrier should turn freely in a clockwise direction and the one-way clutch should turn freely in a counterclockwise direction. If these conditions do not exist, you may have installed the one-way clutch backwards on the rear planetary carrier. Remove the one-way clutch and install correctly.
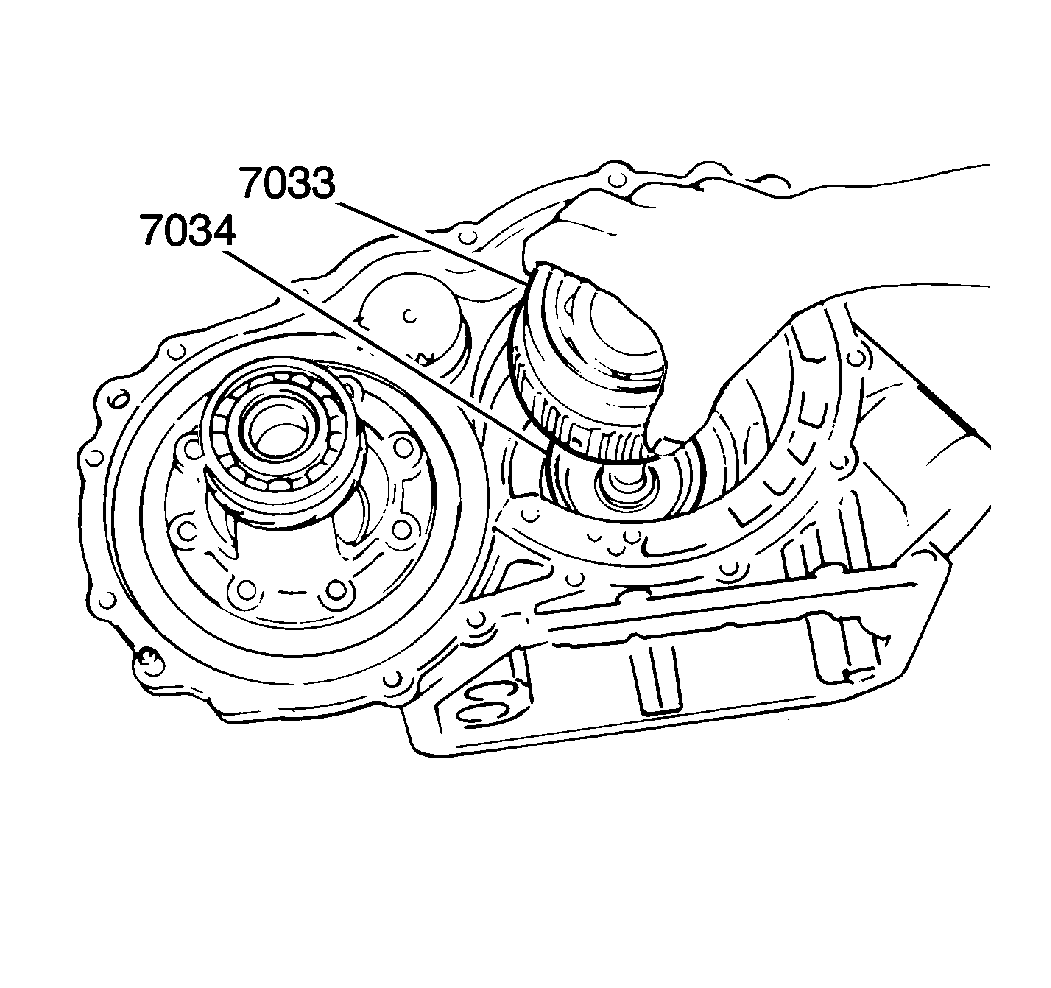
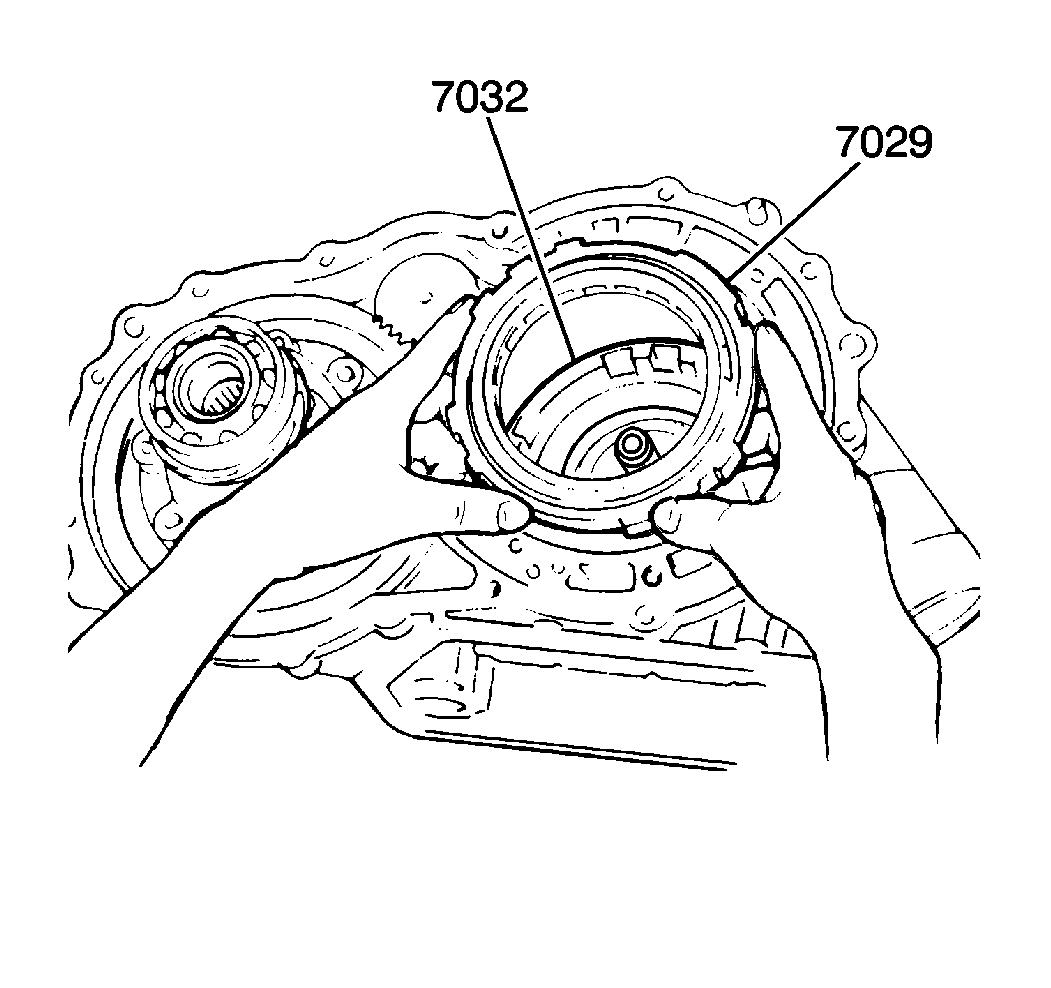
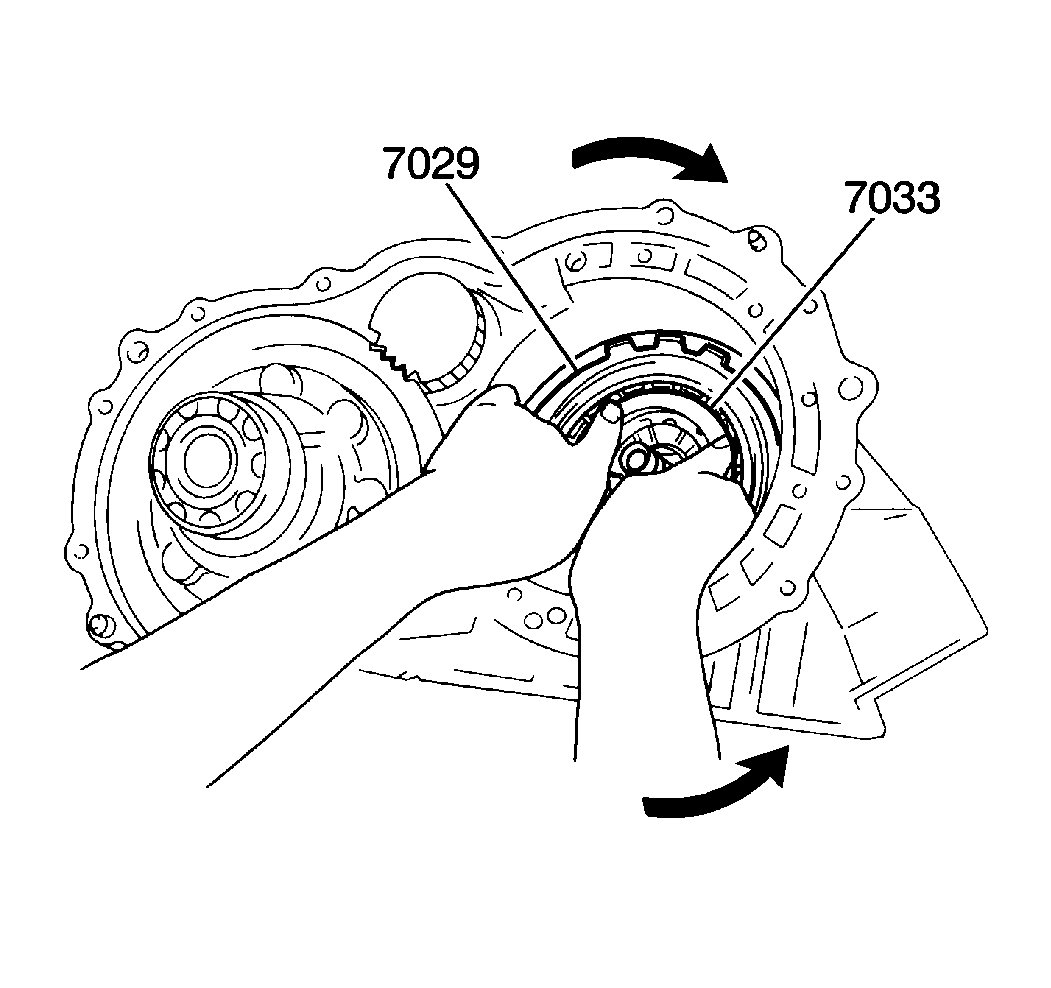
Important: When performing the next step, use caution not to damage the bushing inside the sun gear.
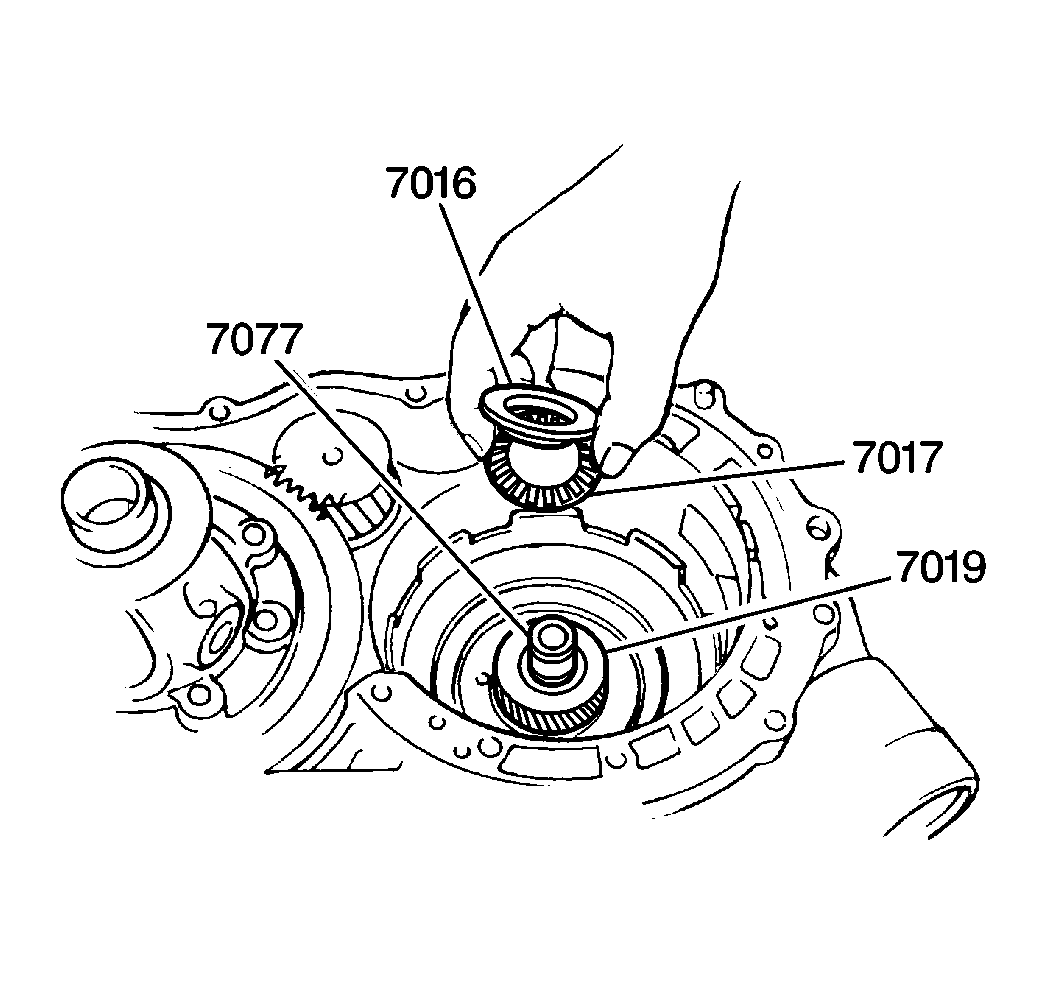
Important: Lubricate the front planetary carrier bearing and race with J 36850 .
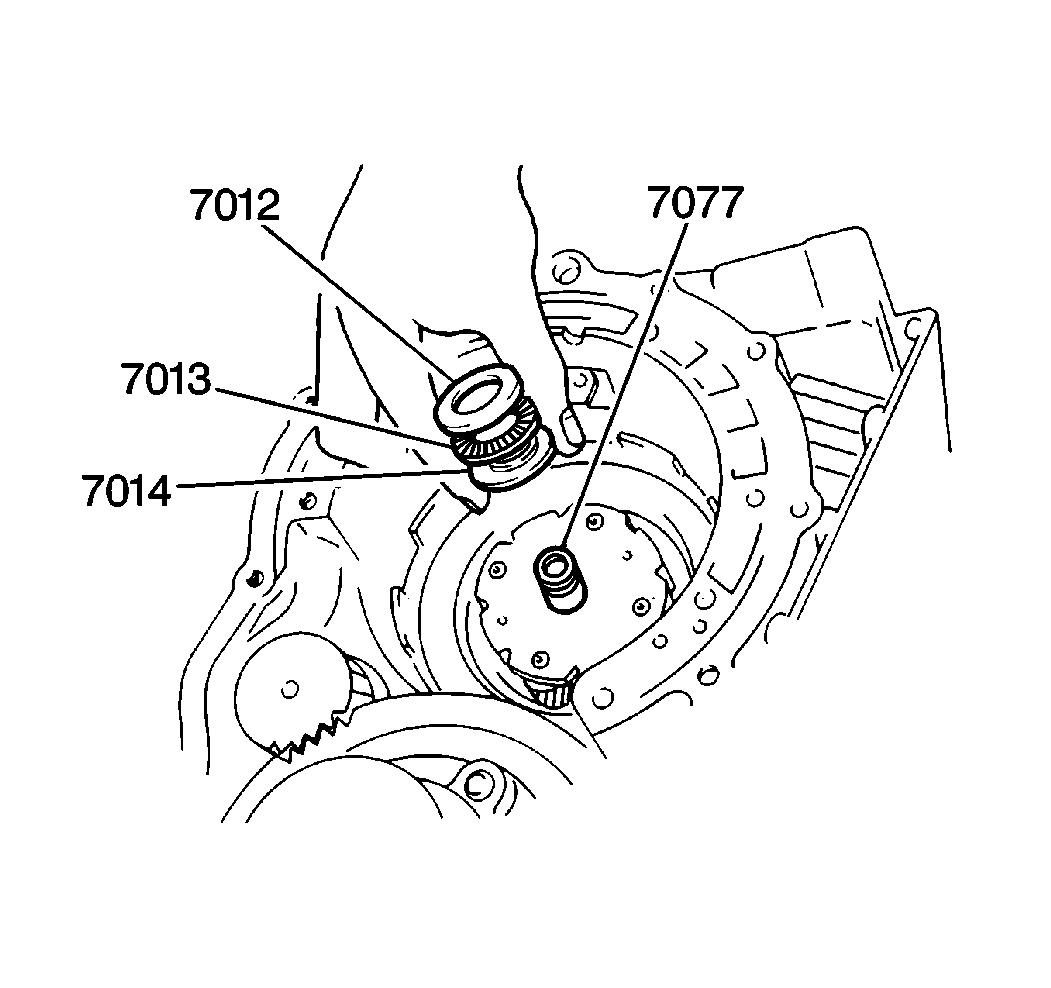
Important: Lubricate the front planetary ring gear inner bearing and races with J 36850 .
| 20.1. | The number 4 inner front planetary ring gear race (7014) with the flange side up |
| 20.2. | The front planetary ring gear inner bearing (7013) |
| 20.3. | The number 3 inner front planetary ring gear race (7012) with the flange side down |
