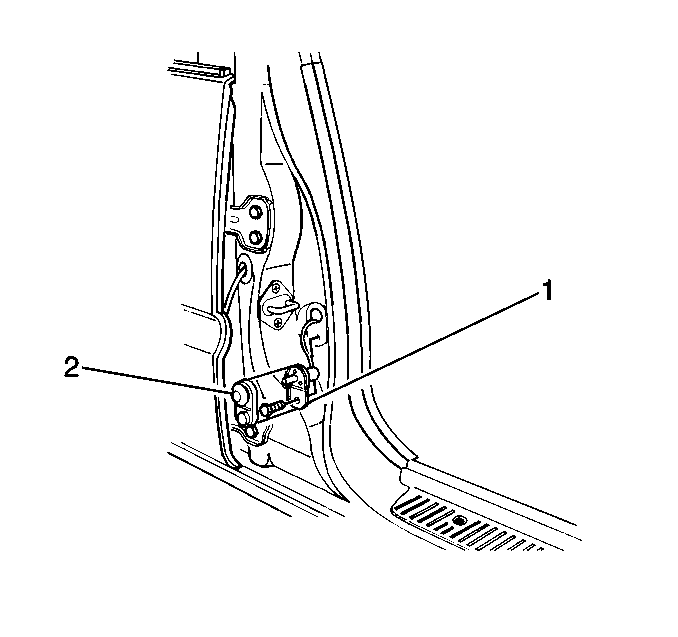
Front Side Door Jamb Switch Replacement 2 Door
Removal Procedure

- Remove the rubber boot (2)
from the door-jamb switch (1).
- Remove the screw which secures the switch (1) to the door jamb.
- Perform the following steps in order to attain access to the electrical
connector of the switch (1):
- Disconnect the door-jamb switch electrical connector.
- Remove the switch (1) from the vehicle.
Installation Procedure

- Connect the door-jamb
switch electrical connector.
- Install the door-jamb switch (1) to the vehicle. Secure
the switch with the screw.
- Perform the following steps:
- Install the rubber boot (2) to the switch (1).
Front Side Door Jamb Switch Replacement 4 Door
Removal Procedure

- Remove the rubber boot (2)
from the door-jamb switch (1).
- Remove the screw which secures the switch (1) to the door jamb.
- Remove the lower center pillar trim panel in order to attain access
to the electrical connector of the switch (1).
- Disconnect the door-jamb switch electrical connector.
- Remove the switch (1) from the vehicle.
Installation Procedure

- Connect the door-jamb
switch electrical connector.
- Install the door-jamb switch (1) to the vehicle. Secure
the switch with the screw.
- Install the lower center pillar trim panel to the vehicle.
- Install the rubber boot (2) to the switch (1).


