For 1990-2009 cars only
Removal Procedure
- Partially drain the cooling system. Refer to Cooling System Draining and Filling .
- Remove the intake manifold cover. Refer to Intake Manifold Cover Replacement .
- Remove the oil level indicator tube. Refer to Oil Level Indicator and Tube Replacement .
- Disconnect the left spark plug wires from the spark plugs.
- Remove the spark plug wire harness clip from the heater inlet and outlet front pipe bracket.
- Reposition the spark plug harness.
- Remove the positive crankcase ventilation (PCV) foul air tube. Refer to Plastic Collar Quick Connect Fitting Service .
- Remove the left engine mount strut bracket. Refer to Engine Mount Strut Bracket Replacement - Left Side .
- Reposition the heater inlet and outlet hose/pipe clamps at the engine inlet and outer pipes.
- Remove the heater inlet and outlet hose/pipe clip nuts at the throttle body.
- Remove the heater inlet and outer hoses/pipes from the engine inlet and outlet pipes.
- Remove the clips from the throttle body studs. Reposition the hose/pipe assembly.
- Remove the front heater outlet hose from the outlet heater pipe.
- Remove the heater inlet and outlet pipe bolt and stud.
- Remove the heater inlet and outlet pipe from the vehicle.
- Loosen the valve rocker arm cover bolts.
- Remove the valve rocker arm cover. If necessary, bump the end of the cover with the palm of your hand or a soft rubber mallet if the cover adheres to the cylinder head.
- Cut the RTV in the channel where the intake, cylinder head and valve rocker arm cover meet with a suitable tool.
- Remove the valve cover gasket.
- Clean the sealing surface on the cylinder head with degreaser.
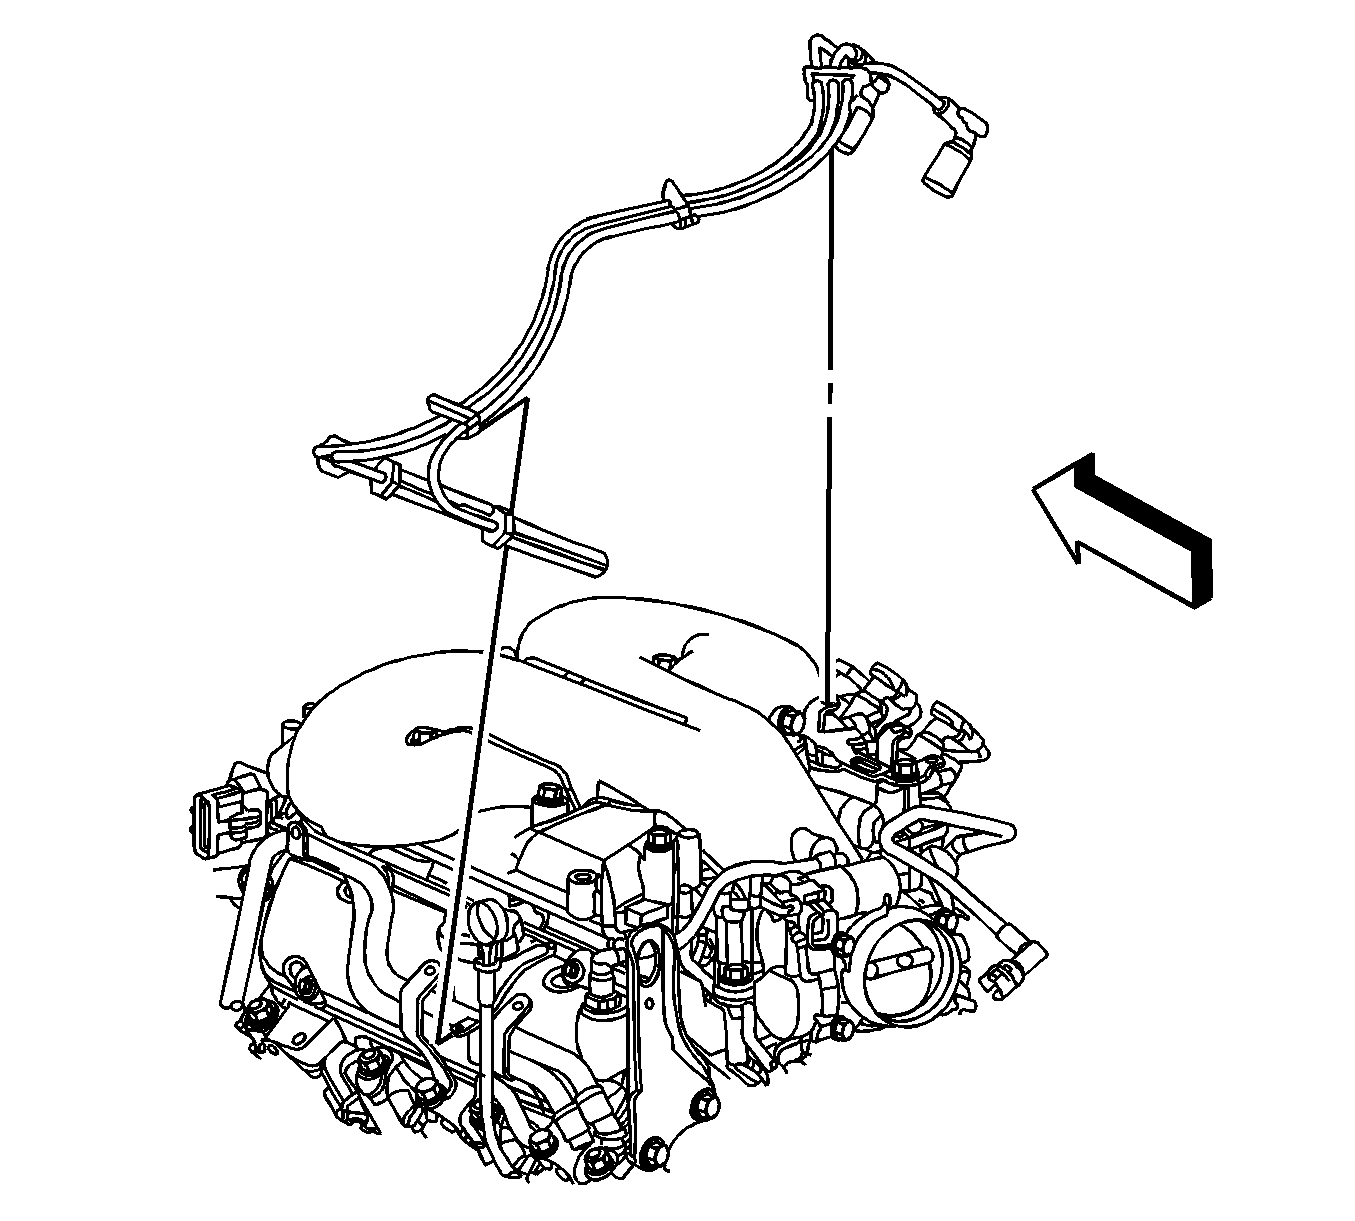
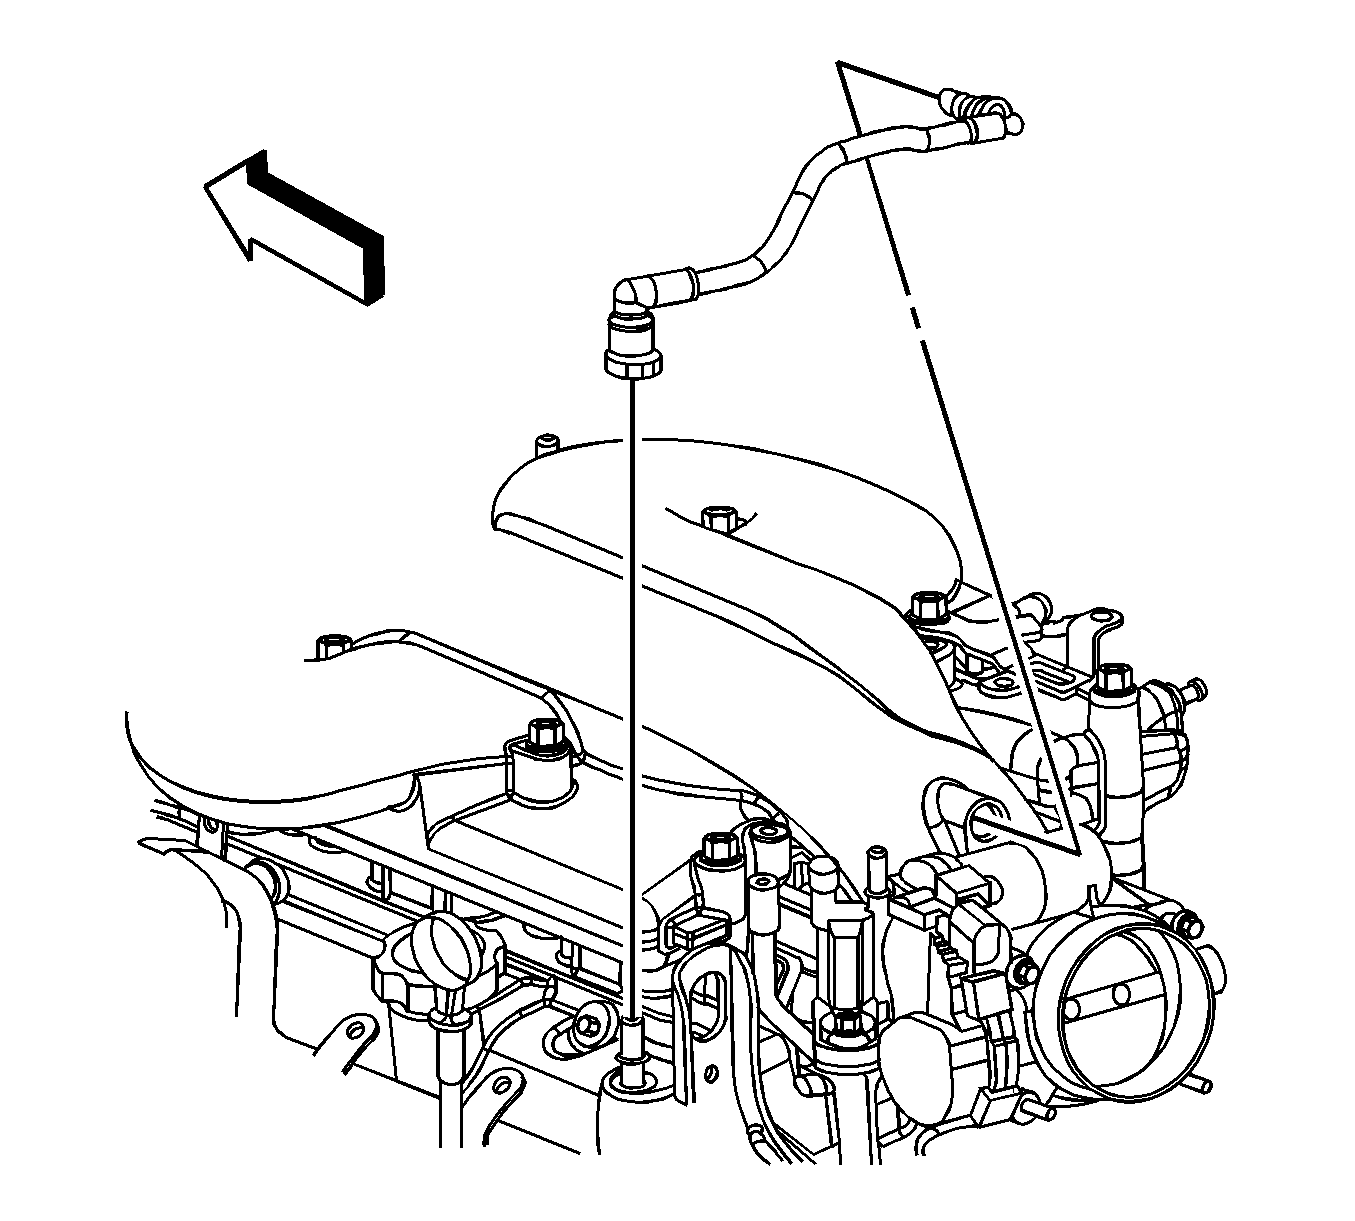
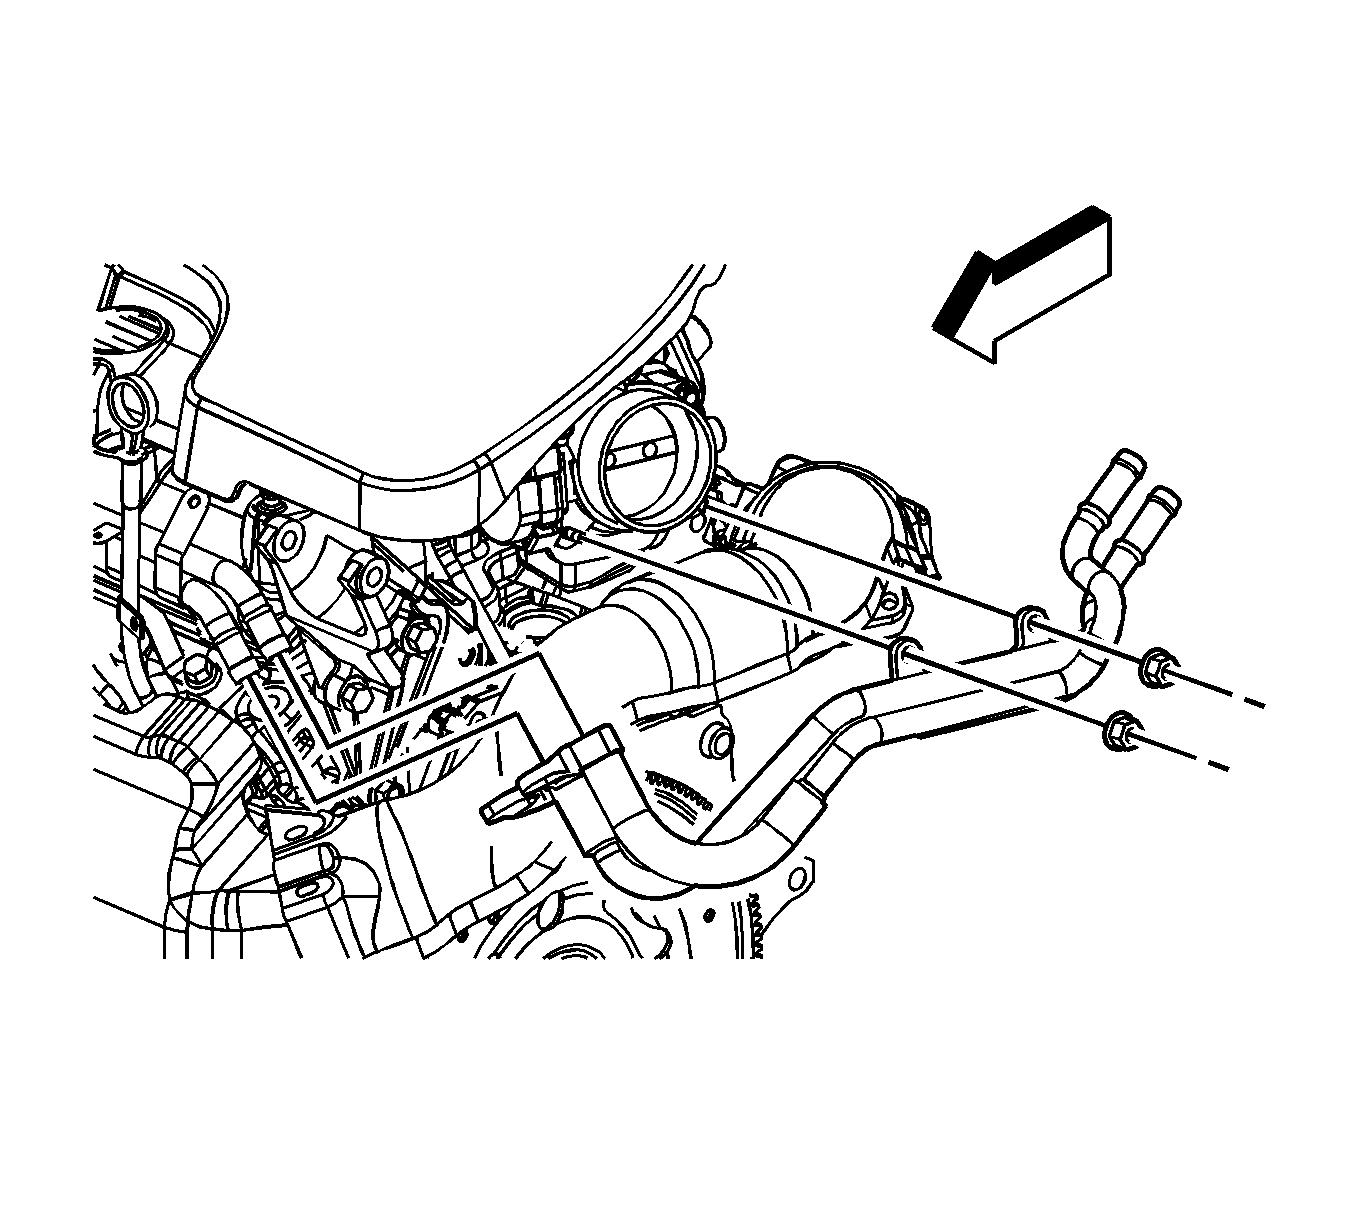
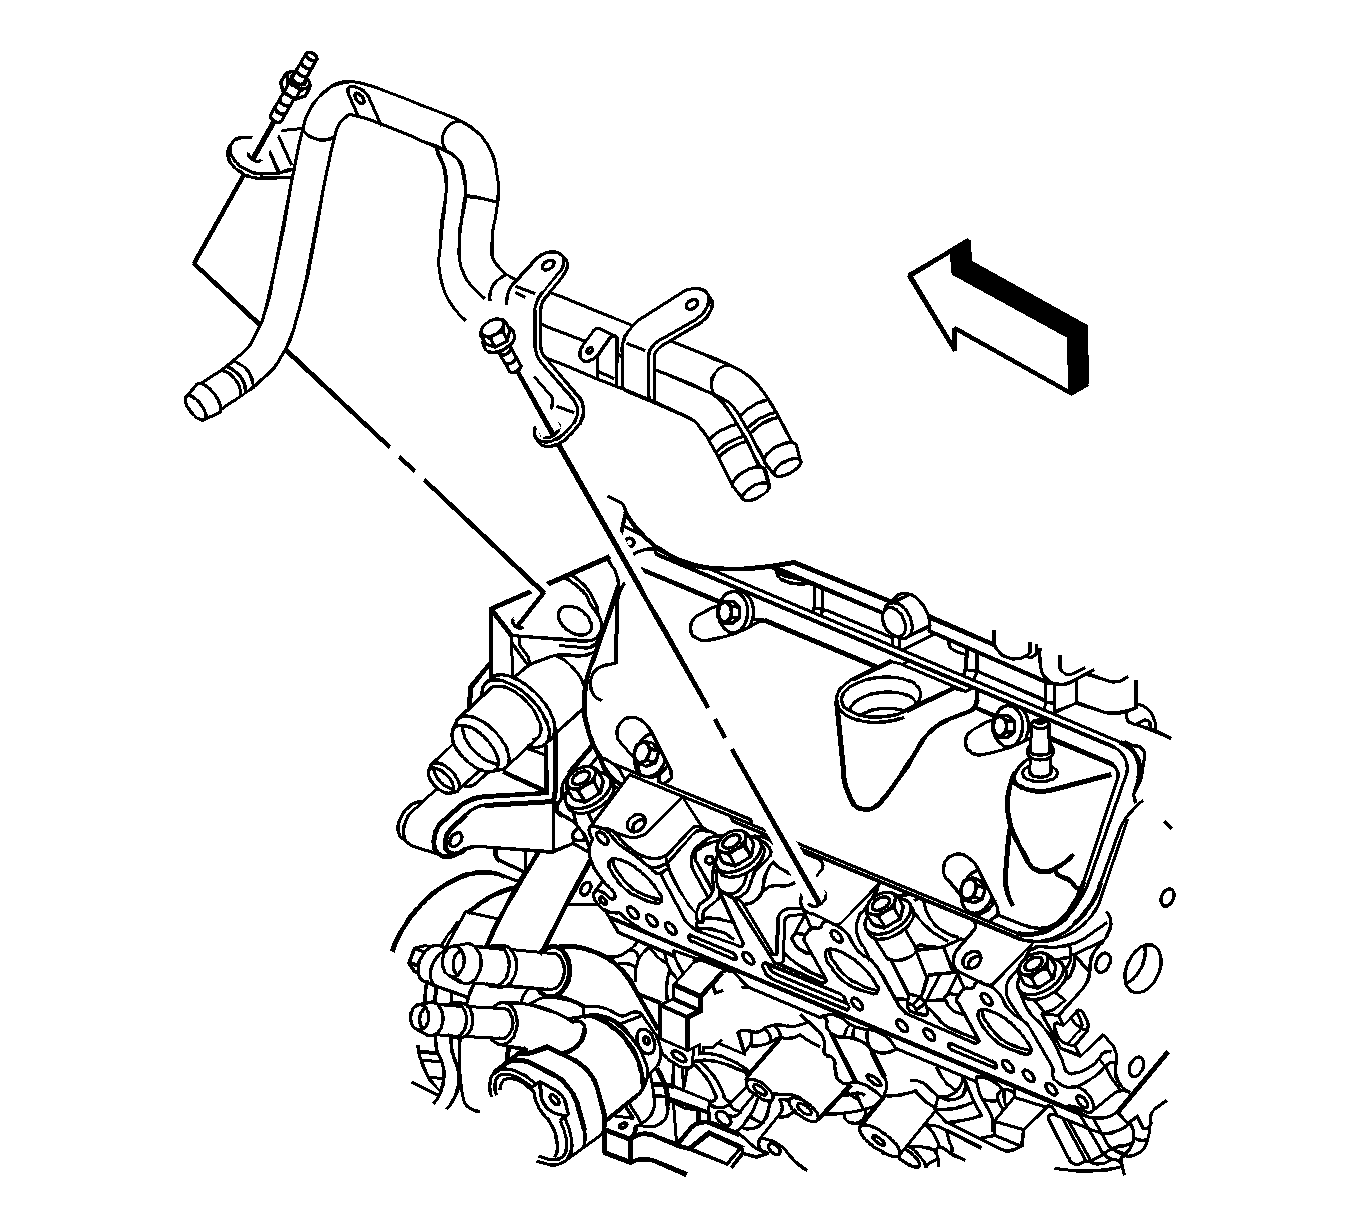
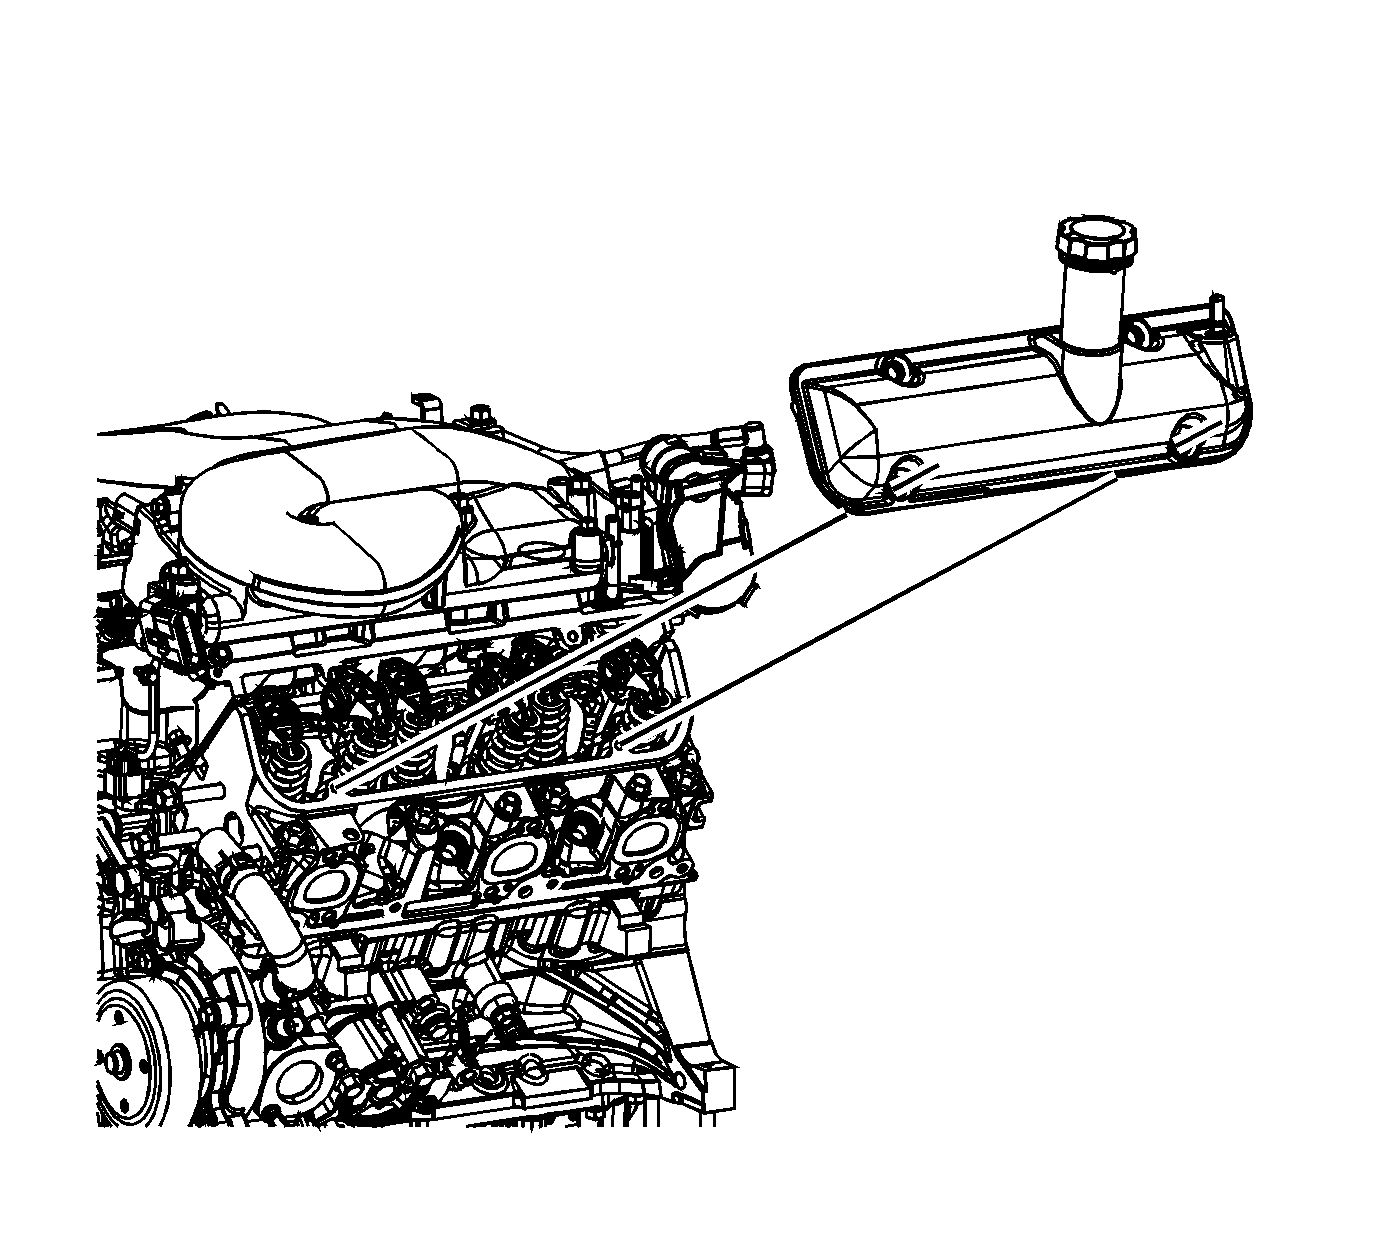
Important: When removing the valve rocker arm cover, ensure the gasket stays in place attached to the cylinder head.
Installation Procedure
Important: All gasket mating surfaces need to be free of oil and foreign material. Use cleaner to clean the surfaces. Refer to Adhesives, Fluids, Lubricants, and Sealers for the 3.9L engine.
- Install a NEW valve rocker arm cover gasket into the groove in the valve rocker arm cover. Ensure that the gasket is properly seated in the groove of the valve rocker arm cover.
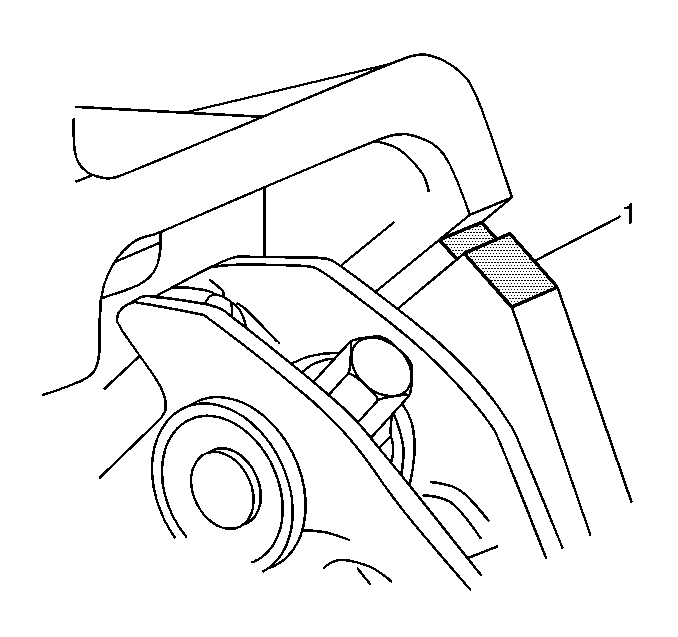
- Apply sealant at the cylinder head to the surfaces where the cylinder head and intake manifold meet (1). Refer to Adhesives, Fluids, Lubricants, and Sealers for the 3.9L engine.
- Install the valve rocker arm cover.
- Tighten the valve rocker arm cover bolts.
- Install the heater inlet and outlet pipe to the vehicle.
- Install the heater inlet and outlet pipe bolt and stud.
- Install the front heater outlet hose to the outlet heater pipe.
- Position the hose/pipe assembly. Install the clips to the throttle body studs.
- Install the heater inlet and outer hoses/pipes to the engine inlet and outlet pipes.
- Install the heater inlet and outlet hose/pipe clip nuts at the throttle body.
- Position the heater inlet and outlet hose/pipe clamps at the engine inlet and outer pipes.
- Install the left engine mount strut bracket. Refer to Engine Mount Strut Bracket Replacement - Left Side .
- Install the PCV foul air tube. Refer to Plastic Collar Quick Connect Fitting Service .
- Position the spark plug harness.
- Install the spark plug wire harness clip to the heater inlet and outlet front pipe bracket.
- Connect the left spark plug wires to the spark plugs.
- Install the oil level indicator tube. Refer to Oil Level Indicator and Tube Replacement .
- Install the intake manifold cover. Refer to Intake Manifold Cover Replacement .
- Fill the cooling system. Refer to Cooling System Draining and Filling .

Notice: Refer to Fastener Notice in the Preface section.
Important: Use an alternating criss-cross pattern when tightening the valve rocker cover bolts. Failure to do so may result in oil leakage from the valve cover due to improper seating of the gasket.
Tighten
Tighten the bolts to 10 N·m (89 lb in).

Tighten
| • | Tighten the bolt to 25 N·m (18 lb ft). |
| • | Tighten the stud to 10 N·m (89 lb in). |

Tighten
Tighten the nuts to 10 N·m (89 lb in).


