- Remove the sound insulator. Refer to
Instrument Panel Insulator Replacement
.

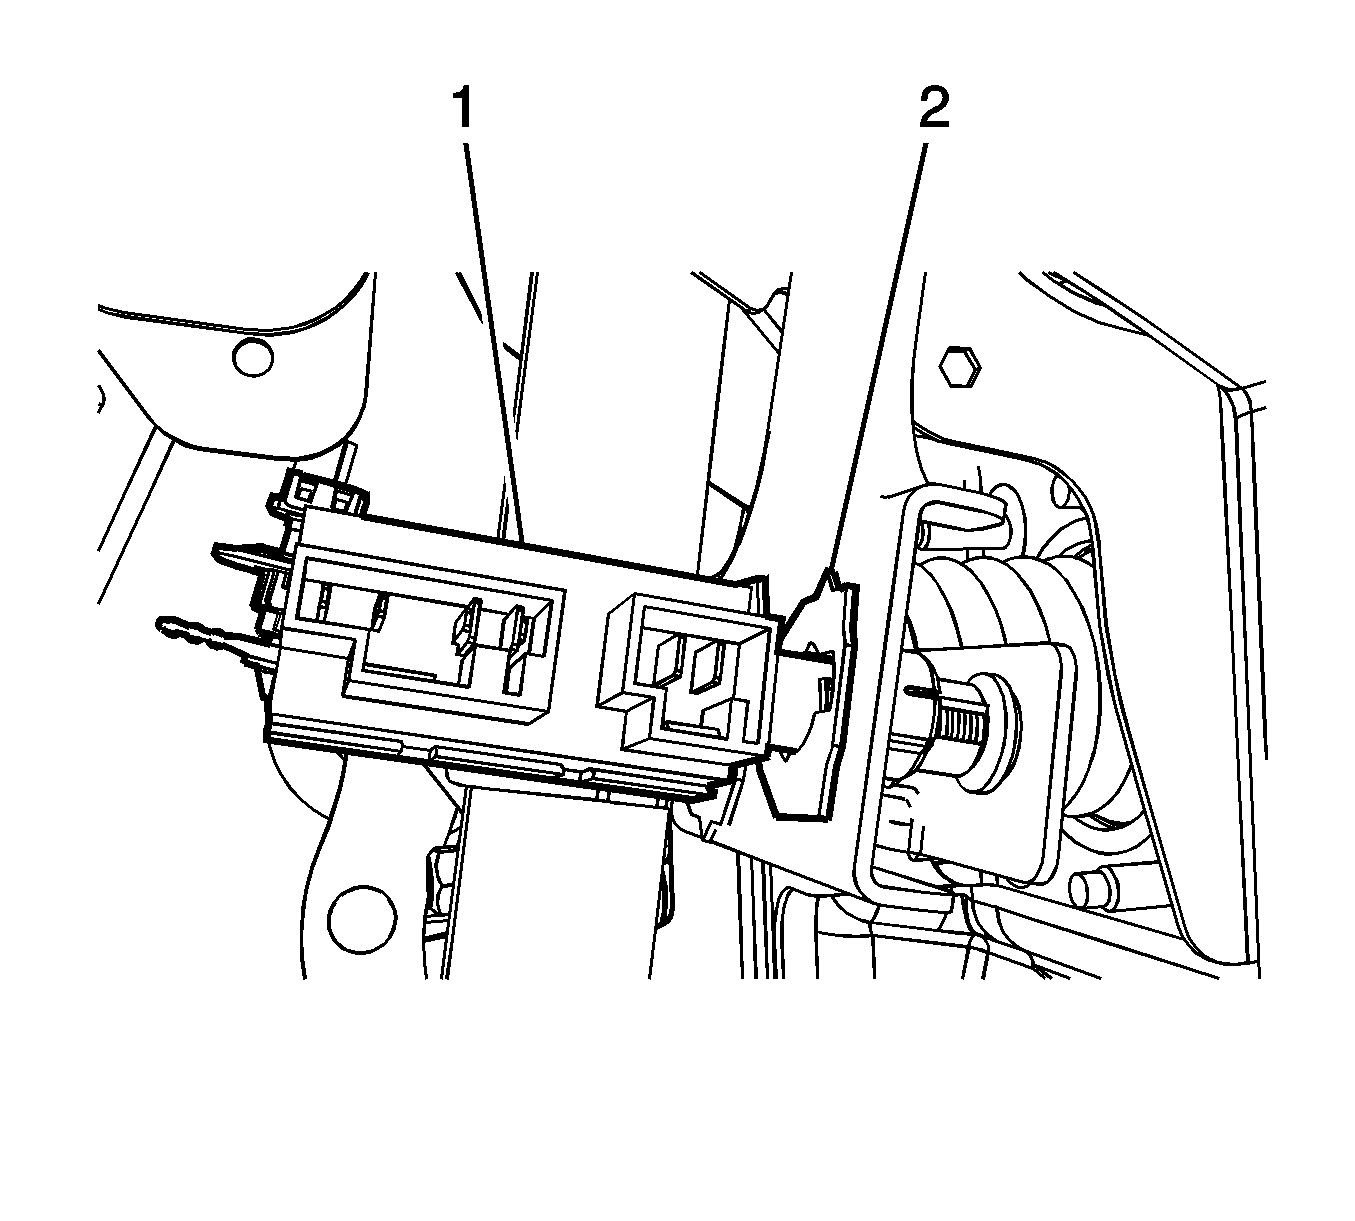
- Ensure the stop lamp switch retainer is
fully seated in the bracket.
- Remove the stop lamp switch (1) from the switch retainer (2).
Rotate the switch counterclockwise to release the switch.
Notice: Proper stoplamp switch adjustment is essential. Improper stoplamp switch
adjustment may cause brake drag, heat buildup and excessive brake lining wear.
- Pull back lightly on the brake pedal to ensure the system is fully released.
- While lightly holding the brake pedal, install and adjust the stop lamp
switch:
| 5.1. | If a new brake pedal assembly is being installed, the brake pedal will
include a stop lamp switch adjustment spacer in place over the switch contact rubber
bumper. |
| 5.2. | If the pedal assembly is being reused, position a 2 mm (5/64 in)
drill bit or hex wrench as a spacer over the face of the switch contact rubber bumper. |
| 5.3. | Insert the stop lamp switch into the retainer. |
| 5.4. | Ensure the switch plunger is fully depressed against the adjustment spacer,
drill bit, or hex wrench without deflecting the bracket or the switch contact arm
on the pedal. |
| 5.5. | Rotate the switch clockwise to secure the switch in the retainer. |
| 5.6. | Remove the adjustment spacer, drill bit, or hex wrench. |

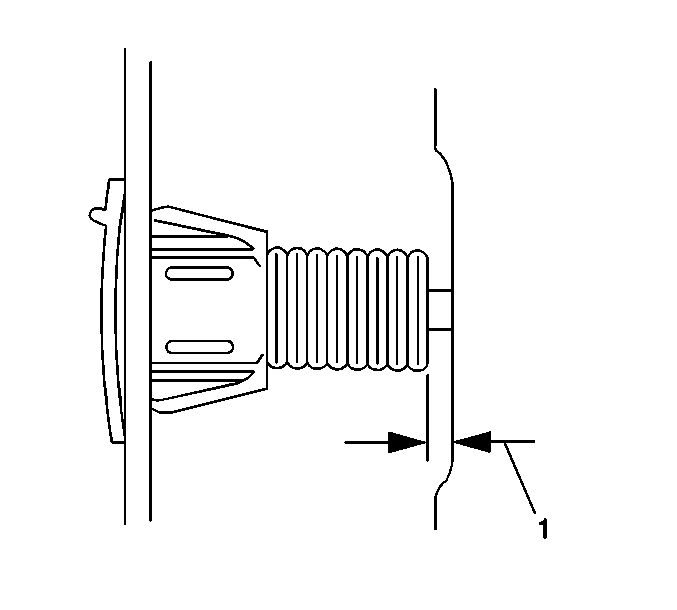
- Release the brake pedal and inspect the
switch barrel to switch contact rubber bumper clearance (1).
Specification
Clearance should not exceed 1.2 mm
(0.047 in).
- Ensure the following contacts open at 25.4 mm (1 in)
or less of pedal travel:
| • | The cruise release switch. |
| • | The stop lamp and torque converter clutch (TCC) switch. |
- Ensure the switches open simultaneously or before the onset of braking.
- The brake pedal may travel up to 25.4 mm (1 in) before
the cruise control system disengages.
- Install the sound insulator. Refer to
Instrument Panel Insulator Replacement
.


