For 1990-2009 cars only
Removal Procedure
- Remove the hood stop bracket to oil tank bolt.
- Disconnect the positive crankcase ventilation (PCV) fresh air tube from the front port on the oil tank.
- Disconnect the PCV dirty air tube from the rear port on the oil tank.
- Remove the 2 oil tank middle bracket nuts.
- Raise and support the vehicle. Refer to Lifting and Jacking the Vehicle .
- Drain the engine oil. Refer to Draining Fluids and Oil Filter Removal .
- Remove the right front tire and wheel assembly. Refer to Tire and Wheel Removal and Installation .
- Remove the right front wheelhouse rear liner. Refer to Fender, Insulator, Liner, Brake Caliper Cooling Duct Replacement - Front .
- Disconnect the oil temperature sensor electrical connector.
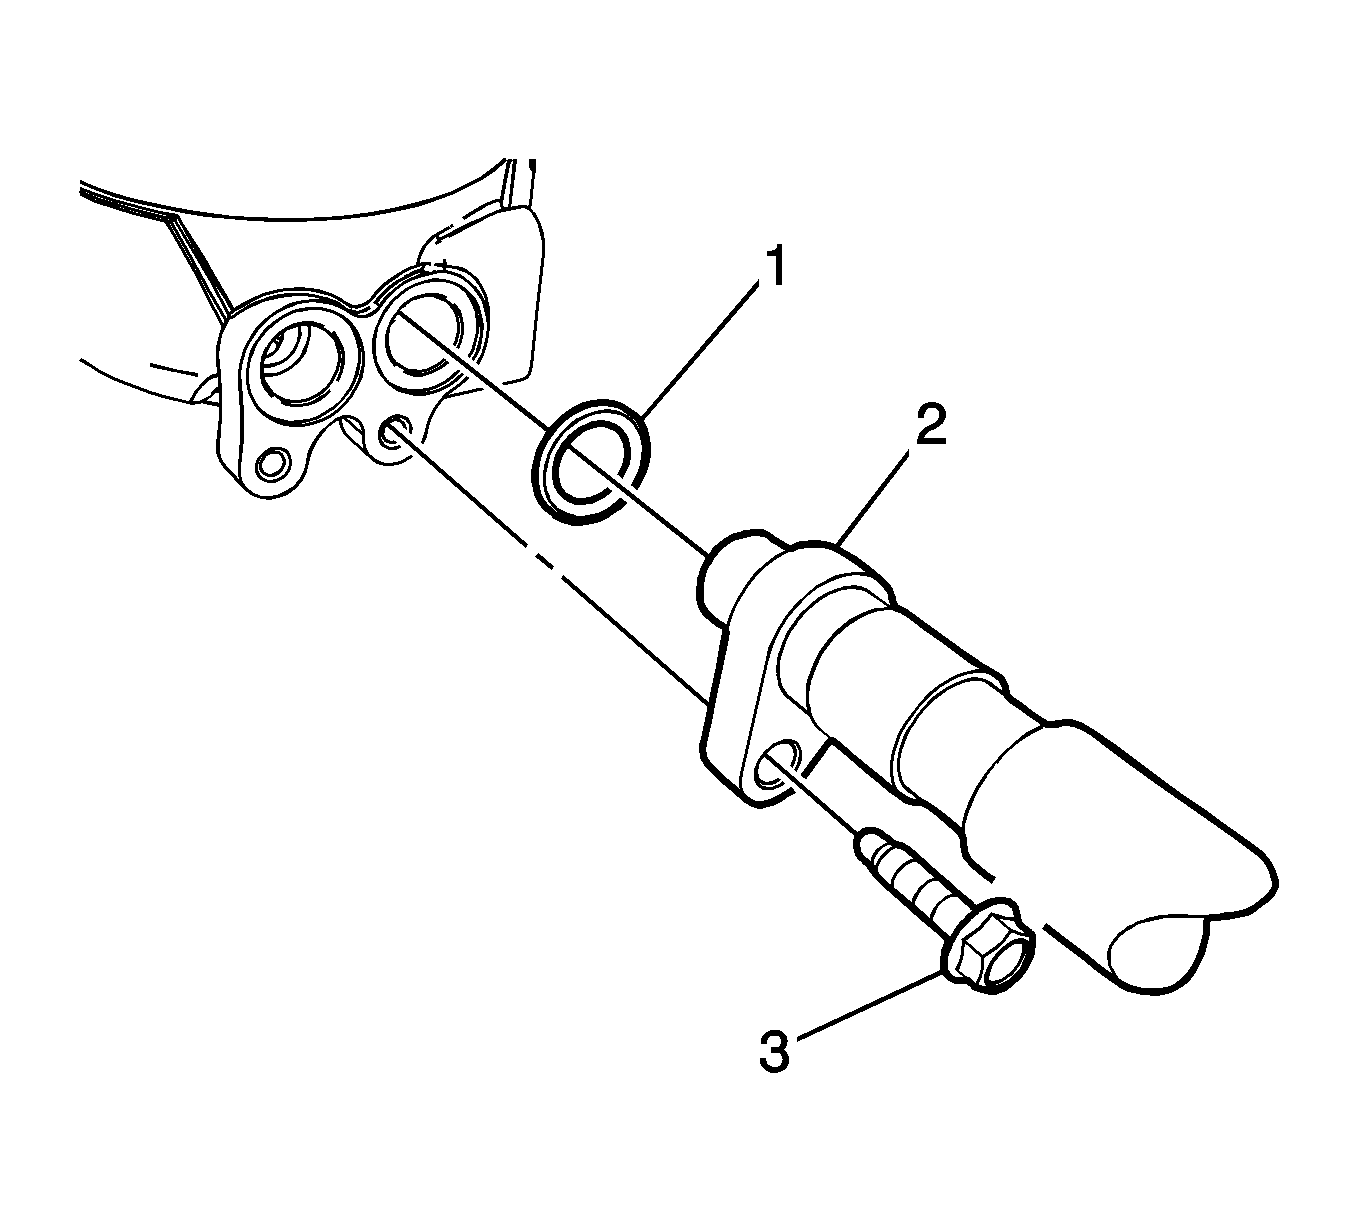
- Remove the inlet hose to oil tank bolt (3) and disconnect the hose (2) from the oil tank. Discard the oil seal (1).
- Remove the outlet hose to oil tank bolt (3) and disconnect the hose (2) from the oil tank. Discard the oil seal (1).
- Remove the oil tank to frame bolts.
- Remove the oil tank from the bottom of the vehicle.
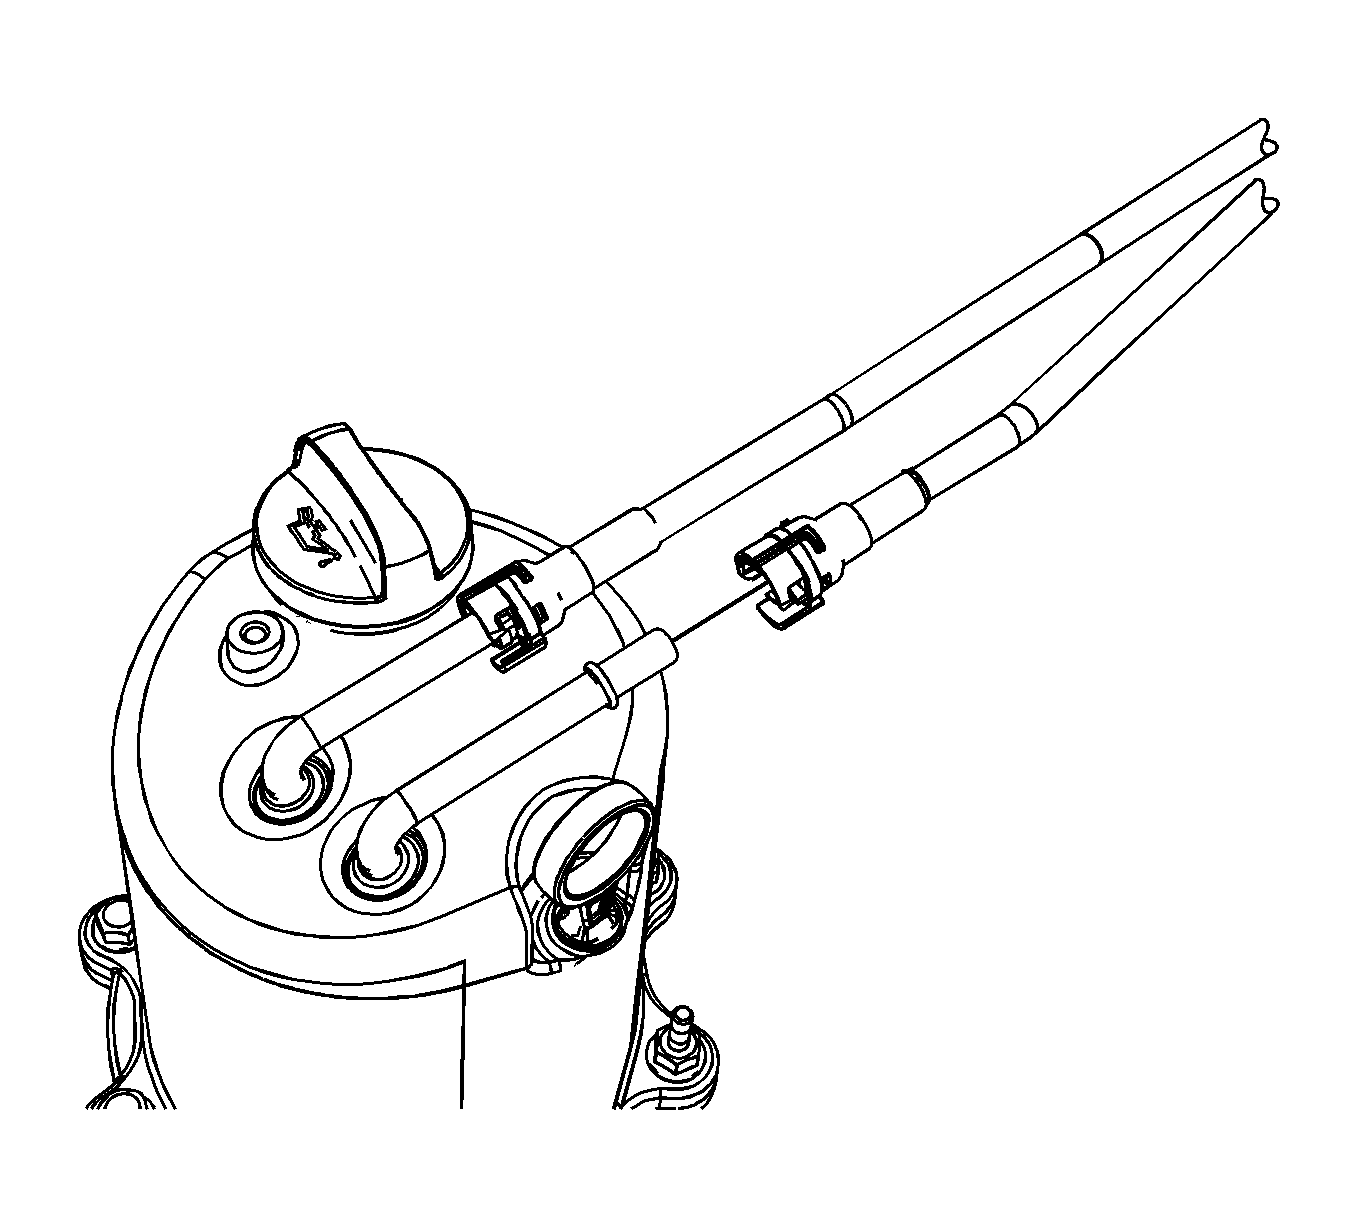
Important: Prior to the disconnecting the PCV tubes from the oil tank, mark the port locations to the proper tubes or they can be installed incorrectly.
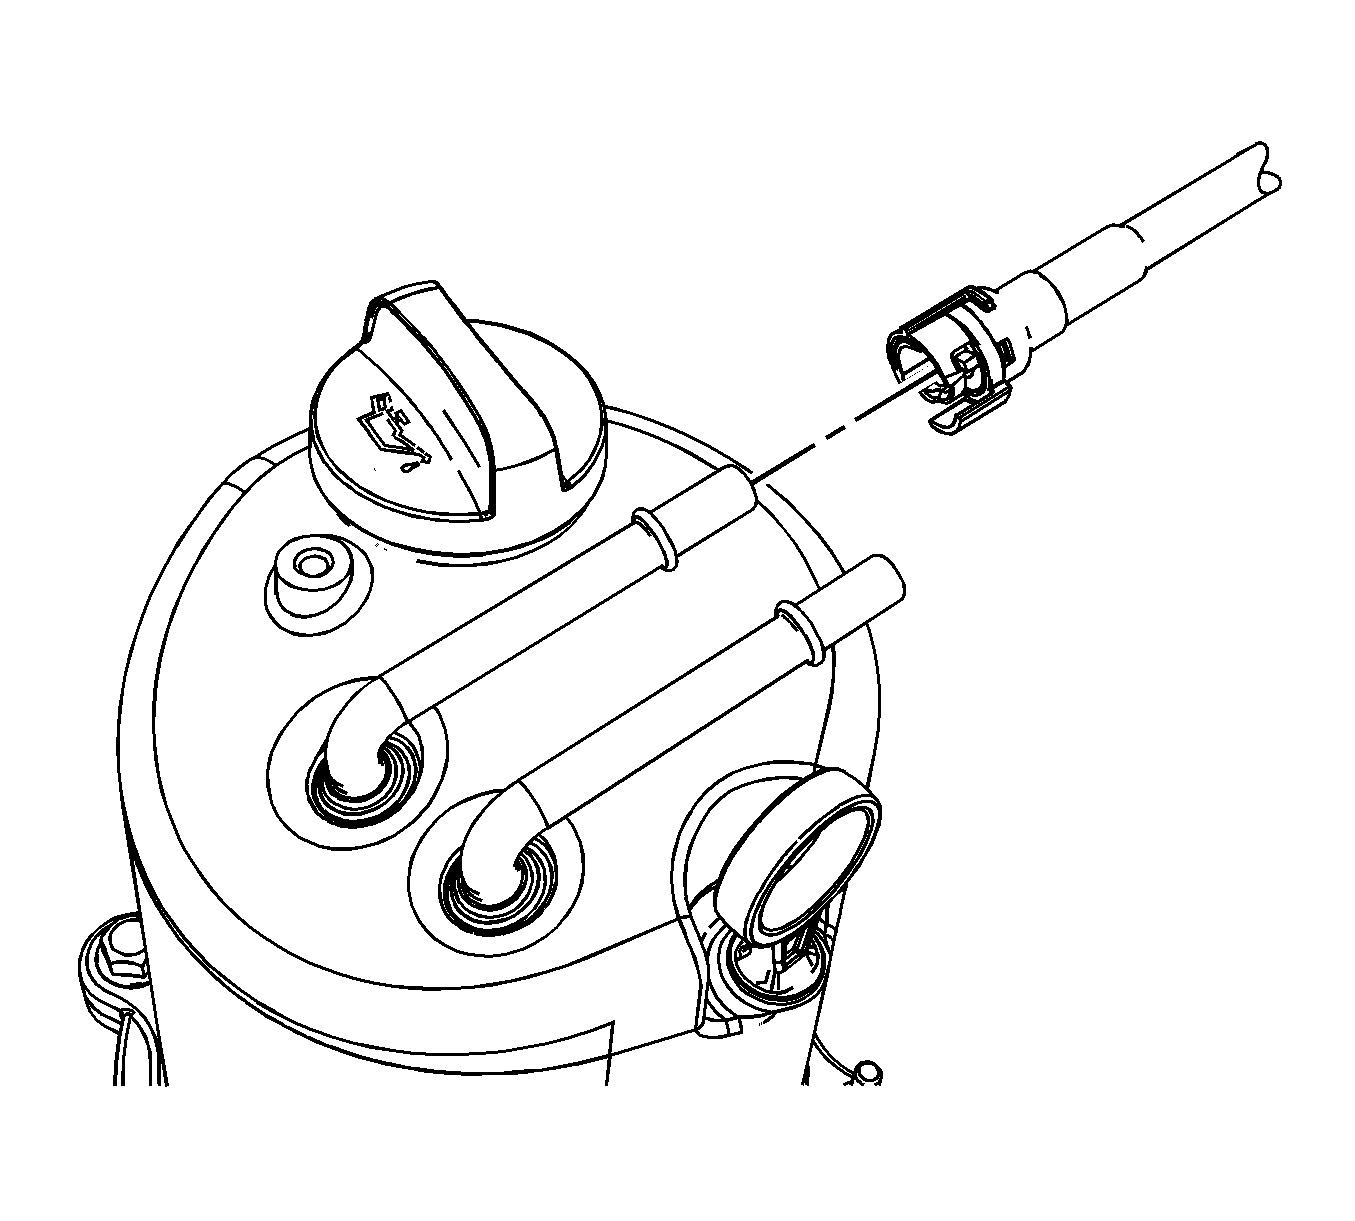
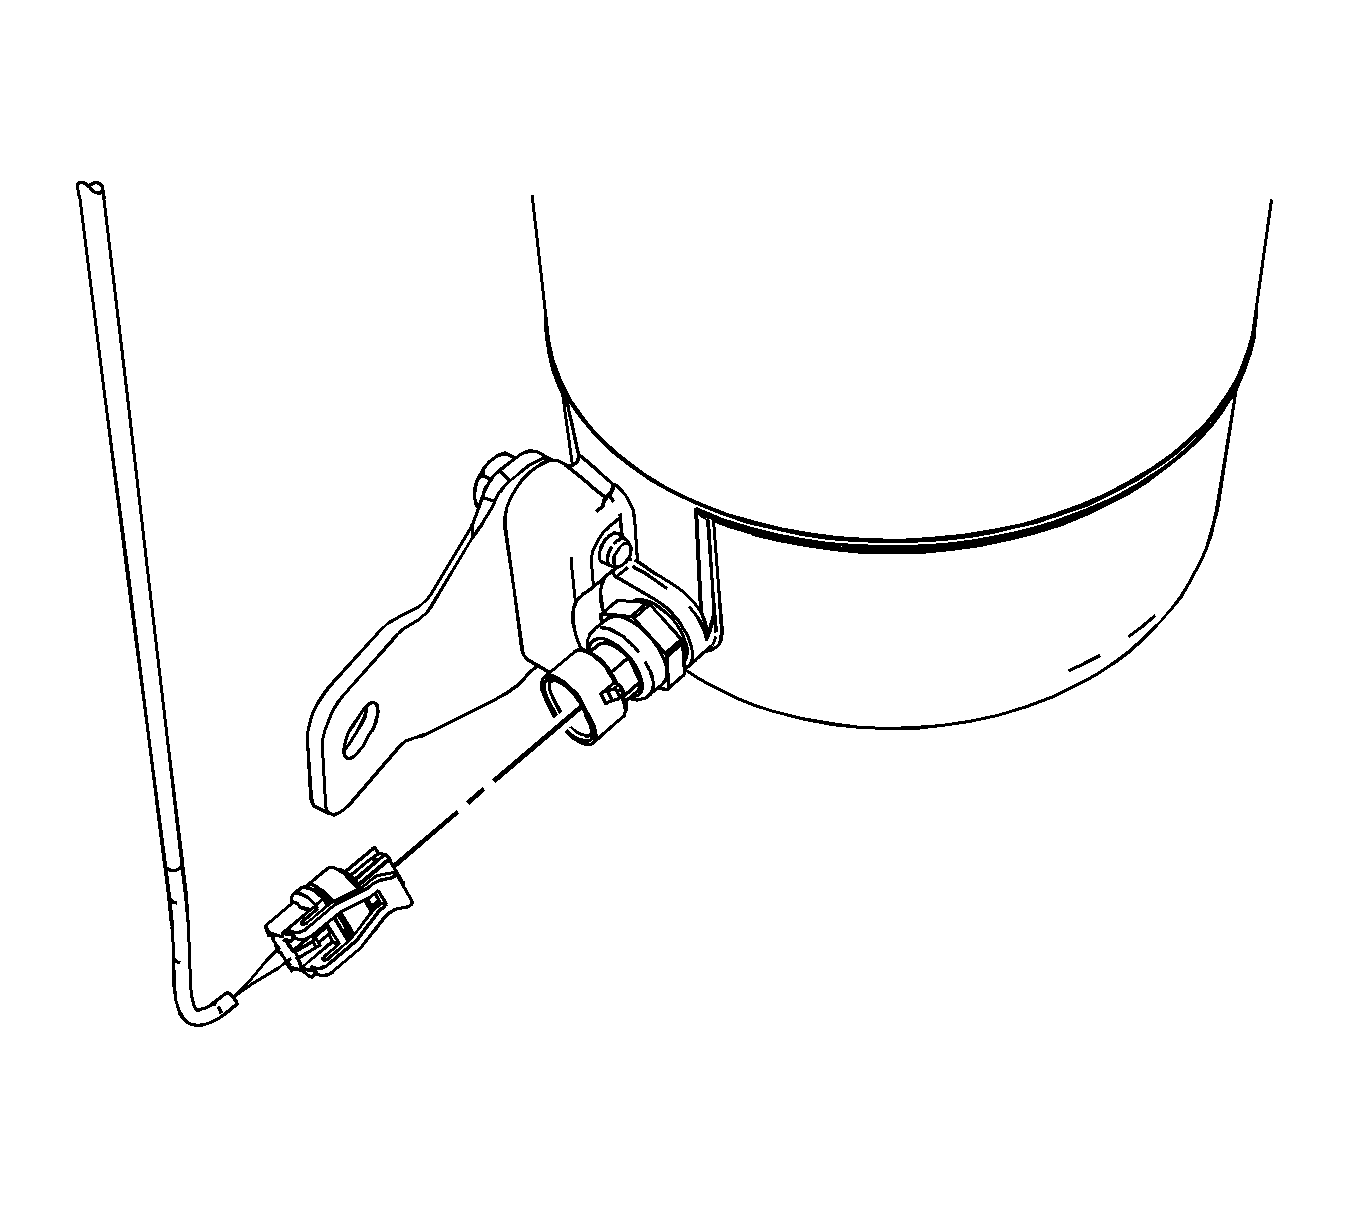
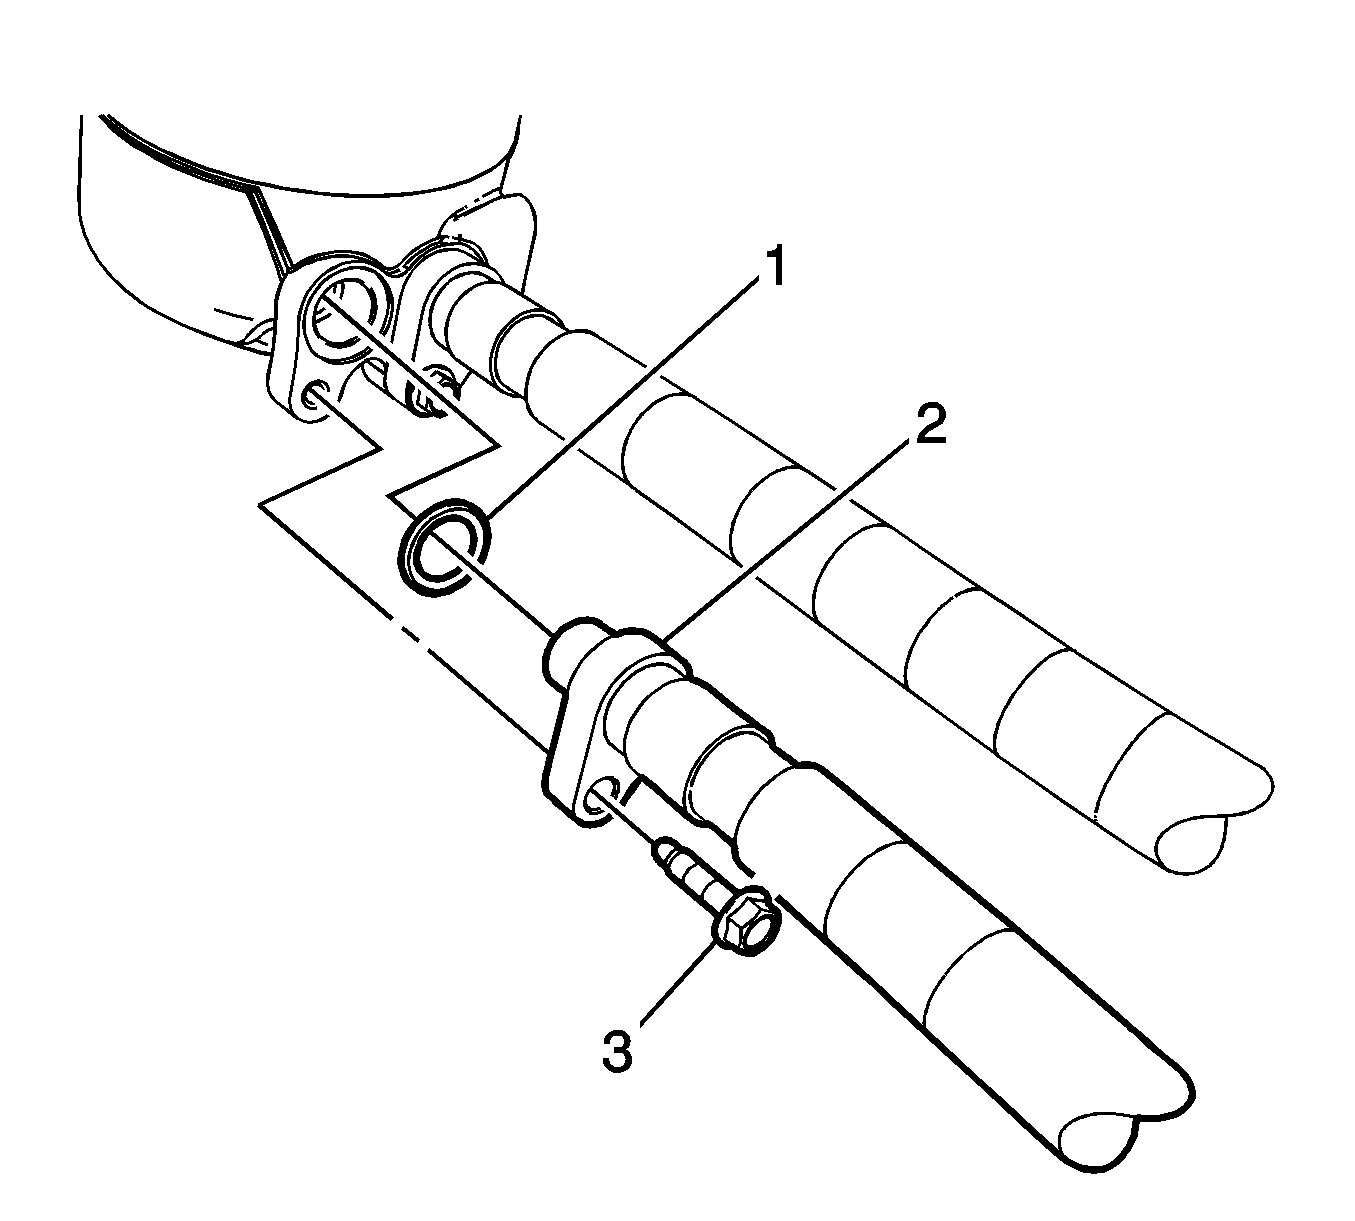
Important: Anytime the oil tank inlet and outlet hoses are serviced, the oil seals must be replaced.
Installation Procedure
- Position the oil tank in place from the bottom of the vehicle.
- Install the oil tank lower bracket bolts to frame bolts.
- Using g a new oil seal (1) install the oil tank outlet hose (2) and bolt (3) to the oil tank.
- Using g a new oil seal (1) install the oil tank inlet hose (2) and bolt (3) to the oil tank.
- Connect the oil temperature sensor electrical connector.
- Install the right front wheelhouse liner. Refer to Fender, Insulator, Liner, Brake Caliper Cooling Duct Replacement - Front .
- Install the right front tire and wheel assembly. Refer to Tire and Wheel Removal and Installation .
- Lower the vehicle.
- Install the 2 oil tank middle bracket nuts.
- Connect the PCV dirty air tube to the rear port on the oil tank.
- Connect the PCV fresh air tube to the front port on the oil tank.
- Install the hood stop bracket to oil tank bolt.
- Change the engine oil. Refer to Engine Oil and Oil Filter Replacement .
Notice: Refer to Fastener Notice in the Preface section.
Tighten
Tighten the oil tank lower bracket to frame bolts to 36 N·m (27 lb ft).

Tighten
Tighten the outlet hose to oil tank bolt to 22 N·m (16 lb ft).

Tighten
Tighten the inlet hose to oil tank bolt to 22 N·m (16 lb ft).

Tighten
Tighten the oil tank middle bracket nuts to 10 N·m (89 lb in).


Tighten
Tighten the hood stop bracket to oil tank bolt to 10 N·m (89 lb in).
