For 1990-2009 cars only
Removal Procedure
- Tilt the sunshade down toward the windshield.
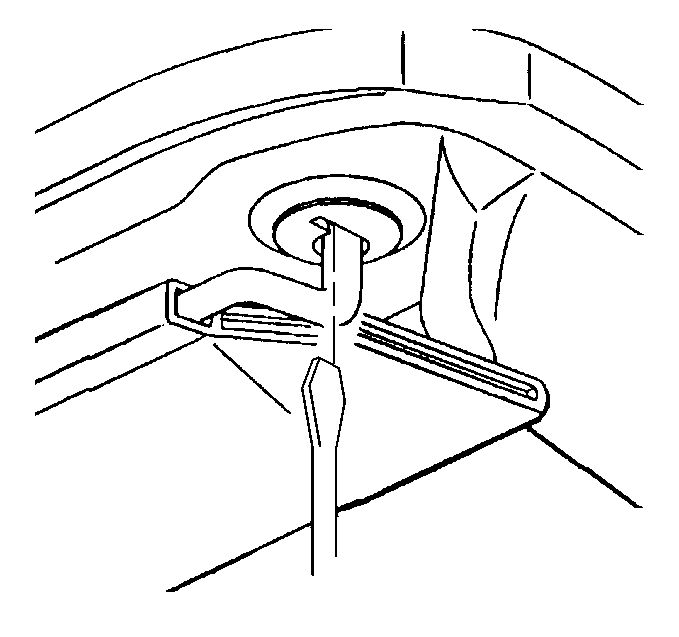
- Insert a flat head screwdriver blade into the slot in the sunshade inner bezel.
- Using the screwdriver against the elbow of the sunshade arm for leverage pull down on the sunshade arm while rotating the sunshade outboard until the sunshade stops. (the first tab disengages).
- Push up on the sunshade and continue rotating the sunshade outboard until the sunshade with the inner bezel disengages from the mounting bezel.
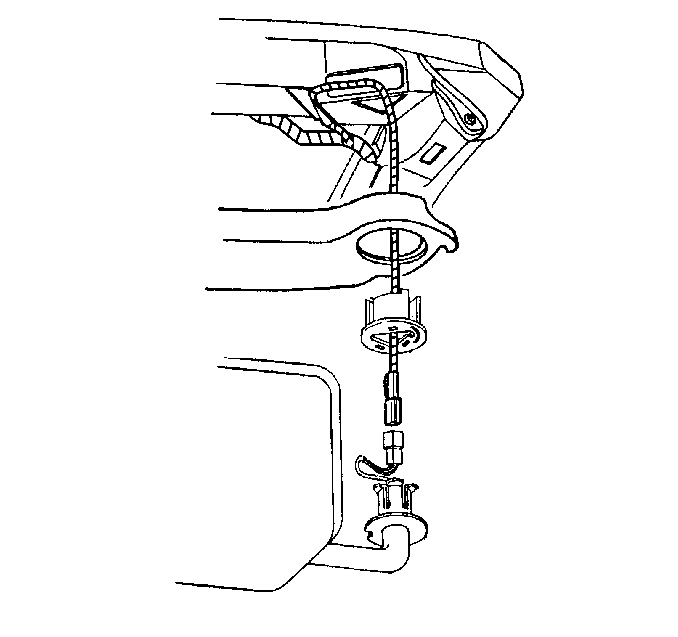
- Disconnect the electrical connector.
- Remove the sunshade.
- Disassemble as necessary.


| • | If removing the mounting bezel, pull the bezel from the garnish molding with your fingers. |
| • | If replacing the inner bezel, remove the bezel from the sunshade shaft and press the new bezel onto the shaft. |
Installation Procedure
- Route the harness through the mounting bezel.
- Insert the mounting bezel into the garnish molding engaging the snap fingers.
- Connect the harness to the sunshade electrical connector.
- Push the connector up through the bezel and through the hole in the garnish molding.
- Position the sunshade approximately midway between the windshield and the side of the vehicle.
- Insert the rod with inner bezel firmly attached fully into the mounting bezel.
- Rotate the sunshade toward the centerline of the vehicle until the sunshade locks in place.

