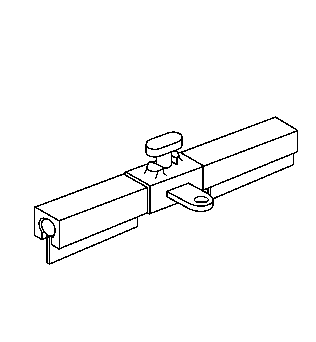
Tools Required
J 42058 Frame Adapter Clamp
Removal Procedure
Notice: Do not replace any SMC body panels until the frame rails have been replaced
or repaired; mounting SMC panels requires the rails to be positioned
accurately.
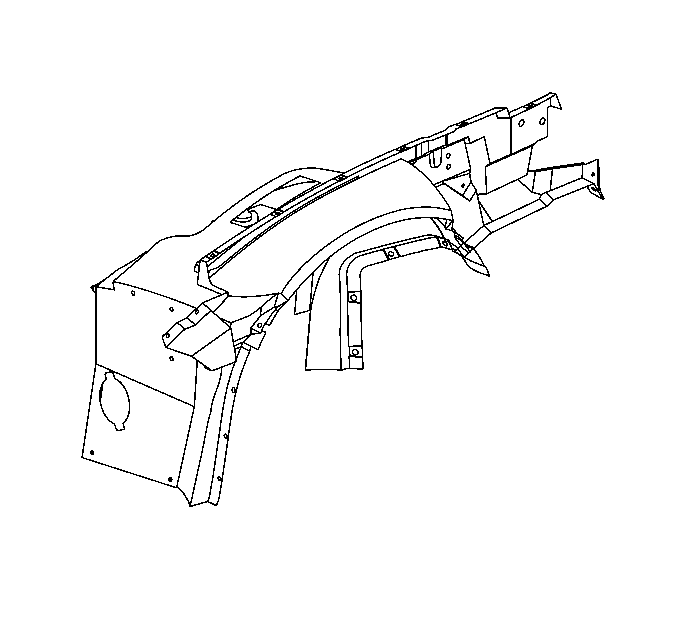
- Remove the following panels and components to gain access to the front wheelhouse:
| • | Headlamp mounting brackets |
- Visually inspect and restore as much damage as possible to specifications using three-dimensional measuring procedures. Use J 42058
to secure the vehicle if pulling and straightening are required.
- Relocate wiring as necessary to avoid damage.

- Remove the four bracket bolts attaching the wheelhouse to the front hinge pillar.

- Heat and pry to remove or dislodge adhesive beads attaching the wheelhouse to the vehicle.
- Remove the damaged wheelhouse.
Installation Procedure
Notice: Do not adjust the fender by compromising the wheelhouse to rail gap.
This gap must remain a nominal width to maintain the correct adhesive strength.
The gap should be correct if the rails are properly located.
Notice: If possible, when prepping area for service part leave small portions
of original adhesive in various places to act as shimming for wheelhouse spacing
from frame rails. If original adhesive is not usable for shimming, use paint
stir sticks, or equivalent, and shim according to body dimensions and body
panel alignment.
- Remove all remaining adhesive.
- Scuff all bonding surfaces to ensure proper adhesion.
- Clean and prepare all bonding surfaces prior to SMC panel installation. Refer to
Plastic Panels
in Plastic Panel Information and Repair.
- Prime all bare metal surfaces with a two-part catalyzed primer. Refer to GM P/N 4901M-D. Do not top-coat any bonding surface.
- Temporarily attach the fender to the wheelhouse.
| 5.1. | Align the fender to door and hood and clamp the wheelhouse assembly into place. |
| 5.2. | Scribe line on rail to denote location of wheelhouse. |

Important: Use only approved adhesives. Refer to
Rigid Plastic Part Repair Materials
in Plastic Panel Information and Repair.
- Apply adhesive to the wheelhouse.
- Position front wheelhouse service part according to the scribe lines on the rail.
- Install the four bracket bolts which attach the wheelhouse to the front hinge pillar, and clamp the wheelhouse to the rail.
- Trowel around perimeter of bonding area to remove excess adhesive and restore original appearance.
- Install all related panels and components.
