Fuel Tank Filler Door Lock Actuator Replacement Coupe
Removal Procedure
The electronically operated fuel filler door can be manually opened from inside the rear cargo area by pulling on the manual release cable located behind the drivers side rear wheelhouse carpet.
- Open the fuel door and remove the jam nut from the fuel door release cable.
- Remove the drivers side rear tire and wheel. Refer to Tire and Wheel Removal and Installation in Tires and Wheels.
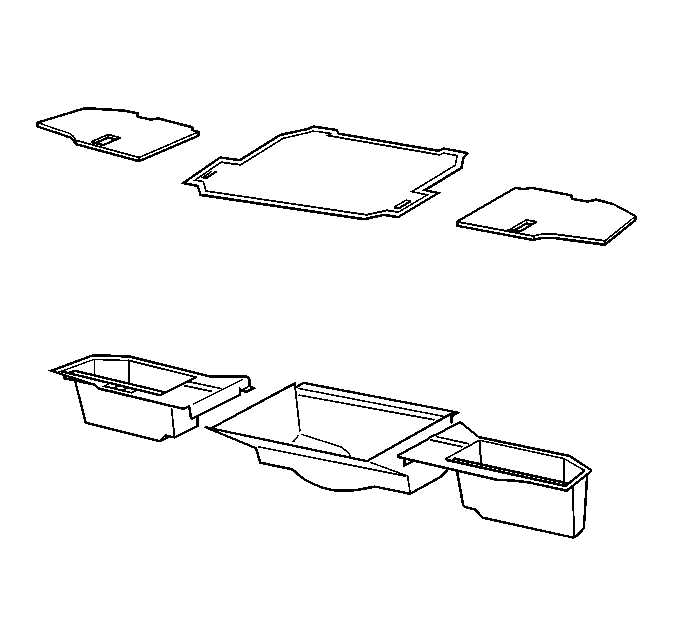
- Remove the center and the drivers side rear floor stowage compartment covers.
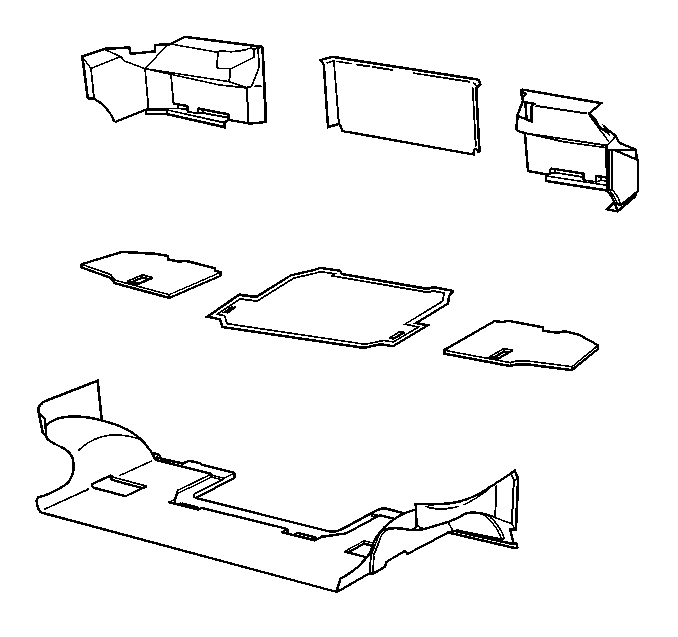
- Remove the drivers side rear/end trim corner carpet panel.
- Remove the carpet from the inner wheelhouse.
- Remove the nut securing the actuator.
- Disconnect the electrical connection.
- Remove the actuator and cable.
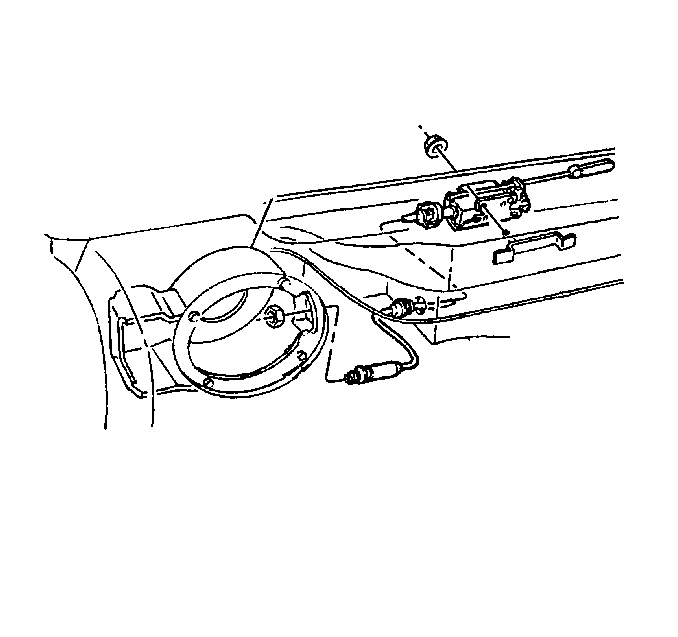
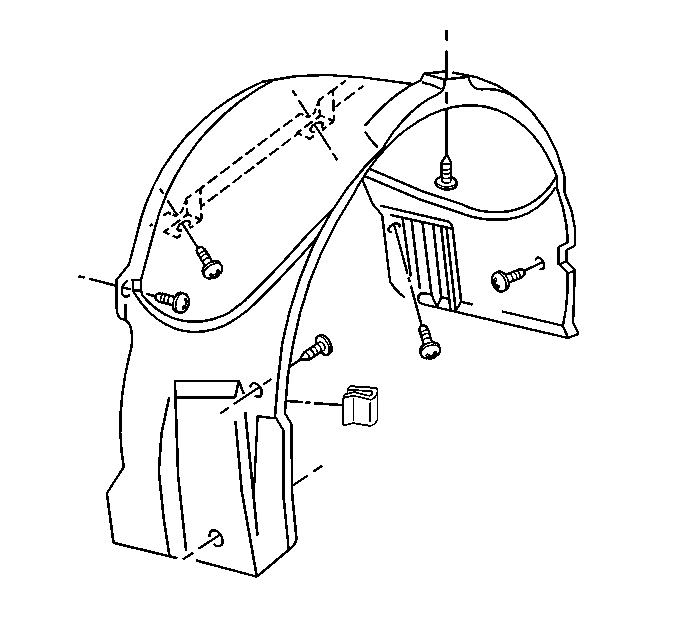
Remove the drivers side rear wheelhouse liner panel for cable installation access.

Installation Procedure
- Position the actuator.
- Install the nut attaching the actuator.
- Install the cable to the fuel pocket.
- Install the nut attaching the fuel filler door release cable to the fuel filler pocket.
- Connect the electrical connection.
- Install the wheelhouse carpet.
- Install the drivers side rear/end trim corner carpet panel.
- Install the center and drivers side rear floor stowage compartment covers.
- Install the wheelhouse liner panel with the upper outer bolt.
- Install the remaining upper bolts.
- Position the lower front corner of the wheelhouse liner panel behind the door opening finish panel and install the attaching bolt.
- Install the remaining bolts attaching the wheelhouse liner panel.
- Install the tire and wheel. Refer to Tire and Wheel Removal and Installation in Tires and Wheels.

Notice: Use the correct fastener in the correct location. Replacement fasteners must be the correct part number for that application. Fasteners requiring replacement or fasteners requiring the use of thread locking compound or sealant are identified in the service procedure. Do not use paints, lubricants, or corrosion inhibitors on fasteners or fastener joint surfaces unless specified. These coatings affect fastener torque and joint clamping force and may damage the fastener. Use the correct tightening sequence and specifications when installing fasteners in order to avoid damage to parts and systems.
Tighten
Tighten the fuel filler door release actuator nut to 2 N·m
(18 lb in).
Tighten
Tighten the fuel filler door release cable nut to 3.4 N·m
(30 lb in).


Tighten
Tighten the wheelhouse liner panel bolts to 1.9 N·m (17 lb in).
Fuel Tank Filler Door Lock Actuator Replacement Convertible
Removal Procedure
The electronically operated fuel filler door can be manually opened from inside the rear trunk by pulling on the manual release cable located behind the stowage compartment support trim.
- Open the fuel door and remove the jam nut from the actuator cable.
- Remove the drivers side rear tire and wheel. Refer to Tire and Wheel Removal and Installation in Tires and Wheels.
- Raise the convertible top.
- Position the seat forward for better access.
- Remove the trim panel from the rear compartment support.
- Remove the side trim panel.
- Reposition the carpet away from the wheel house.
- Disconnect the electrical connector from the actuator.
- Remove the nut attaching the actuator.
- Remove the actuator.


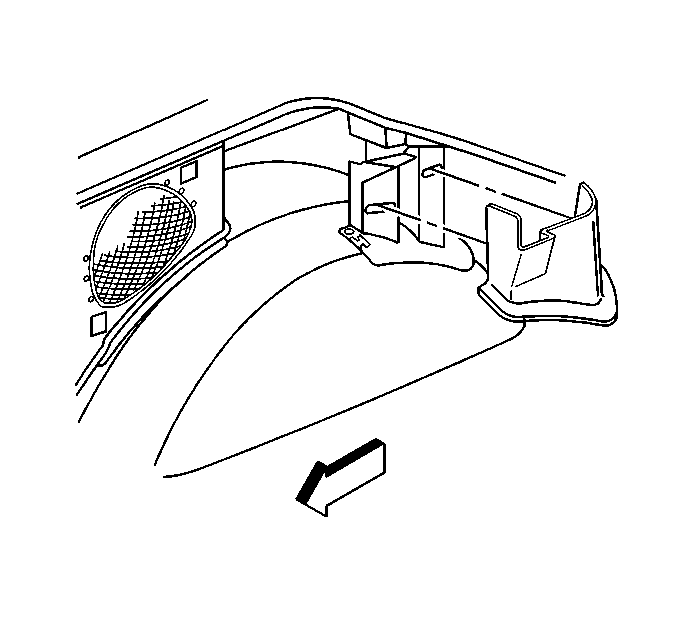
Remove the drivers side rear wheelhouse liner panel for cable installation access.



Installation Procedure
- Position the actuator.
- Install the nut attaching the actuator.
- Connect the electrical connection.
- Install the cable to the fuel pocket.
- Install the nut attaching the fuel filler door release cable to the fuel filler pocket.
- Install the wheelhouse liner panel with the upper outer bolt.
- Install the remaining upper bolts.
- Position the lower front corner of the wheelhouse liner panel behind the door opening finish panel and install the attaching bolt.
- Install the remaining bolts attaching the wheelhouse liner panel.
- Install the tire and wheel. Refer to Tire and Wheel Removal and Installation in Tires and Wheels.
- Reposition the rear floor carpet over the wheelhouse.
- Install the stowage compartment support trim panel.
- Install the side trim panel.

Notice: Use the correct fastener in the correct location. Replacement fasteners must be the correct part number for that application. Fasteners requiring replacement or fasteners requiring the use of thread locking compound or sealant are identified in the service procedure. Do not use paints, lubricants, or corrosion inhibitors on fasteners or fastener joint surfaces unless specified. These coatings affect fastener torque and joint clamping force and may damage the fastener. Use the correct tightening sequence and specifications when installing fasteners in order to avoid damage to parts and systems.
Tighten
Tighten the fuel filler door release actuator nut to 2 N·m
(18 lb in).
Tighten
Tighten the fuel filler door release cable nut to 3 N·m
(27 lb in).

Tighten
Tighten the wheelhouse liner panel bolts to 2 N·m (18 lb in).


Fuel Tank Filler Door Lock Actuator Replacement Hardtop
Removal Procedure
The electronically operated fuel filler door can be manually opened from inside the rear trunk by pulling on the manual release cable located behind the stowage compartment support trim.
- Open the fuel door and remove the jam nut from the actuator cable.
- Remove the drivers side rear tire and wheel. Refer to Tire and Wheel Removal and Installation in Tires and Wheels.
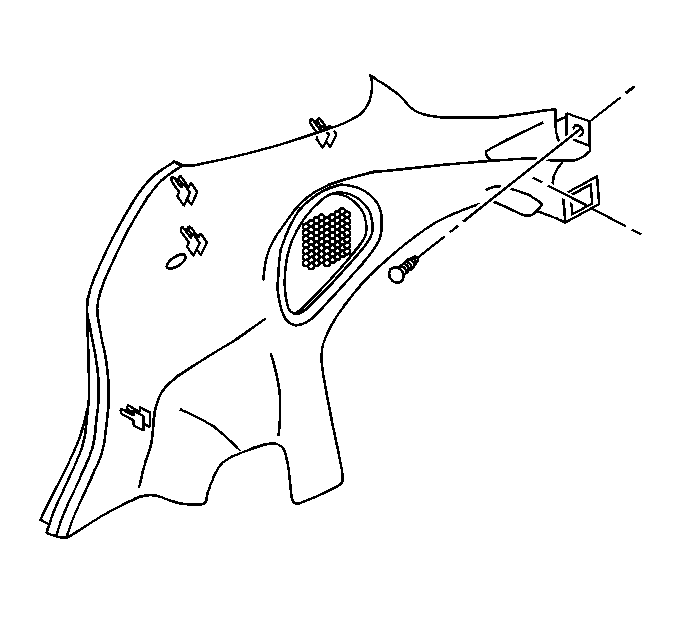
- Remove the wheelhouse liner panel for cable installation access.
- Reposition the seat for better access.
- Remove the trim panel from the rear compartment support.
- Remove the rear side trim panel.
- Reposition the carpet away from the wheel house.
- Disconnect the electrical connector from the actuator.
- Remove the nut attaching the actuator.
- Remove the actuator.



Installation Procedure
- Position the actuator.
- Install the nut attaching the actuator.
- Connect the electrical connection.
- Install the cable to the fuel pocket.
- Install the nut attaching the fuel filler door release cable to the fuel filler pocket.
- Install the wheelhouse liner panel with the upper outer bolt.
- Install the remaining upper bolts.
- Position the lower front corner of the wheelhouse liner panel behind the door opening finish panel and install the attaching bolt.
- Install the remaining bolts attaching the wheelhouse liner panel.
- Install the tire and wheel. Refer to Tire and Wheel Removal and Installation in Tires and Wheels.
- Reposition the rear floor carpet over the wheelhouse.
- Position the manual release cable over the carpet.
- Install the stowage compartment support trim panel.
- Install the rear side trim panel.

Notice: Use the correct fastener in the correct location. Replacement fasteners must be the correct part number for that application. Fasteners requiring replacement or fasteners requiring the use of thread locking compound or sealant are identified in the service procedure. Do not use paints, lubricants, or corrosion inhibitors on fasteners or fastener joint surfaces unless specified. These coatings affect fastener torque and joint clamping force and may damage the fastener. Use the correct tightening sequence and specifications when installing fasteners in order to avoid damage to parts and systems.
Tighten
Tighten the fuel filler door release actuator nut to 2 N·m
(18 lb in).
Tighten
Tighten the fuel filler door release cable nut to 3 N·m
(27 lb in).

Tighten
Tighten the wheelhouse liner panel bolts to 2 N·m
(18 lb in).


