Removal Procedure
- Loosen the fixed antenna mast.
- Remove the radio fixed antenna mast from the radio fixed antenna.
- Open the rear compartment lid.
- Remove the right deck lid support trim panel.
- Pull back the edge of the rear compartment floor carpet from behind the right deck lid support, then reposition the right side of the carpet.
- Remove the convenience net right plastic retaining nuts, if equipped.
- Pull back the right edge of the rear carpet trim panel.
- Disconnect the electrical connector from the cargo lamp assembly.
- Remove the cargo lamp assembly.
- Reposition the right edge of the rear carpet trim panel.
- Release the antenna coaxial cable from the retaining clip on the rear of the wheelhouse.
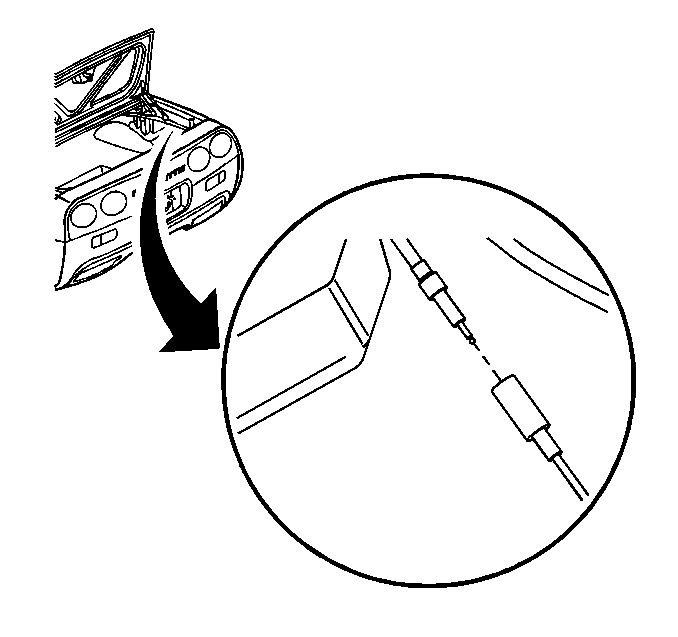
- Disconnect the fixed antenna coaxial cable from the fixed antenna coaxial extension cable.
- Remove the screws retaining both of the right tail lamps.
- Remove both of the right tail lamps.
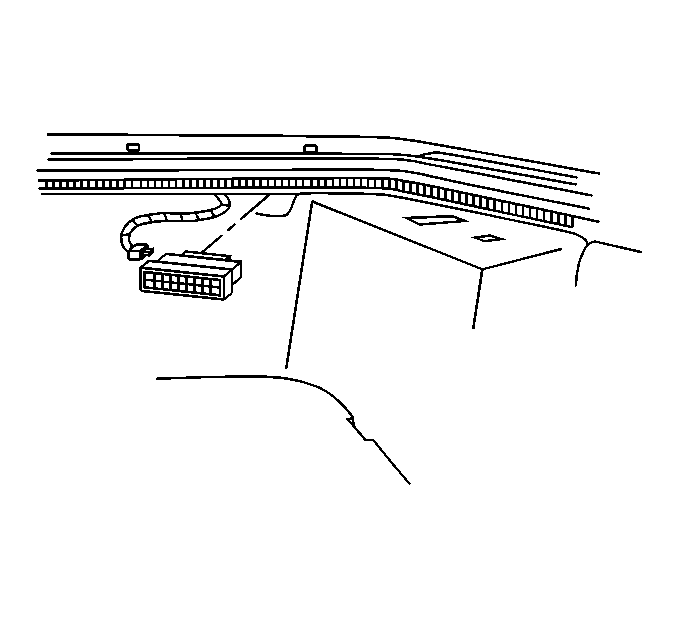
- Disconnect the antenna ground connector from the rear body wiring harness.
- Remove the nut retaining the antenna dual cable strap (1) and antenna short braided ground strap (2) to the rear fascia retaining stud, then reposition the straps.
- Remove the nut retaining the antenna long braided ground strap to the rear bumper impact bar stud, then reposition the strap.
- Remove the antenna retaining nuts.
- Release the antenna from the mounting studs.
- Reposition the antenna body toward the RR tire.
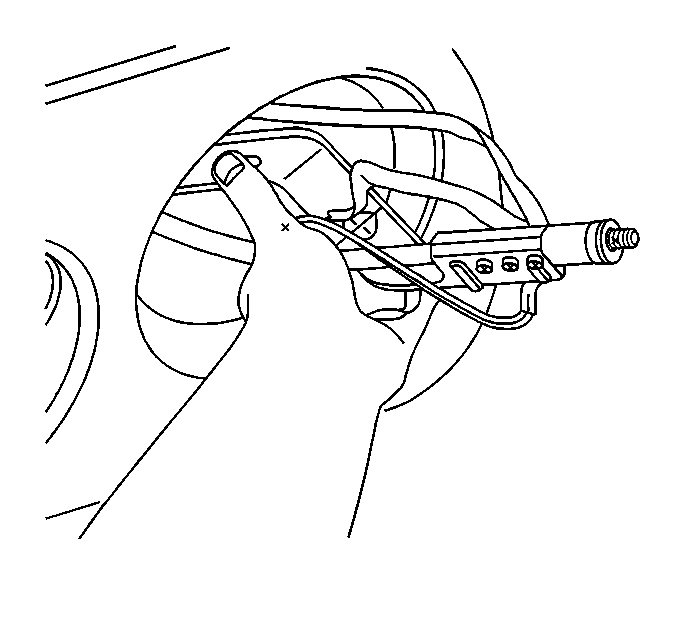
- Using a slight twisting motion, pull down to release the antenna from the antenna bezel.
- Release the antenna coaxial cable grommet from the rear compartment panel, toward the outside of the vehicle.
- Remove the antenna coaxial cable and grommet from the opening in the rear compartment panel toward the outside of the vehicle.
- Carefully remove the fixed antenna from the vehicle through one of the tail lamp openings.
- Remove the antenna bezel upward through the quarter panel, if necessary.
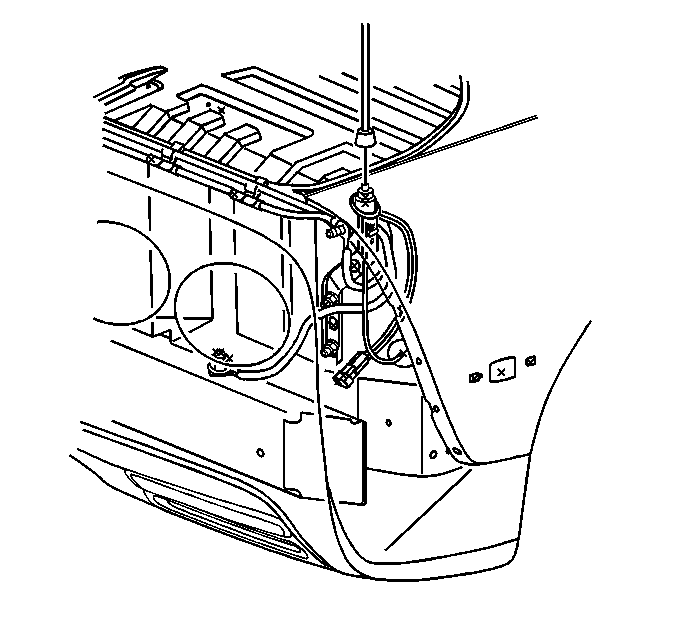
Notice: Use tape on the tool surface so that you do not damage the paint on the antenna mast.
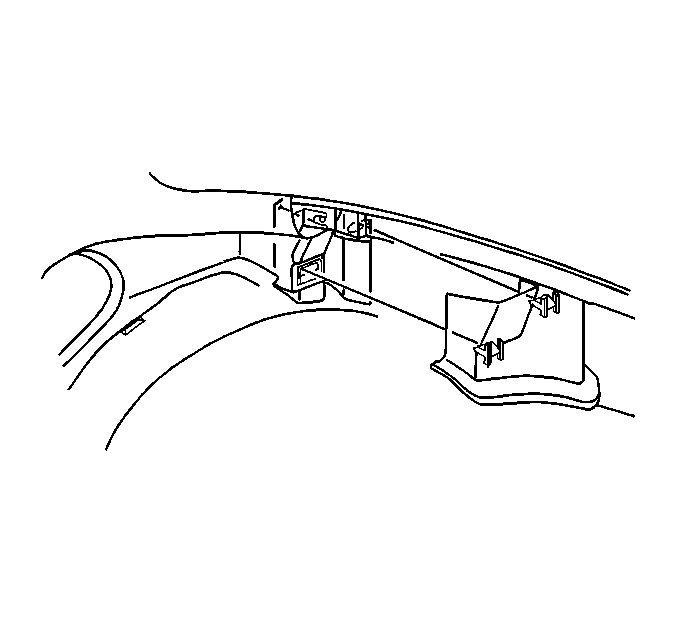
Pull to release the retaining clips.
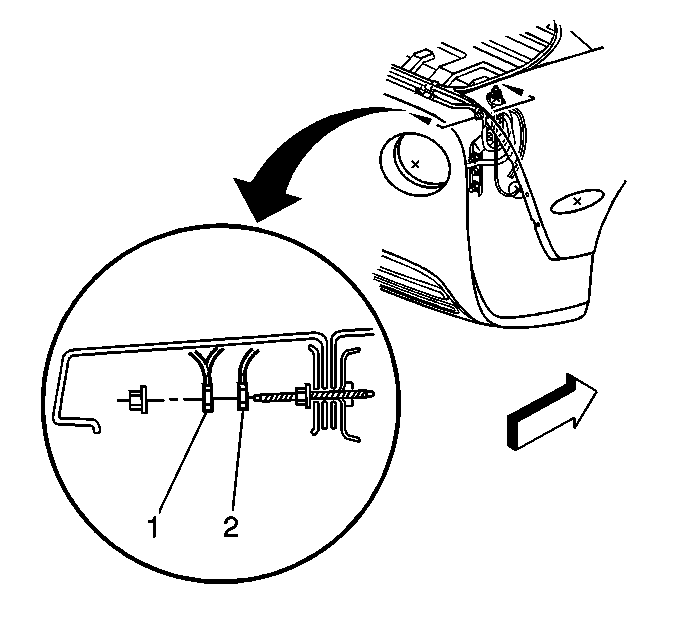
Important: Use care not to twist and damage the ground straps when removing the retaining nut.
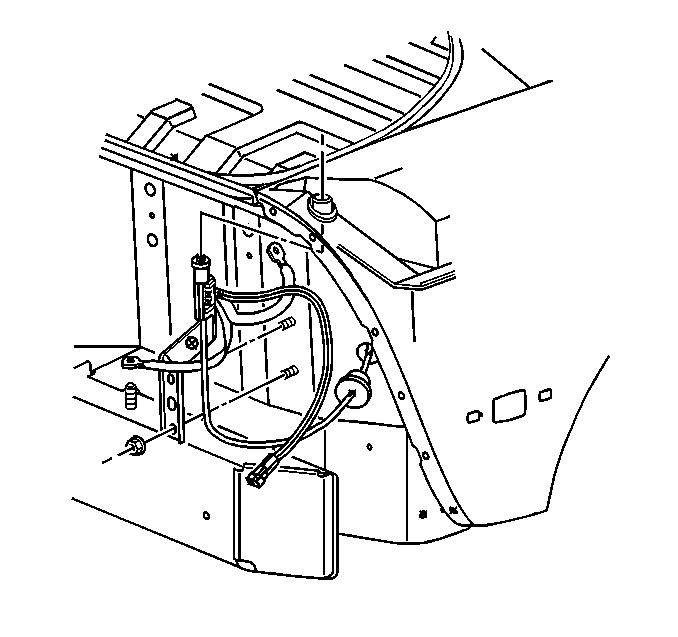
| 22.1. | Starting from the outer lip of the grommet, on the outside of the vehicle, begin to unseat the bottom right area of the grommet. |
| 22.2. | Using a flat bladed screwdriver or other suitable tool as an aid if necessary, work around the base of the tapered lip of the grommet on the inside of the vehicle, while simultaneously finessing the outer lip of the grommet on the outside of the vehicle, in order to release the grommet completely from the rear compartment panel. |
Installation Procedure
- Install the antenna bezel to the quarter panel, if removed.
- Carefully install the fixed antenna to the vehicle through one of the tail lamp openings.
- Apply sealer to the groove on the antenna coaxial cable grommet.
- Apply a light coating of lubricant to the narrow end of the antenna coaxial cable grommet to aid in seating the grommet.
- Install the antenna coaxial cable and grommet through the opening in the rear compartment panel toward the inside of the vehicle.
- Fully seat the antenna coaxial cable grommet to the rear compartment panel.
- Position the antenna upright, toward the RR tire and align the top of the antenna with the opening in the antenna bezel.
- Install the antenna to the bezel.
- Position the antenna and install the antenna onto the mounting studs.
- Install the antenna retaining nuts.
- Install the antenna long braided ground strap to the rear bumper impact bar stud.
- Install the nut retaining the antenna long braided ground strap to the rear bumper impact bar stud.
- Install the antenna short braided ground strap (2), then the antenna dual cable strap (1), to the rear fascia retaining stud.
- Install the nut retaining the straps to the rear fascia retaining stud.
- Connect the antenna ground connector to the rear body wiring harness.
- Install both of the right tail lamps.
- Install the screws retaining both of the right tail lamps.
- Secure the antenna coaxial cable to the retaining clip on the rear of the wheelhouse.
- Connect the antenna coaxial cable to the antenna coaxial extension cable.
- Install the cargo lamp assembly to the rear carpet trim panel.
- Connect the electrical connector to the cargo lamp assembly.
- Install the right edge of the rear carpet trim panel into position.
- Install the convenience net right plastic retaining nuts, if equipped.
- Install the edge of the rear compartment floor carpet behind the right deck lid support.
- Install the right deck lid support trim panel.
- Close the rear compartment lid.
- Install the radio fixed antenna mast to the radio fixed antenna.
- Using the tool taped previously, tighten the antenna mast.

Align the locating tab on the antenna bezel to the notch in the quarter panel, then insert the bezel and push to secure.

Insert the antenna up through the opening in the bezel, then check that the antenna and the bezel are seated properly.
Notice: Use the correct fastener in the correct location. Replacement fasteners must be the correct part number for that application. Fasteners requiring replacement or fasteners requiring the use of thread locking compound or sealant are identified in the service procedure. Do not use paints, lubricants, or corrosion inhibitors on fasteners or fastener joint surfaces unless specified. These coatings affect fastener torque and joint clamping force and may damage the fastener. Use the correct tightening sequence and specifications when installing fasteners in order to avoid damage to parts and systems.
Notice: Do NOT twist or damage the ground straps when you tighen the retaining nut.
Tighten
Tighten the retaining nuts to 12 N·m (106 lb in).
Tighten
Tighten the retaining nut to 5.8 N·m (51 lb in).

Tighten
Tighten the retaining nut to 5.8 N·m (51 lb in).
Tighten
Tighten the tail lamp retaining screws to 2 N·m (18 lb in).


Align the panel, then push to secure the retaining clips.

Tighten
Tighten the antenna mast to 5 N·m (44 lb in).
