Step | Action | Value(s) | Yes | No | ||||||||
|---|---|---|---|---|---|---|---|---|---|---|---|---|
1 | Were you sent here from the HVAC System Check? | -- | Go to Diagnostic System Check in Manual System or Diagnostic System Check in Automatic System | |||||||||
2 |
The low and high side pressure readings should be almost equal to each other once the system has come to rest. Are both the low and high side pressures above the specified value? | 345 kPa (50 psi) | ||||||||||
3 | Are both the low and high side pressures below the specified value? | 69 kPa (10 psi) | ||||||||||
4 |
Are both the low and high side refrigerant pressures above the specified value? | 345 kPa (50 psi) | -- | |||||||||
5 |
Are both the low and high side refrigerant pressures above the specified value? | 345 kPa (50 psi) | -- | |||||||||
6 |
Does the compressor clutch engage? | -- | Go to HVAC Compressor Clutch Does Not Engage in Automatic system or HVAC Compressor Clutch Does Not Engage in Manual system. | |||||||||
7 |
(These figures will be used later.)
(Stabilization usually requires 2-3 minutes.) Refer to
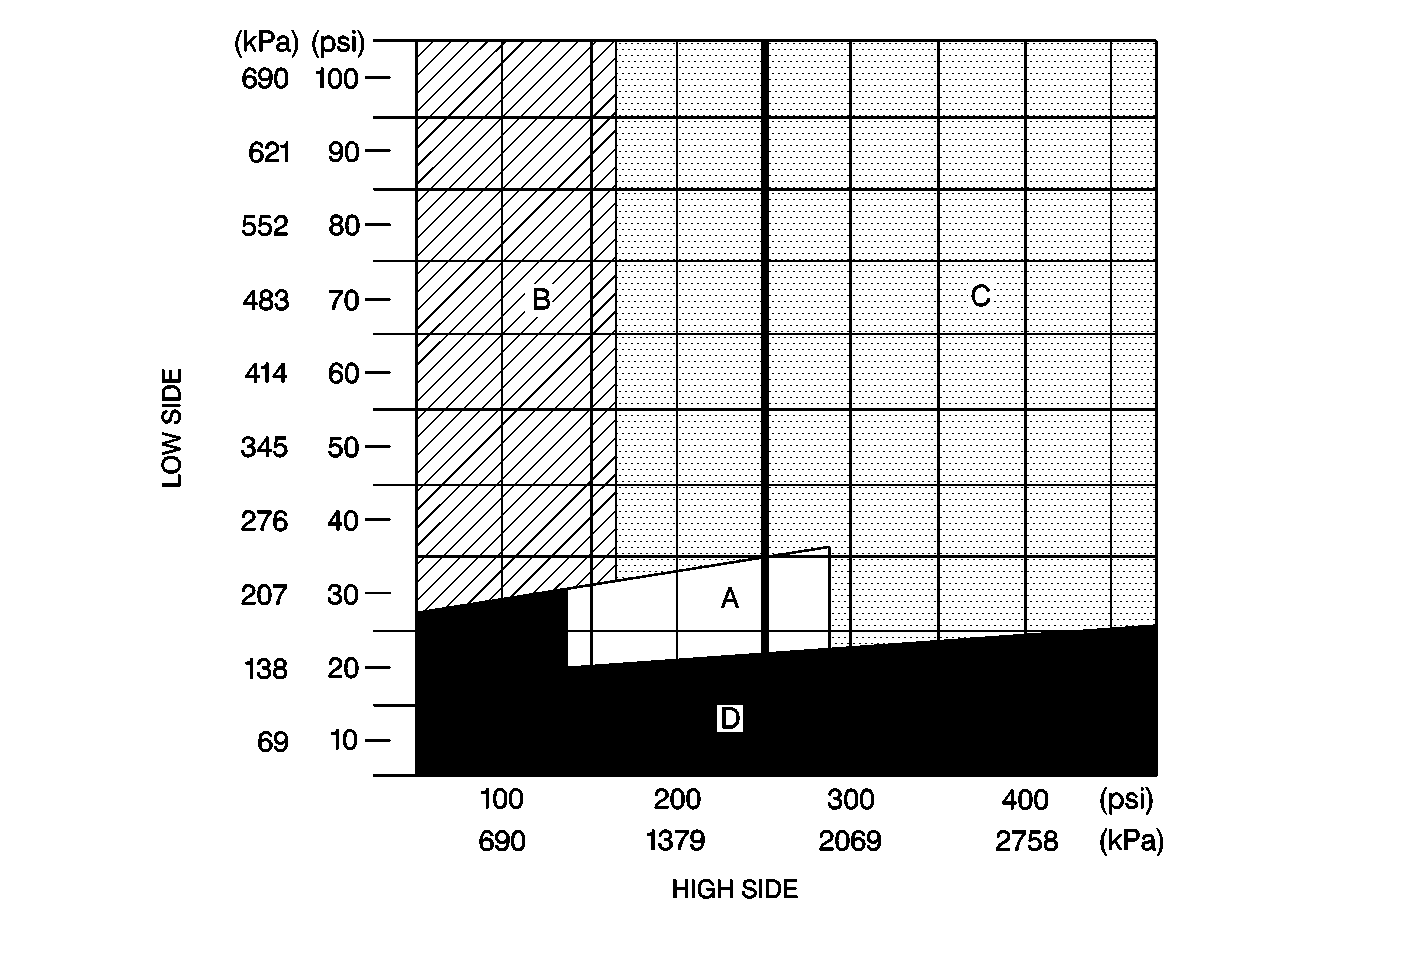
Do both the low and high side pressures fall within Zone A on the classification chart? | -- | Go to Cooling Insufficient - Air Conditioning (A/C) System - Pressure Zone A | |||||||||
8 | Compare the low
and high side pressures to the A/C System Pressure -- Zone Classification
Chart above. Refer to
Do both the low and high side pressures fall within Zone B on the classification chart? | -- | Go to Cooling Insufficient - Air Conditioning (A/C) System - Pressure Zone B | |||||||||
9 | Compare the low
and high side pressures to the A/C System Pressure -- Zone Classification
Chart above. Refer to
Do both the low and high side pressures fall within Zone C on the classification chart? | -- | Go to Cooling Insufficient - Air Conditioning (A/C) System - Pressure Zone C | Go to Cooling Insufficient - Air Conditioning (A/C) System - Pressure Zone D |

