Removal Procedure
Tools Required
J 42640 Steering Column Lock Pin
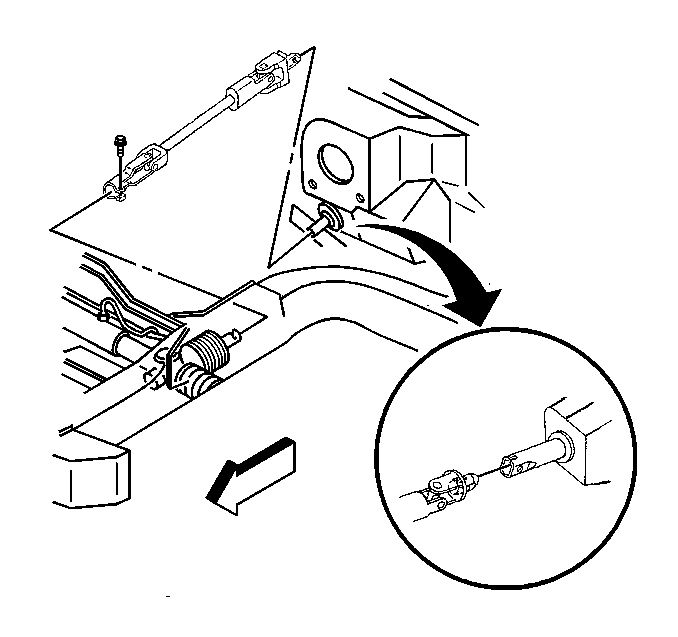
- Turn the steering wheel far enough to the left to gain access to the upper coupling bolt.
- Remove the upper coupling bolt.
- Turn the steering wheel back to the right until the wheels are in a straight ahead position and then lock the steering column.
- Install J 42640 to the steering column.
- Remove the steering wheel inflator module from the steering wheel. Refer to Inflatable Restraint Steering Wheel Module Replacement in SIR.
- Remove the driver knee bolster trim panel. Refer to Driver Knee Bolster Panel Replacement in Instrument Panel, Gauges and Console.
- Remove the driver knee bolster bracket. Refer to Knee Bolster Bracket Replacement in Instrument Panel, Gauges and Console.
- Disconnect the electrical connectors from the instrument panel wiring harness.
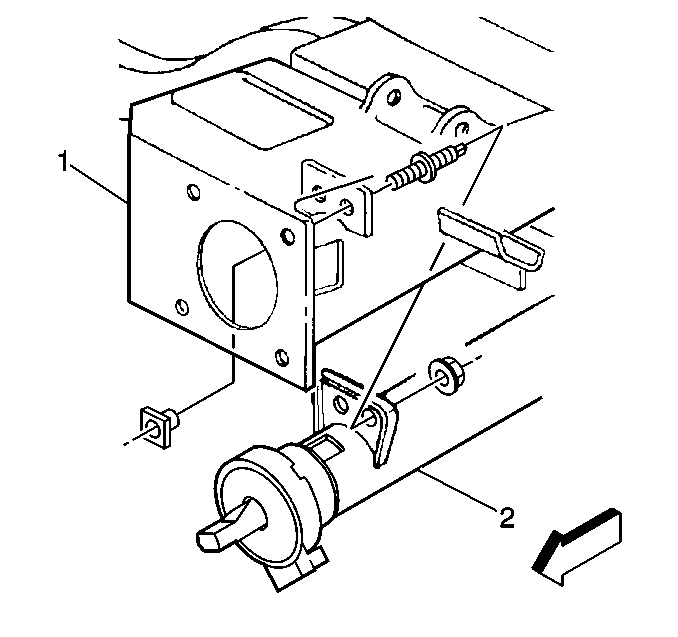
- Remove the nuts from lower steering column support plate (1).
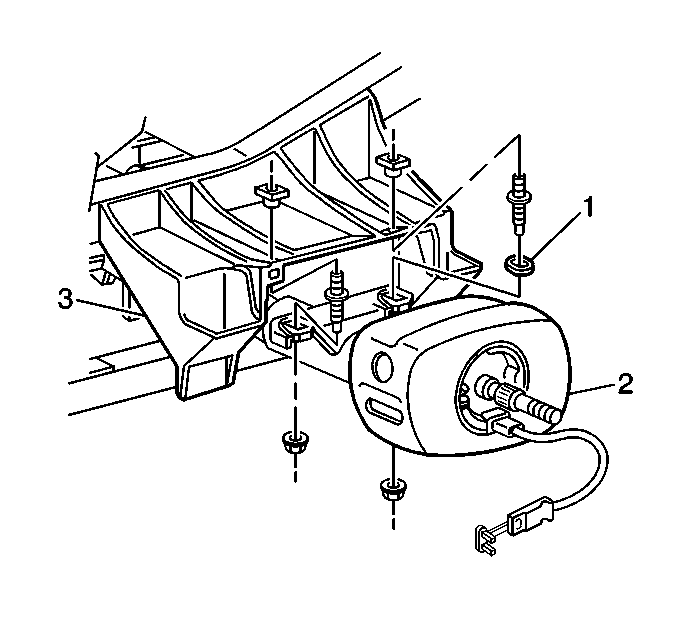
- Remove the upper steering column bracket nuts from the upper reinforcement assembly (3).
- Slide the steering column (2) off of the intermediate shaft.
- Remove the steering column (2) from the vehicle.
Important: If the steering column connectors are disconnected with the ignition in the ON position, the BCM will enter a fail enable mode and prevent steering column lock operation. The PCM will also inhibit vehicle motion by disabling fuel. To clear the BCM fail enable mode, disconnect the BCM fuse #25 for 15 seconds.


Rotate the steering column clockwise as the bottom of the steering column reaches the reinforcement assembly. This will allow the telescoping steering column motor and the steering wheel position sensor room to clear the instrument panel brace.
Installation Procedure
- Position the steering column assembly (2) into the vehicle and insert the lower steering shaft assembly into the upper coupling of the intermediate shaft.
- Install the cross car locating bushing (1) on the right hand mounting stud.
- Install the upper steering column bracket nuts to the upper reinforcement assembly (3).
- Install the lower steering column support plate (1) nuts.
- Turn the steering wheel far enough to the left to gain access to the upper coupling of the intermediate shaft.
- Install the upper coupling bolt.
- Connect all the electrical connectors (except the SIR) to the instrument panel wiring harness.
- Remove J 42640 from the steering column.
- Install the driver knee bolster bracket (1). Refer to Knee Bolster Bracket Replacement in Instrument Panel, Gages and Console.
- Install the driver knee bolster trim panel. Refer to Driver Knee Bolster Panel Replacement in Instrument Panel, Gauges and Console.
- Install the steering wheel inflator module. Refer to Inflatable Restraint Steering Wheel Module Replacement in SIR.
- Perform the SIR Diagnostic System Check. Refer to A Diagnostic System Check - SIR in SIR.
- Perform the SWPS plausibility test. Refer to Steering Wheel Position Sensor Plausibility Test in ABS Brakes.

Notice: Use the correct fastener in the correct location. Replacement fasteners must be the correct part number for that application. Fasteners requiring replacement or fasteners requiring the use of thread locking compound or sealant are identified in the service procedure. Do not use paints, lubricants, or corrosion inhibitors on fasteners or fastener joint surfaces unless specified. These coatings affect fastener torque and joint clamping force and may damage the fastener. Use the correct tightening sequence and specifications when installing fasteners in order to avoid damage to parts and systems.
Tighten
Tighten the upper steering column bracket nuts to 24 N·m
(17 lb ft).

Tighten
Tighten the lower steering column support plate nuts to 24 N·m
(17 lb ft).

Tighten
Tighten the upper coupling bolt to 48 N·m (35 lb ft).

