For 1990-2009 cars only
Removal Procedure
- Disconnect the negative battery cable.
- Relieve the fuel system pressure. Refer to the Fuel System Pressure Relief Procedure.
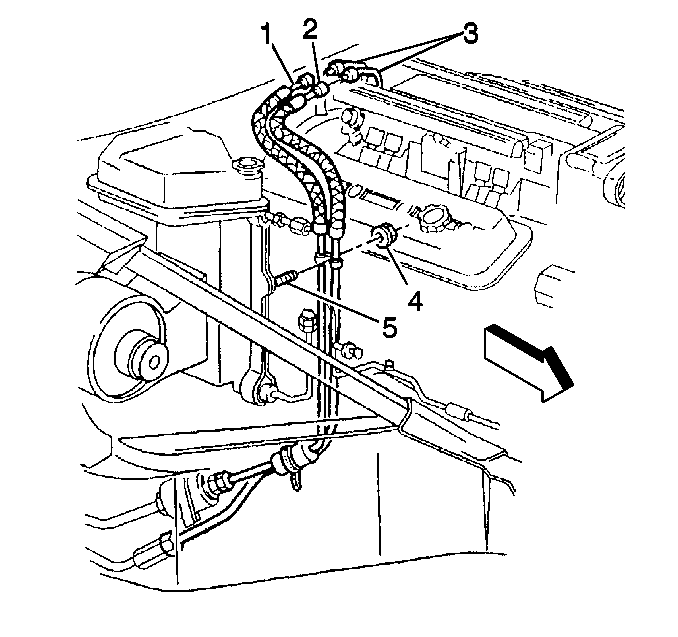
- Remove the fuel pipe retaining nut (4) from the A/C evaporator and blower module stud (5).
- Raise the vehicle.
- Remove the lower underbody brace bolts and nuts and remove the underbody brace (convertible only).
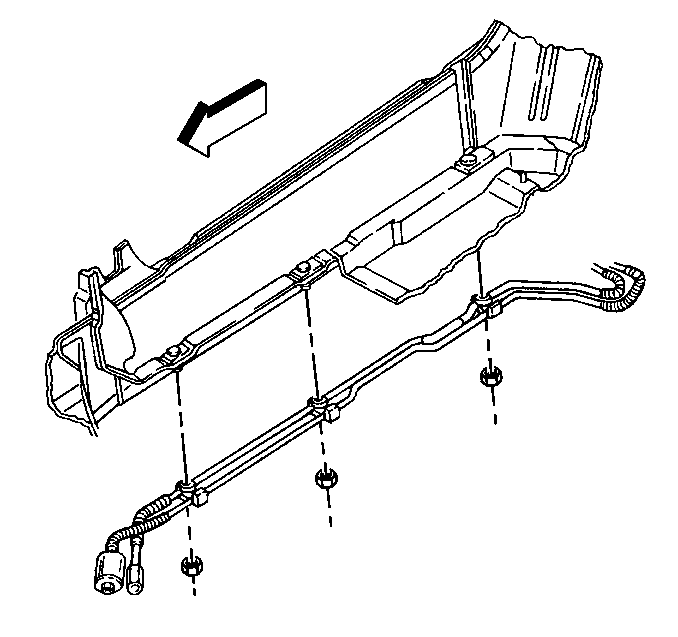
- Remove the chassis fuel pipe retaining nuts.
- Clean all the fuel filter connections and the surrounding areas before disconnecting the fuel lines in order to avoid possible contamination of the fuel system.
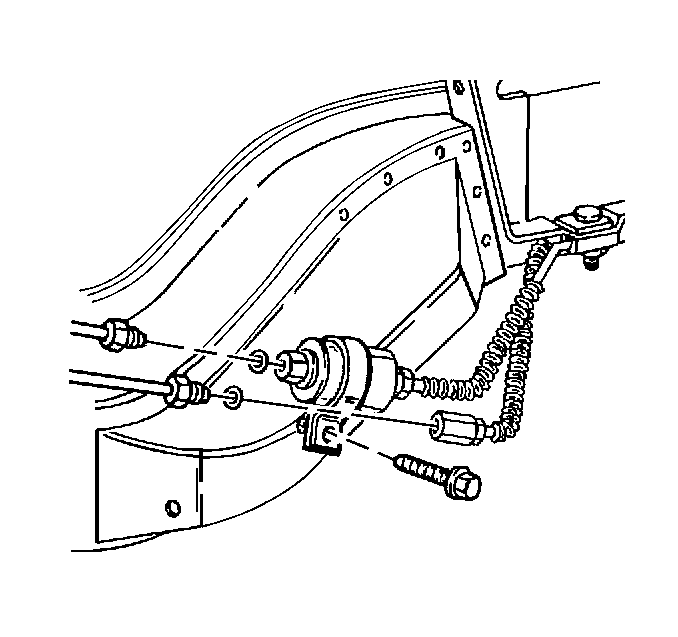
- Remove the fuel inlet pipe from the fuel filter.
- Reposition the fuel inlet pipe to gain access to the fuel filter. Drain any remaining fuel into an approved container.
- Remove the fuel filter attaching screw and the fuel filter bracket.
- Hold the pipe outlet nut and turn the fuel filter to remove.
- Inspect the fuel pipe O-rings for cuts, nicks, swelling, or distortion. Replace the O-rings if necessary.

Important:
• There is no service interval for fuel filter replacement. Only
replace a restricted fuel filter. • Inspect the fuel tank internally and clean the fuel tank if you
find a restricted fuel filter.


Installation Procedure
- Loosely install the new fuel filter on the outlet side fuel pipe.
- Connect the fuel inlet nut to the fuel filter.
- Install the fuel filter bracket and the attaching screw.
- Install the chassis fuel pipe retaining nuts.
- Install the lower underbody brace and the underbody brace bolts and nuts (convertible only).
- Lower the vehicle.
- Install the fuel pipe retaining nut (4) to the A/C evaporator and blower module stud (5).
- Tighten the fuel filler cap.
- Connect the negative battery cable.
- Inspect for leaks.

Tighten
Tighten the fuel pipe fittings to 27 N·m (20 lb ft).
Tighten
Tighten the fuel filter bracket attaching screw to 6 N·m
(53 lb in).

Tighten
Tighten the chassis fuel pipe retaining nuts to 4.5 N·m
(40 lb in).
Tighten
| • | Tighten the underbody brace nuts to 27 N·m (20 lb ft). |
| • | Tighten the underbody brace bolts to 62.5 N·m (46 lb ft). |

Tighten
Tighten the fuel pipe retaining nut to 4.5 N·m (40 lb in).
| 10.1. | Turn the ignition switch ON for 2 seconds. |
| 10.2. | Turn the ignition switch OFF for 10 seconds. |
| 10.3. | Turn the ignition switch ON. |
| 10.4. | Check for fuel leaks. |
