Transfer Case Output Shaft Seal Replacement Rear Output Shaft Seal
Tools Required
J 29162
Rear Output Shaft Seal Installer.
Removal Procedure
- Raise the vehicle. Refer to
Lifting and Jacking the Vehicle
in General Information.
- If equipped, remove the transfer case shields. Refer to
Shield Replacement
.
- Remove rear propeller shaft. Refer to
One-Piece Propeller Shaft Replacement
or
Two-Piece Propeller Shaft Replacement
in Propeller Shaft.
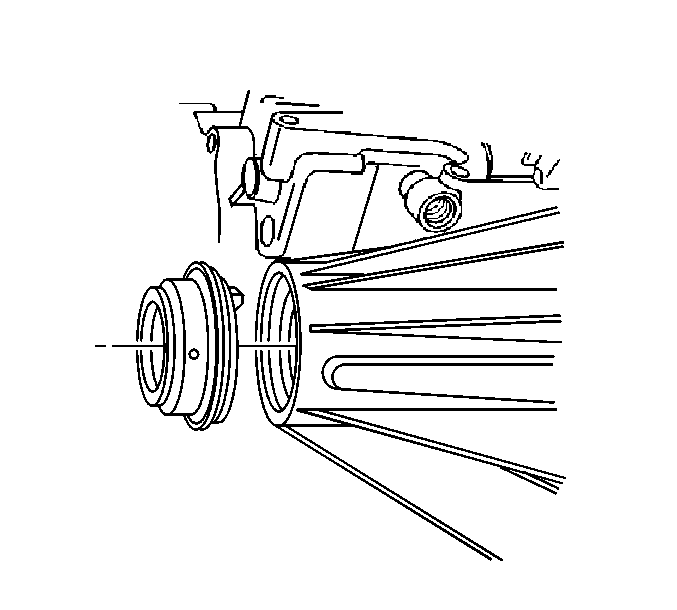
- Remove the rear output shaft seal.
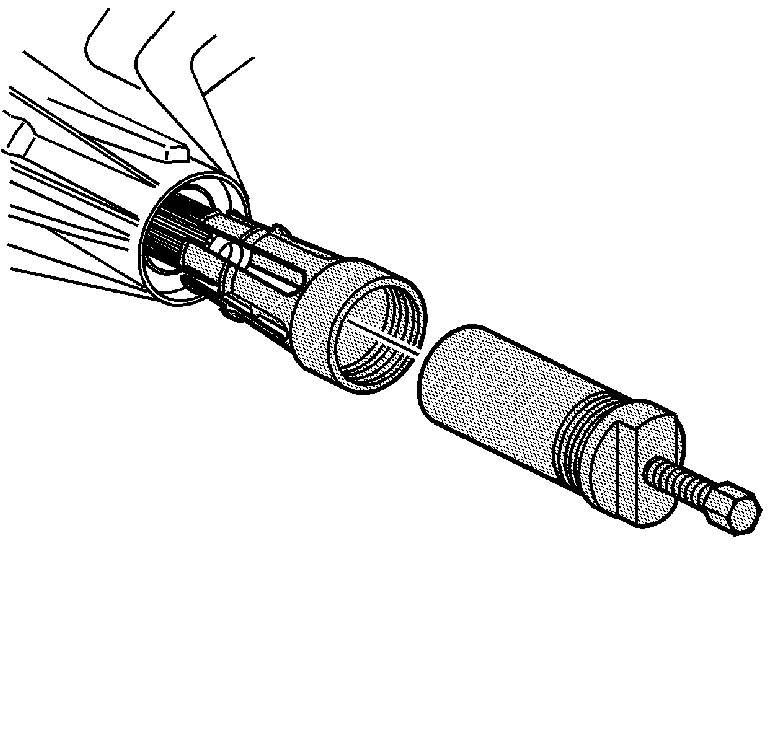
- Inspect the rear output shaft bushing for scoring or wear.
- If the vehicle is equipped with a light duty transfer case, remove the rear output shaft bushing if required, using the
J 45380
.
| • | Install the finger section of the
J 45380
in front of the bushing. |
| • | Install the tube and forcing screw to the finger section. Ensure the forcing screw is backed out. |
| • | Using a wrench on the forcing screw, remove the rear output shaft bushing. |
- If the vehicle is equipped with a super heavy duty transfer case, refer to
Transfer Case Replacement
.
Installation Procedure
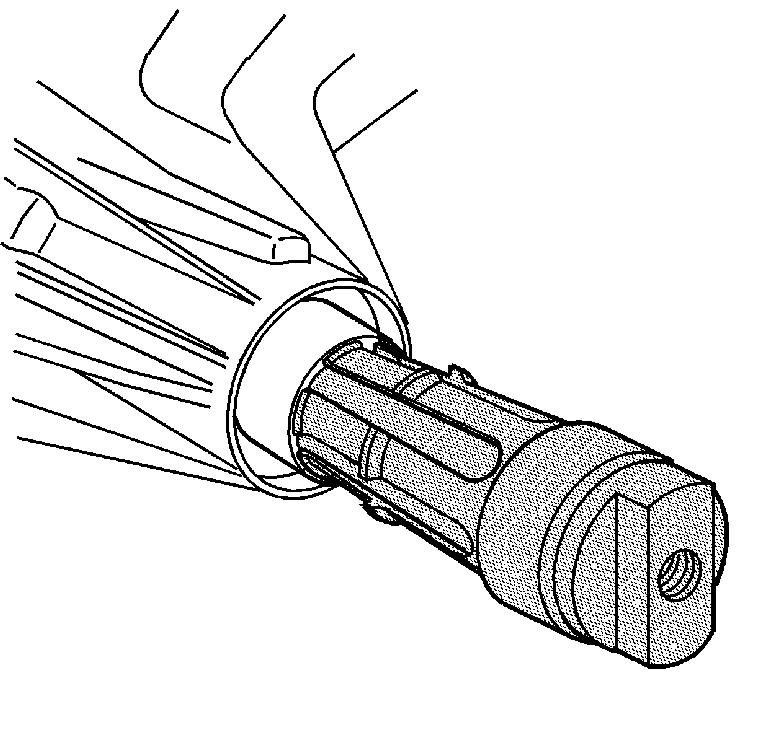
- If the vehicle is equipped with a light duty transfer case, install a NEW rear output shaft bushing, if required using the
J 45380
| • | Install the bushing or the finger section of the
J 45380
. |
| • | Install the finger section to the main body of the
J 45380
. |
| • | Position the bushing and tool to the case. |
| • | Using a hammer and the
J 45380
, install the bushing. |
- If the vehicle is equipped with a super heavy duty transfer case, remove the transfer case. Refer to
Transfer Case Replacement
.
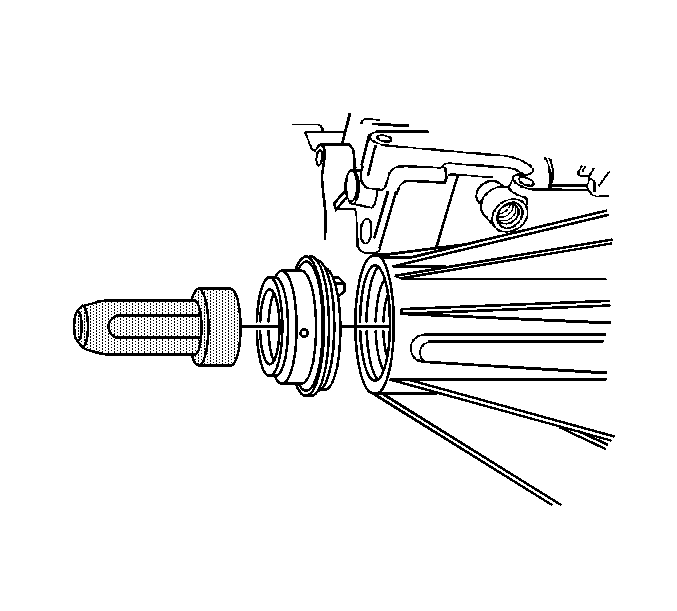
- Install the seal.
| 3.1. | Lubricate the seal mating surface with DEXRON® III oil GM P/N 12346143. |
| 3.2. | Install the seal using the
J 29162
. |
- Install the rear propeller shaft. Refer to
One-Piece Propeller Shaft Replacement
or
Two-Piece Propeller Shaft Replacement
in Propeller Shaft.
- Check the transfer case oil level and add oil as necessary. Refer to
Oil Replacement
.
- If equipped, install the transfer case shields. Refer to
Shield Replacement
.
- Lower the vehicle.
Transfer Case Output Shaft Seal Replacement Front Output shaft Seal
Removal Procedure
- Raise the vehicle. Refer to
Lifting and Jacking the Vehicle
in General Information.
- If equipped, remove the transfer case shields. Refer toShield Replacement
.
- Remove front propeller shaft. Refer to
Front Propeller Shaft Replacement
in Propeller Shaft.
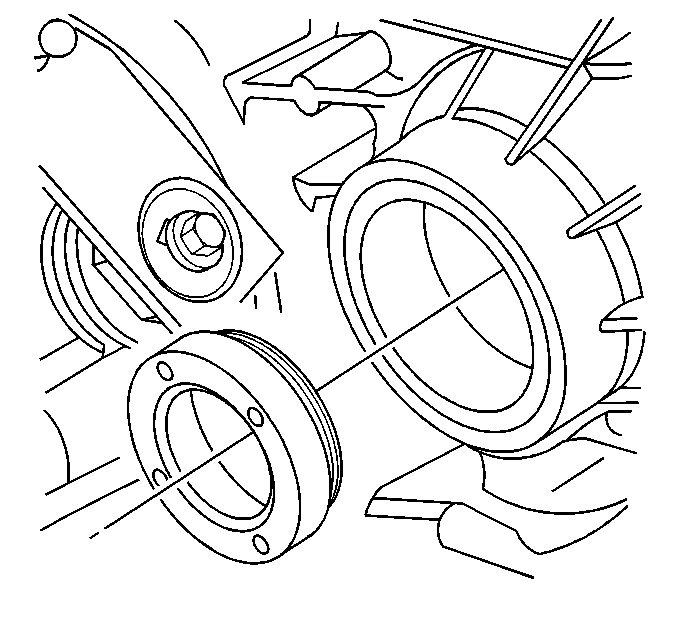
- Remove the front output shaft seal.
| • | Remove the inner sleeve of the seal first in order to remove the seal
from the transfer case |
| • | Remove the outer area of the seal after removal of the inner sleeve of
the seal. |
Installation Procedure
Tools Required
J 43484 Front Output Shaft
Seal Installer (midyear 1999 and later seal) J 35870
Front Output Shaft Seal Installer (start of production to midyear
1999 seal)

- Install the seal.
| 1.1. | Lubricate the seal mating surfaces with Dexron® III oil GM P/N 12346143. |
| 1.2. | Install the seal using the J 35870
for installation of start of production to midyear 1999 seal, or J 43484
for installation of midyear
1999 and later seal. |
| 1.3. | Ensure the seal is positioned straight during installation. |
- Check the transfer case oil level and add oil as necessary. Refer to
Oil Replacement
.
- Install the front propeller shaft. Refer to
Front Propeller Shaft Replacement
in Propeller Shaft.
- If equipped, install the transfer case shields. Refer toShield Replacement
.
- Lower the vehicle.


