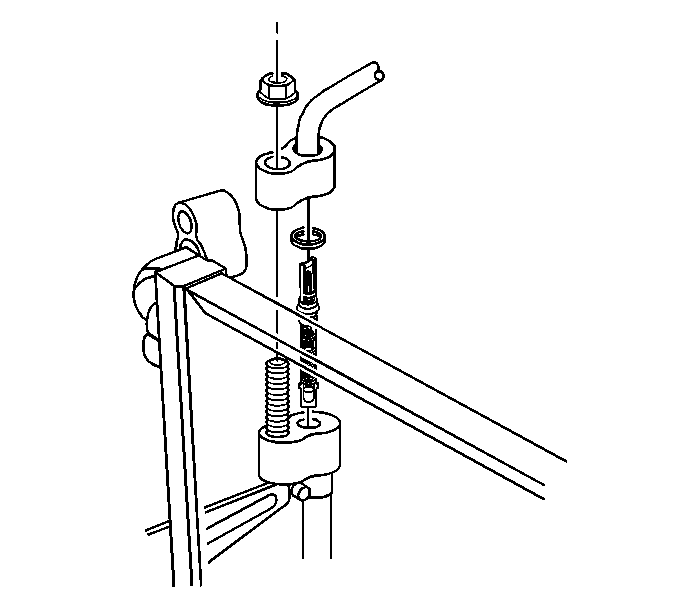
For 1990-2009 cars only
Tools Required
| • | J 39400-A Halogen Leak Detector |
| • | J 26549-E Orifice Tube Remover |
Removal Procedure
- Remove the evaporator tube. Refer to Evaporator Tube Replacement .
- Remove the evaporator tube from the condenser tube.
- Use theJ 26549-E in order to remove the expansion orifice tube.
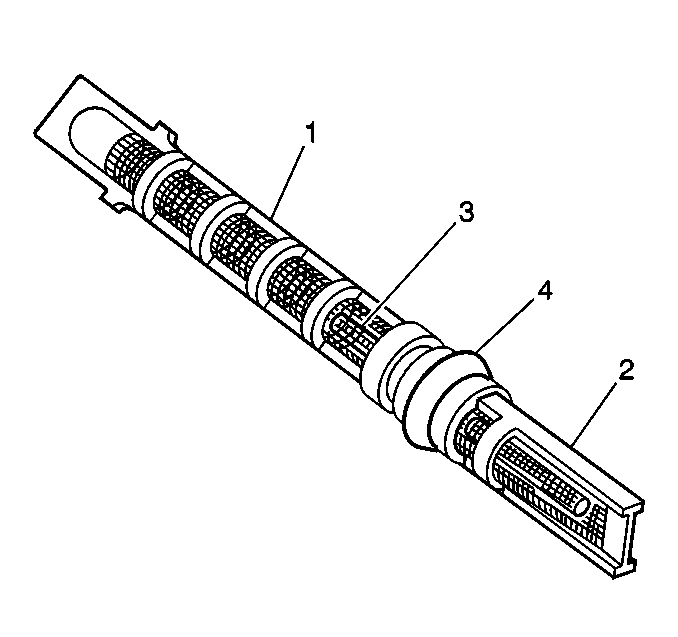
- Inspect the expansion (orifice) tube for the following conditions and clean or replace with a new tube as indicated:


| • | Broken plastic frame, replace tube. |
| • | Filter screen (1,2) torn, damaged or plugged with fine gritty material, replace tube. |
| • | Brass orifice tube (3) damaged or plugged, replace tube. |
| • | Filter screen (1) coated with metal chips, flakes, or slivers--coating may be removed with low pressure shop air and reused if cleaned satisfactorily. |
| • | If reusing the tube, install a new O-ring (4). |
Installation Procedure
- Lightly coat the new orifice tube O-ring seal (4) with mineral base 525 viscosity refrigerant oil.
- Remove the cap or tape from the evaporator tube.
- Using needle-nose pliers, CAREFULLY grasp the edge of the expansion (orifice) tube (short filter screen (2) inlet side of tube) without touching the filter screen and insert the tube (long filter screen (1) outlet side first) fully into the evaporator line.
- Using a lint-free clean, dry cloth, carefully clean the sealing surfaces of the tube fittings.
- Install a new O-ring seal on the condenser tube.
- Install the evaporator tube. Refer to Evaporator Tube Replacement .
- Evacuate and recharge the A/C system. Refer to Refrigerant Recovery and Recharging .
- Leak test the fittings of the component using the J 39400-A .
- Install the hood close out filler panel. Refer to Hood Close Out Filler Replacement in Body Front End.


Coat the O-ring seal with 525 viscosity refrigerant oil.
