F/CMVSS Noncompliance - Cold Spot Welds

| Subject: | 01072 -- Cold Spot Welds |
| Models: | 2002 Chevrolet Camaro and Pontiac Firebird |
Condition
General Motors has decided that certain 2002 Chevrolet Camaro and Pontiac Firebird model vehicles fail to conform to Federal/Canada Motor Vehicle Safety Standard (FMVSS/CMVSS) FMVSS 208, "Occupant Crash Protection," CMVSS 208 "Occupant Restraint Systems in Frontal Impact," and FMVSS 214 "Side Impact Protection," CMVSS 214 "Side Door Strength." These vehicles may have four welds attaching the front body hinge pillar outer to the front body hinge pillar reinforcement near the lower driver's side door hinge that do not meet GM's specifications. In a crash, an occupant could receive more severe injuries.
Correction
Dealers are to install three structural rivets.
Vehicles Involved
Involved are certain 2002 Chevrolet Camaro and Pontiac Firebird model vehicles built within these VIN breakpoints:
Year | Division | Model | Plant | From | Through |
|---|---|---|---|---|---|
2002 | Chevrolet | Camaro | Ste. Therese | 22121761 | 22125702 |
2002 | Pontiac | Firebird | Ste. Therese | 22121781 | 22125701 |
Important: Dealers should confirm vehicle eligibility through GMVIS (GM Vehicle Inquiry System) or GM Access Screen (Canada only) before beginning recall repairs. [Not all vehicles within the above breakpoints may be involved.]
Involved vehicles have been identified by Vehicle Identification Number. Computer listings containing the complete Vehicle Identification Number, customer name and address data have been prepared, and are being furnished to involved dealers with the recall bulletin. The customer name and address data furnished will enable dealers to follow up with customers involved in this recall. Any dealer not receiving a computer listing with the recall bulletin has no involved vehicles currently assigned.
These dealer listings may contain customer names and addresses obtained from Motor Vehicle Registration Records. The use of such motor vehicle registration data for any other purpose is a violation of law in several states/provinces/countries. Accordingly, you are urged to limit the use of this listing to the follow-up necessary to complete this recall.
Parts Information
Important: A 100% supply of parts required to complete this recall will be pre-shipped to involved dealers of record. This pre-shipment is scheduled to begin the week of December 10, 2001. Parts received for a recently transferred vehicle should be forwarded by the original dealer (with a phone call) to the dealer that received the transferred vehicle. Pre-shipped parts will be charged to dealer's open parts account.
Additional parts, if required, are to be obtained from General Motors Service Parts Operations (GMSPO). Please refer to your "involved vehicles listing" before ordering parts. Normal orders should be placed on a DRO = Daily Replenishment Order. In an emergency situation, parts should be ordered on a CSO = Customer Special Order.
Part Number | Description | Qty/ Vehicle |
|---|---|---|
09442977 | Rivet - Dome Head Type FS | 3 |
10184895 | Rivet, Frt Bpr Fascia Reinf (Plastic) (Camaro w/Y3F Aero Mldg only) | 2 (Pre-pkg/Qty 10) |
Service Procedure
2002 F Car Driver's Door Hinge Pillar - Install Rivets Above and Below Lower Hinge Plate
The following service procedure describes how to install three rivets in the driver's door opening hinge pillar, above and below the lower hinge. One of the rivets must be installed from inside the vehicle and the remaining two from outside. Because of this, the procedure is broken down into two sections. The first section covers the work that is done from inside the vehicle, and the second section covers the work done from outside the vehicle. To complete this recall, both sections of this procedure must be performed.
Important: Before beginning this procedure, make a copy of the two templates included in this recall bulletin and cut them out using scissors. The template copies will be used for properly determining hole locations for drilling. When photocopying the templates, be aware that some copiers may not make an exact copy of the original. Some may make the copy slightly smaller or larger than the original. Adjust the photocopier settings as necessary to make an exact size copy of the templates.
From Inside the Vehicle
- Open the driver's door and remove the floor mat.
- Remove the five Phillip's head screws attaching the carpet retainer molding and remove the molding.
- Remove the two 10 mm hex head screws attaching the hood latch release handle to the body and reposition the handle out of the way.
- Release the clip attaching the wiring harness to the plastic insulator panel.
- Remove the round push-in retainer that attaches the plastic insulator side panel to the body sheet metal.
- Reposition the carpet away from the plastic insulator panel.
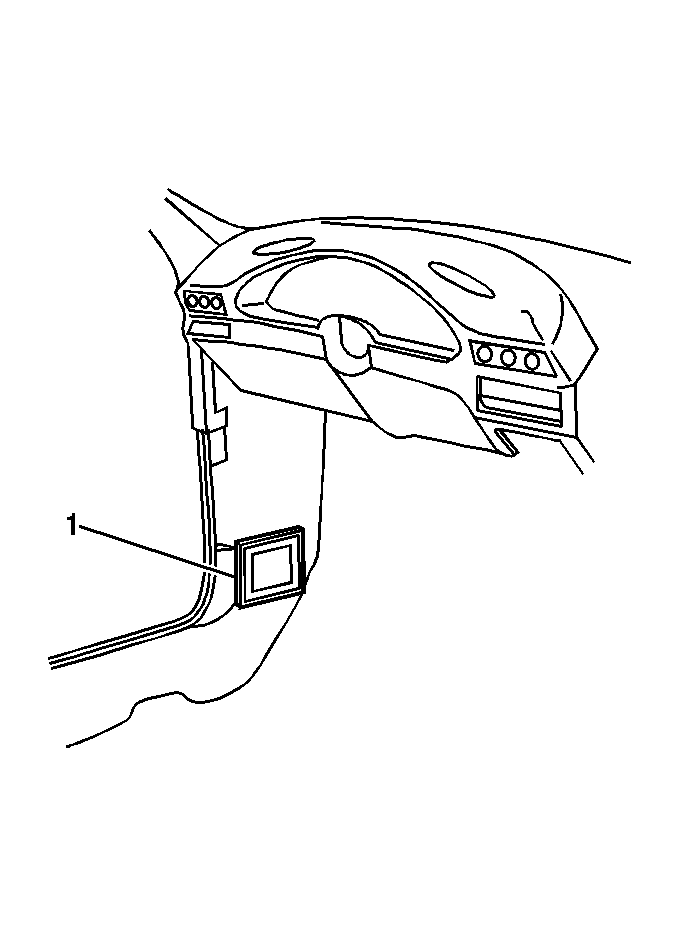
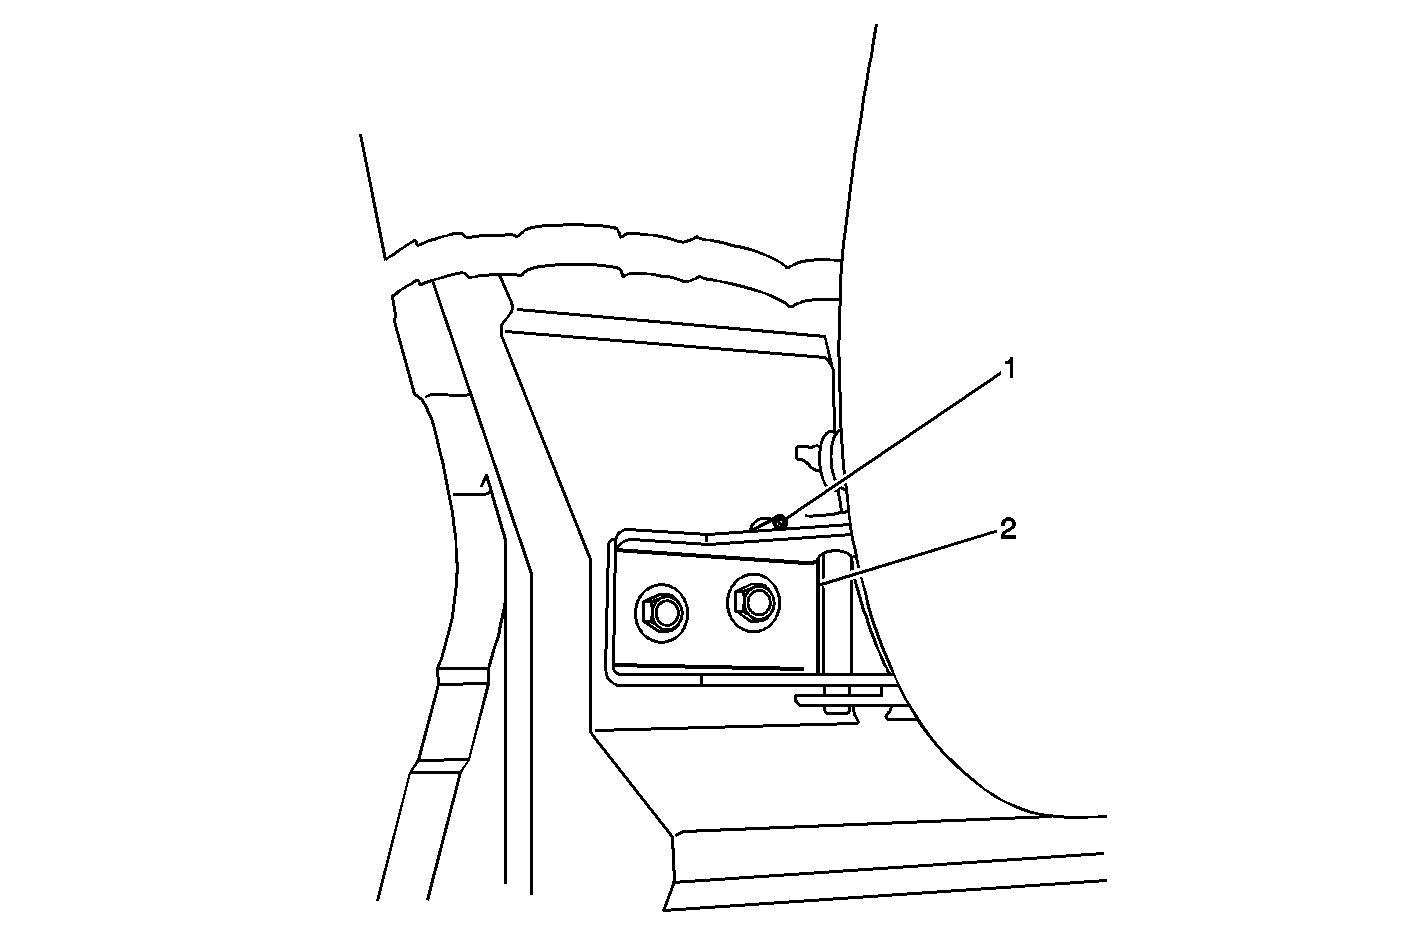
- Reposition the wiring harness and pull the plastic side insulator panel away from the body sheet metal to expose the sound deadening material (1).
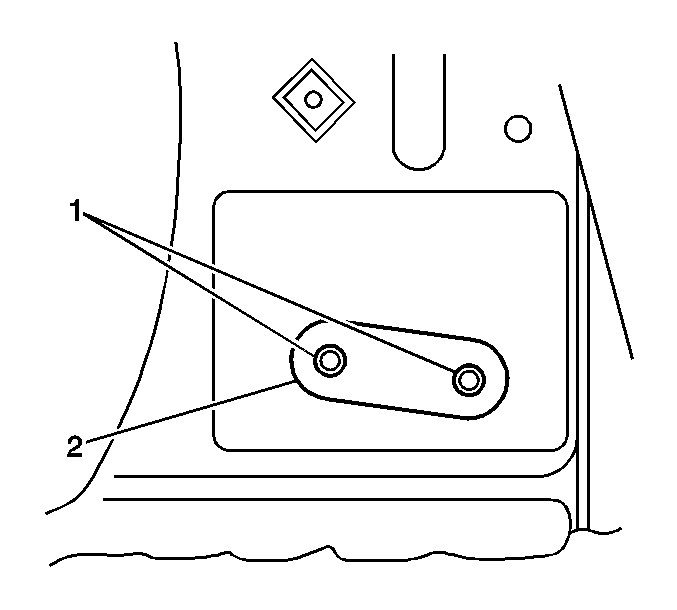
- Carefully remove the sound deadening material from over the opening in the body sheet metal. Once removed, the ends of the two lower hinge attaching bolts (1) and the tapping plate (2) can be seen through the opening.
- Using a pair of scissors, make a hole in the center of the two circles that contain an "X" in the smaller template.
- Carefully position the COPY of the smaller template inside the opening in the body sheet metal so that the two hinge bolts protrude through the two holes made in the template in the previous step. When properly positioned, the template will be positioned as shown above.
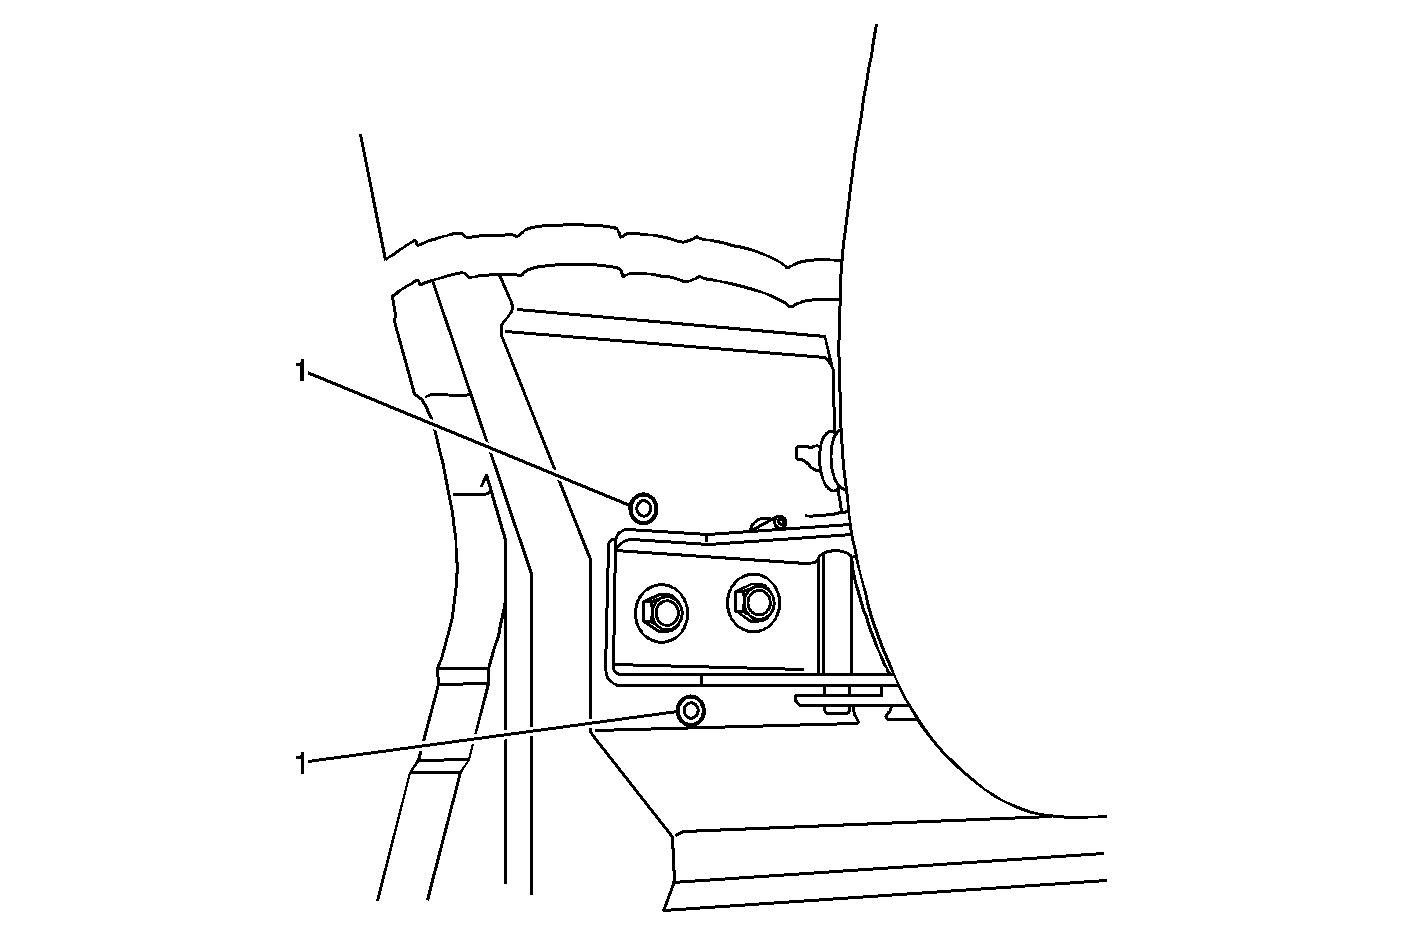
- Center punch and drill a 1/8 in diameter PILOT hole (1) through the body sheet metal at the location shown on the template. At this time , the template may be removed.
- Using a 17/64 in drill bit, increase the size of the pilot hole to allow for installation of the rivet.
- Remove any metal burrs or debris from the drilled hole. Touch-up the drilled hole as necessary using the information found in the applicable Service Manual and GM Refinish Material Booklet #4901M-D-2001 (English) or #4901M-D-F2001 (French).
- Using the appropriate size rivet gun, install rivet, P/N 9442977 into the drilled hole (1).
- Reinstall the sound deadening material over the hole in the body sheet metal.
- Reposition the plastic side insulator panel to the body sheet metal and install the round plastic push-in retainer.
- Reposition the wiring harness and secure to the plastic side insulator with a clip.
- Reposition the carpet.
- Install the hood latch release to the body sheet metal and install the two 10 mm hex head screws.
- Install the carpet retainer and install the five Phillips head screws.
- Reinstall the floor mat.
Important: It is not necessary to remove the sound insulator/close-out panel from below the instrument panel in order to reposition the side insulator panel in the next step.
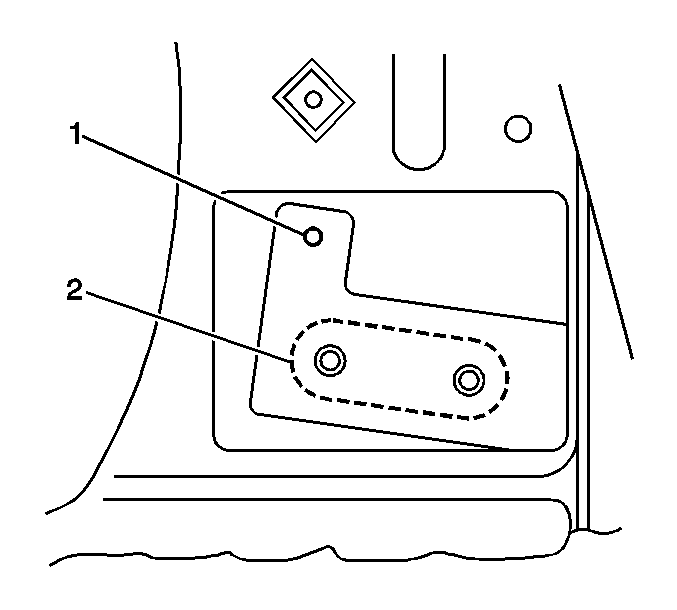
Important: Because the tapping plate (2) is behind it, the template will not fit flush against the sheet metal when installed in the next step.

Important: To avoid a rattle condition, be careful not to allow the rivet mandrel to fall down into the body opening when the rivet is installed in the next step.
Important: Only install a rivet with part number 9442977 in the next step. Do NOT substitute another type of rivet or a rivet with a different part number.
Tighten
Tighten the screws to 7 N·m (62 lb in).
Tighten
Tighten the screws to 1.5 N·m (14 lb in).
From Outside the Vehicle
- Place the ignition switch in the OFF position so that the front wheels can be turned left or right from outside the vehicle as necessary.
- Open the hood.
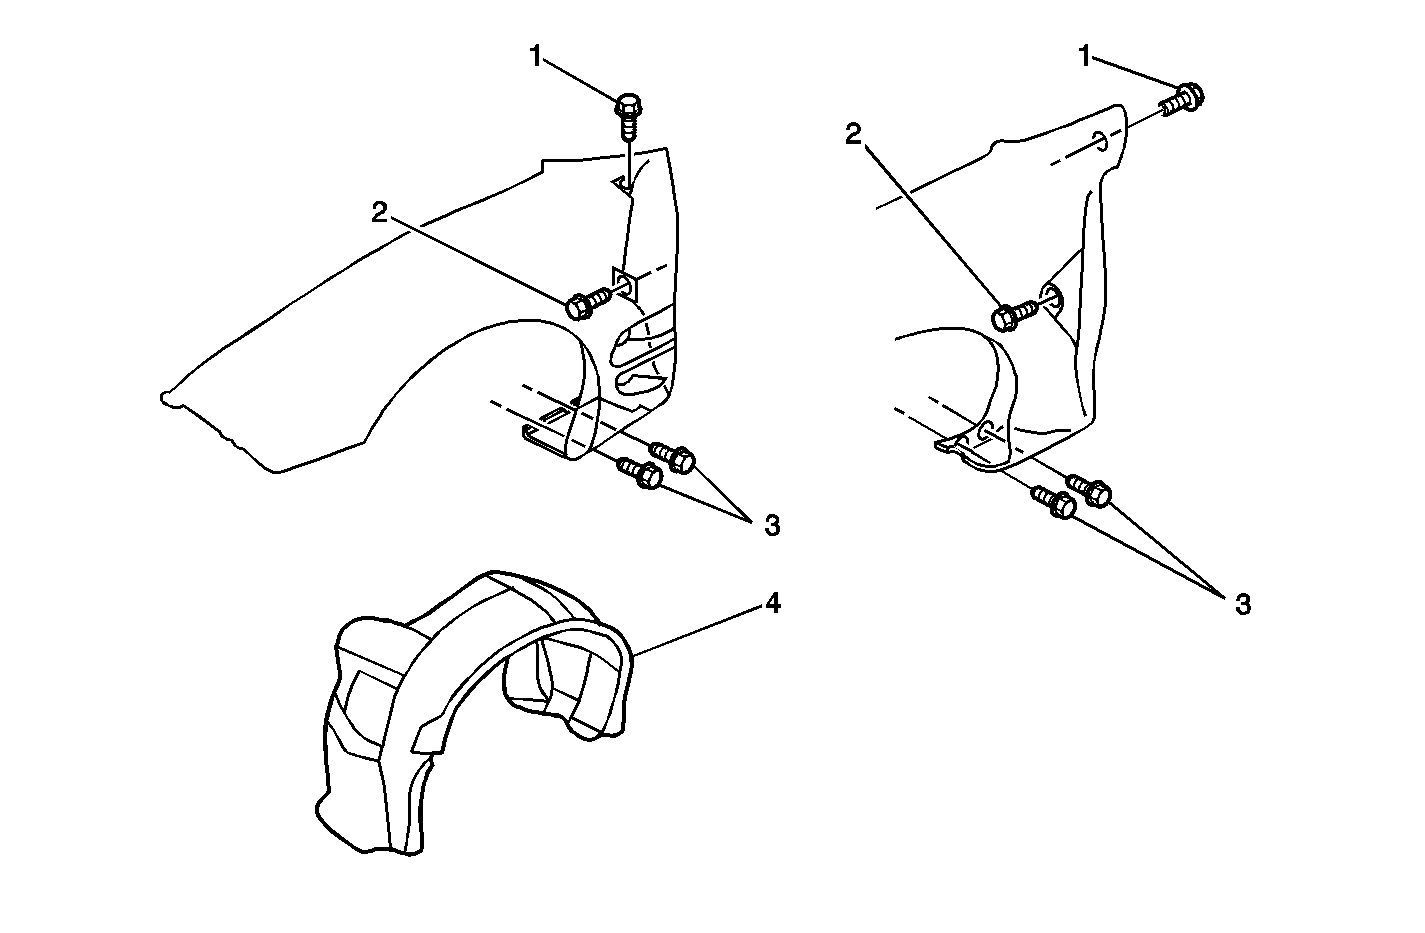
- Remove the upper rear bolt (1) that attaches the left front fender. On Camaro models, the bolt can be accessed through the driver's door opening. On Firebird models, the bolt can be accessed from outside the vehicle by slightly repositioning the outboard end of the leaf screen at the base of the windshield.
- Raise the vehicle on a suitable hoist.
- On Camaro models with a plastic rocker molding, remove the two plastic rivets and other fasteners attaching the rocker molding to the sheet metal and remove the molding. On Firebird models with a plastic rocker molding, remove all the fasteners except the two nuts that attach the rocker molding to the sheet metal. Do not attempt to remove the molding from the front fender until instructed to in Step 7.
- Remove the screws and push-in fasteners that attach the front wheelhouse panel to the vehicle and remove the panel (4).
- On Firebird models with a plastic rocker molding, remove the two nuts that attach the front of the rocker molding to the front fender and remove the rocker molding.
- Remove the middle rear bolt (2) that attaches the left front fender.
- Remove the two lower rear bolts (3) that attach the bottom of the left front fender.
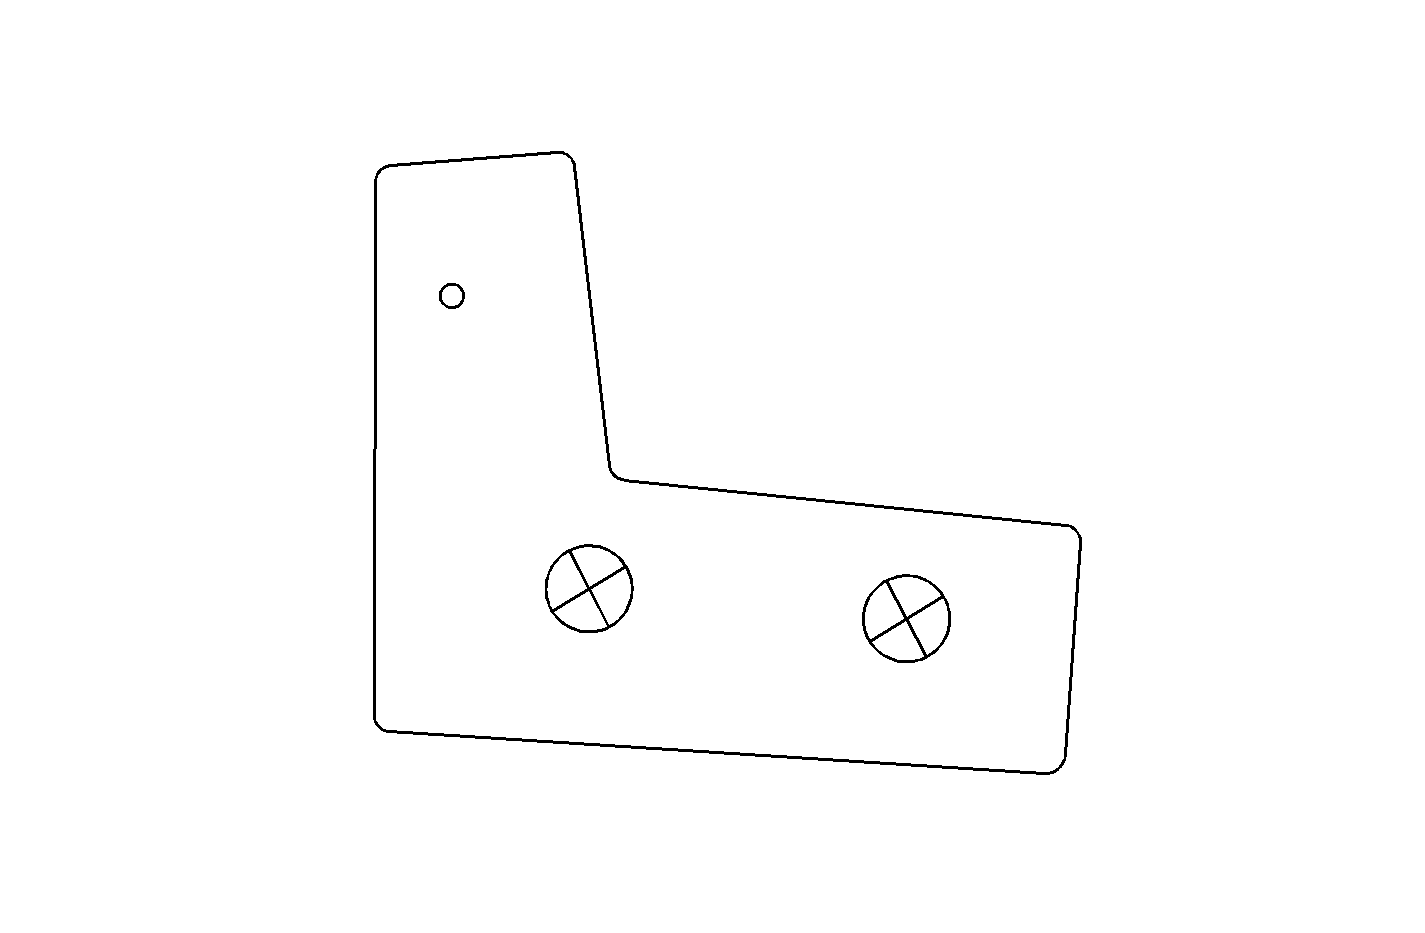
- To access the lower door hinge (2), carefully pull the bottom of the left front fender outwards. Support the fender in this position with a block of wood. At this time, you will be able to see the backside of the rivet (1) installed from inside the vehicle.
- To avoid paint damage when drilling and riveting, apply several layers of masking tape to the front edge of the driver's door in the area of the lower door hinge. Also apply masking tape to the rear edge of the front fender.
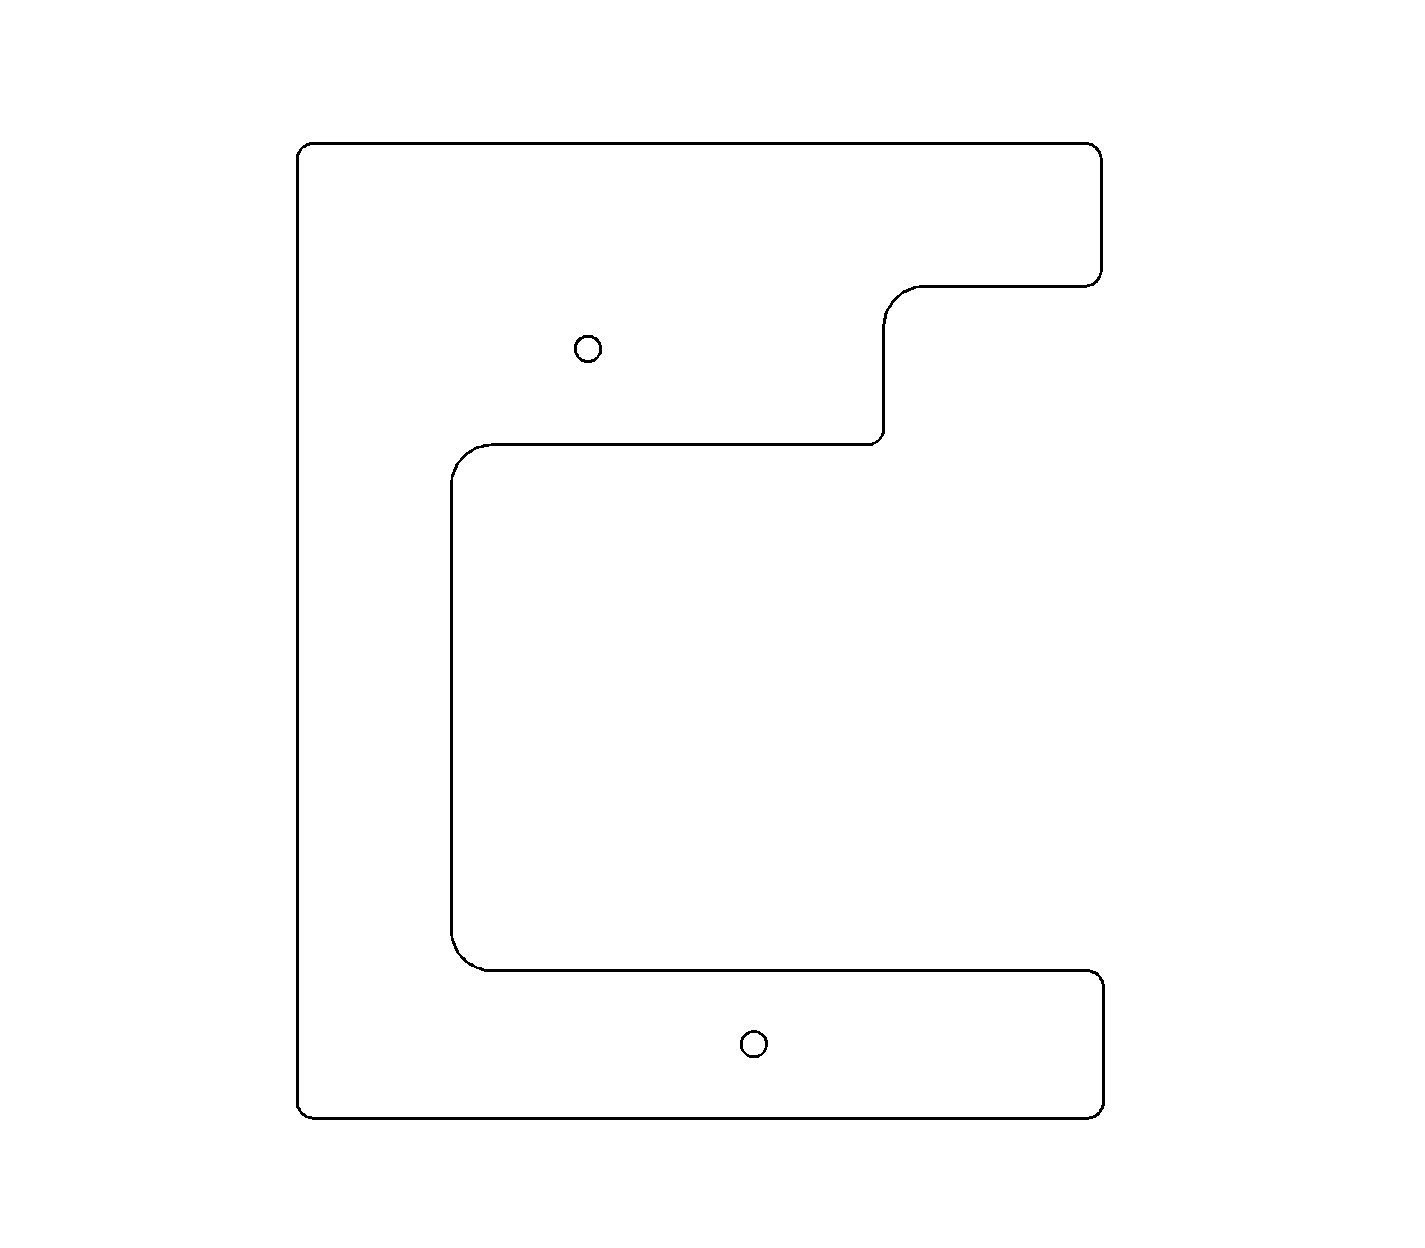
- Carefully position the COPY of the larger template (1) to the hinge pillar sheet metal at the lower hinge (2) as shown.
- Center punch and drill a 1/8 in diameter PILOT hole through the hinge pillar sheet metal at the two locations (3) shown on the template. At this time the template may be removed.
- Using a 17/64 in drill bit, increase the size of both pilot holes to allow for installation of the rivets.
- Remove any metal burrs or debris from the drilled hole. Touch-up the drilled hole as necessary using the information found in the applicable Service Manual and GM Refinish Material Booklet #4901M-D-2001 (English) or #4901M-D-F2001 (French).
- Using the appropriate size rivet gun, install a rivet, P/N 9442977, into each of the drilled holes (1).
- Apply primer and body colored touch-up paint to the exposed side of all three rivets installed.
- Remove the masking tape from the door and front fender.
- Remove the block of wood supporting the front fender and position the front fender back to the body.
- Align the fender to the door and install the two lower rear bolts.
- Install the middle rear fender bolt.
- On Firebird models equipped with the plastic rocker molding, position the rocker molding to the body and install the two nuts that attach the molding to the fender.
- Position the front wheelhouse panel to the vehicle and install the push-in fasteners and screws.
- On Firebird models equipped with the plastic rocker molding, install the remaining rocker molding fasteners.
- On Camaro models equipped with the plastic rocker molding, position the rocker molding to the body and install the fasteners. Install two new rivets, P/N 10184895 to the front end of the molding.
- Lower the vehicle.
- Install the upper rear fender bolt.
- Install the GM Recall Identification Label and close the hood.

Important: Only install a rivet with part number 9442977 in the next step. Do NOT substitute another type of rivet or a rivet with a different part number.
Tighten
Tighten the bolts to 5.5 N·m (49 lb in).
Tighten
Tighten the bolts to 5.5 N·m (49 lb in).
Tighten
Tighten the nuts to 6 N·m (53 lb in).
Tighten
Tighten the larger screws to 10 N·m (89 lb in) and the smaller screws to 1.5 N·m (13 lb in).
Tighten
Tighten the fasteners to 1.5 N·m (13 lb in).
Tighten
Tighten the fasteners to 1.5 N·m (13 lb in).
Tighten
Tighten the bolt to 5.5 N·m (49 lb in).
Template (actual size)
Template (actual size)
Recall Identification Label
FOR US
Place a Recall Identification Label on each vehicle in accordance with the instructions outlined in this Product Recall Bulletin. Each label provides a space to include the recall number and the five (5) digit dealer code of the dealer performing the recall service. This information may be inserted with a typewriter or a ball point pen.
Put the Recall Identification Label on a clean and dry surface of the radiator core support in an area that will be visible to people servicing the vehicle. When installing the Recall Identification Label, be sure to pull the tab to allow the adhesion of the clear protective covering. Additional Recall Identification Labels for US dealers can be obtained from Dealer Support Materials by calling 1-866-700-0001 (Monday-Friday, 8:00 am to 5:00 pm EST). Ask for Item Number S-1015 when ordering.
Recall Identification Label
FOR CANADA
Place a Recall Identification Label on each vehicle in accordance with the instructions outlined in this Product Recall Bulletin. Each label provides a space to include the recall number and the five (5) digit dealer code of the dealer performing the recall service. This information may be inserted with a typewriter or a ball point pen.
Put the Recall Identification Label on a clean and dry surface of the radiator core support in an area that will be visible to people servicing the vehicle. Additional Recall Identification Labels for Canadian dealers can be obtained from DGN by calling 1-800-668-5539 (Monday-Friday, 8:00 am to 5:00 pm EST). Ask for Item Number GMP 91 when ordering.
Claim Information
Submit a Product Recall Claim with the information indicated below:
Repair Performed | Part Count | Part No. | Parts Allow | CC-FC | Labor Op | Labor Hours* |
|---|---|---|---|---|---|---|
Install Structural Rivets | 3 | 09442977 | ** | MA-96 | V0805 | 1.1 |
Add: Camaro w/Ground Effects Option Y3F | 2 | 10184895 |
|
| V0808 | 0.4 |
Add: Firebird w/Ground Effects Option W68 or Trans Am |
|
|
|
| V0809 | 0.4 |
* -- For Recall Administrative Allowance, add 0.1 hours to the "Labor Hours". ** -- The "Parts Allowance" should be the sum total of the current GMSPO Dealer Net price plus applicable Mark-Up for parts needed to complete the repair. | ||||||
Refer to the General Motors WINS Claim Processing Manual for details on Product Recall Claim Submission.
Customer Notification
FOR US AND CANADA
Customers will be notified of this recall on their vehicles by General Motors (see copy of customer letter included with this bulletin).
Dealer Recall Responsibility
FOR US
The US National Traffic and Motor Vehicle Safety Act provides that each vehicle that is subject to a recall of this type must be adequately repaired within a reasonable time after the customer has tendered it for repair. A failure to repair within sixty days after tender of a vehicle is prima facie evidence of failure to repair within a reasonable time. If the condition is not adequately repaired within a reasonable time, the customer may be entitled to an identical or reasonably equivalent vehicle at no charge or to a refund of the purchase price less a reasonable allowance for depreciation. To avoid having these burdensome remedies, every effort must be made to promptly schedule an appointment with each customer and to repair their vehicle as soon as possible. In the recall notification letters, customers are told how to contact the US National Highway Traffic Safety Administration if the recall is not completed within a reasonable time.
This bulletin is notice to you that the new motor vehicles included in this recall may not comply with the standard identified above. Under Title 49, Section 30112 of the United States Code, it is illegal for a dealer to sell a new motor vehicle which the dealer knows does not comply with an applicable Federal Motor Vehicle Safety Standard. As a consequence, if you sell any of these motor vehicles without first performing the recall correction, your dealership may be subject to a civil penalty for each such sale.
Dealer Recall Responsibility
ALL
All unsold new vehicles in dealers' possession and subject to this recall MUST be held and inspected/repaired per the service procedure of this recall bulletin BEFORE customers take possession of these vehicles.
Dealers are to service all vehicles subject to this recall at no charge to customers, regardless of mileage, age of vehicle, or ownership, from this time forward.
Customers who have recently purchased vehicles sold from your vehicle inventory, and for which there is no customer information indicated on the dealer listing, are to be contacted by the dealer. Arrangements are to be made to make the required correction according to the instructions contained in this bulletin. This could be done by mailing to such customers a copy of the customer letter accompanying this bulletin. Recall follow-up cards should not be used for this purpose, since the customer may not as yet have received the notification letter.
In summary, whenever a vehicle subject to this recall enters your vehicle inventory, or is in your dealership for service in the future, please take the steps necessary to be sure the recall correction has been made before selling or releasing the vehicle.
December, 2001Dear General Motors Customer:
This notice is sent to you in accordance with the requirements of the National Traffic and Motor Vehicle Safety Act.
Reason For This Recall
General Motors has decided that certain 2002 Chevrolet Camaro and Pontiac Firebird model vehicles fail to conform to Federal Motor Vehicle Safety Standard (FMVSS) FMVSS 208, "Occupant Crash Protection" and FMVSS 214 "Side Impact Protection." These vehicles may have four welds attaching the front body hinge pillar outer to the front body hinge pillar reinforcement near the lower driver's side door hinge that do not meet GM's specifications. In a crash, an occupant could receive more severe injuries.
What Will Be Done
Dealers are to install structural rivets. This service will be performed for you at no charge .
How Long Will The Repair Take?
The length of time required to perform this service correction is approximately 70 to 90 minutes. Additional time may be required to schedule and process your vehicle. If you dealer has a large number of vehicles awaiting service, this additional time may be significant. Please ask your dealer if you wish to know how much additional time will be needed schedule, process, and repair your vehicle.
Contacting Your Dealer
Please contact your dealer as soon as possible to arrange a service date. Parts are available and instructions for making this correction have been sent to your dealer.
Your dealer is best equipped to obtain parts and provide services to correct your vehicle as promptly as possible. Should your dealer be unable to schedule a service date within a reasonable time, you should contact the appropriate Customer Assistance Center at the number listed below:
Division | Number | Deaf, Hearing Impaired, or Speech Impaired* |
|---|---|---|
Chevrolet | 1-800-222-1020 | 1-800-833-2438 |
Pontiac | 1-800-762-2737 | 1-800-833-7668 |
Puerto Rico - English | 1-800-496-9992 |
|
Puerto Rico - Español | 1-800-496-9993 |
|
Virgin Islands | 1-800-496-9994 |
|
* Utilizes Telecommunication Devices for the Deaf/Text Telephones (TDD/TTY) | ||
If, after contacting the appropriate customer assistance center, you are still not satisfied that we have done our best to remedy this condition without charge and within a reasonable time, you may wish to write the Administrator, National Highway Traffic Safety Administration, 400 Seventh Street SW, Washington, DC 20590 or call 1-888-327-4236.
Customer Reply Card
The attached customer reply card identifies your vehicle. Presentation of this card to your dealer will assist in making the necessary correction in the shortest possible time. If you no longer own this vehicle, please let us know by completing the attached and mailing it in the postage paid envelope.
We are sorry to cause you this inconvenience; however, we have taken this action in the interest of your safety and continued satisfaction with our products.
General Motors Corporation
Enclosure
