Tools Required
| • | GM P/N 1052369, Loctite 312 Adhesive kit, 2-component
pack or the equivalent |
| • | A wax marking pencil or crayon |
| • | A window cleaning solution or window polishing compound |
| • | Fine grit emery cloth or sandpaper, number 320 or number 360 |
The rearview mirror support is installed by the window supplier, using
a plastic-polyvinyl butyl adhesive.
Service replacement windshields have the rearview mirror support bonded
to the windshield.
Notice: Do not use tools or other objects to pry the mirror mount or the mirror
away from the windshield. Using tools may damage the mirror mount, the mirror
or the windshield.

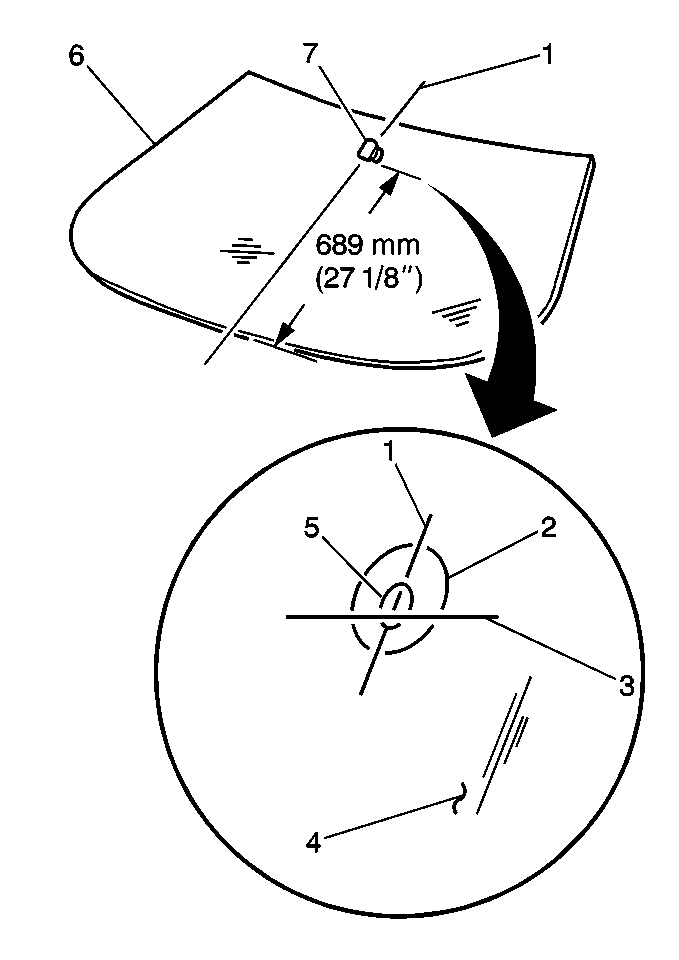
- Measure the distance from
the bottom of the windshield (6) in order to determine the location of the
rearview mirror support (7).
- Locate the rearview mirror support (7) at the center (5) of the
windshield (6) 689 mm (27 1/8 in) from the base of the
windshield (6) to the base of the rearview mirror support (7).
- Use a wax pencil or crayon in order to mark the location on the
outside of the windshield (6).
- Make a larger diameter circle (2) around the marked location on
the outside windshield (6) surface.
- Clean the area of the large circle on the inside windshield (6)
surface using a paper towel and one of the following items:
| • | Window cleaning solution |
| • | Window polishing compound |
- Rub the area until the area is completely clean and dry.
- When the area is dry, clean the area using an alcohol-saturated
paper towel in order to remove any traces of cleaning solution or polishing
compound.
- Sand the bonding surface of the new or detached original rearview
mirror support (7) using a piece of fine grit every cloth or sandpaper, number
320 or number 360.
- If you are reusing the original mirror support (7), remove all
traces of the old adhesive.
- Wipe the sanded rearview mirror support (7) with a clean paper
towel saturated with alcohol.
- Allow the mirror support (7) to dry.
Installation Procedure

- Follow the directions
on the adhesive kit GM P/N 1052369 or the equivalent in order to prepare the
rearview mirror support (7) prior to installation on the windshield (6).
- Lightly apply the adhesive accelerator to the bonding surfaces
of the following components:
| • | The rearview mirror support (7) |
- Allow the adhesive accelerator to dry completely.
Important: Due to the rapid bonding action of the adhesive, immediately perform
the following steps:
- Rub the area until the area is completely clean and dry.
- When the area is dry, clean the area using an alcohol-saturated
paper towel in order to remove any traces of cleaning solution or polishing
compound.
- Sand the bonding surface of the new or detached original rearview
mirror support (7) using a piece of fine grit every cloth or sandpaper, number
320 or number 360.
- If you are reusing the original mirror support (7), remove all
traces of the old adhesive.
- Wipe the sanded rearview mirror support (7) using a clean paper
towel saturated with alcohol.
- Allow the mirror support (7) to dry.


