Removal Procedure
- Disable the SIR system.
Refer to
Disabling the SIR System
in Restraints.
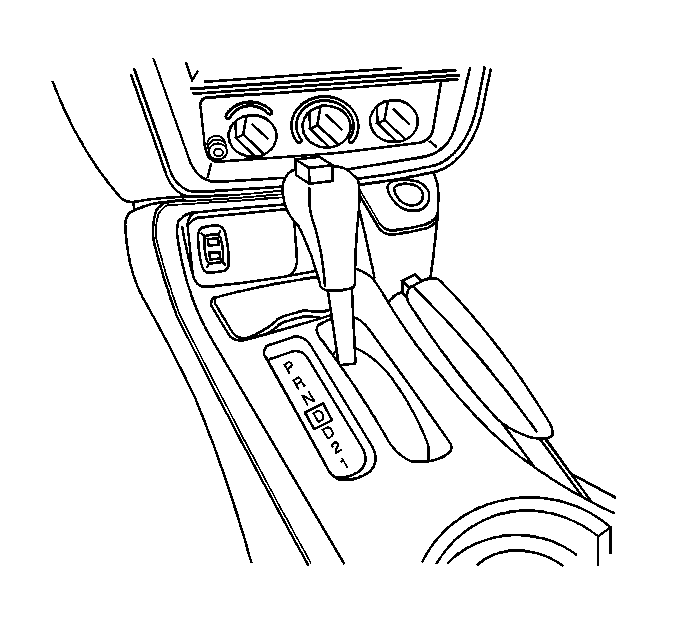
- Place the transmission control into the PARK position.
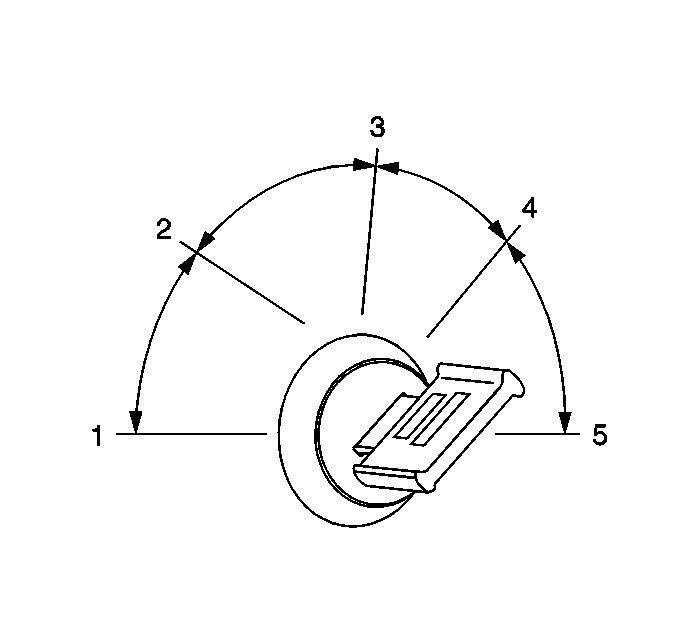
- Turn the ignition key
to the RUN position.
Important: Do not proceed to the next step with the ignition key in any other position.
- Remove the left side instrument panel insulator. Refer to
Instrument Panel Insulator Replacement
in Instrument Panel, Gauges and Console.
- Remove the instrument panel driver knee bolster and deflector.
Refer to
Knee Bolster Replacement
in Instrument Panel, Gauges and Console.
- Remove the front floor console. Refer to
Front Floor Console Replacement
in Instrument
Panel, Gauges and Console.
- Remove the body hinge pillar trim panel. Refer to
Body Hinge Pillar Trim Panel Replacement
in Interior Trim.
- Reposition the floor carpet until the retaining clip on the tunnel
is accessible.
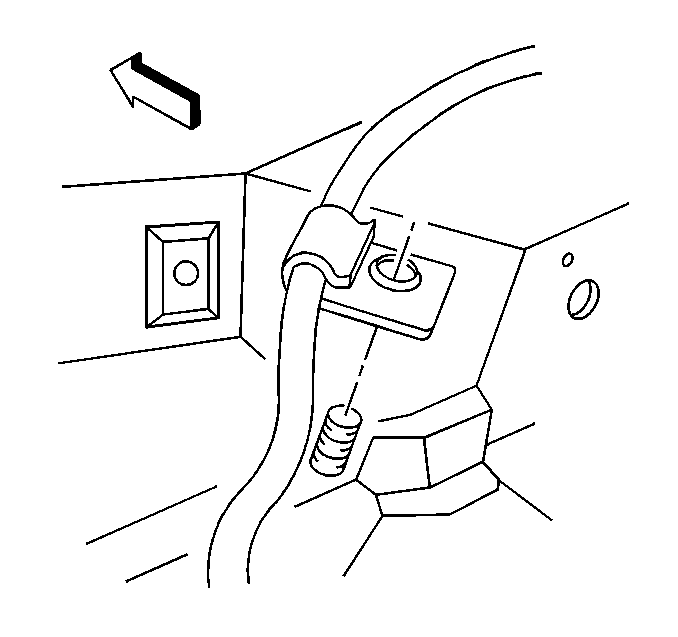
- Remove the nut and the
park/lock cable clip from the stud on the front of dash.
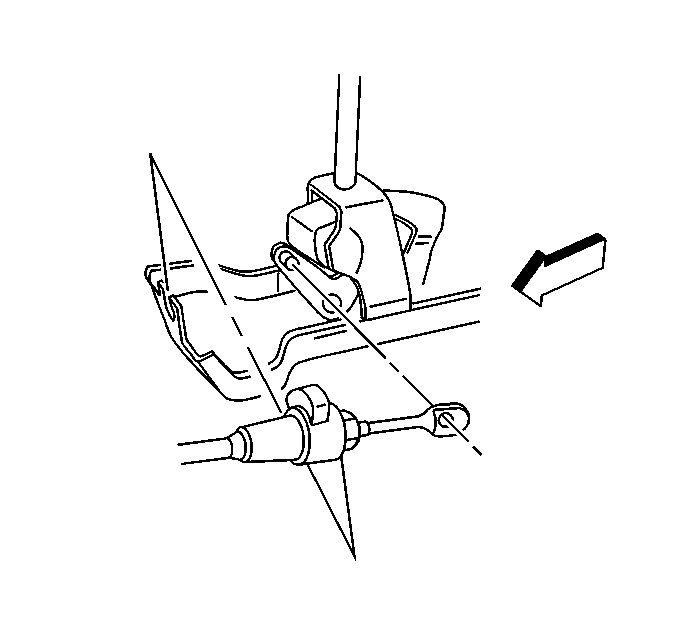
- Disconnect the park/lock
cable end from the park/lock lever pin.
- Remove the park/lock cable from the transmission control base.
- Lower the steering column.
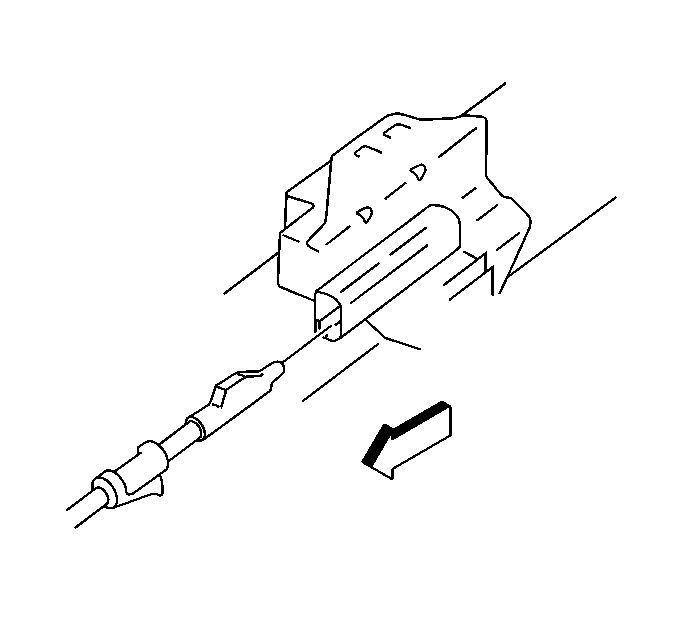
- Unsnap the park/lock cable
from the inhibitor attached to the steering column.
| • | Insert a small flat bladed screwdriver into the inhibitor slot. |
| • | Depress the park/lock cable latch down. |
| • | Gently pull the park/lock cable from the inhibitor. |
- Open the retaining clip on the drivers side of the tunnel and
remove the cable.
Installation Procedure

- Place the transmission
control into the PARK position.

- Turn the ignition key
to the RUN position (4).
Important: Do not proceed to the next step with the ignition key in any other position.
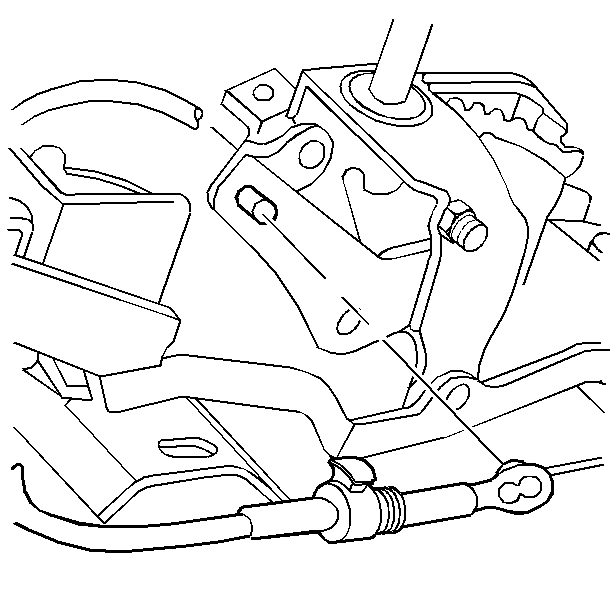
- Snap the cable terminal
to the park/lock lever pin.
- Push the park/lock cable connector forward in order to remove
slack.
- With no load applied to the connector, press the park/lock cable
lock button down.

- Install the park/lock
cable to the bracket. Complete the following steps:
| 6.1. | Push the bracket housing against the adjusting spring. |
| 6.2. | drop the park/lock cable through the slot in the bracket and seat
the cable to the automatic transmission control. |
- Push the park/lock cable button down.

- Snap the park/lock cable
into the inhibitor on the steering column.
- Raise the steering column.

- Install the park/lock
clip to the stud on the front of dash.
- Close the cable retainer and reposition the carpet.
- Install the front floor console. Refer to
Front Floor Console Replacement
in Instrument
Panel, Gauges, and Console.
- Install the instrument panel driver knee bolster and deflector.
Refer to
Knee Bolster Replacement
in Instrument Panel, Gauges, and Console.
- Install the left side instrument panel insulator. Refer to
Instrument Panel Insulator Replacement
in Instrument Panel, Gauges, and Console.

- Turn the ignition key
to the OFF position (3).
- Enable the SIR system. Refer to
Enabling the SIR System
in Restraints.
Inspection Procedure

- Place the transmission
control in the PARK position.

- Turn the ignition key
to the LOCK position (2).
- Transmission control should not be able to be moved to another
position.
- The ignition key should be able to be removed from the ignition.
- Turn the ignition key to the RUN position.
- Place the transmission control in the NEUTRAL position.
- The ignition key should not be able to be removed from the ignition.
- If the above functional checks were met, the adjustment is complete.
- If the ignition key can be removed in NEUTRAL, snap connector
lock button to the UP position and repeat steps 9 and 10 from above.
- If the ignition key cannot be removed in the PARK position, snap
the connector lock button to the UP position.
- Move the cable connector nose rearward until the ignition key
can be removed from the ignition.
- Snap the lock button down.


