COMPARTMENT LIFT WINDOW MOLD F-SERIES INFORMATION

Subject: MOLDING REPAIR WINDOW BODY
CAUTION:
When working with glass assemblies, the use of personal protection items, such as work gloves and eye protection, is recommended to reduce the chance of personal injury should the glass break.
REMOVAL
1. Remove compartment lift window from body, as described in the body portion of the Car Division Chassis Service Manual and with aid of helper place upside down on a protected work surface.
2. Remove upper hinges.
3. Remove screws retaining moldings to panel.
CAUTION:
To reduce the chance of personal injury, perform the urethane burn-out operation in a well ventilated area and avoid inhalation of the fumes being emitted as these fumes may be hazardous.
4. Using an acetylene torch, with a #2 tip, start at the top of either the right or left side molding and apply heat for a distance of 200mm (8") to outboard edge of molding for 30 to 60 seconds using a back and forth motion.
5. Immediately grasp heated section of molding with pliers and pull molding away from glass.
6. Repeat Steps 4 and 5 for the entire length of molding.
7. Do the same procedure outlined in Steps 4 through 6 for opposite side molding.
INSTALLATION
1. Clean all adhesive from glass using a razor blade and cloth dampened with alcohol or oil-free naphtha.
2. Seal original holes in panel where molding retaining screws were removed in Step 3 of Removal Procedure.
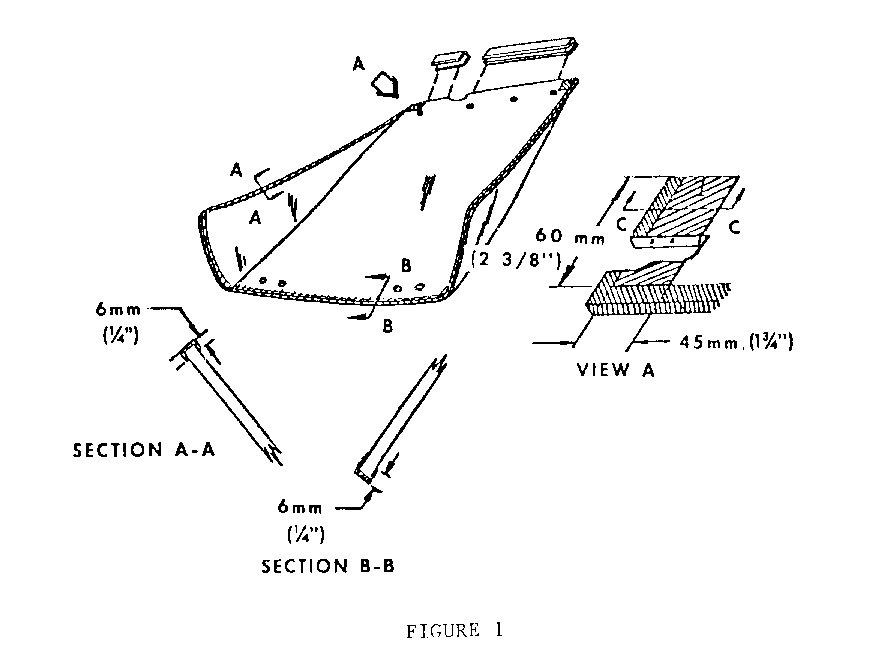
3. Apply clear primer in urethane kit 9636067, or equivalent, to glass as shown in Figure 1.
a. Apply black primer over same areas. Allow to air dry for five (5) minutes.
b. Apply black primer to inside of molding channels. Allow to air dry for five (5) minutes.
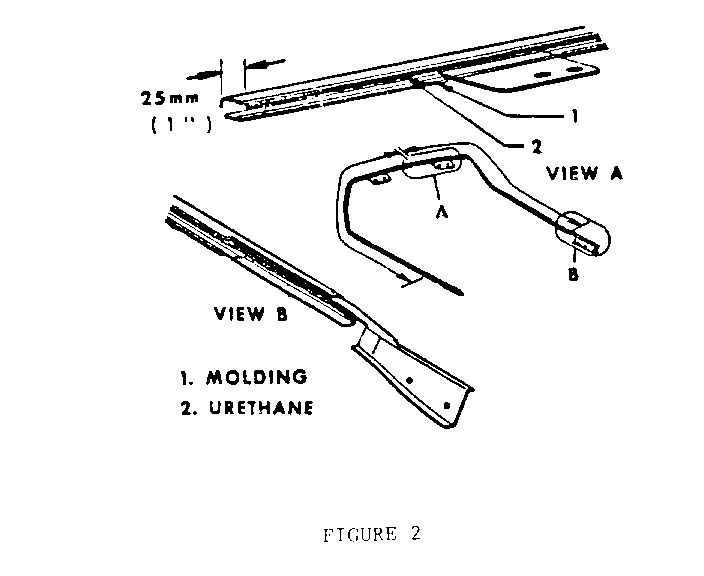
c. Apply a 4.5mm (3/16") bead of urethane from kit into channel of new molding. Do not apply urethane for a distance of 25mm (1") from forward edge of right and left hand moldings (Figure 2).
d. Place escutcheon inside of right and left hand molding.
e. Using a clean rubber mallet, drive moldings onto glass starting at upper corners. Be sure to align holes in tabs of moldings with holes in glass.
f. Apply cloth tape every 200mm (8") over moldings and glass sides to keep molding in place while urethane cures. Allow six (6) hours cure time.
4. Install moldings to panel using screws removed in Step 3 of Removal Procedure. It may be necessary to drill new holes for screw installation.
CAUTION:
When performing next operations, do not tighten beyond specified torque or glass breakage and personal injury could result.
5. Install upper hinges to glass. Torque nuts to 16 N.m (11 ft. lbs.).
6. With aid of helper, install compartment lift window to body and make sure of proper alignment of lift window to body. Torque nuts to 20-28 N.m (15 to 20 ft. lbs.).
Labor Operation Number: B8520
Labor Hours : .7 hours for one (1) side. Add .3 hours for second side.

General Motors bulletins are intended for use by professional technicians, not a "do-it-yourselfer". They are written to inform those technicians of conditions that may occur on some vehicles, or to provide information that could assist in the proper service of a vehicle. Properly trained technicians have the equipment, tools, safety instructions and know-how to do a job properly and safely. If a condition is described, do not assume that the bulletin applies to your vehicle, or that your vehicle will have that condition. See a General Motors dealer servicing your brand of General Motors vehicle for information on whether your vehicle may benefit from the information.
