Removal Procedure
Tools Required
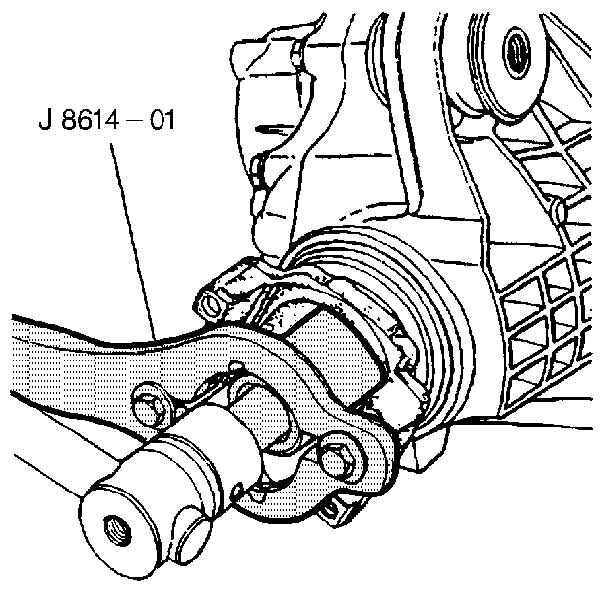
J 8614-01 Pinion Flange Remover
- In order to free the steering linkage for movement, unlock the steering column.
- Raise the vehicle. Support the vehicle with safety stands. Refer to Lifting and Jacking the Vehicle in General Information.
- Remove the battery negative cable.
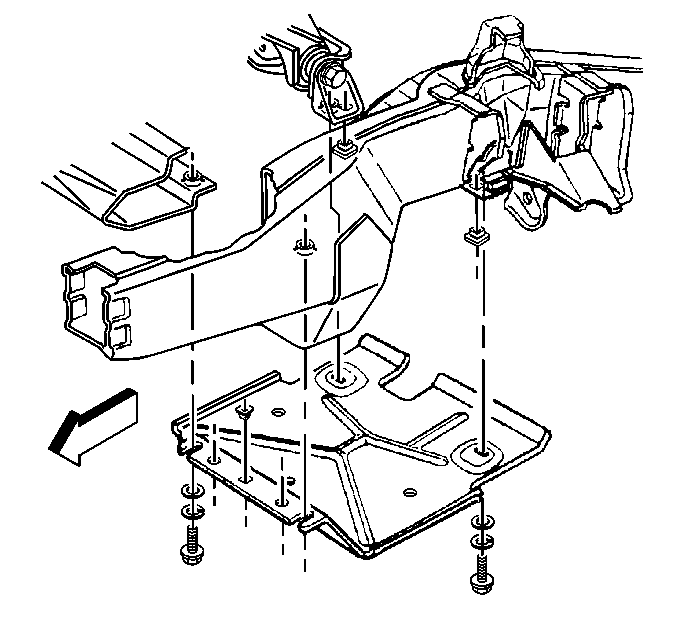
- Remove the front underbody shields, if equipped.
- Remove the left front underbody shield bracket.
- Accurately mark the propeller shaft and pinion flange.
- Remove the bolts from the propeller shaft flange to the front axle.
- Remove the front propeller shaft. Refer to Front Propeller Shaft Replacement in Propeller Shaft.
- Mark the following components in order to maintain the same preload torque upon assembly:
- Remove the pinion flange nut and washer, using the J 8614-01 in order to secure the flange.
- Remove the pinion flange using the J 8614-01 . Provide a suitable container to catch the lubricant.
Important: Note the positions and accurately reference mark all of the following
driveline components relative to the disassembly of the propeller shaft and
axles:
• The propeller shafts • The drive axles • The pinion flanges • The output shafts
Caution: Unless directed otherwise, the ignition and start switch must be in the OFF or LOCK position, and all electrical loads must be OFF before servicing any electrical component. Disconnect the negative battery cable to prevent an electrical spark should a tool or equipment come in contact with an exposed electrical terminal. Failure to follow these precautions may result in personal injury and/or damage to the vehicle or its components.

| • | Pinion Flange |
| • | Pinion Shaft |
| • | Pinion Flange Nut |

Installation Procedure
Tools Required
J 8614-01 Pinion Flange Holder
- Apply special seal lubricant (GM P/N 1052366 or equivalent) to the outside of the pinion flange.
- Install the new pinion flange.
- Install the washer and a new nut using the J 8614-01 .
- Install the propeller shaft. Refer to Front Propeller Shaft Replacement in Propeller Shaft.
- Install the bolts to the flange.
- Inspect the axle lubricant level. Add lubricant as necessary. Refer to Fluid and Lubricant Recommendations in Maintenance and Lubrication.
- Install the left front underbody shield bracket, if equipped.
- Install the front underbody shields, if equipped.
- Connect the battery negative cable.

Notice: Use the correct fastener in the correct location. Replacement fasteners must be the correct part number for that application. Fasteners requiring replacement or fasteners requiring the use of thread locking compound or sealant are identified in the service procedure. Do not use paints, lubricants, or corrosion inhibitors on fasteners or fastener joint surfaces unless specified. These coatings affect fastener torque and joint clamping force and may damage the fastener. Use the correct tightening sequence and specifications when installing fasteners in order to avoid damage to parts and systems.
Tighten
Tighten the nut to the same position as marked during removal. Continue
to tighten the nut 10 degrees after the marks.
Important: Align the marks drawn during removal. Reassemble the components in the same position.
Tighten
Tighten the bolts to 75 N·m (55 lb ft).

