For 1990-2009 cars only
Removal Procedure
- Remove the intake manifold sight shield, as required. Refer to Upper Intake Manifold Sight Shield Replacement.
- If replacing one of the rear 2 ignitions coils on the right side perform steps 3 through 13, otherwise proceed to step 14.
- Perform the service disconnect. Refer to High Voltage Disabling.
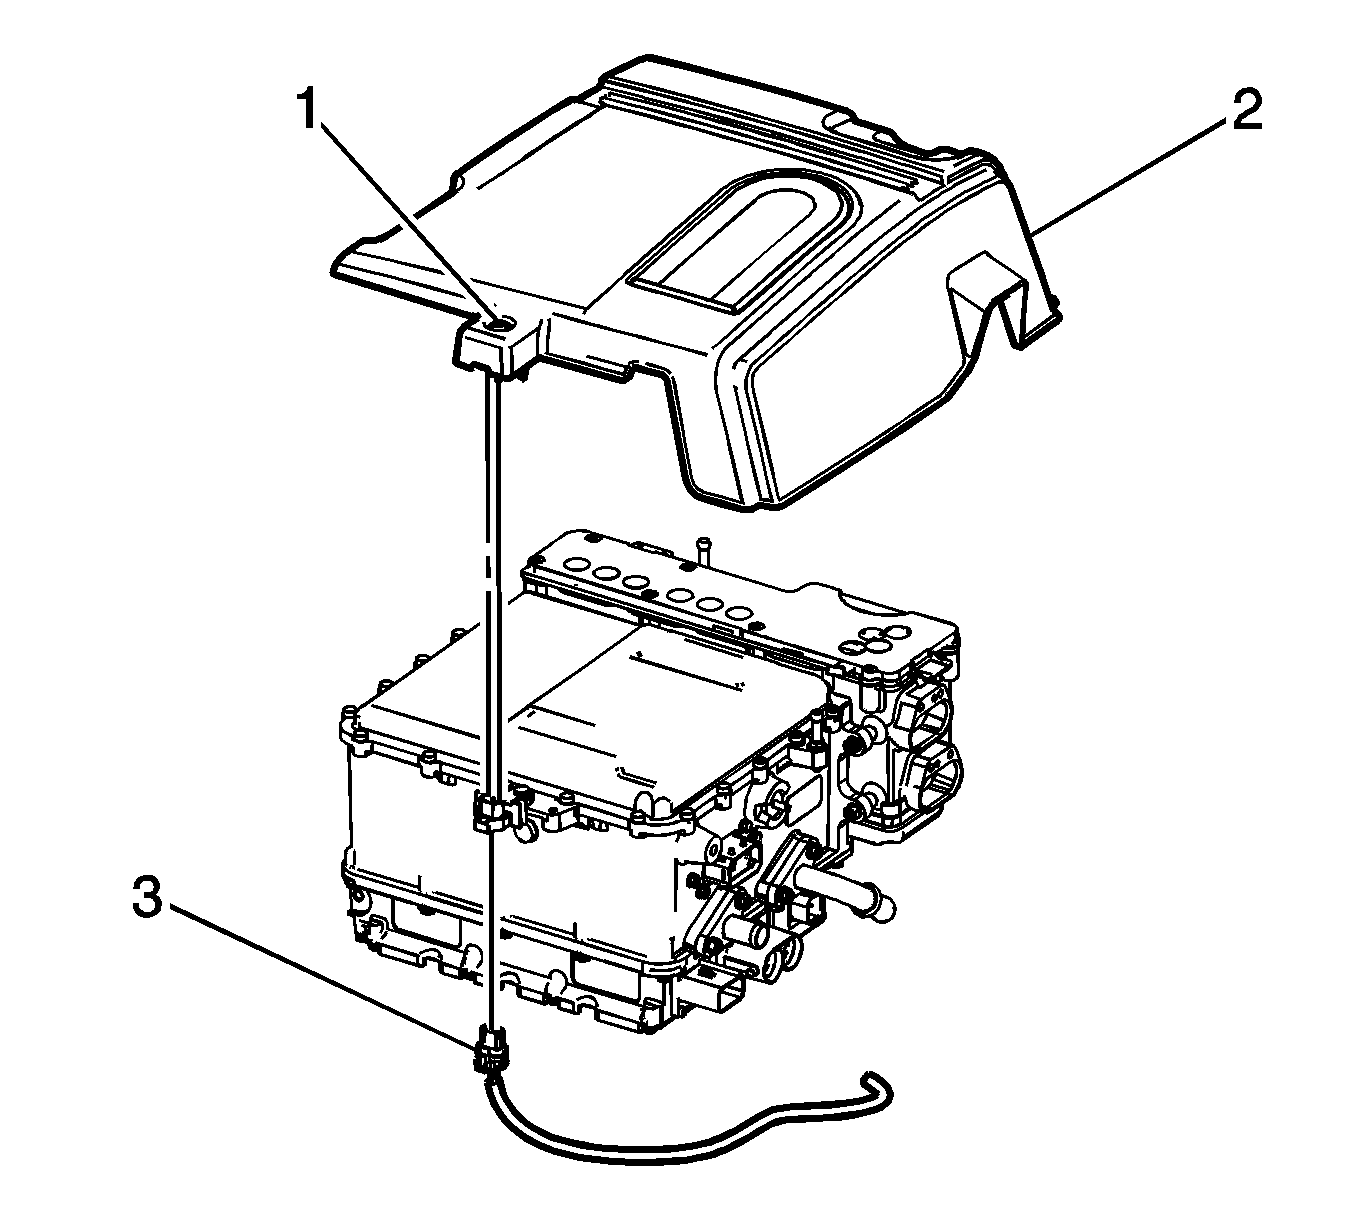
- Disconnect the engine wiring harness electrical connector (3) from the drive motor generator power inverter module cover.
- Loosen the drive motor generator power inverter module cover bolt (1).
- Remove the drive motor generator power inverter module cover (2).
- Remove the generator control module 3 phase cable clip nut (1).
- Remove the generator control module 3 phase cable clip from the engine bracket (2).
- Reposition the generator control module 3 phase cables out of the way.
- Remove the right wheelhouse liner. Refer to Front Wheelhouse Liner Replacement - Right Side.
- Working through the wheel opening, remove the engine bracket bolts (2).
- Lower the vehicle.
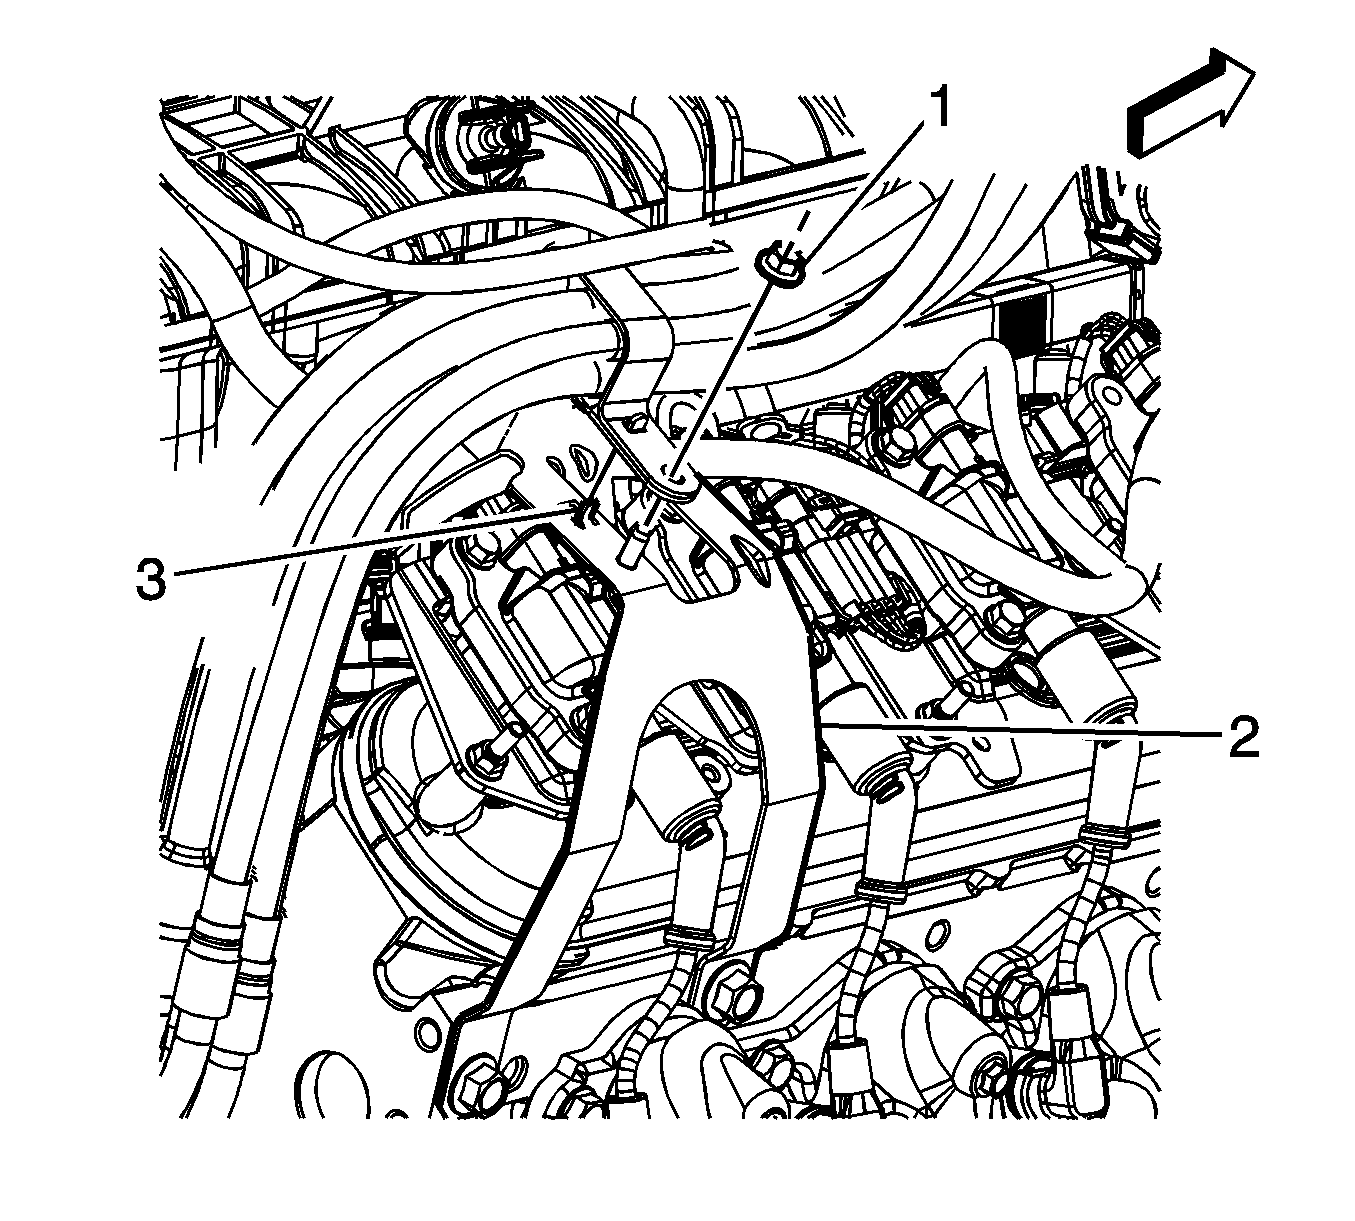
- Remove the engine bracket nut (1) from the ignition coil bracket stud and remove the bracket (3).
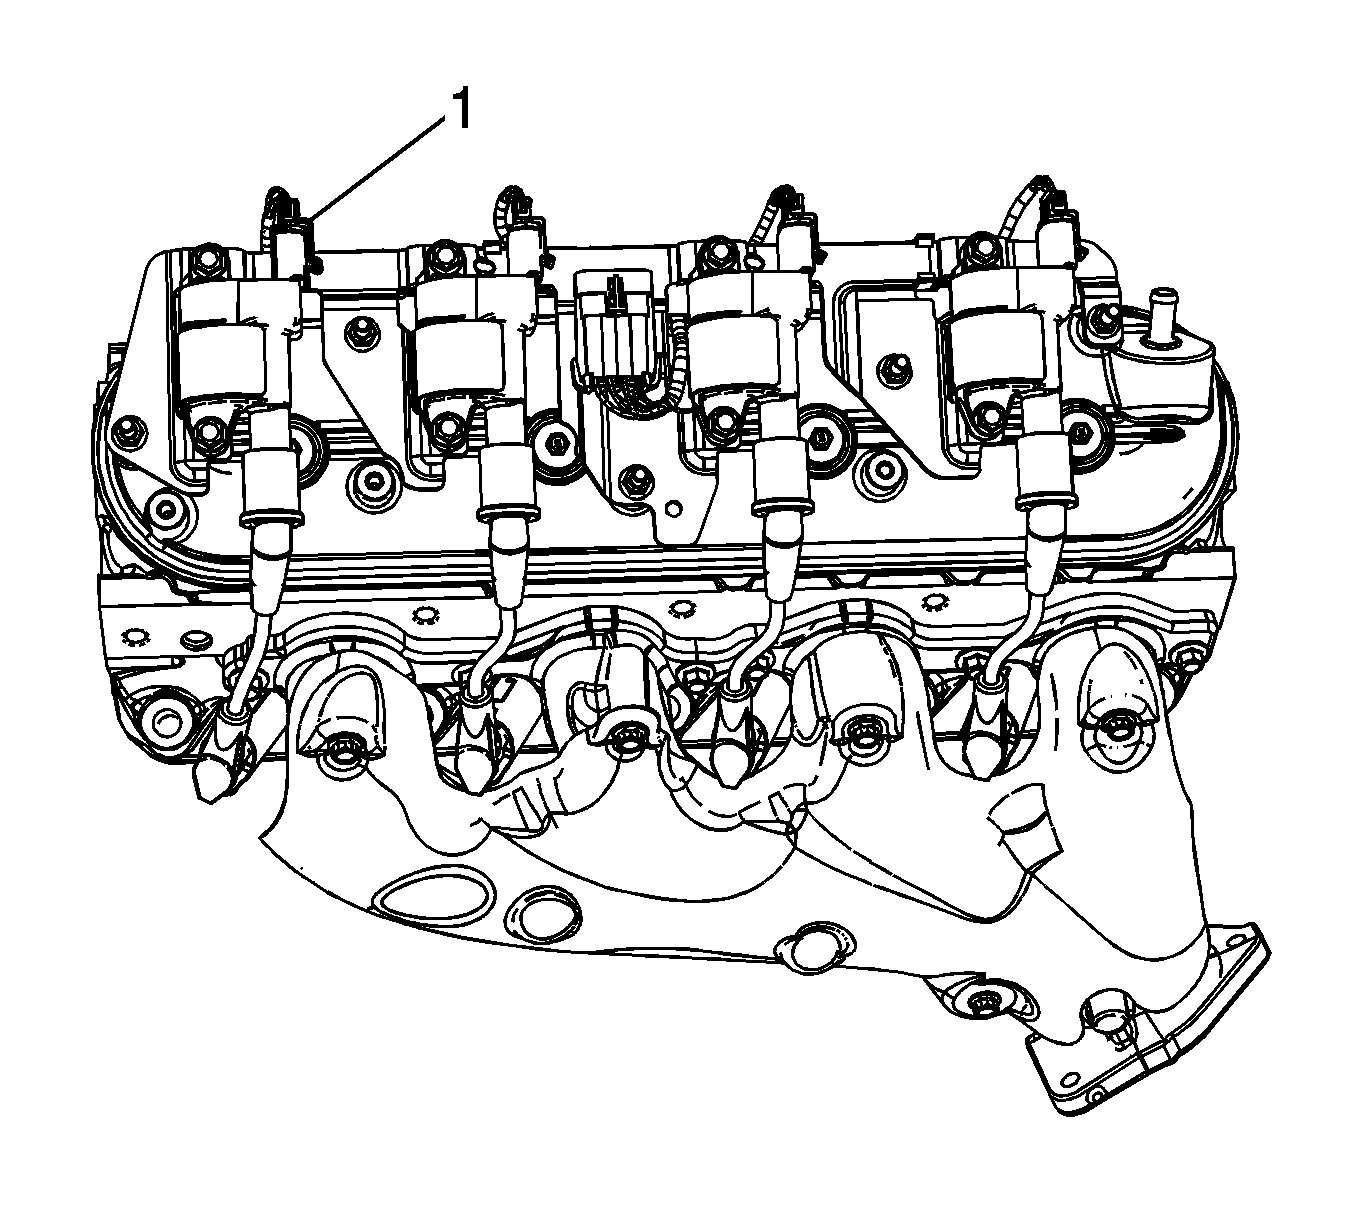
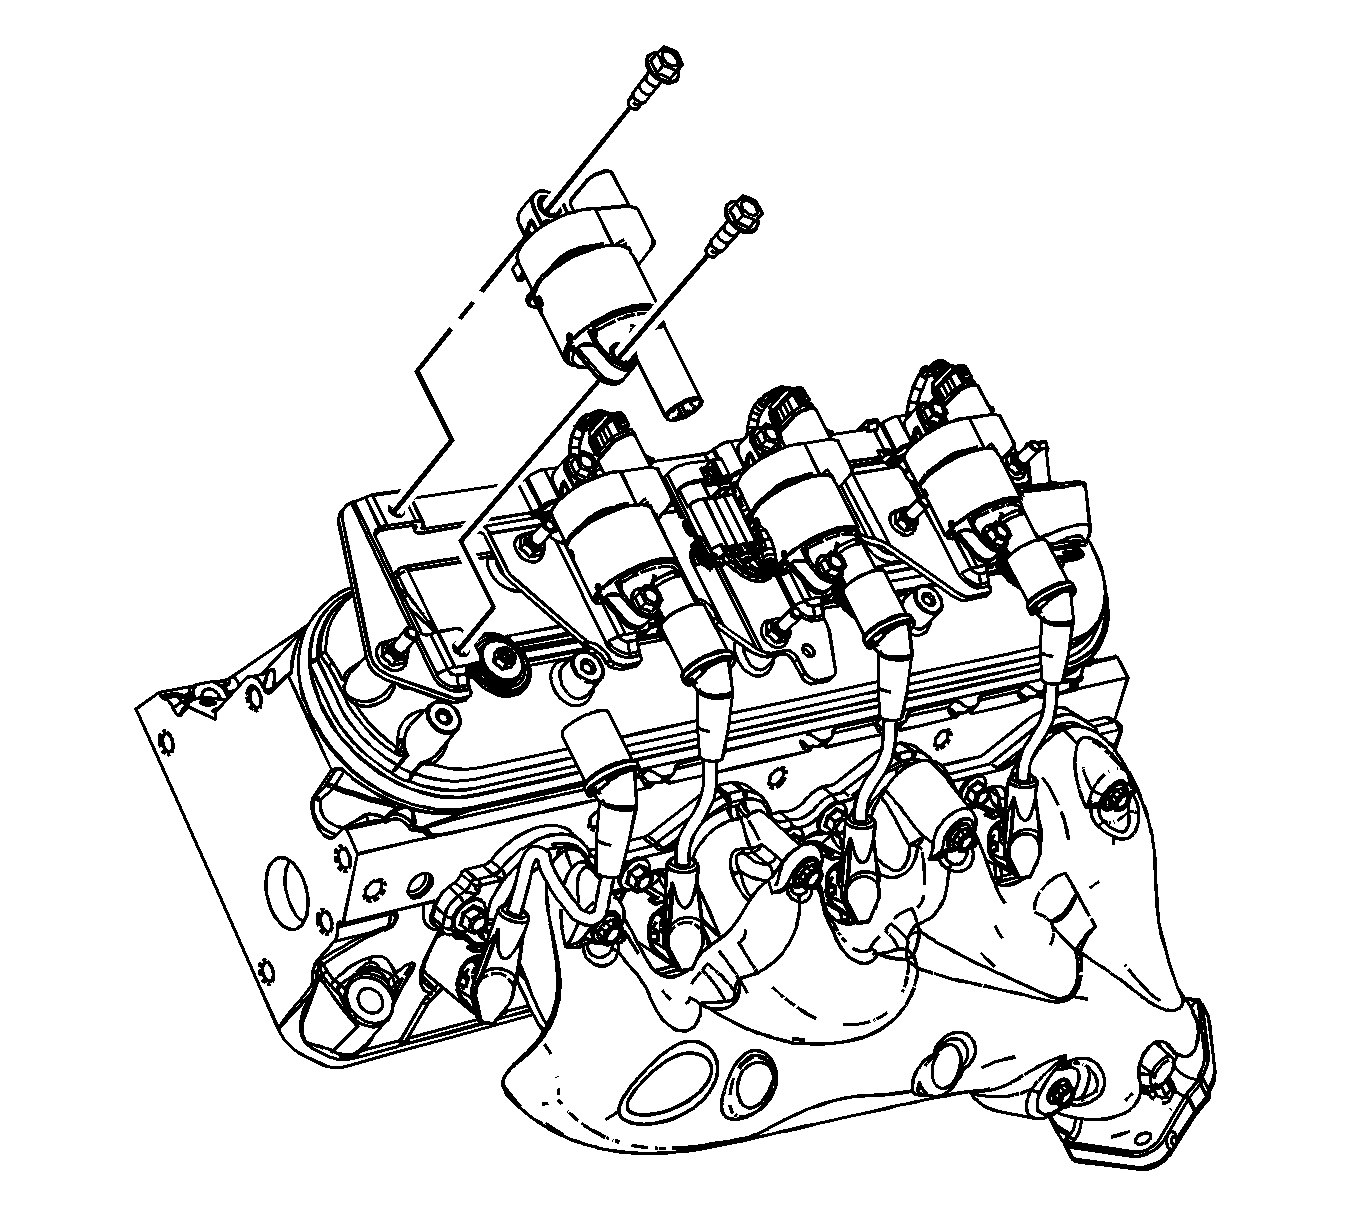
- Disconnect the ignition coil wiring harness electrical connector (1) from the ignition coil.
- Remove the spark plug wire from the ignition coil.
- Remove the ignition coil bolts.
- Remove the ignition coil from the bracket.
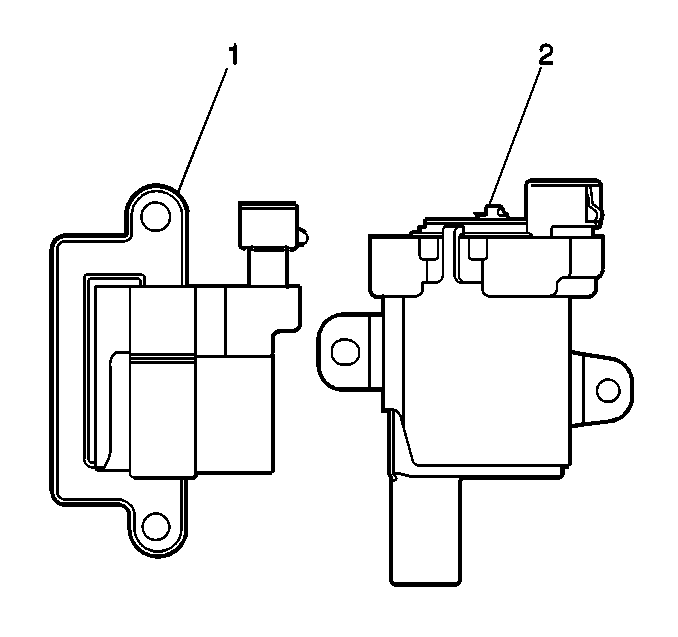
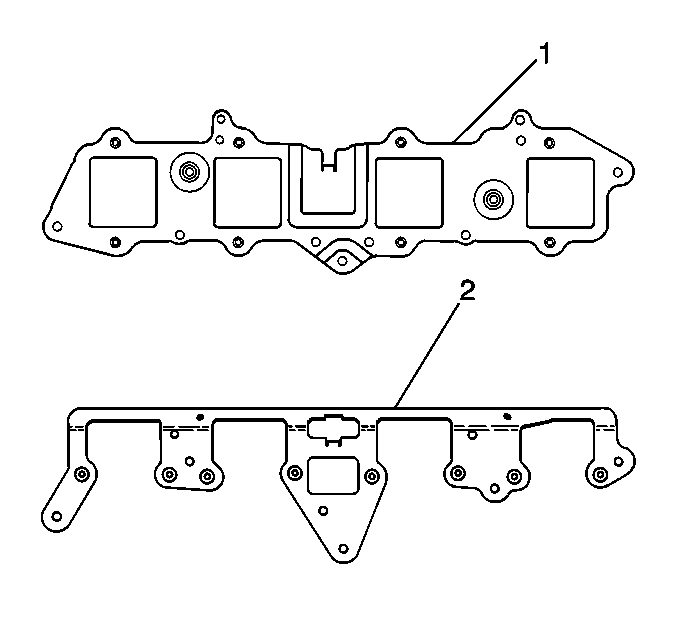
- There are 2 different manufacturers for the ignition coils and coil brackets. They are as follows:
- The Melco® (1) ignition coil is a square design.
- The Delphi® (2) ignition coil is a round design.
- The Melco® ignition coil bracket (1) is a square design.
- The Delphi® ignition coil bracket (2) is a round design.
Danger: Always perform the High Voltage Disabling procedure prior to servicing any High Voltage component or connection. Personal Protection Equipment (PPE) and proper procedures must be followed.
The High Voltage Disabling procedure will perform the following tasks:| • | Identify how to disable high voltage. |
| • | Identify how to test for the presence of high voltage. |
| • | Identify condition under which high voltage is always present and personal protection equipment (PPE) and proper procedures must be followed. |
| • | Twist the spark plug wire boot a 1/2 turn. |
| • | Pull only on the boot in order to remove the wire from the ignition coil. |
Installation Procedure
- Position the ignition coil to the ignition coil bracket.
- Install the ignition coil bolts.
- Install the spark plug wire to the ignition coil.
- Inspect the spark plug wire for proper installation:
- Connect the ignition coil wiring harness electrical connector (1) to the ignition coil.
- If replacing one of the rear 2 ignitions coils on the right side perform steps 7 through 16, otherwise proceed to step 17.
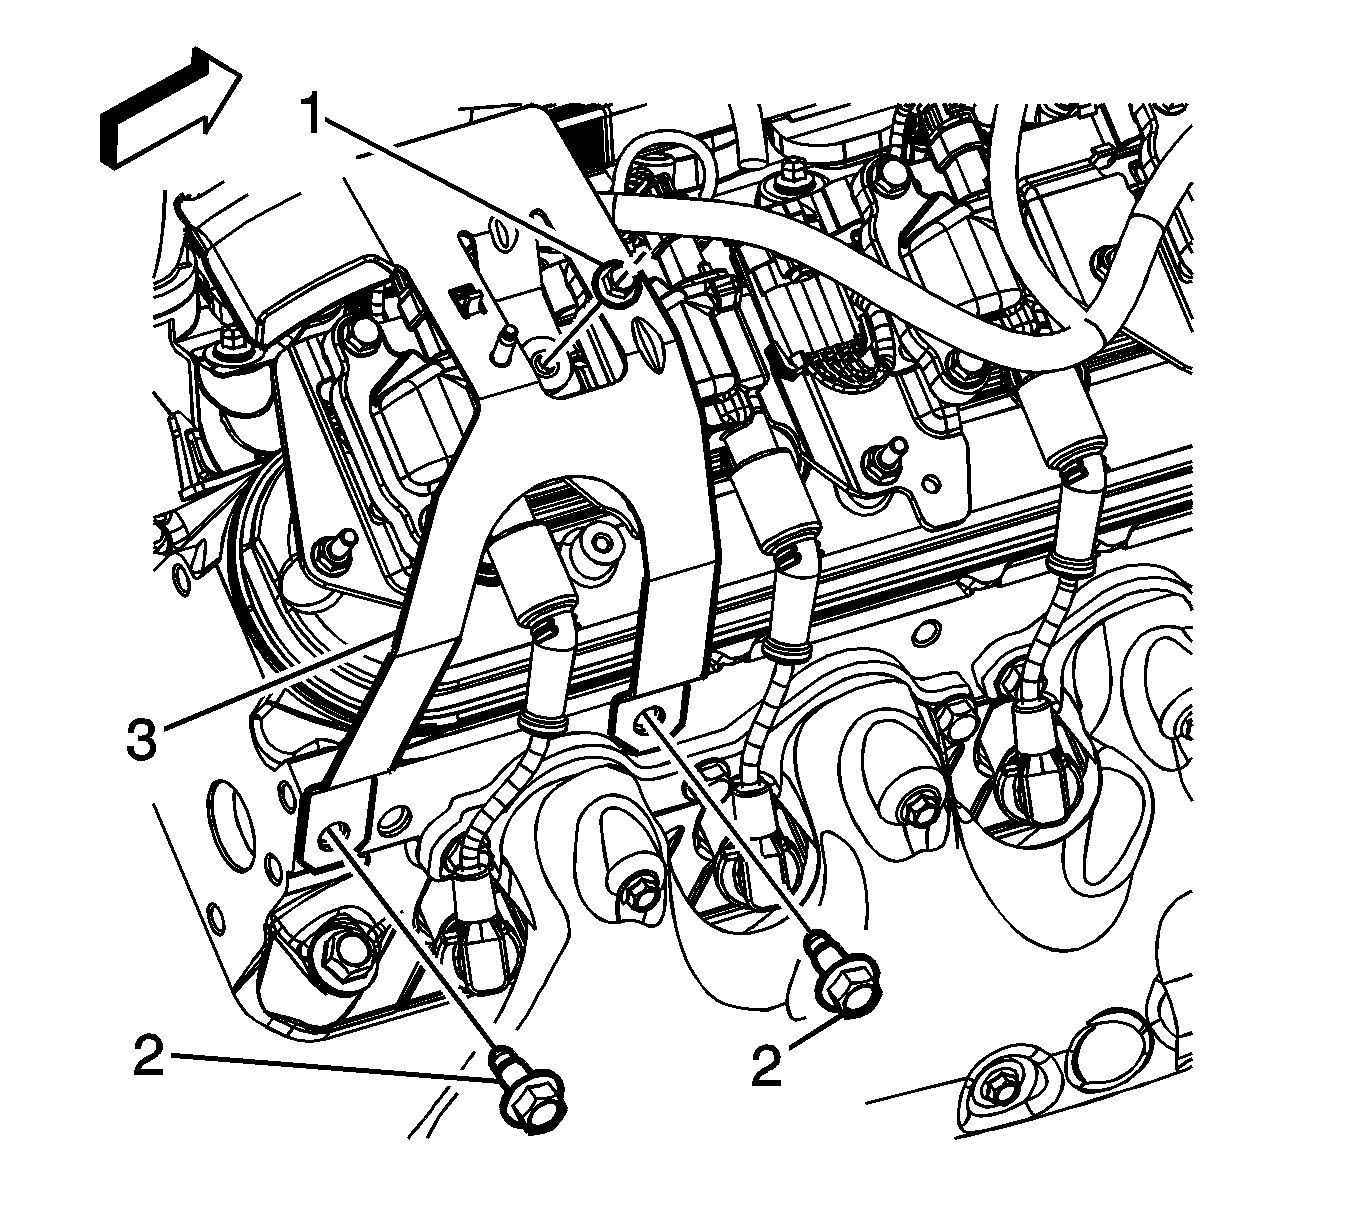
- Install the engine bracket (3) to the ignition coil bracket stud and install nut (1).
- Raise the vehicle half way.
- Working through the wheel opening, install the engine bracket bolts (2).
- Install the right wheelhouse liner. Refer to Front Wheelhouse Liner Replacement - Right Side.
- Position the generator control module 3 phase cables to the bracket channel.
- Install the generator control module 3 phase cable clip to the tab (3) on the engine bracket (2).
- Install the generator control module 3 phase cable clip nut (1).
- Install the drive motor generator power inverter module cover (2).
- Tighten the drive motor generator power inverter module cover bolt (1).
- Connect the engine wiring harness electrical connector (3) to the drive motor generator power inverter module cover.
- Install the intake manifold sight shield, as required. Refer to Upper Intake Manifold Sight Shield Replacement.
- Perform the service reconnect. Refer to High Voltage Enabling.
Caution: Refer to Fastener Caution in the Preface section.
Tighten
Tighten the bolts to 10 N·m (89 lb in).
| • | Push sideways on each boot in order the inspect the seating. |
| • | Reinstall any loose boot. |
Tighten
Tighten the nut to 9 N·m (80 lb in).
Tighten
Tighten the bolts to 50 N·m (37 lb ft).
Tighten
Tighten the nut to 9 N·m (80 lb in).
Tighten
Tighten the bolt to 1.5 N·m (13 lb in).
