Removal Procedure
Caution: When you are performing service on or near the SIR components or the SIR wiring, you must disable the SIR system. Refer to Disabling the SIR System. Failure to follow the correct procedure could cause air bag deployment, personal injury, or unnecessary SIR system repairs.
- If the vehicle is equipped with an audio/visual (A/V) adapter, the A/V adapter must be removed prior to removing the IP compartment. Refer to Audio/Video Wiring Harness Replacement in Navigation.
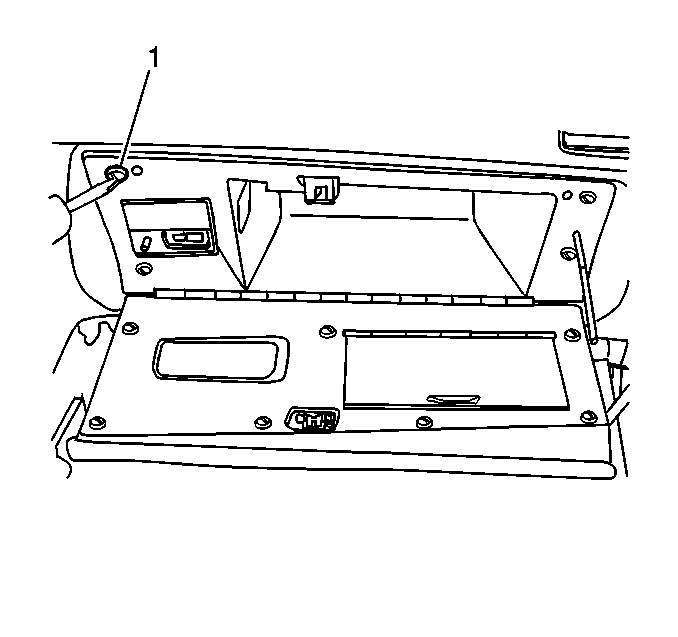
- Remove the IP compartment lamp. Refer to Instrument Panel Storage Compartment Lamp Replacement in Lighting Systems.
- Open the IP storage compartment door.
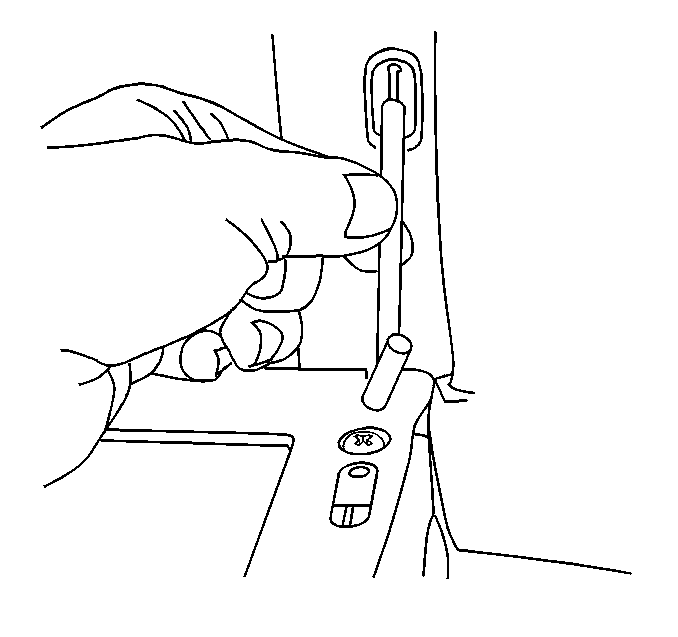
- Lift the door slightly and twist the stop rod in order to disengage the end of the rod from the door.
- Remove the five fasteners (1) from the bin to the IP retainer.
- Partially remove the IP storage compartment from the IP assembly.
- Disconnect the electrical connectors and guide the IP storage compartment lamp lens/connector out of the opening in the IP storage compartment.
- Remove the IP storage compartment.
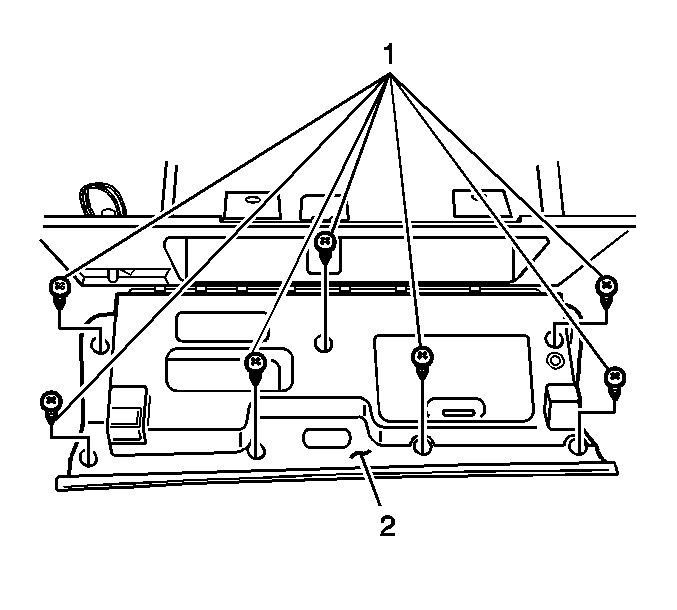
- Remove the fasteners (1) from the IP storage compartment door trim panel (2).
- Remove the IP storage compartment door trim panel (2).
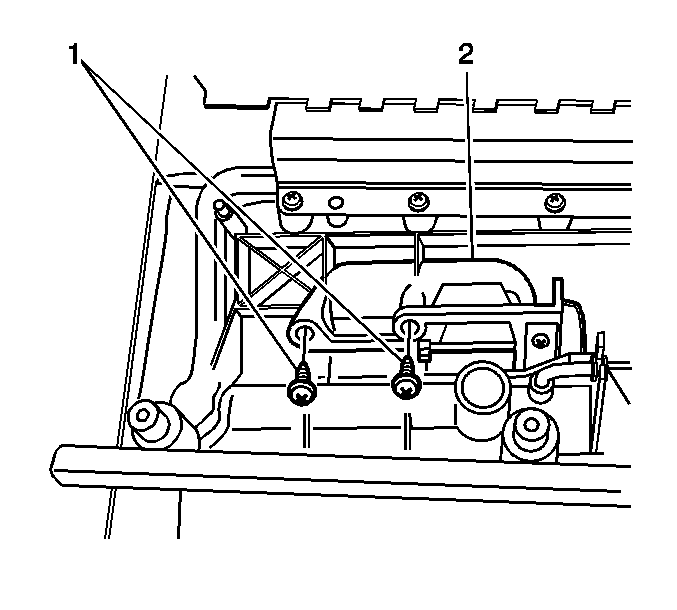
- Remove the fasteners (1) securing the IP storage compartment door handle (2) to the IP storage compartment door.
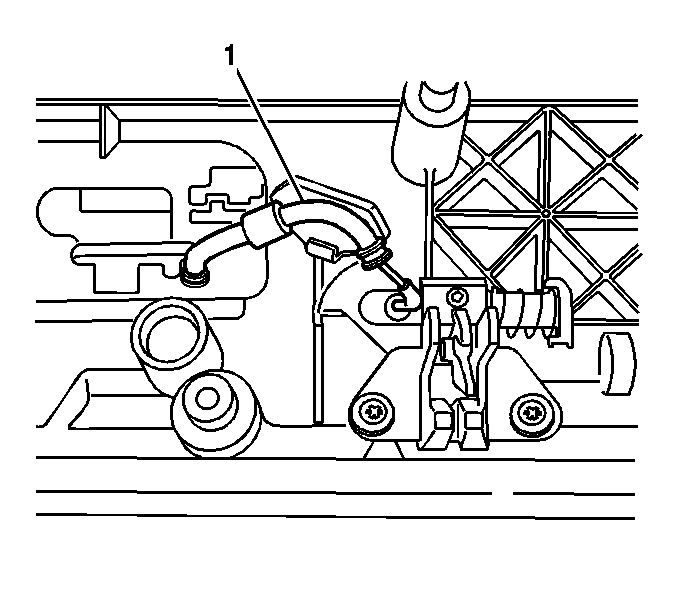
- Disengage the actuator cable (1) from IP storage compartment latch.
- Remove the lock cylinder from the IP storage compartment latch handle:
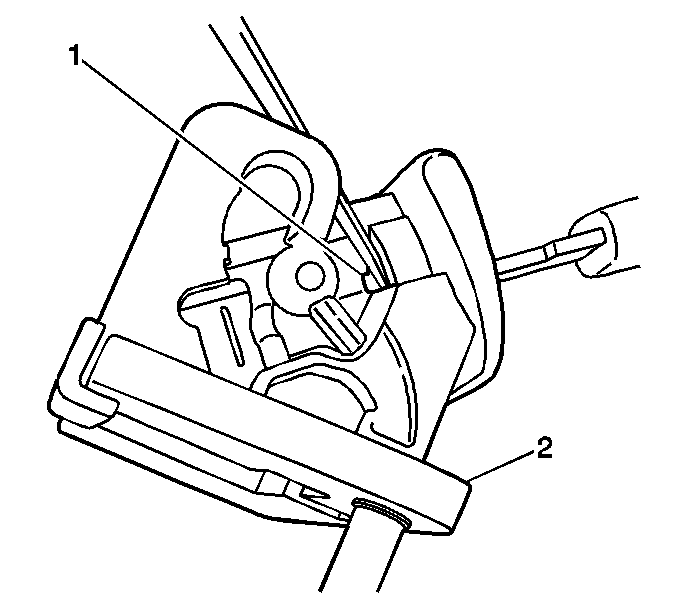
| 13.1. | Insert the key into the door handle lock cylinder. |
| 13.2. | Turn the key 1/4 turn clockwise (LOCK position). |
| 13.3. | Insert a small diameter tool into the small rectangular opening (1) on the RH side of the compartment handle. |
| 13.4. | Depress and hold the lock cylinder retainer. |
| 13.5. | Turn the key an additional 1/4 turn clockwise. |
| 13.6. | Remove the key and lock cylinder from the compartment handle (2). |
Installation Procedure
- Insert the key into the lock cylinder assembly (2).
- Insert the lock cylinder into the IP storage compartment door handle (1).
- Push on the lock cylinder (2) in order to fully seat the lock cylinder to the IP storage compartment latch handle (1).
- Turn the key 1/4 turn counterclockwise in order to secure the lock cylinder (2) to the IP storage compartment handle (1).
- Turn the key an additional 1/4 turn counterclockwise and remove the key from the lock cylinder.
- Inspect the lock cylinder and IP storage compartment latch handle for proper operation.
- Engage the handle/latch actuator cable (1) to the IP storage compartment latch.
- Install the IP storage compartment door handle (2) to the IP storage compartment door.
- Install the IP storage compartment latch fasteners (1).
- Install the IP storage compartment door trim plate (2).
- Install the fasteners (1) to the IP storage compartment door trim panel (2).
- Partially install the IP storage compartment to the IP retainer.
- Connect the electrical connections and guide the storage compartment lamp lens/connector through the opening in the IP storage compartment.
- Install the IP storage compartment into the IP opening.
- Install the five fasteners (1) that retain the IP compartment to the IP.
- Install the IP compartment lamp. Refer to Instrument Panel Storage Compartment Lamp Replacement in Lighting Systems.
- Install the A/V adapter, if equipped. Refer to Audio/Video Wiring Harness Replacement in Navigation.
- Position the compartment door in order to install the check strap to the compartment door.
- Close the IP storage compartment door and verify proper operation of the door.
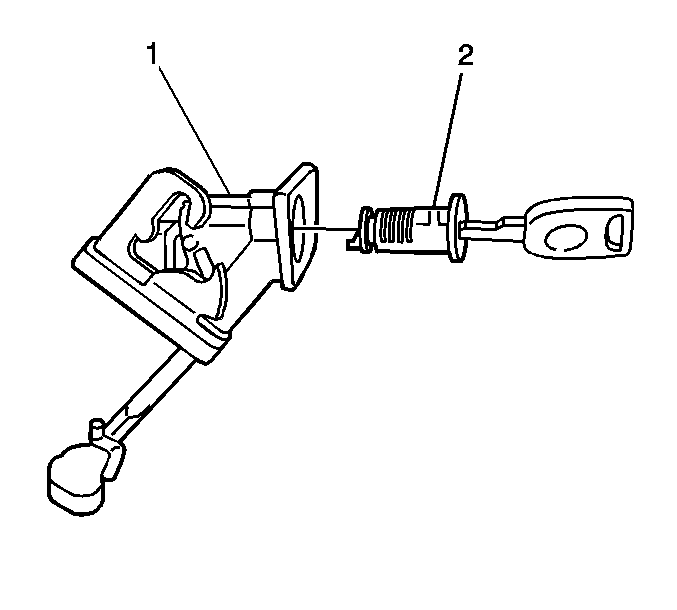
Align the lock cylinder to the same position used during removal.
Important: The lock cylinder should only allow a 1/4 turn and should be securely retained in the door handle.


Notice: Use the correct fastener in the correct location. Replacement fasteners must be the correct part number for that application. Fasteners requiring replacement or fasteners requiring the use of thread locking compound or sealant are identified in the service procedure. Do not use paints, lubricants, or corrosion inhibitors on fasteners or fastener joint surfaces unless specified. These coatings affect fastener torque and joint clamping force and may damage the fastener. Use the correct tightening sequence and specifications when installing fasteners in order to avoid damage to parts and systems.
Tighten
Tighten the fasteners (1) fully driven, seated, but not stripped.

Tighten
Tighten the fasteners (1) fully driven, seated, but not stripped.

Tighten
Tighten the fasteners to 1.5 N·m (14 lb in).

Twist the check strap, once it is installed to the door, in order to secure the check strap to the door.
