For 1990-2009 cars only
Removal Procedure
- Drain the cooling system. Refer to Cooling System Draining and Filling .
- Remove the retaining bolt from the air cleaner resonator.
- Loose the duct clamp at the resonator.
- Remove the air cleaner resonator from the vehicle.
- Loosen the duct clamp at the MAF sensor.
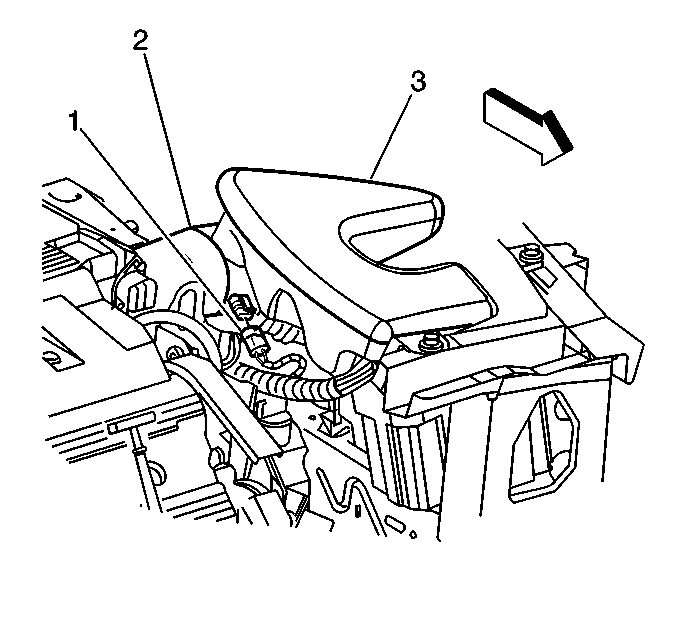
- Disconnect the IAT sensor connector (1).
- Loosen the duct clamp at the air filter cleaner housing cover (3).
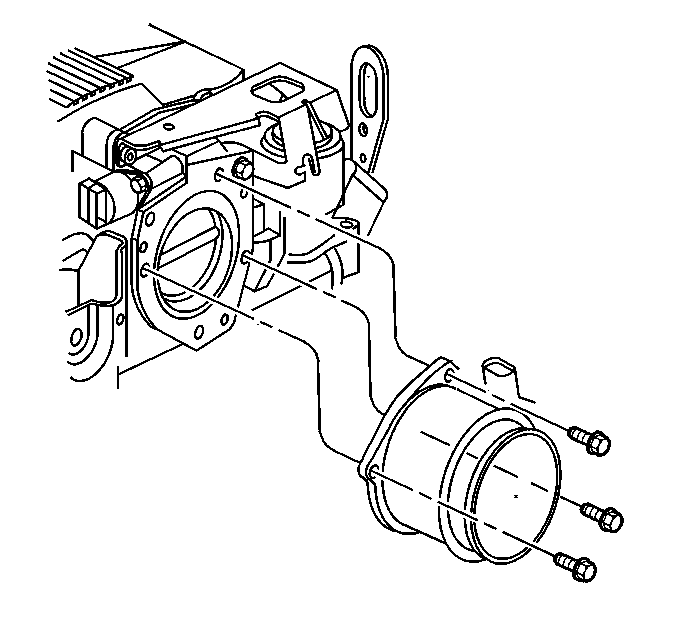
- Remove the MAF sensor (5). Refer to Mass Airflow Sensor Replacement .
- Disconnect the transaxle vent hose (4) from the accelerator controls cable bracket.
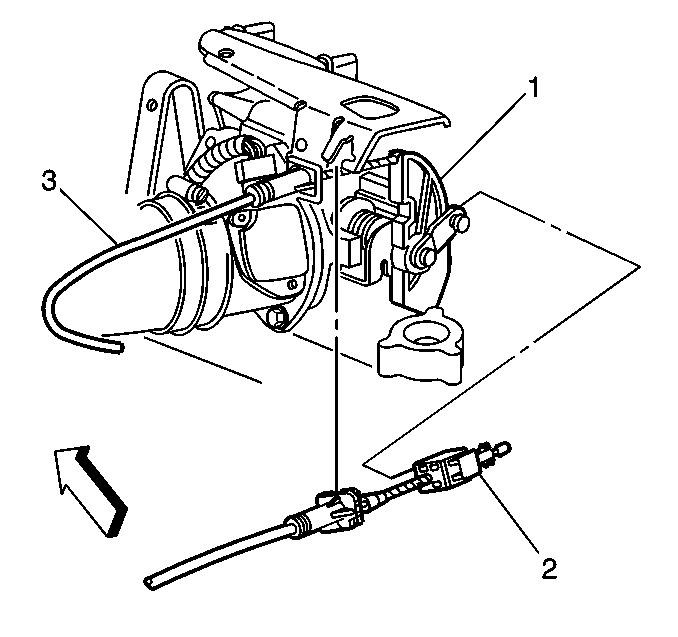
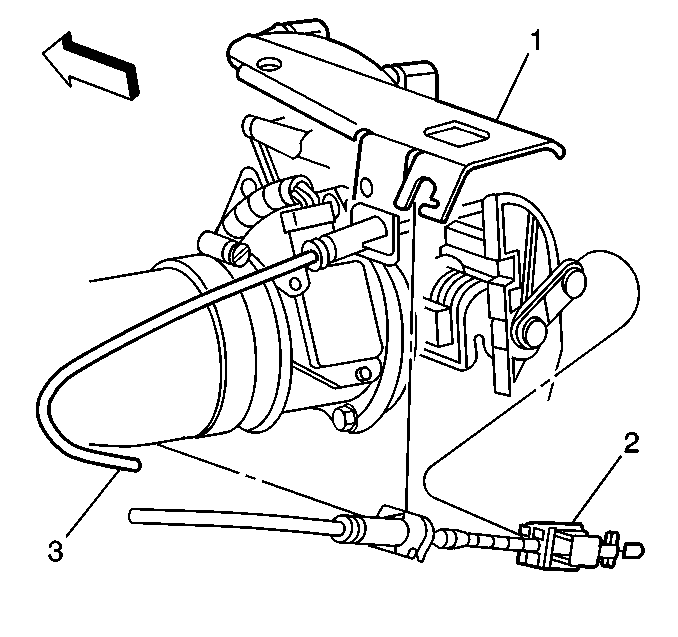
- Disconnect the cruise control cable (2).
- Disconnect the accelerator control cable (3).
- Remove the cruise control cable (2) from the accelerator controls cable bracket (1).
- Remove the accelerator controls cable (3) from the accelerator controls cable bracket (1).
- Disconnect the TP sensor electrical connector (6).
- Disconnect the IAC valve electrical connector (1).
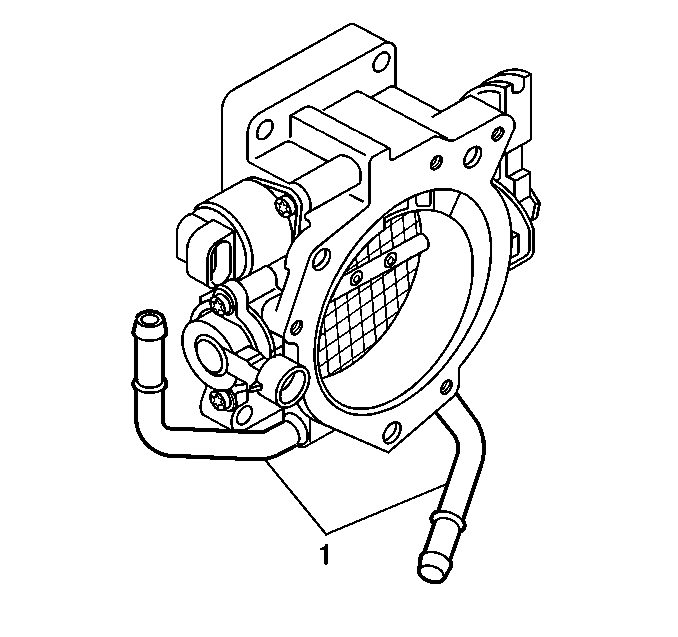
- Disconnect the throttle body coolant hoses (1) from the throttle body.
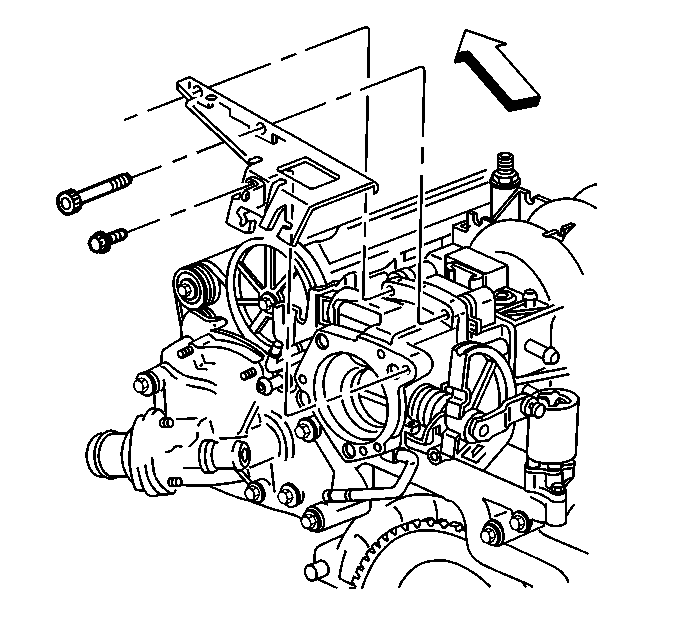
- Remove the bolts retaining the accelerator controls cable bracket.
- Remove the accelerator controls cable bracket.
- Remove the following components:
- Clean any gasket material from the throttle body spacer (3).
Notice: Do not damage the MAF sensor screen. A damaged screen could restrict airflow and lead to a driveability concern.




| • | The throttle body retaining bolts |
| • | The throttle body (1) |
| • | The gasket (2) |
Installation Procedure
Important: The outlet of the air cleaner assembly and the MAF sensor inlet duct must line up when completely installed. Misalignment may cause incorrect airflow readings resulting in MIL illumination or a driveability concern.
- Install the throttle body (1) and the gasket (2) with the retaining bolts.
- Install the accelerator controls cable bracket.
- Install the mounting bolts to the accelerator controls cable bracket.
- Connect the throttle body coolant hoses (1) at the throttle body.
- Connect the IAC valve electrical connector (1).
- Connect the TP sensor electrical connector (6).
- Install the accelerator cable (3) to the accelerator controls cable bracket (1).
- Install the cruise control cable (2) to the accelerator controls cable bracket (1).
- Connect the accelerator controls cable (3) at throttle body lever (1).
- Connect the cruise control cable (2) at throttle body lever (1).
- Install the transaxle vent hose (4) to the accelerator controls cable bracket.
- Install the MAF sensor. Refer to Mass Airflow Sensor Replacement .
- Tighten the air intake duct (2) clamp at the air cleaner housing cover (3).
- Connect the IAT sensor connector (1).
- Tighten the duct clamp (2) at the MAF sensor.
- Install the air cleaner resonator to the vehicle.
- Tighten the duct clamp at the resonator.
- Install the air cleaner resonator bolt.
- Fill the cooling system. Refer to Cooling System Draining and Filling .

Important: Do Not Reuse the old throttle body gasket.
Tighten
Tighten the throttle body attaching bolts to 12 N·m (106 lb in).


Tighten
Tighten the MAF sensor bolts to 8 N·m (71 lb in).

Tighten
Tighten the clamp to 3 N·m (27 lb in).

Tighten
Tighten the clamp to 3 N·m (27 lb in).
Tighten
Tighten the clamp to 3 N·m (27 lb in).
