For 1990-2009 cars only
Exterior Lights Schematics Domestic
| Figure 1: |
Park Lamp and Class 2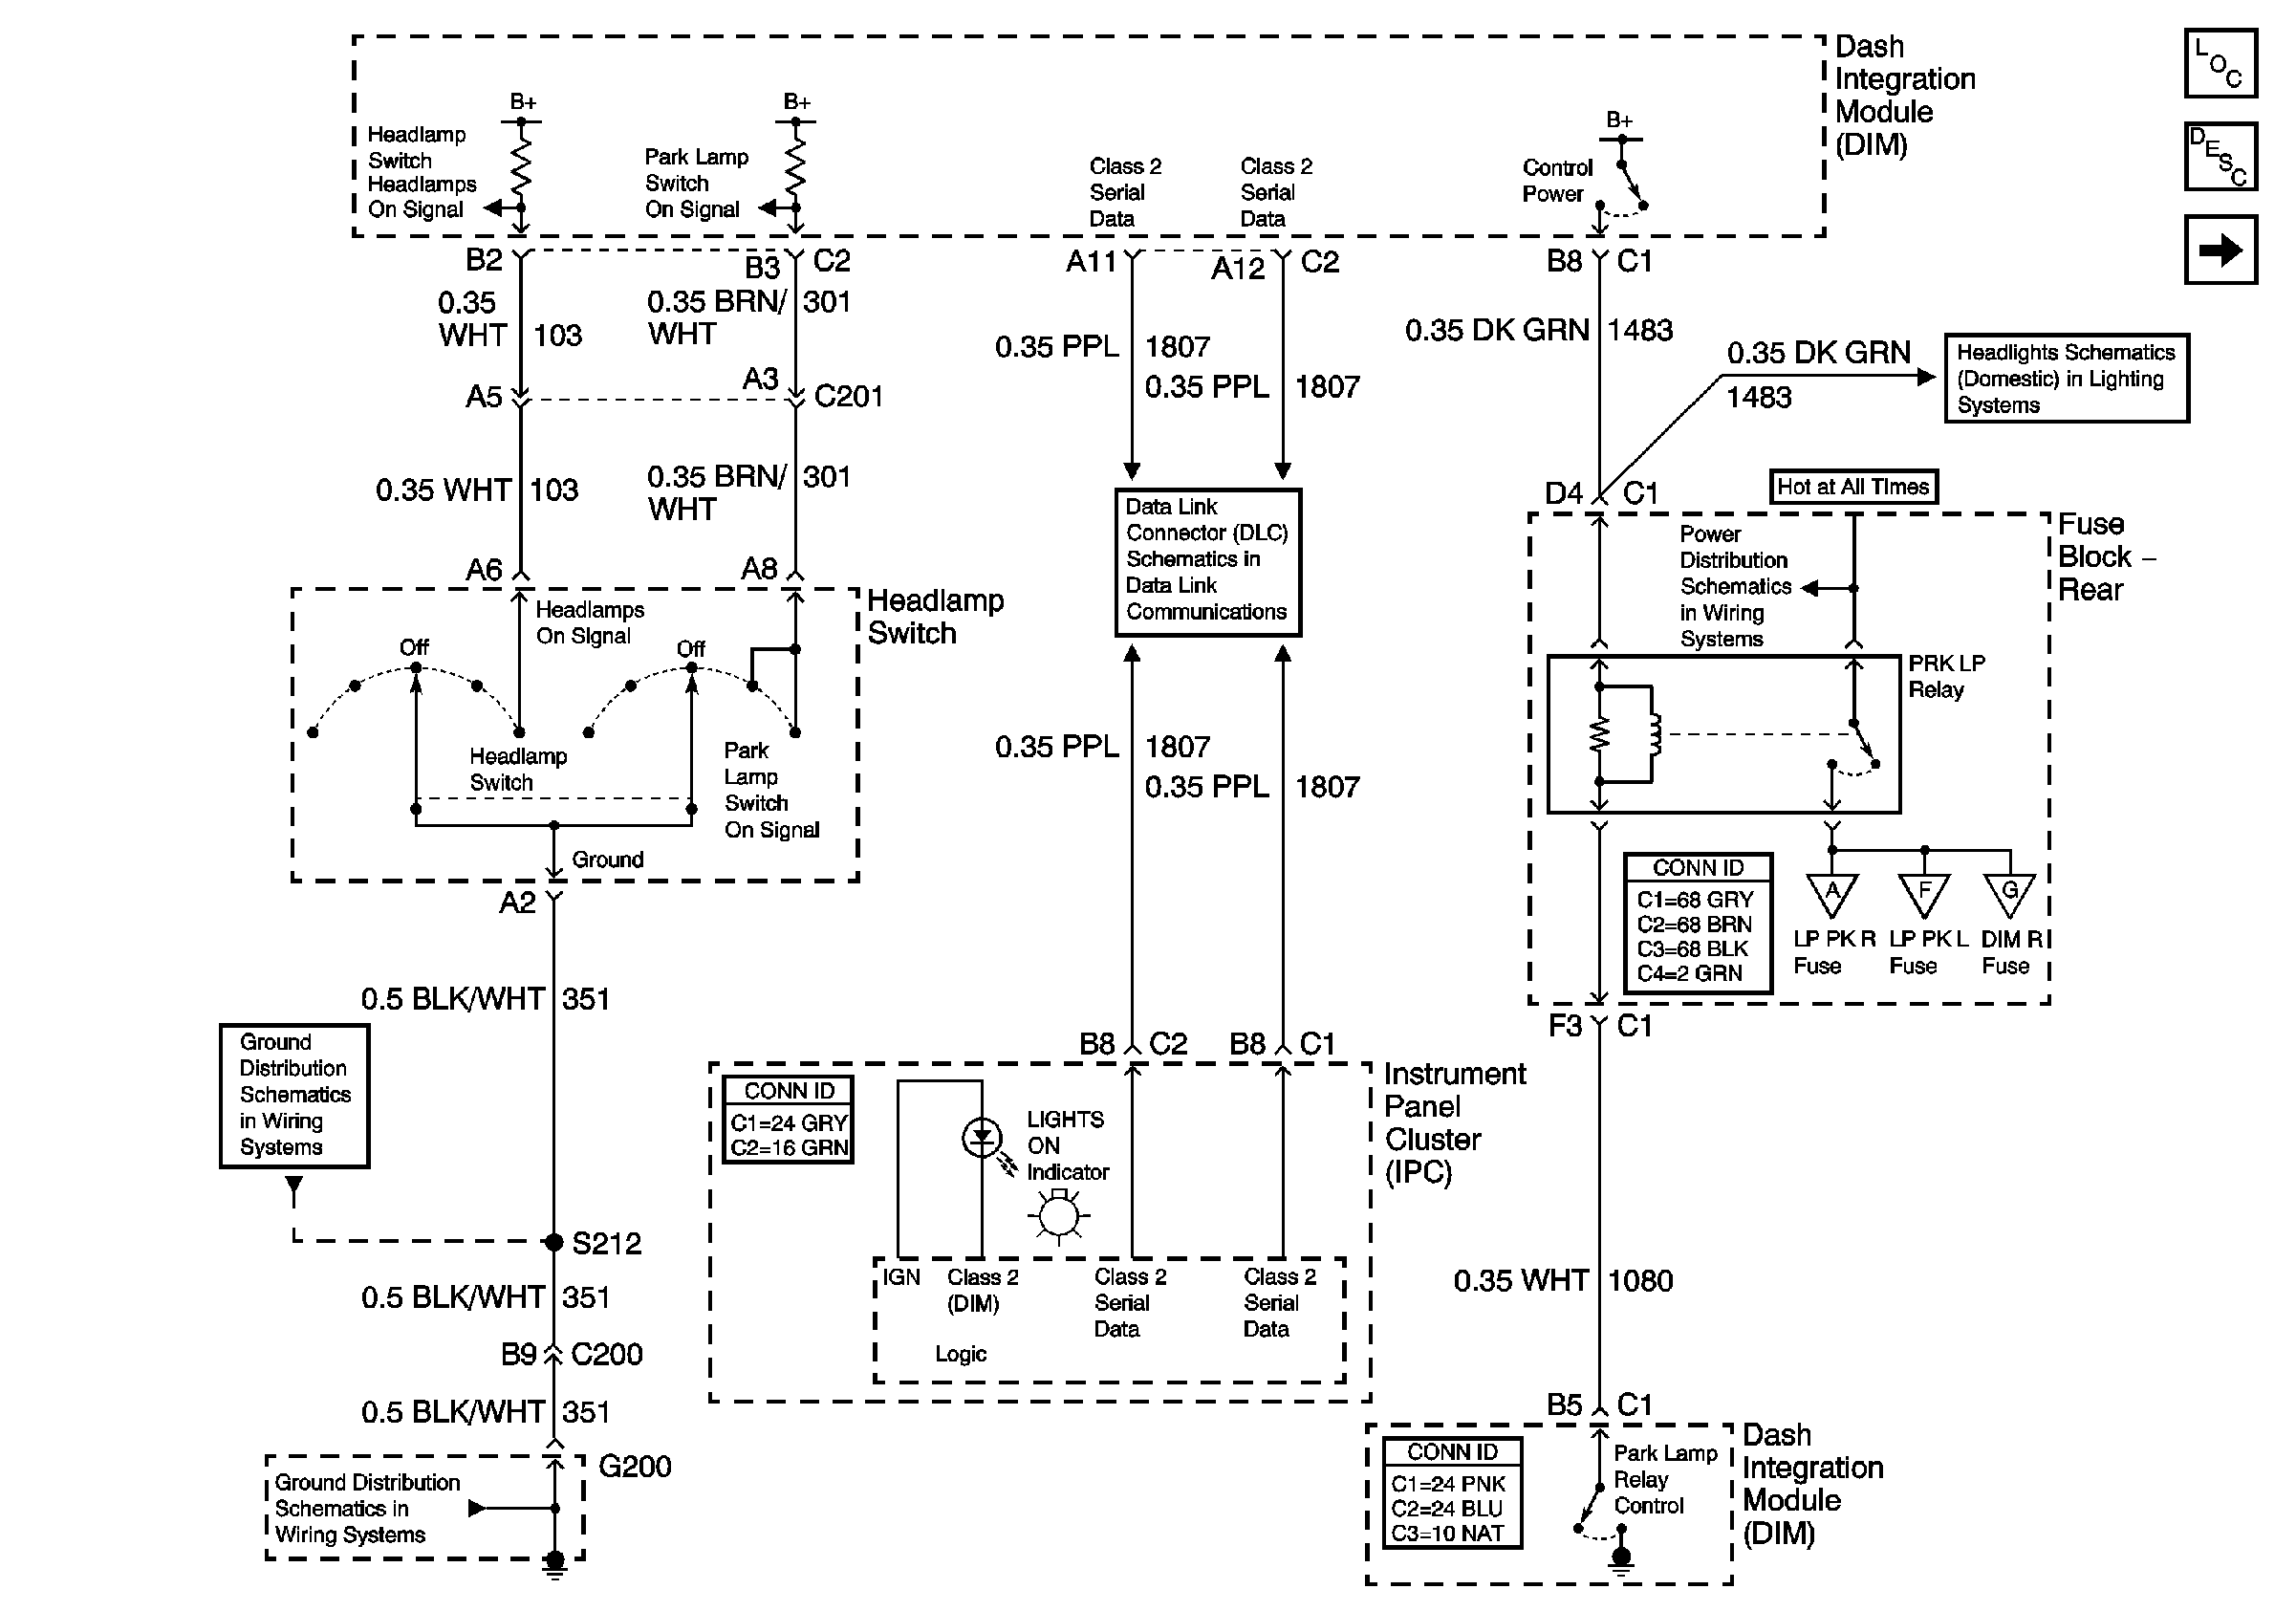
|
| Figure 2: |
Hazard Switch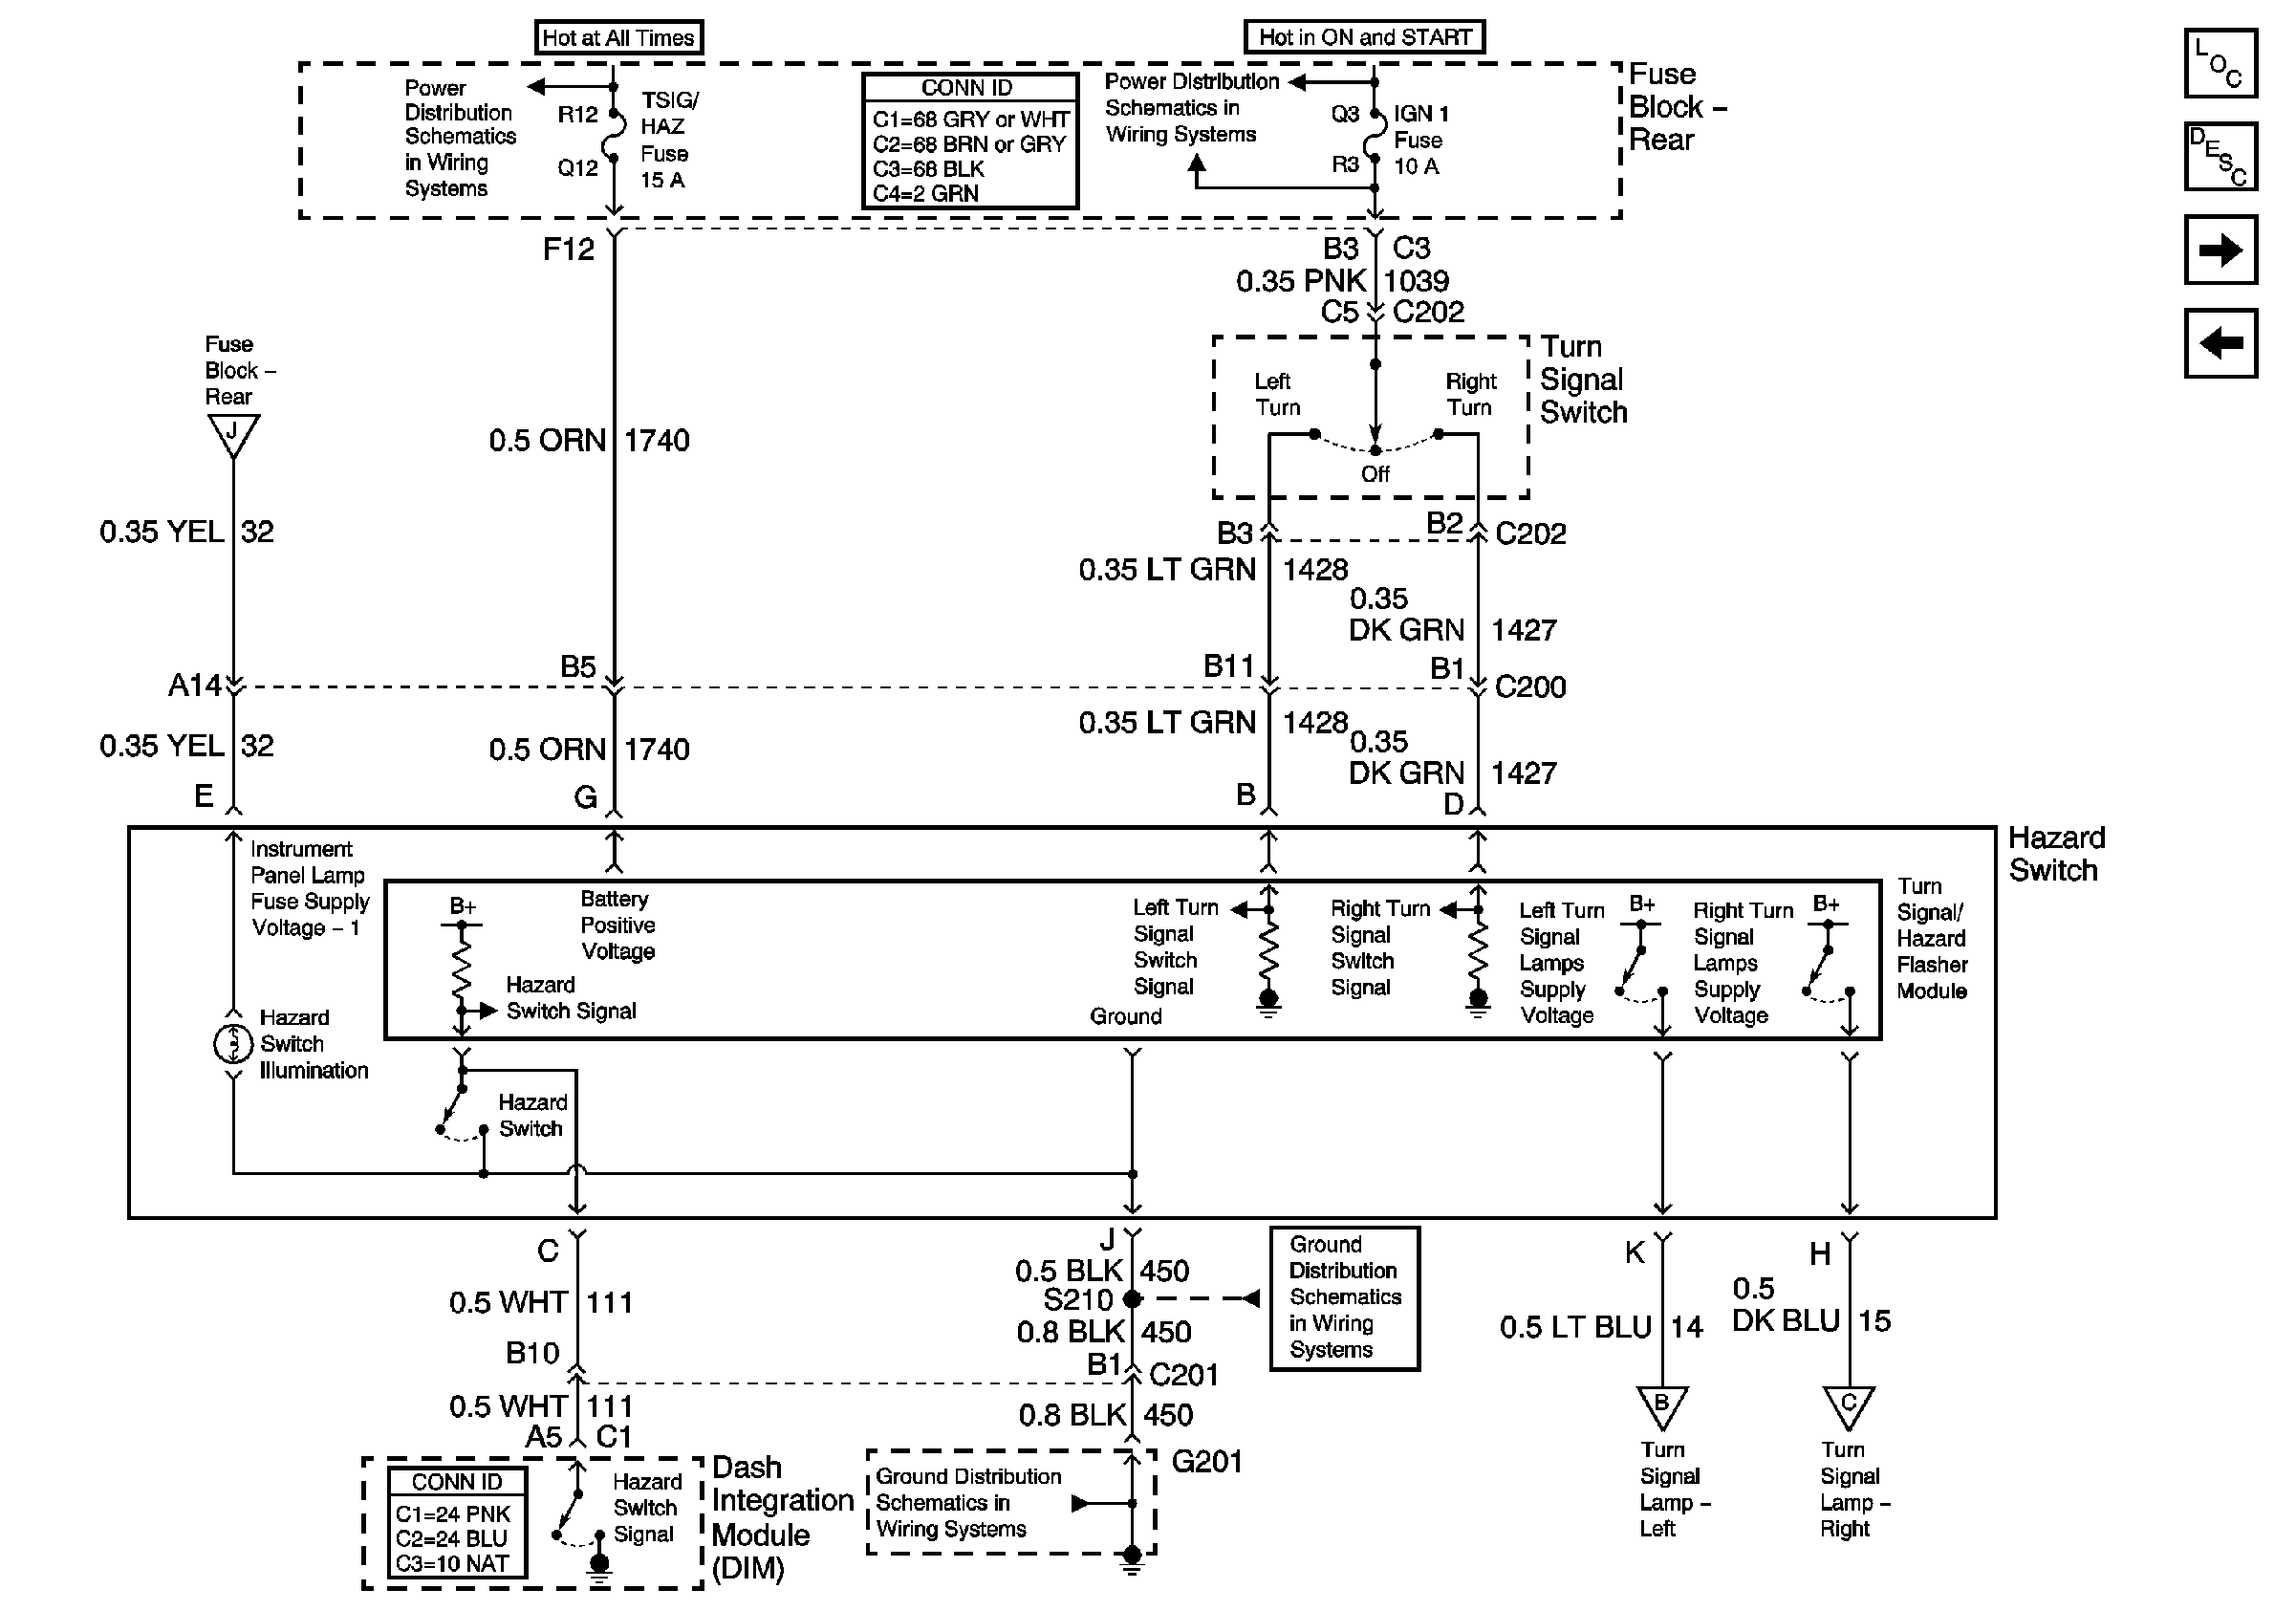
|
| Figure 3: |
Stoplamp Switches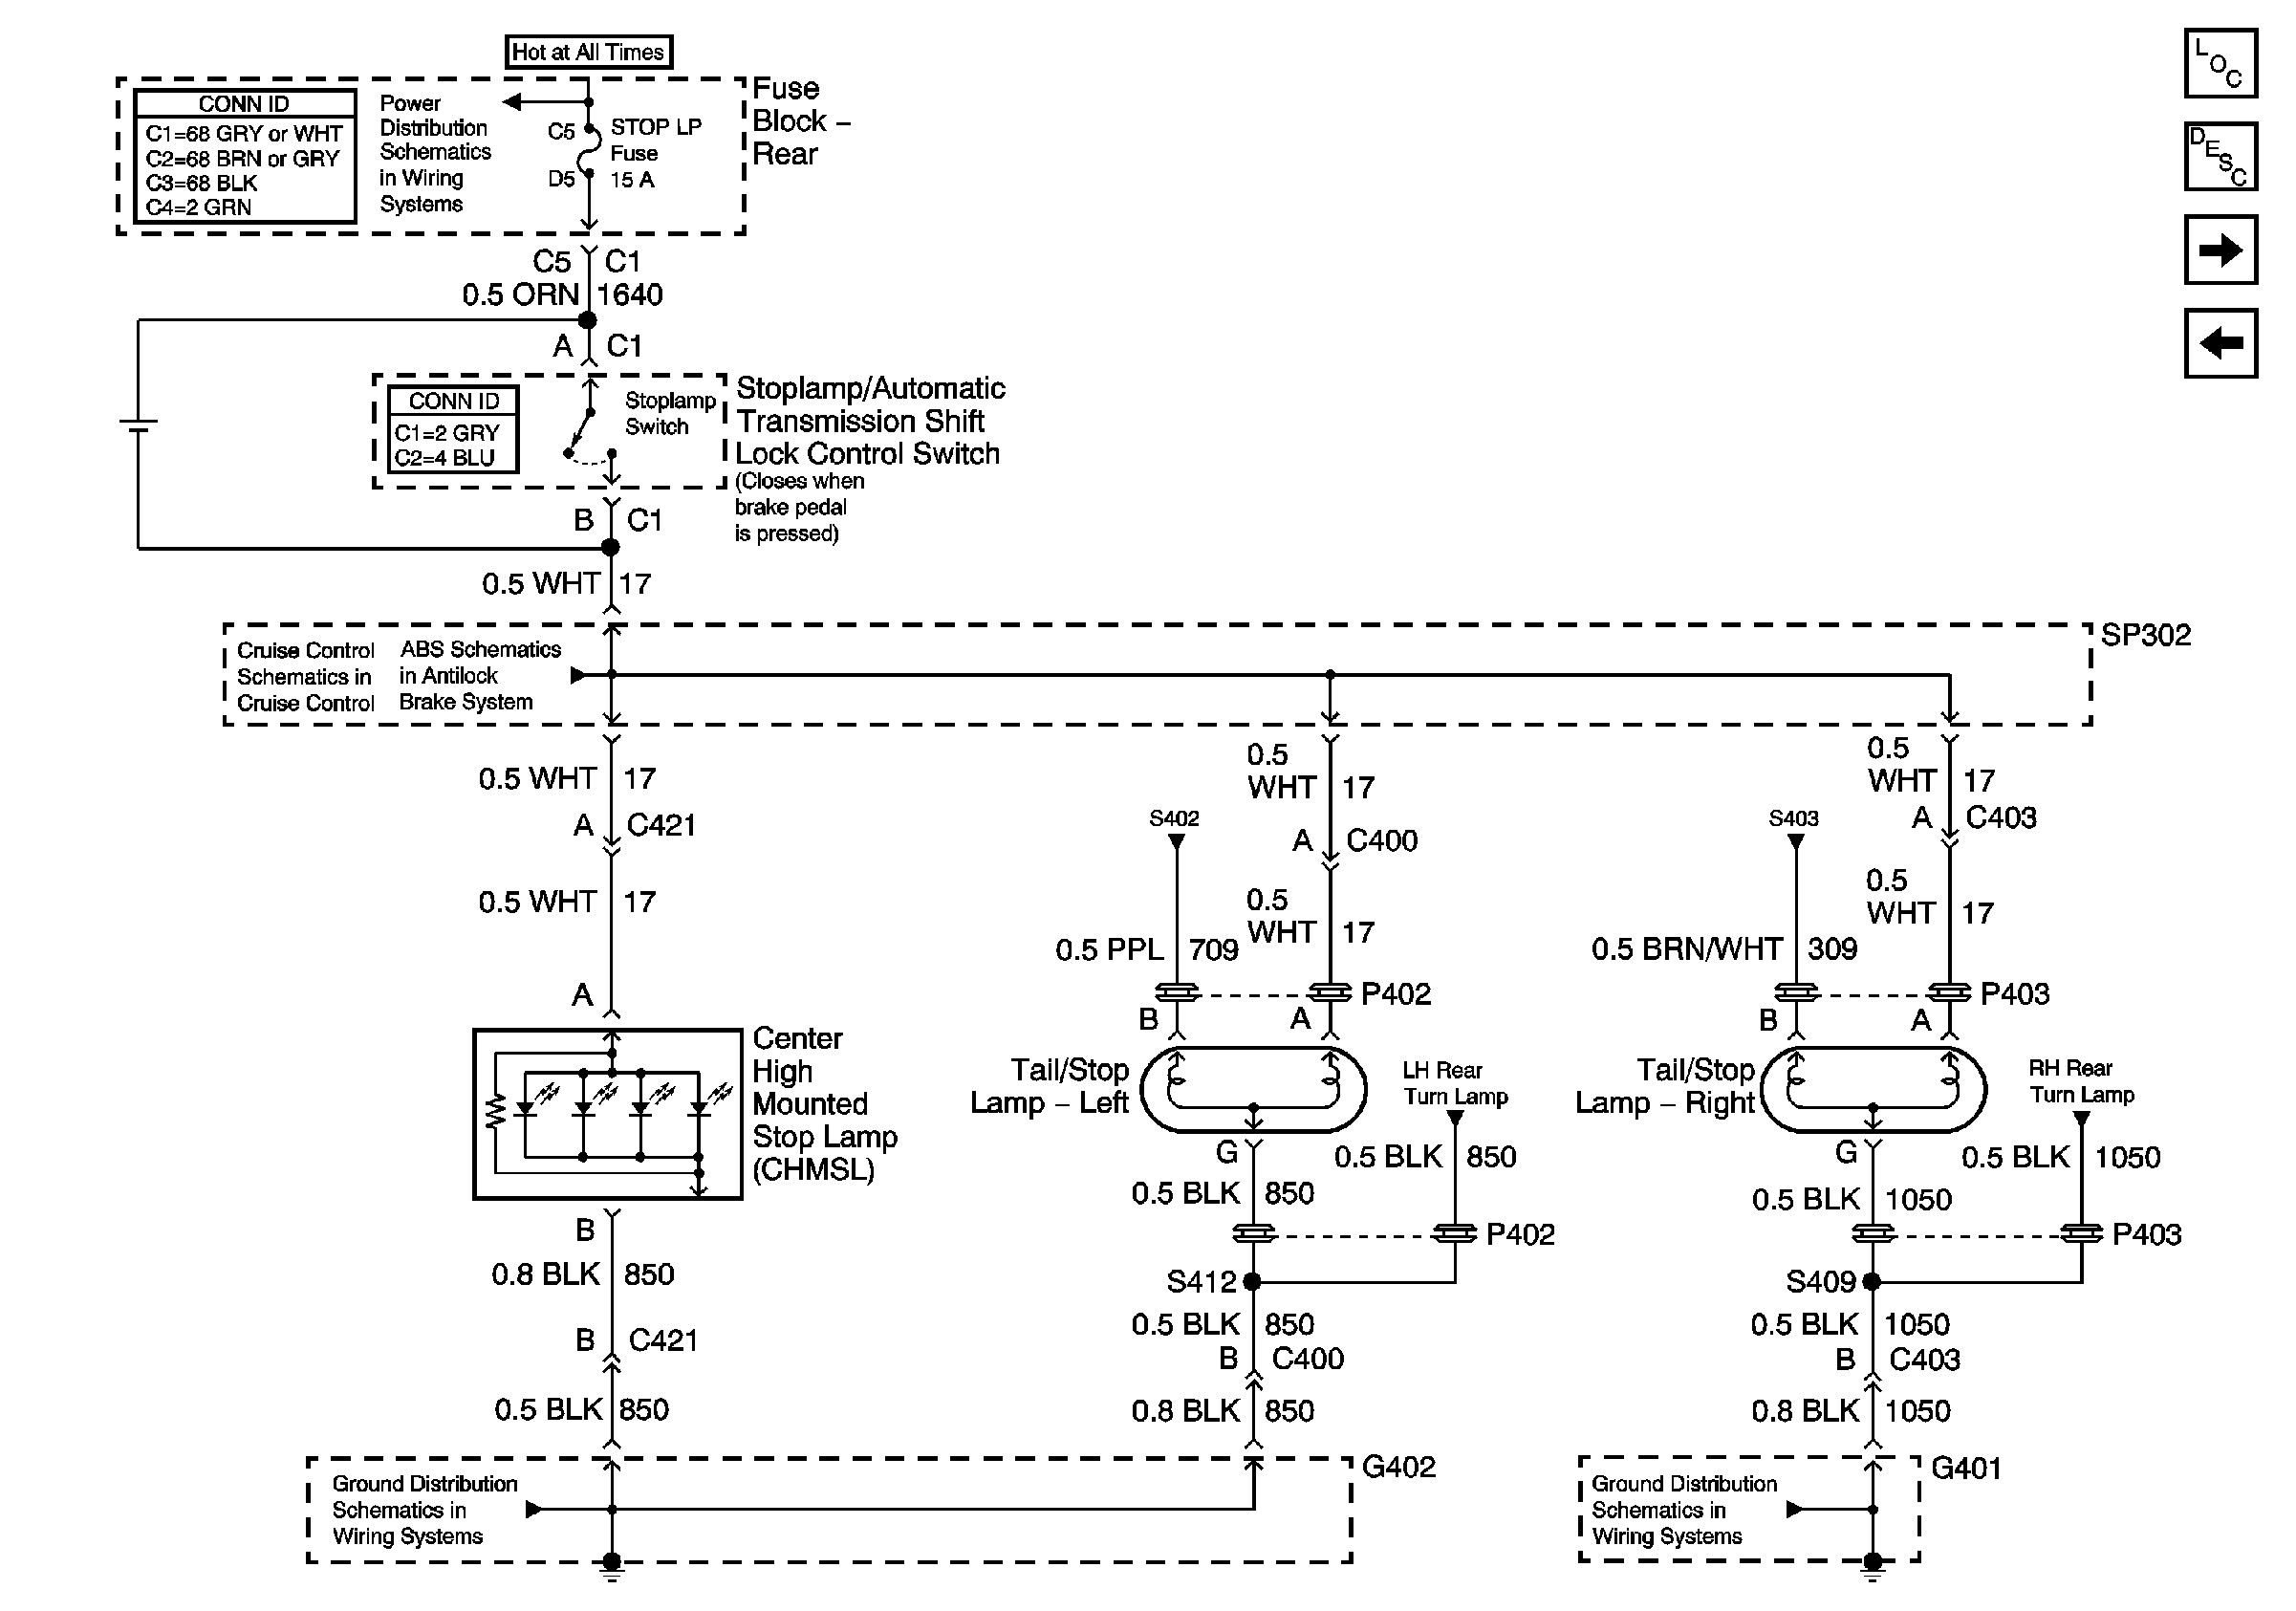
|
| Figure 4: |
Right Exterior Lights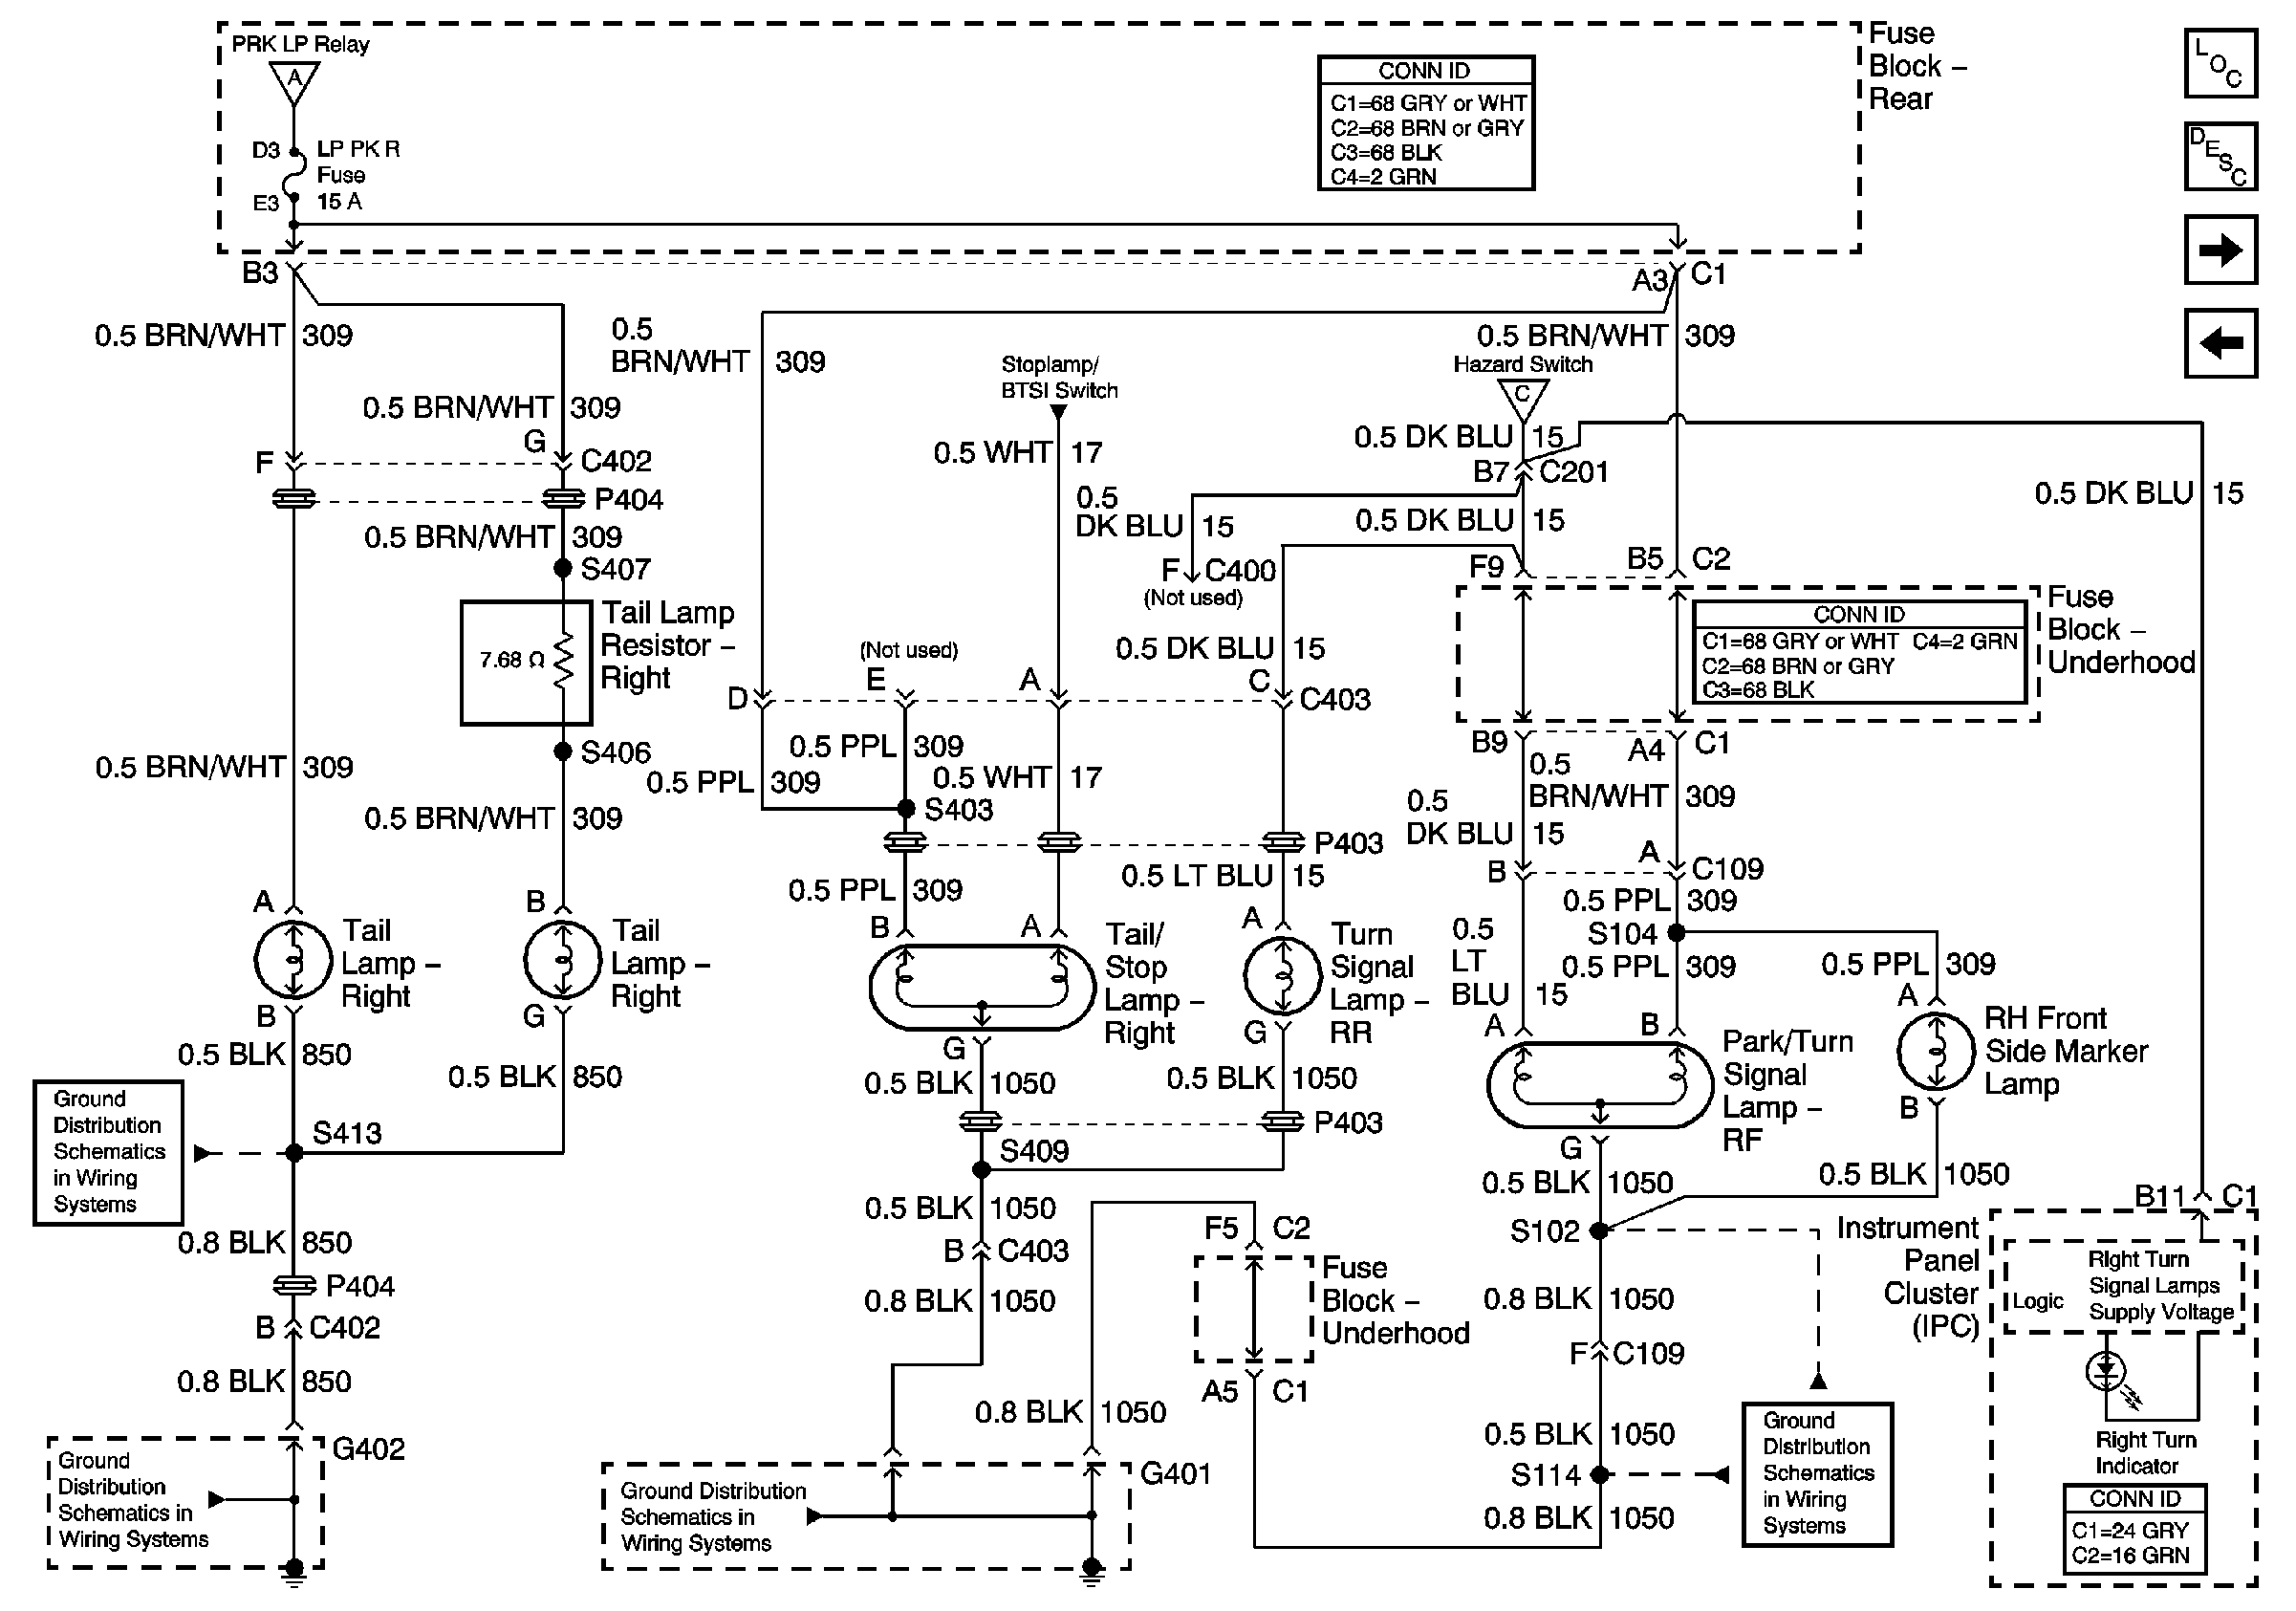
|
| Figure 5: |
Left Exterior Lamps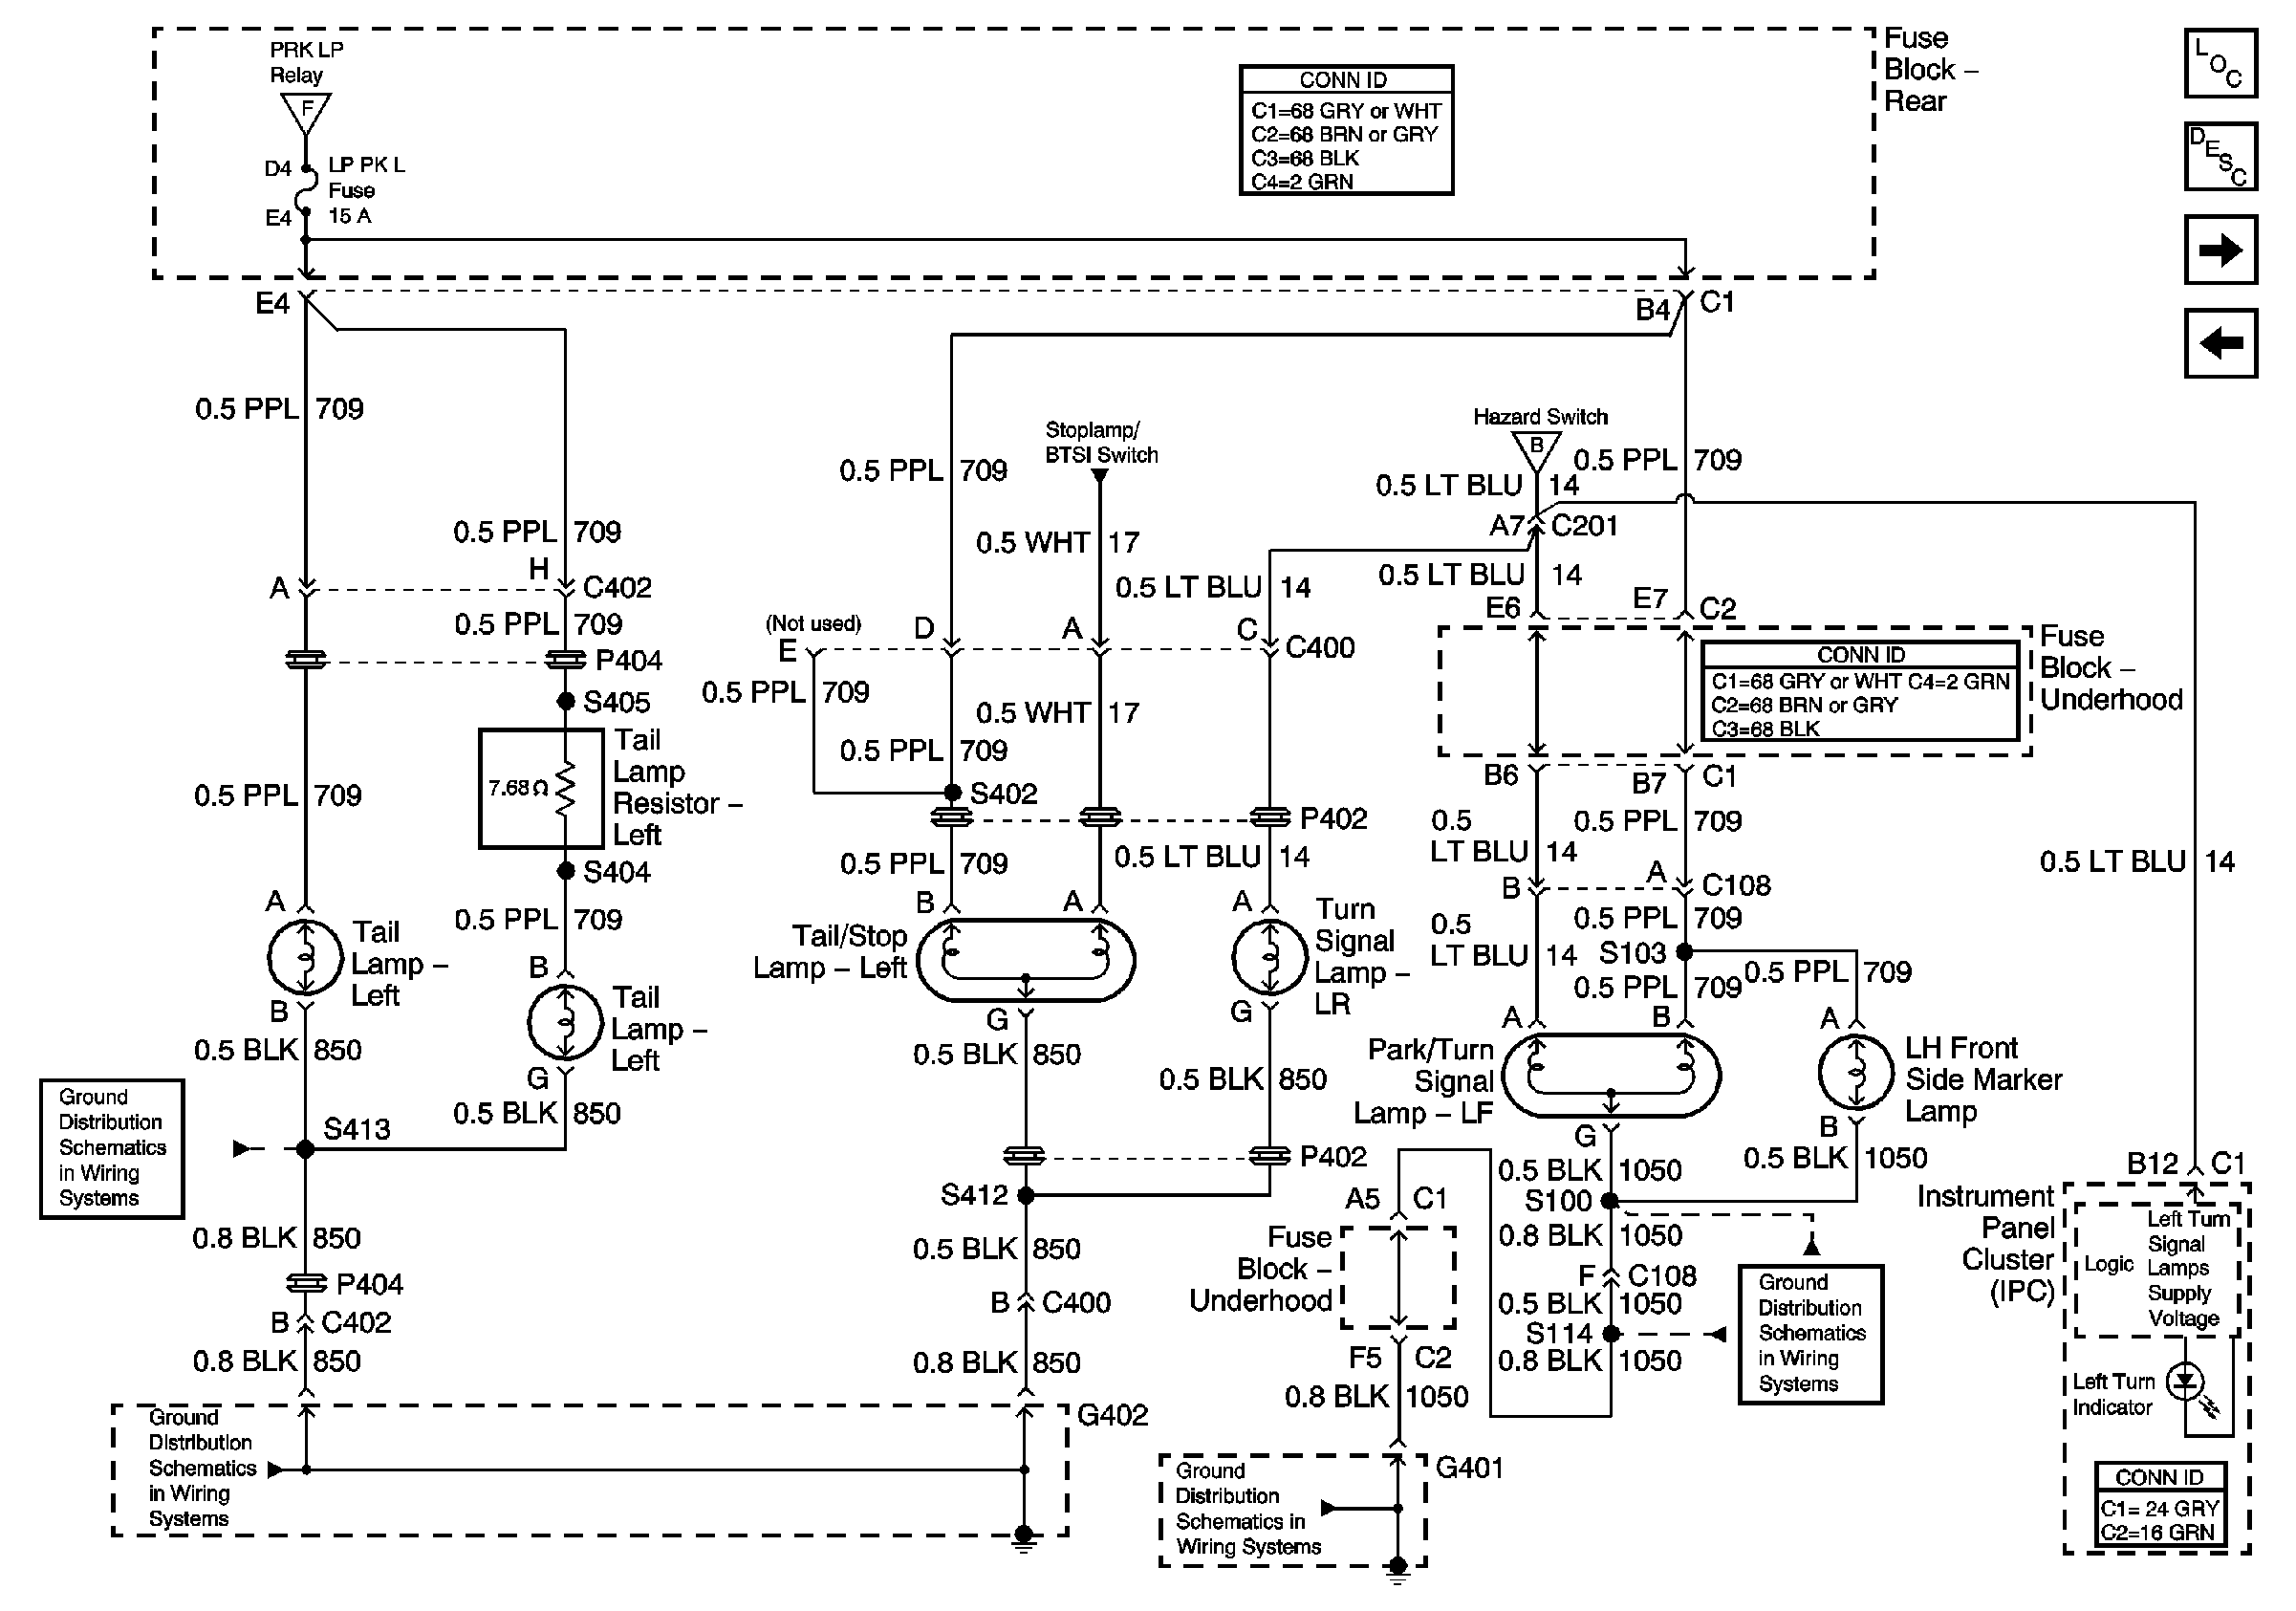
|
| Figure 6: |
License, Underhood, and Cornering Lamps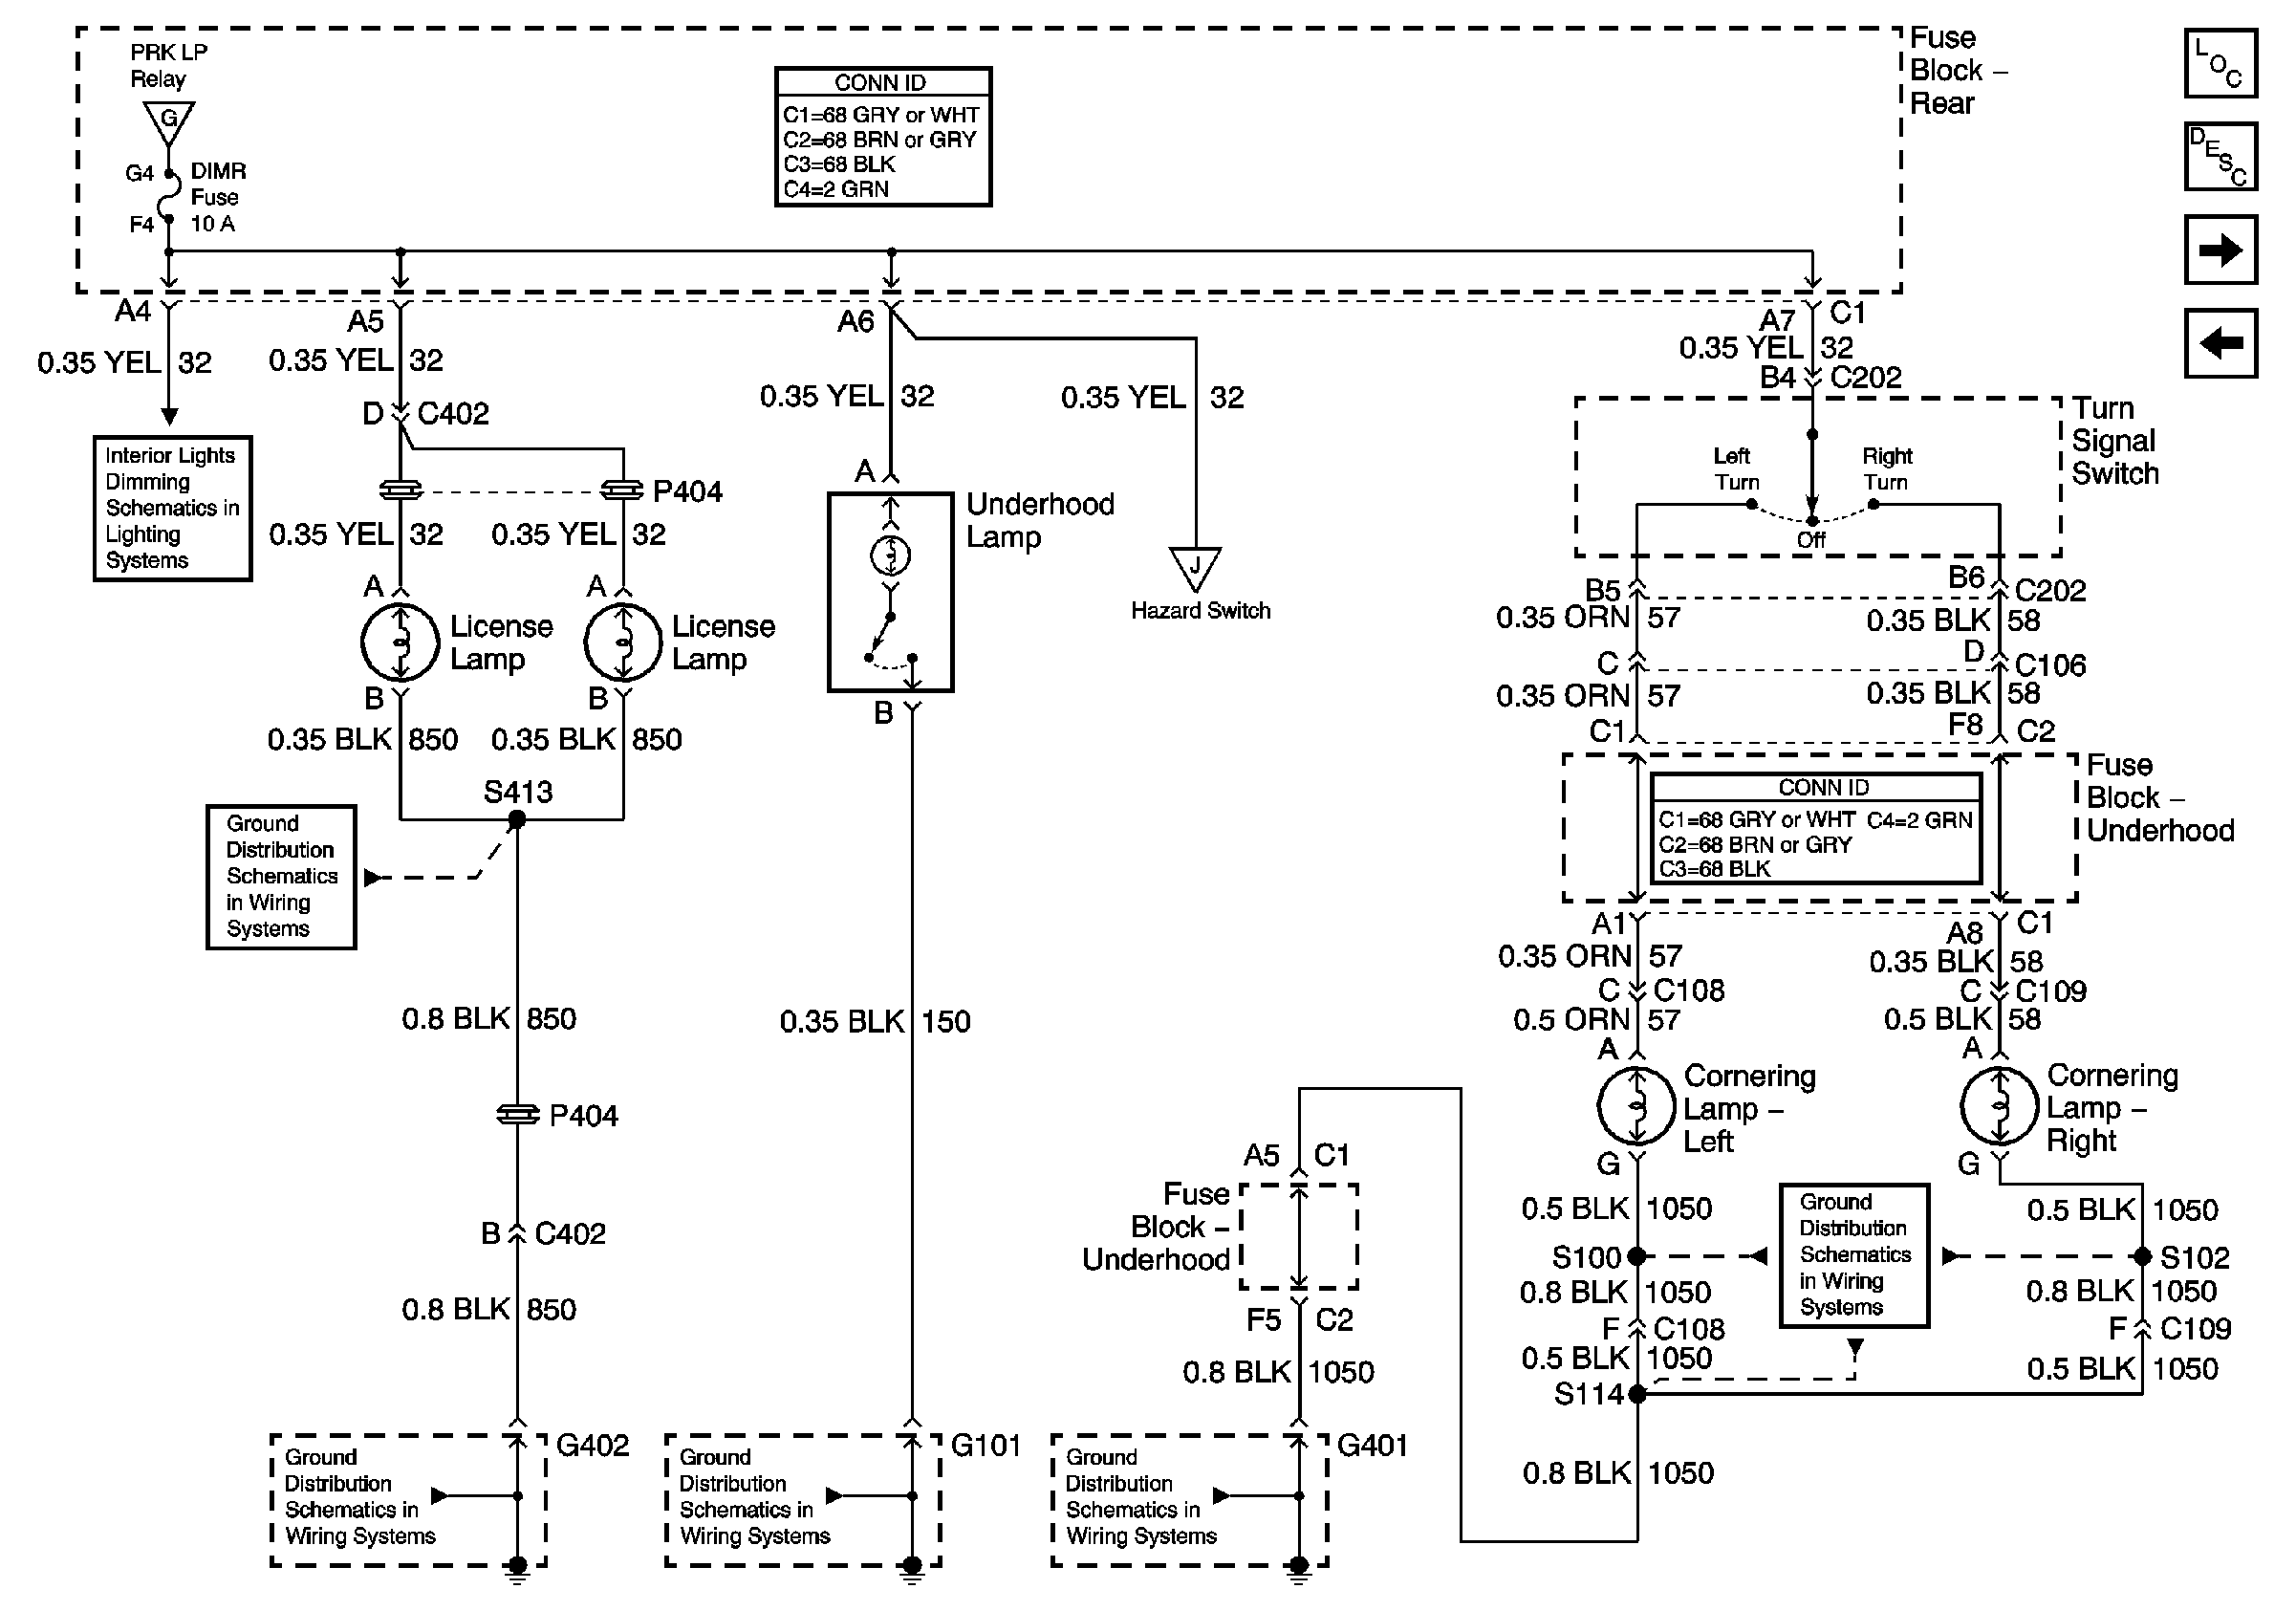
|
| Figure 7: |
Backup Lights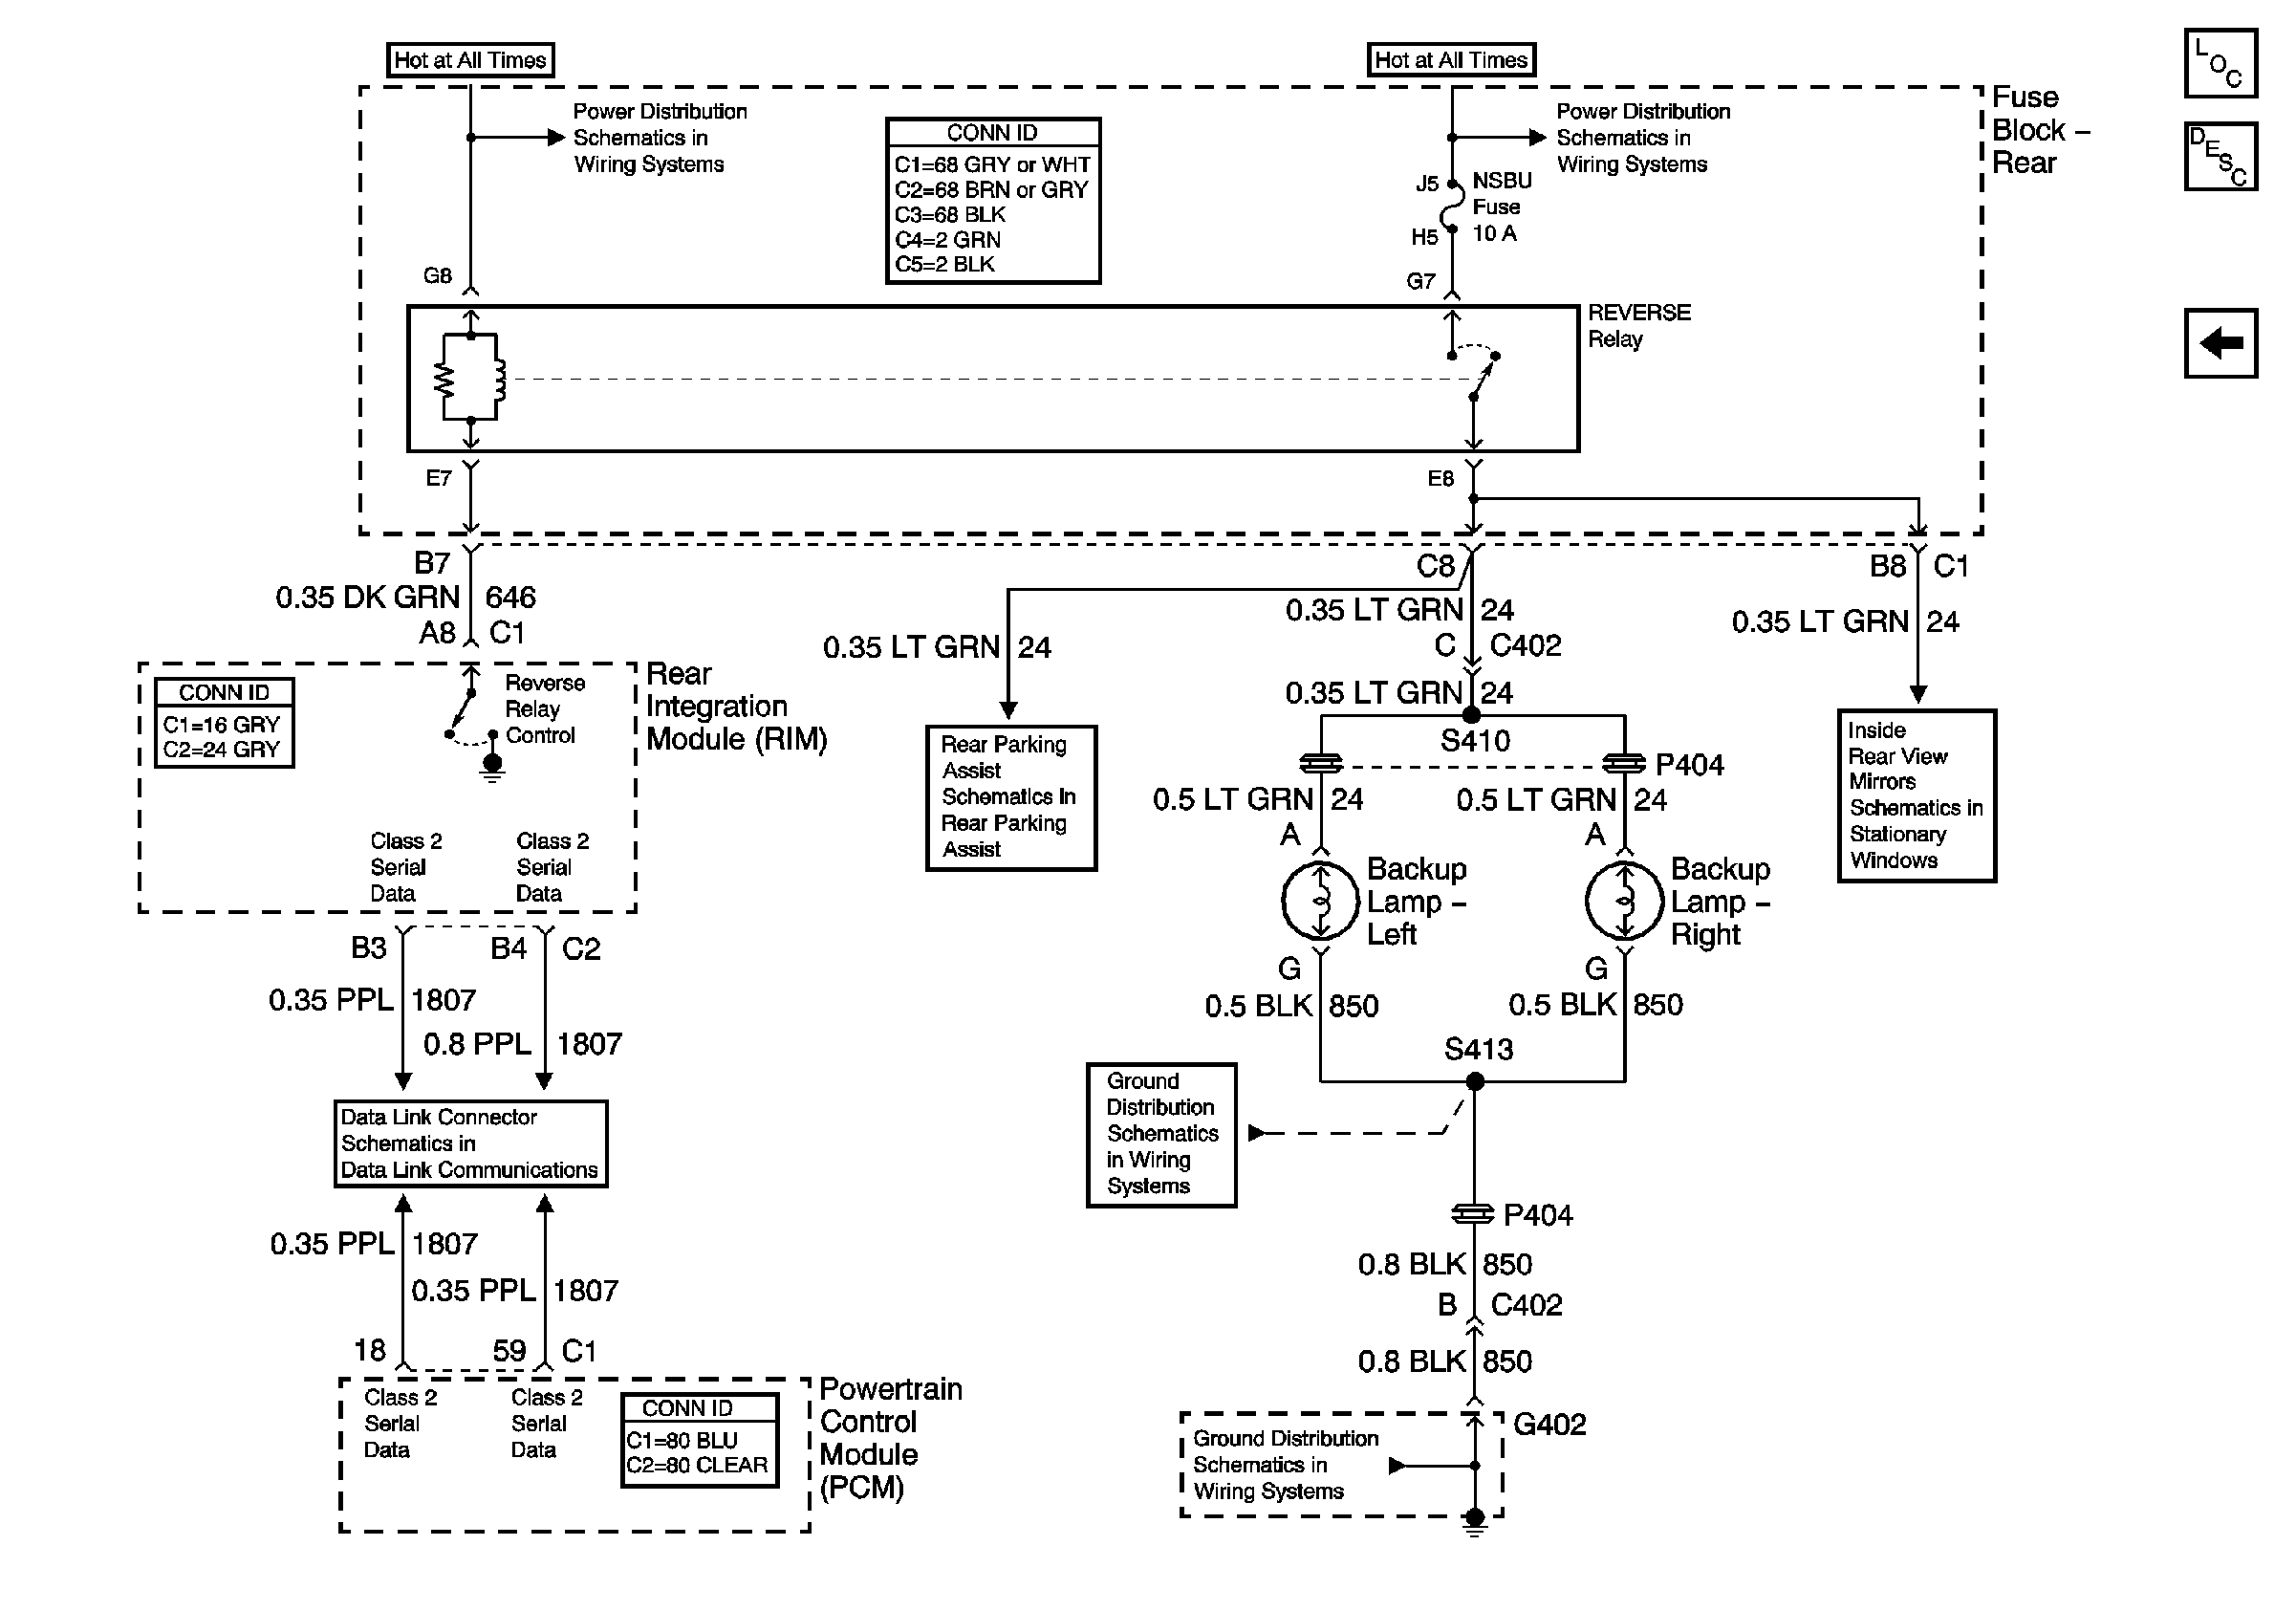
|
Exterior Lights Schematics Export
| Figure 1: |
Park Lamp and Class 2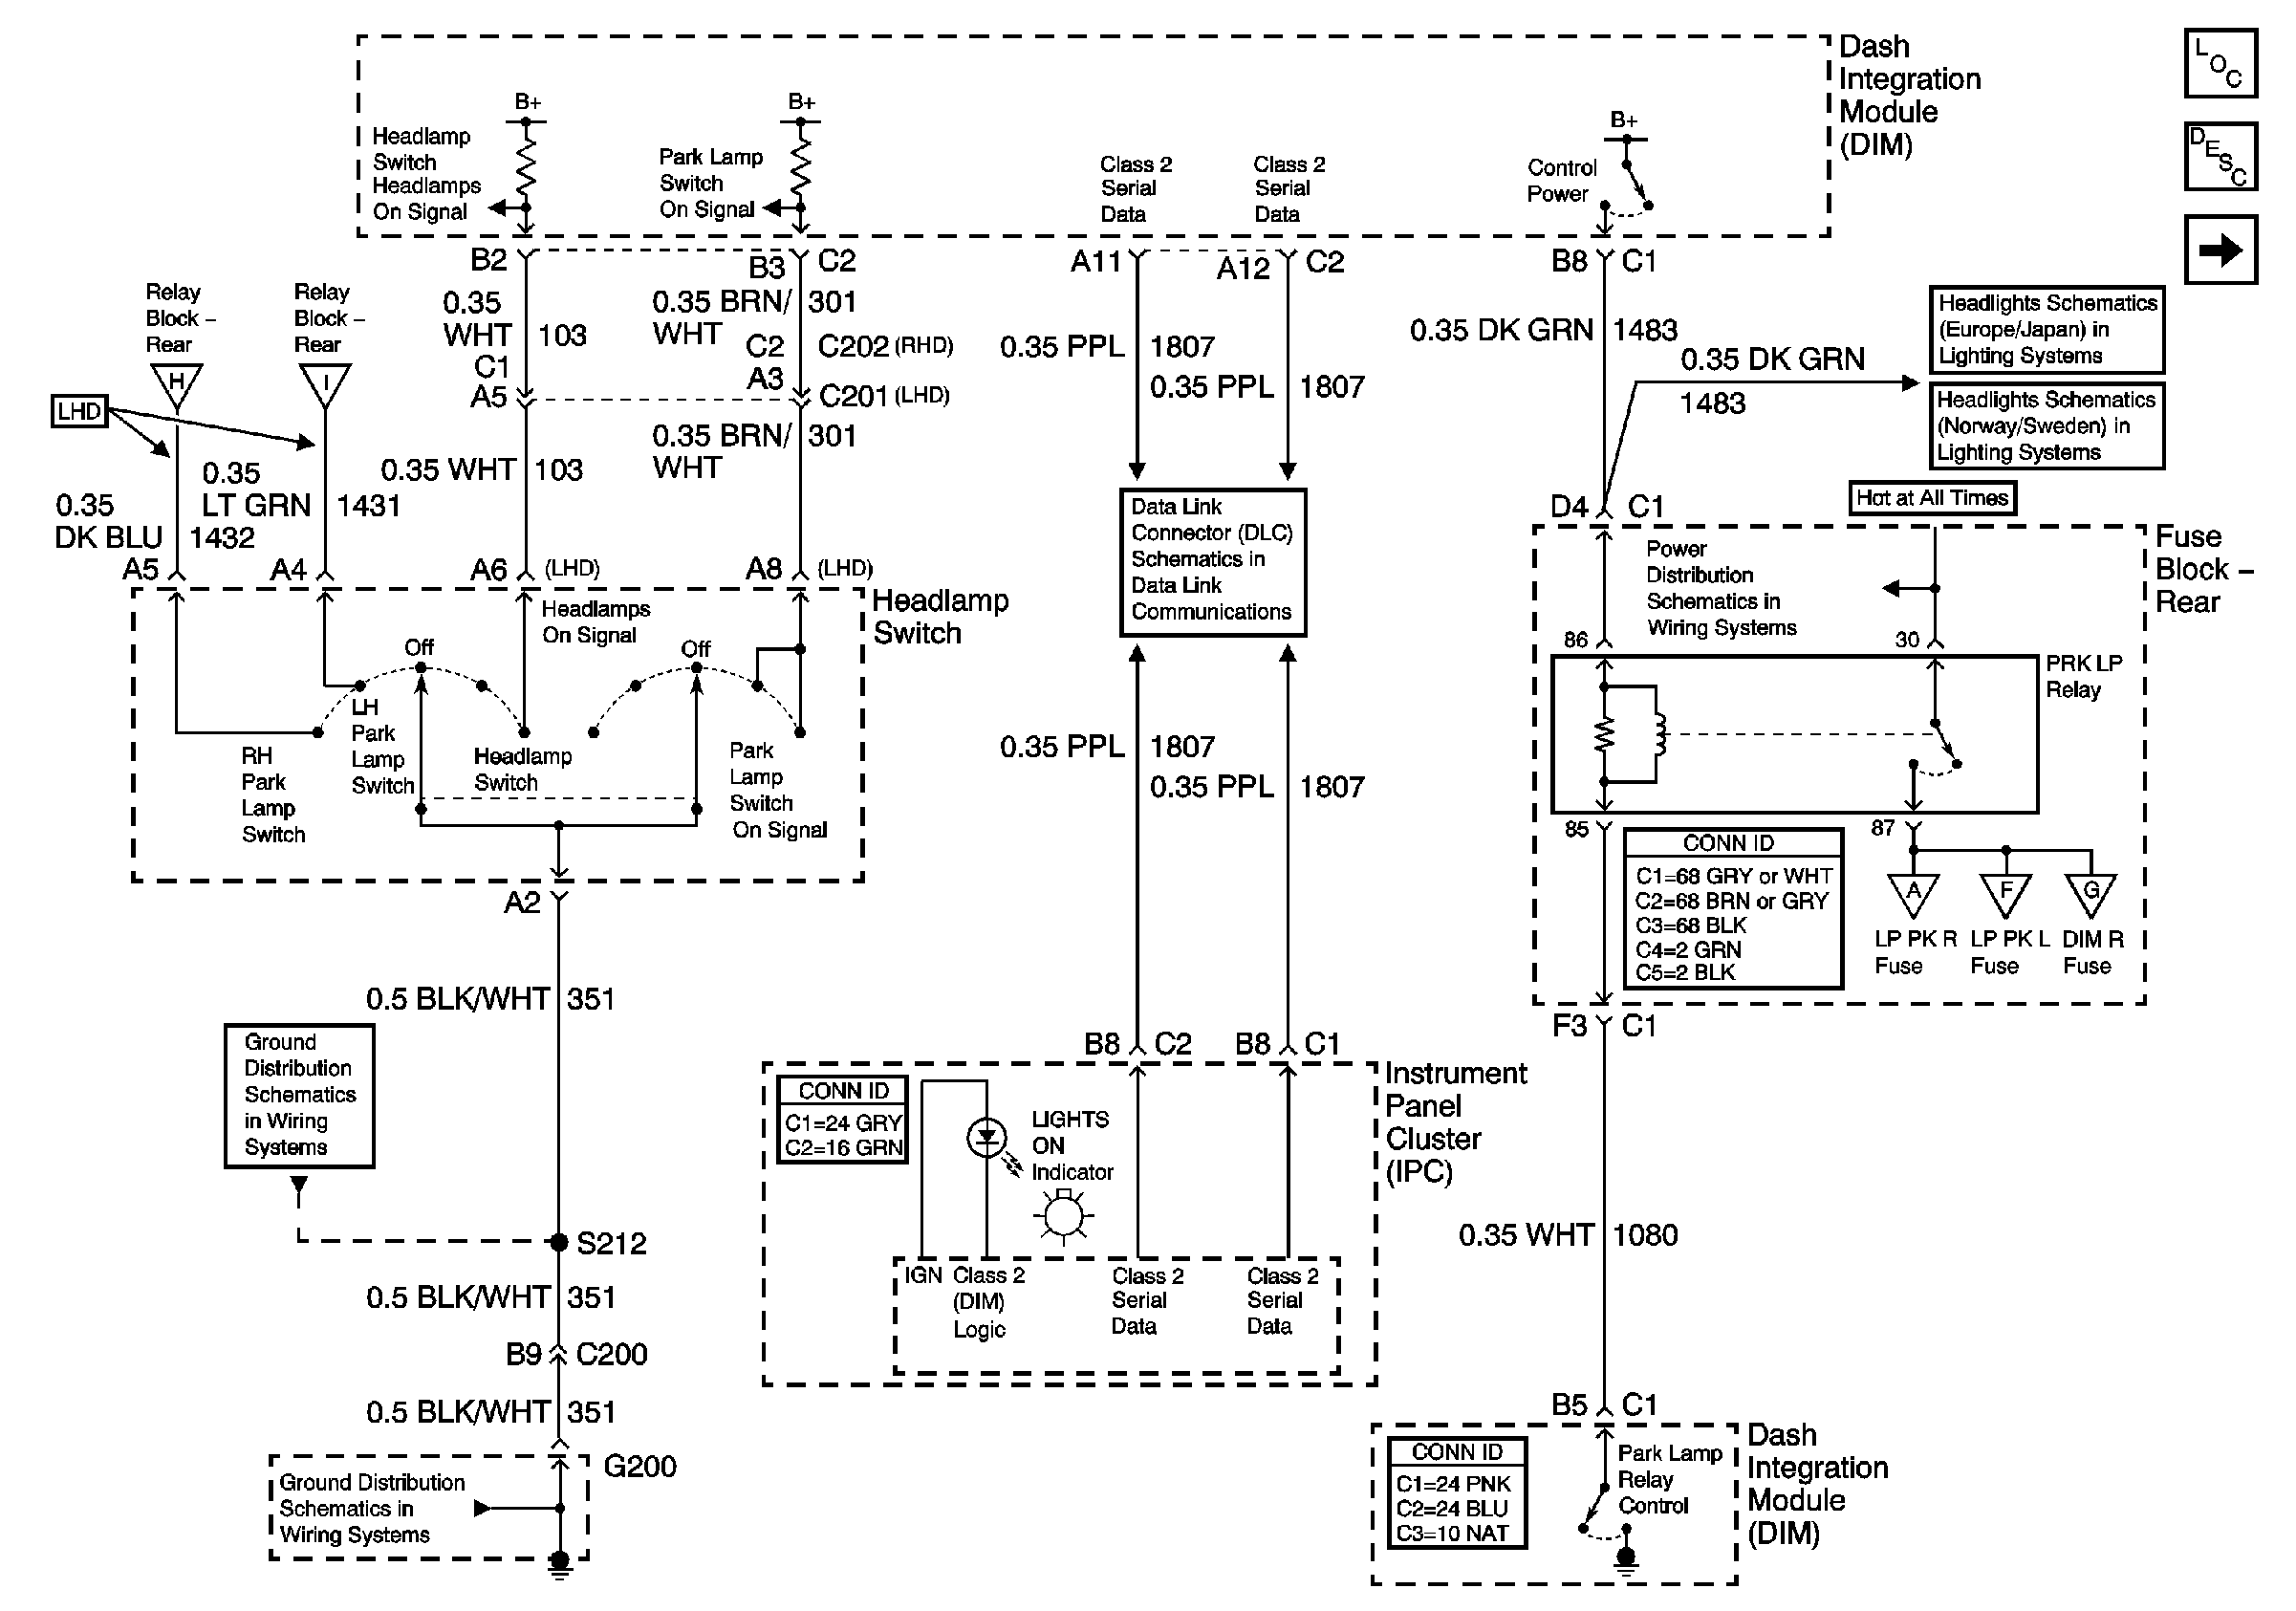
|
| Figure 2: |
Hazard Switch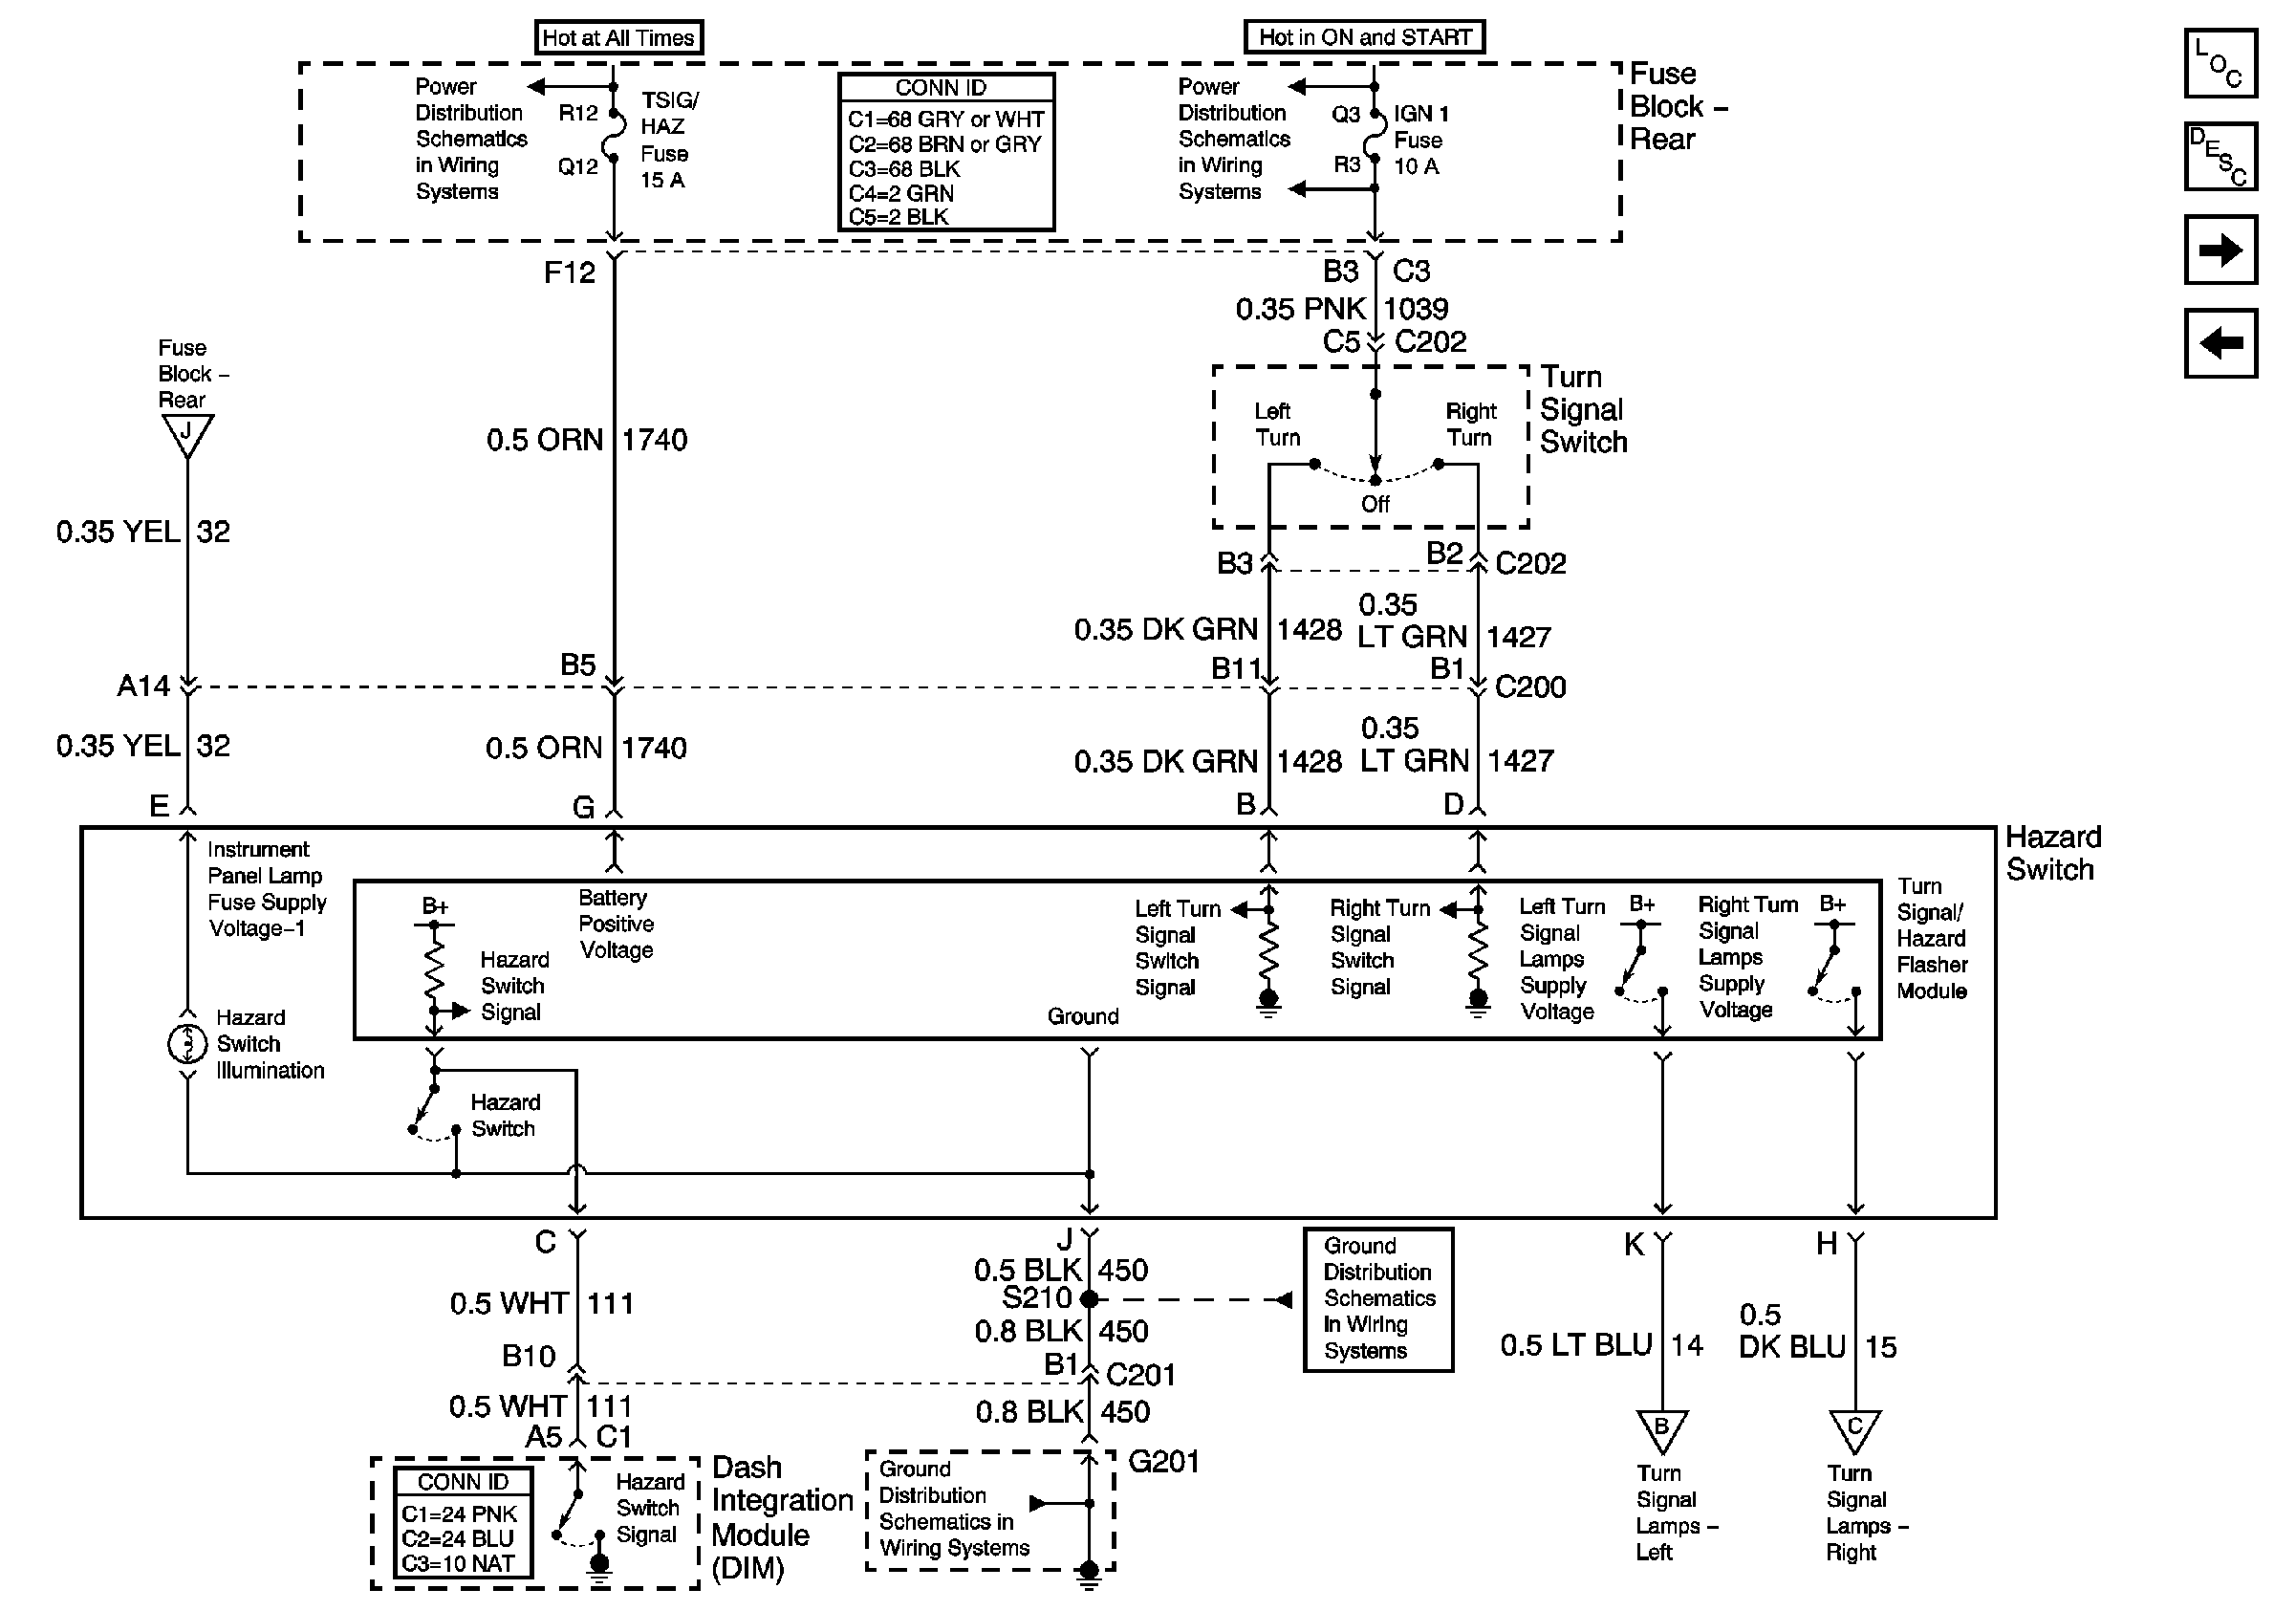
|
| Figure 3: |
Stoplamp Switches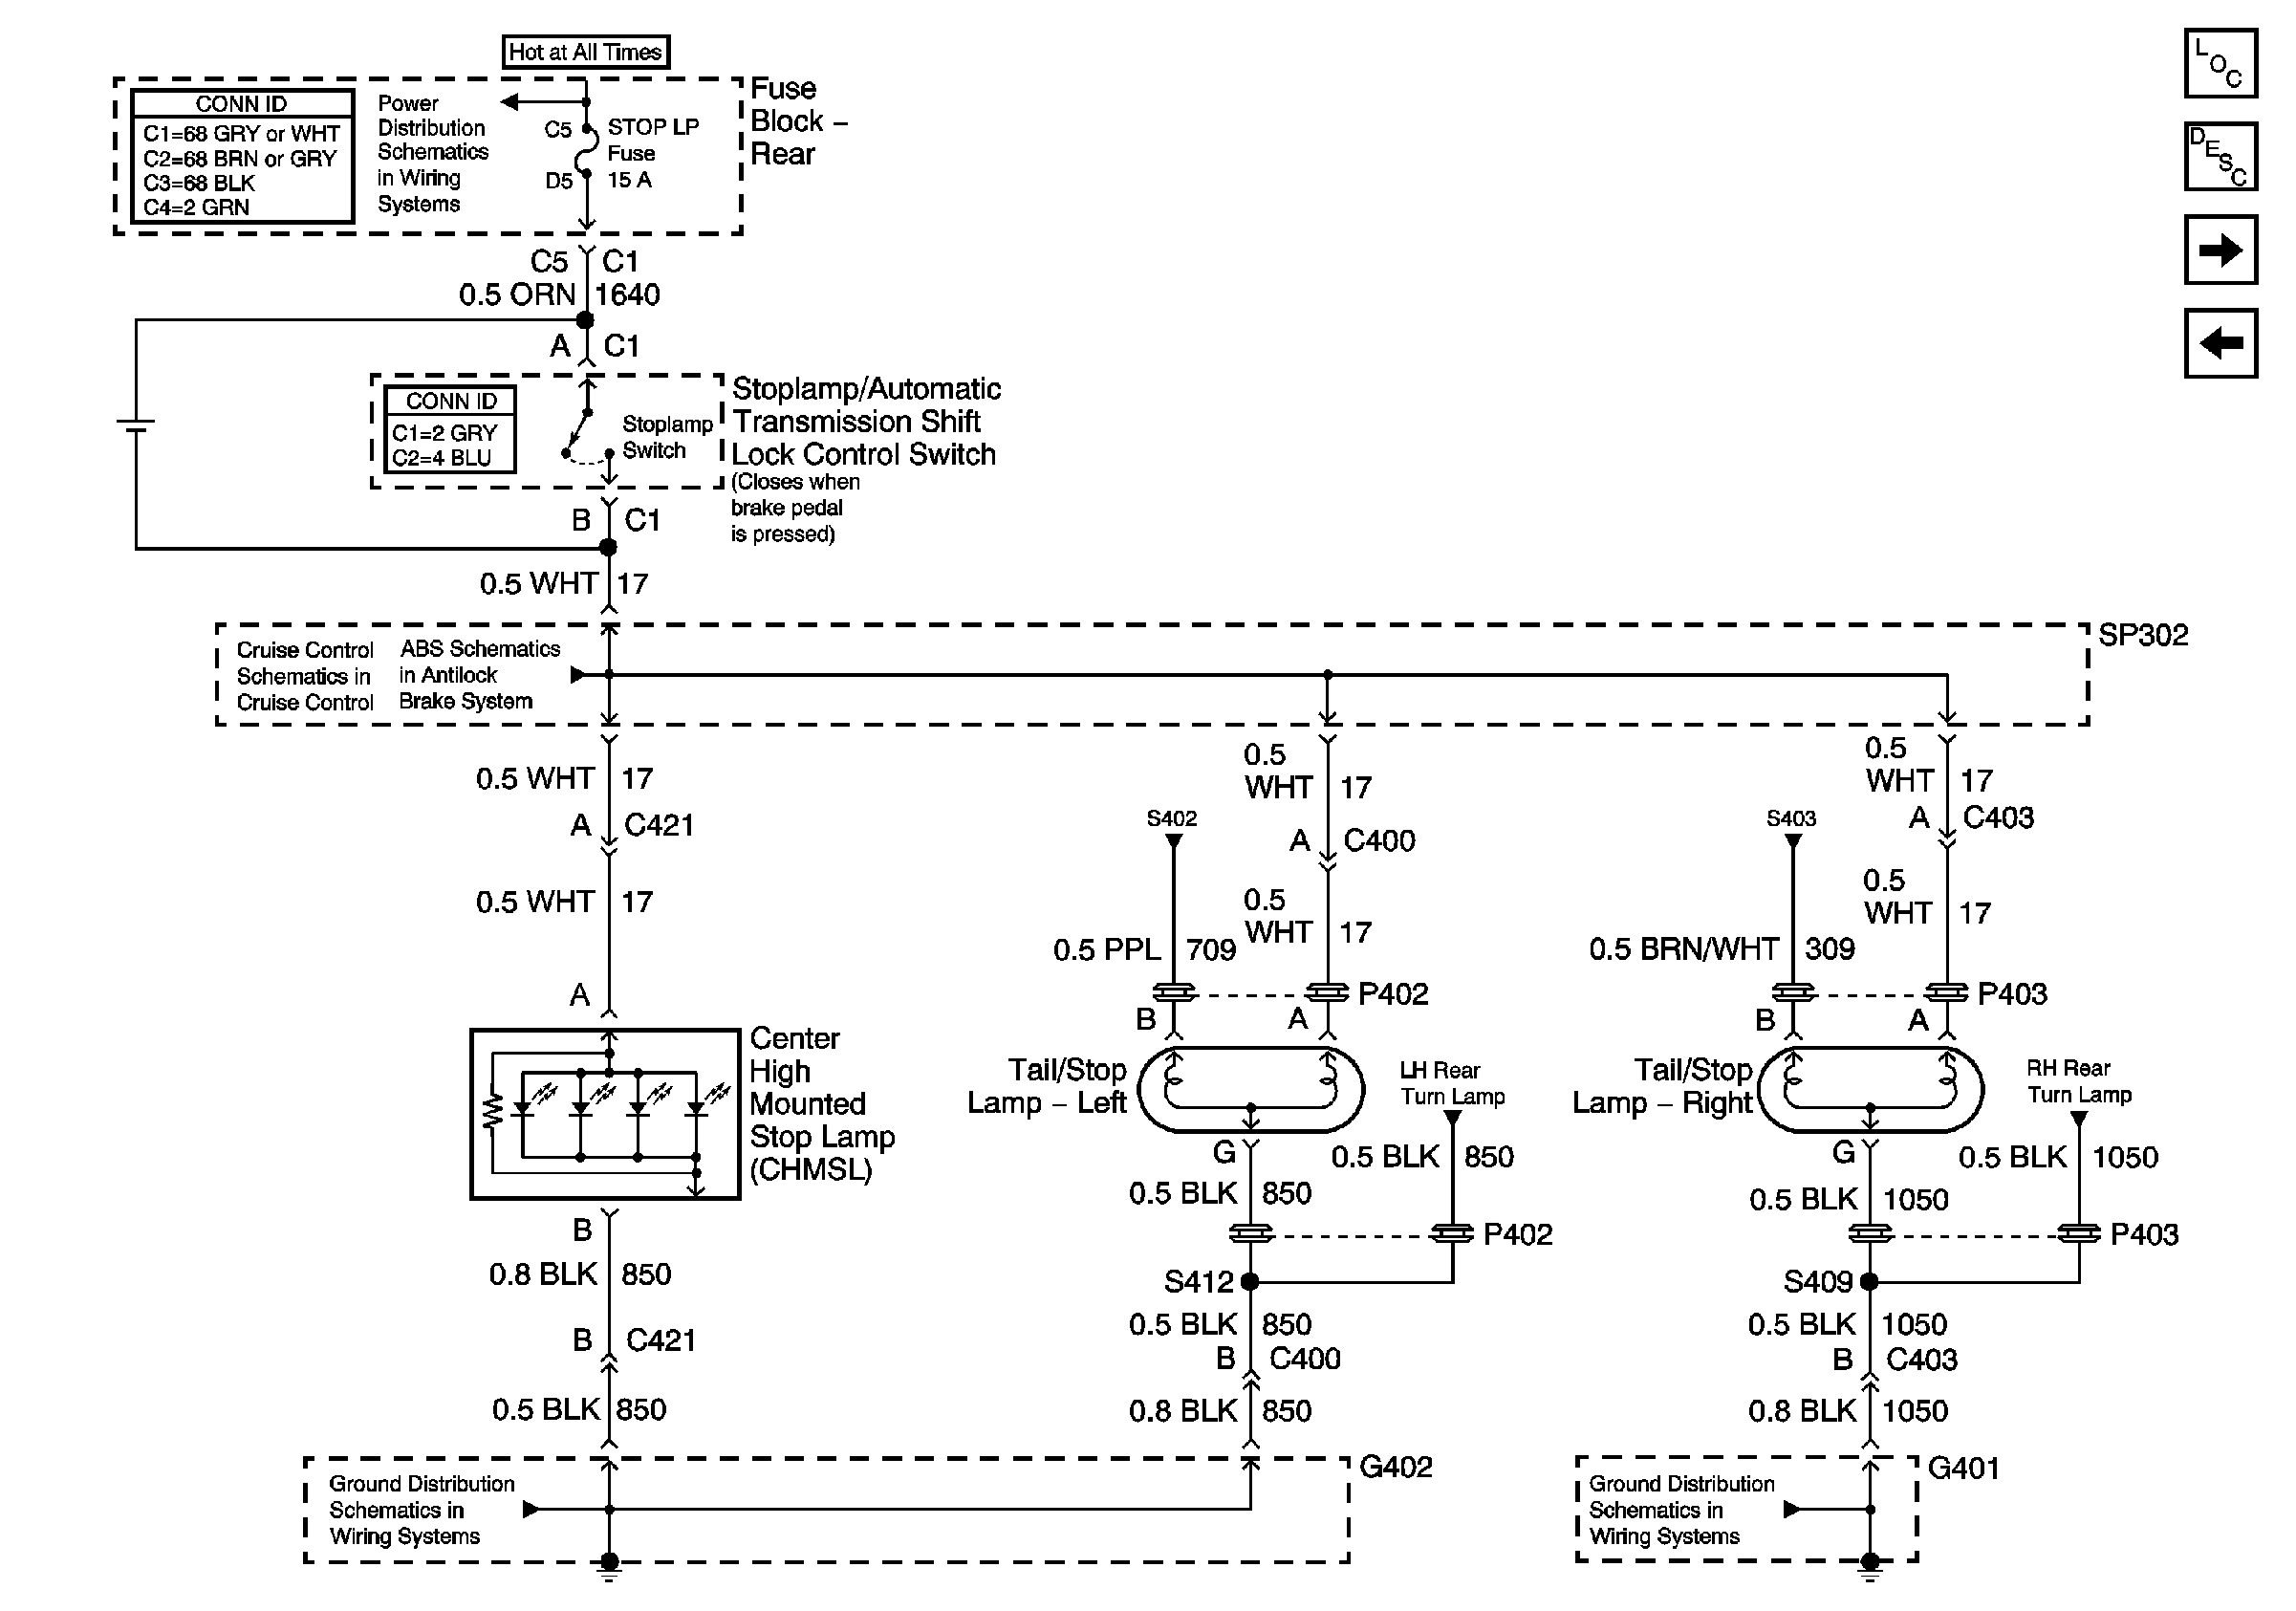
|
| Figure 4: |
Right Exterior Lamps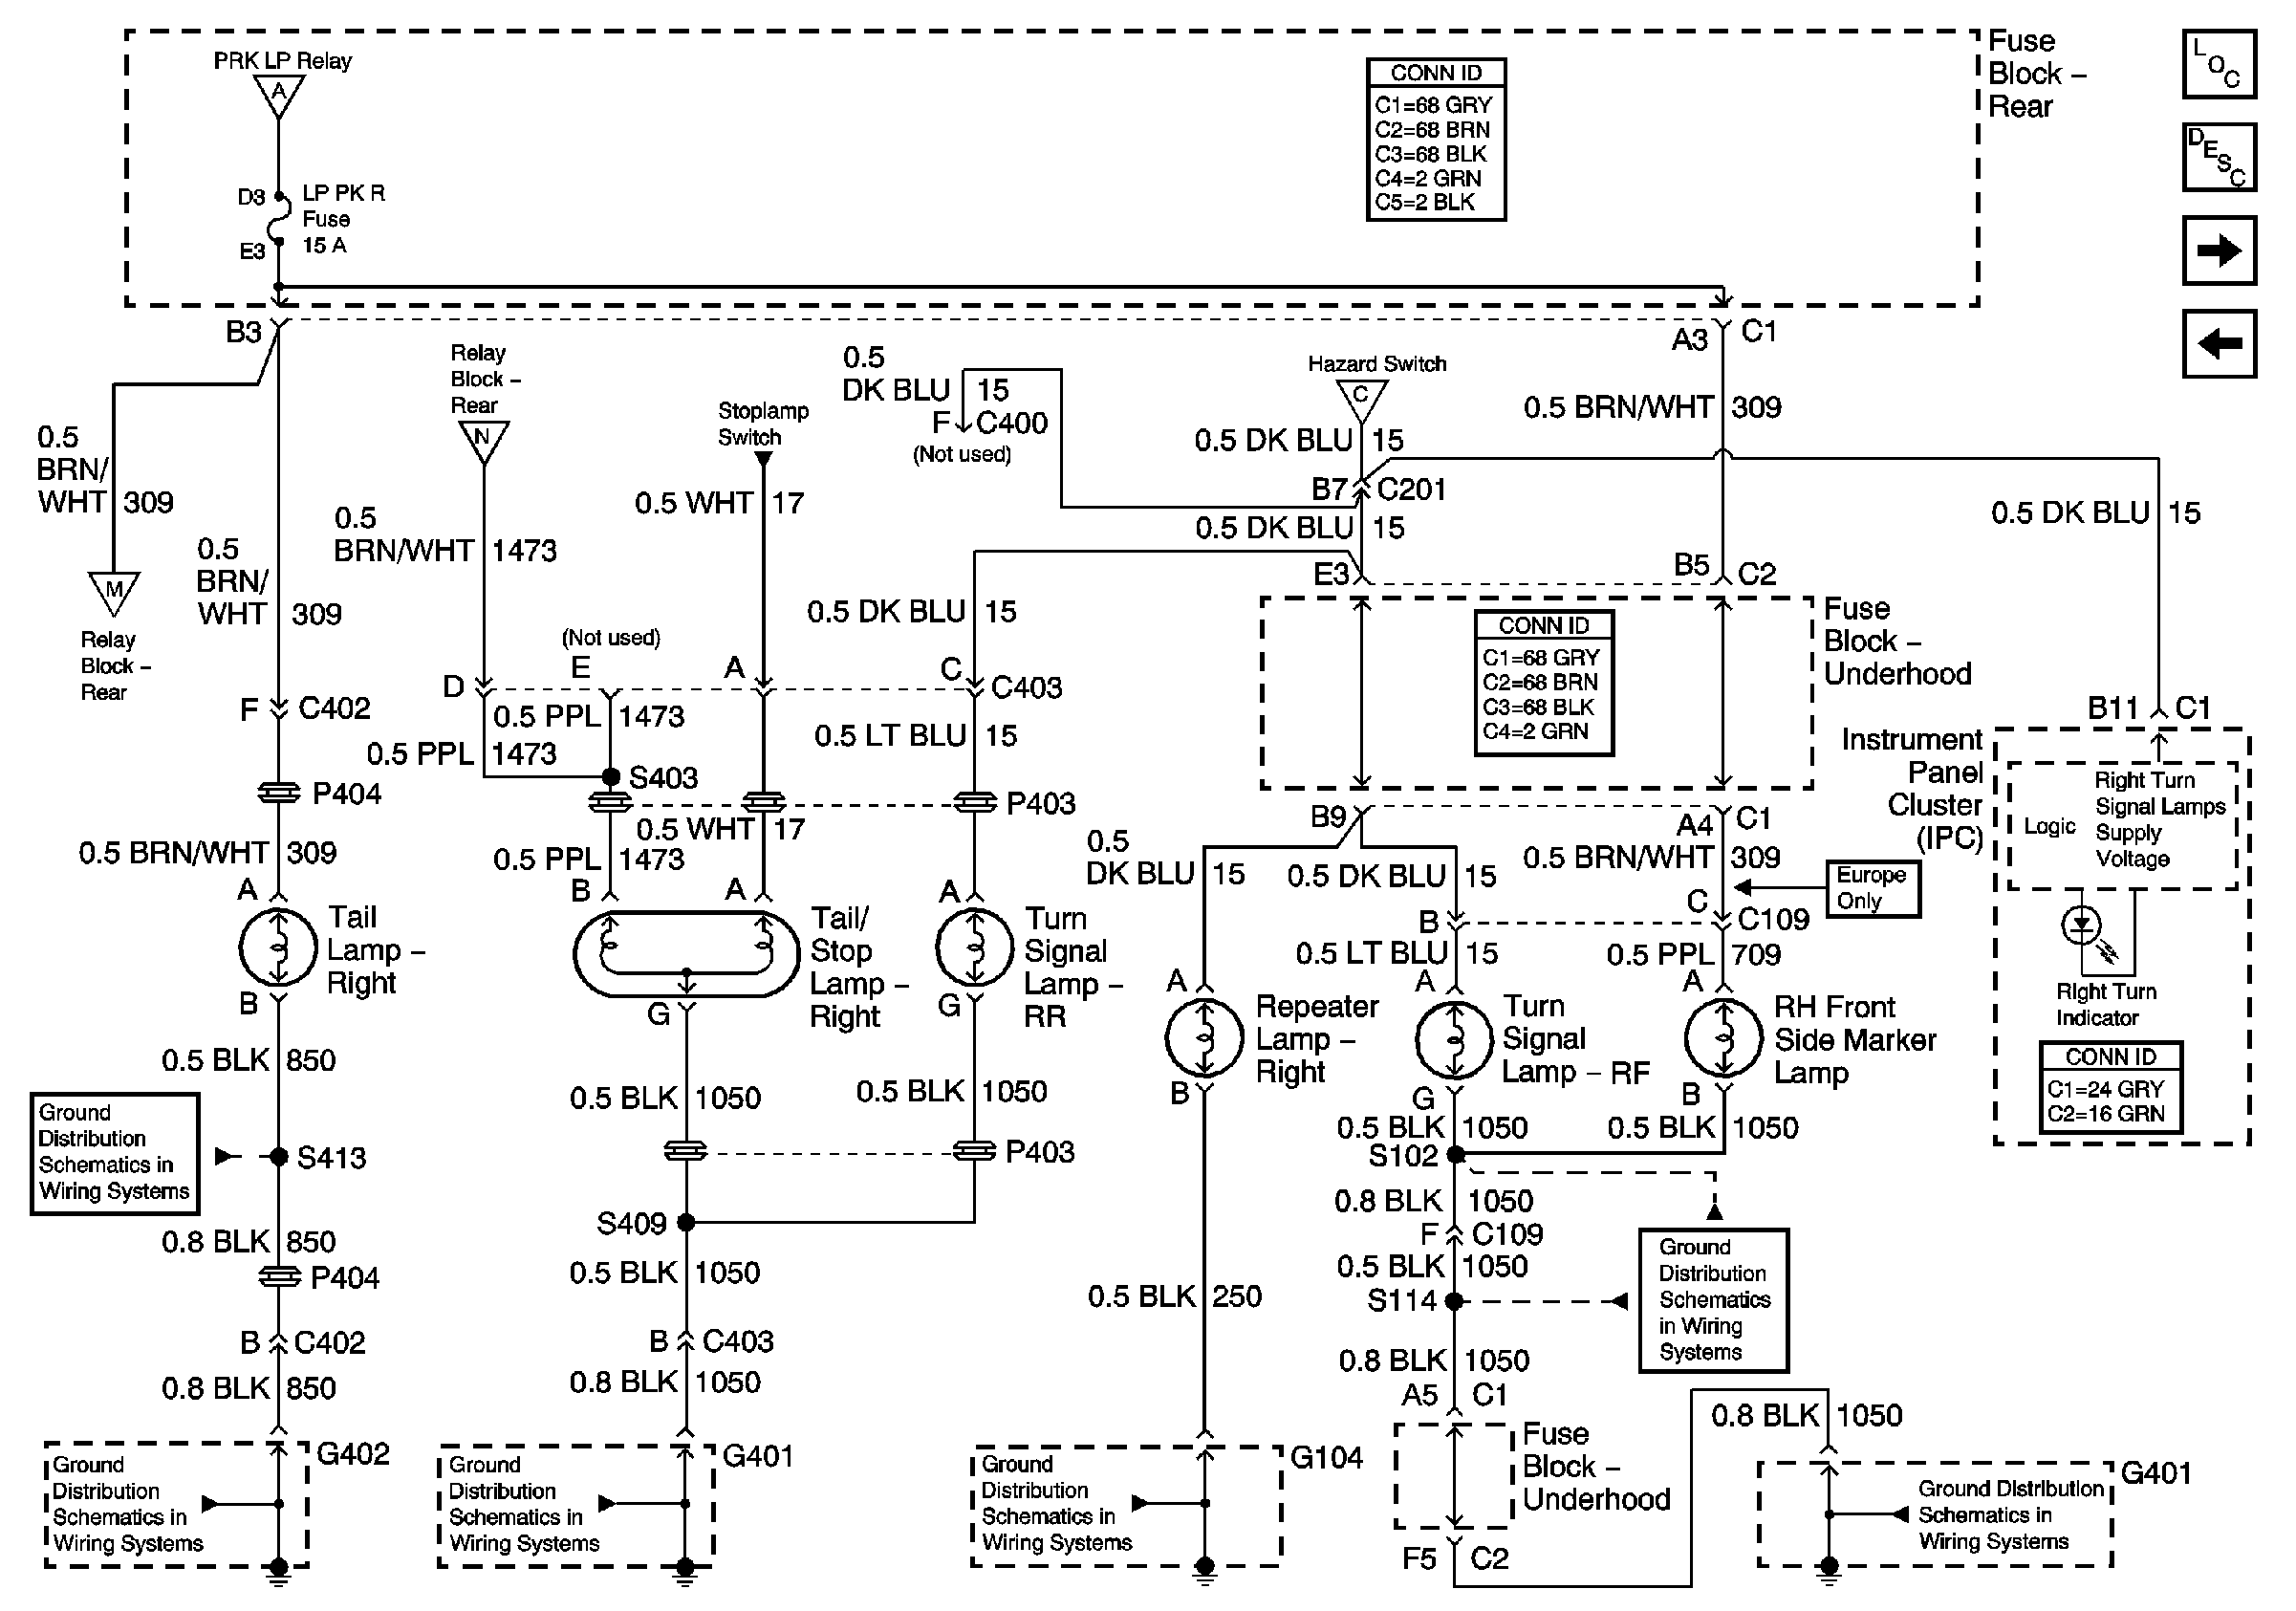
|
| Figure 5: |
Left Exterior Lamps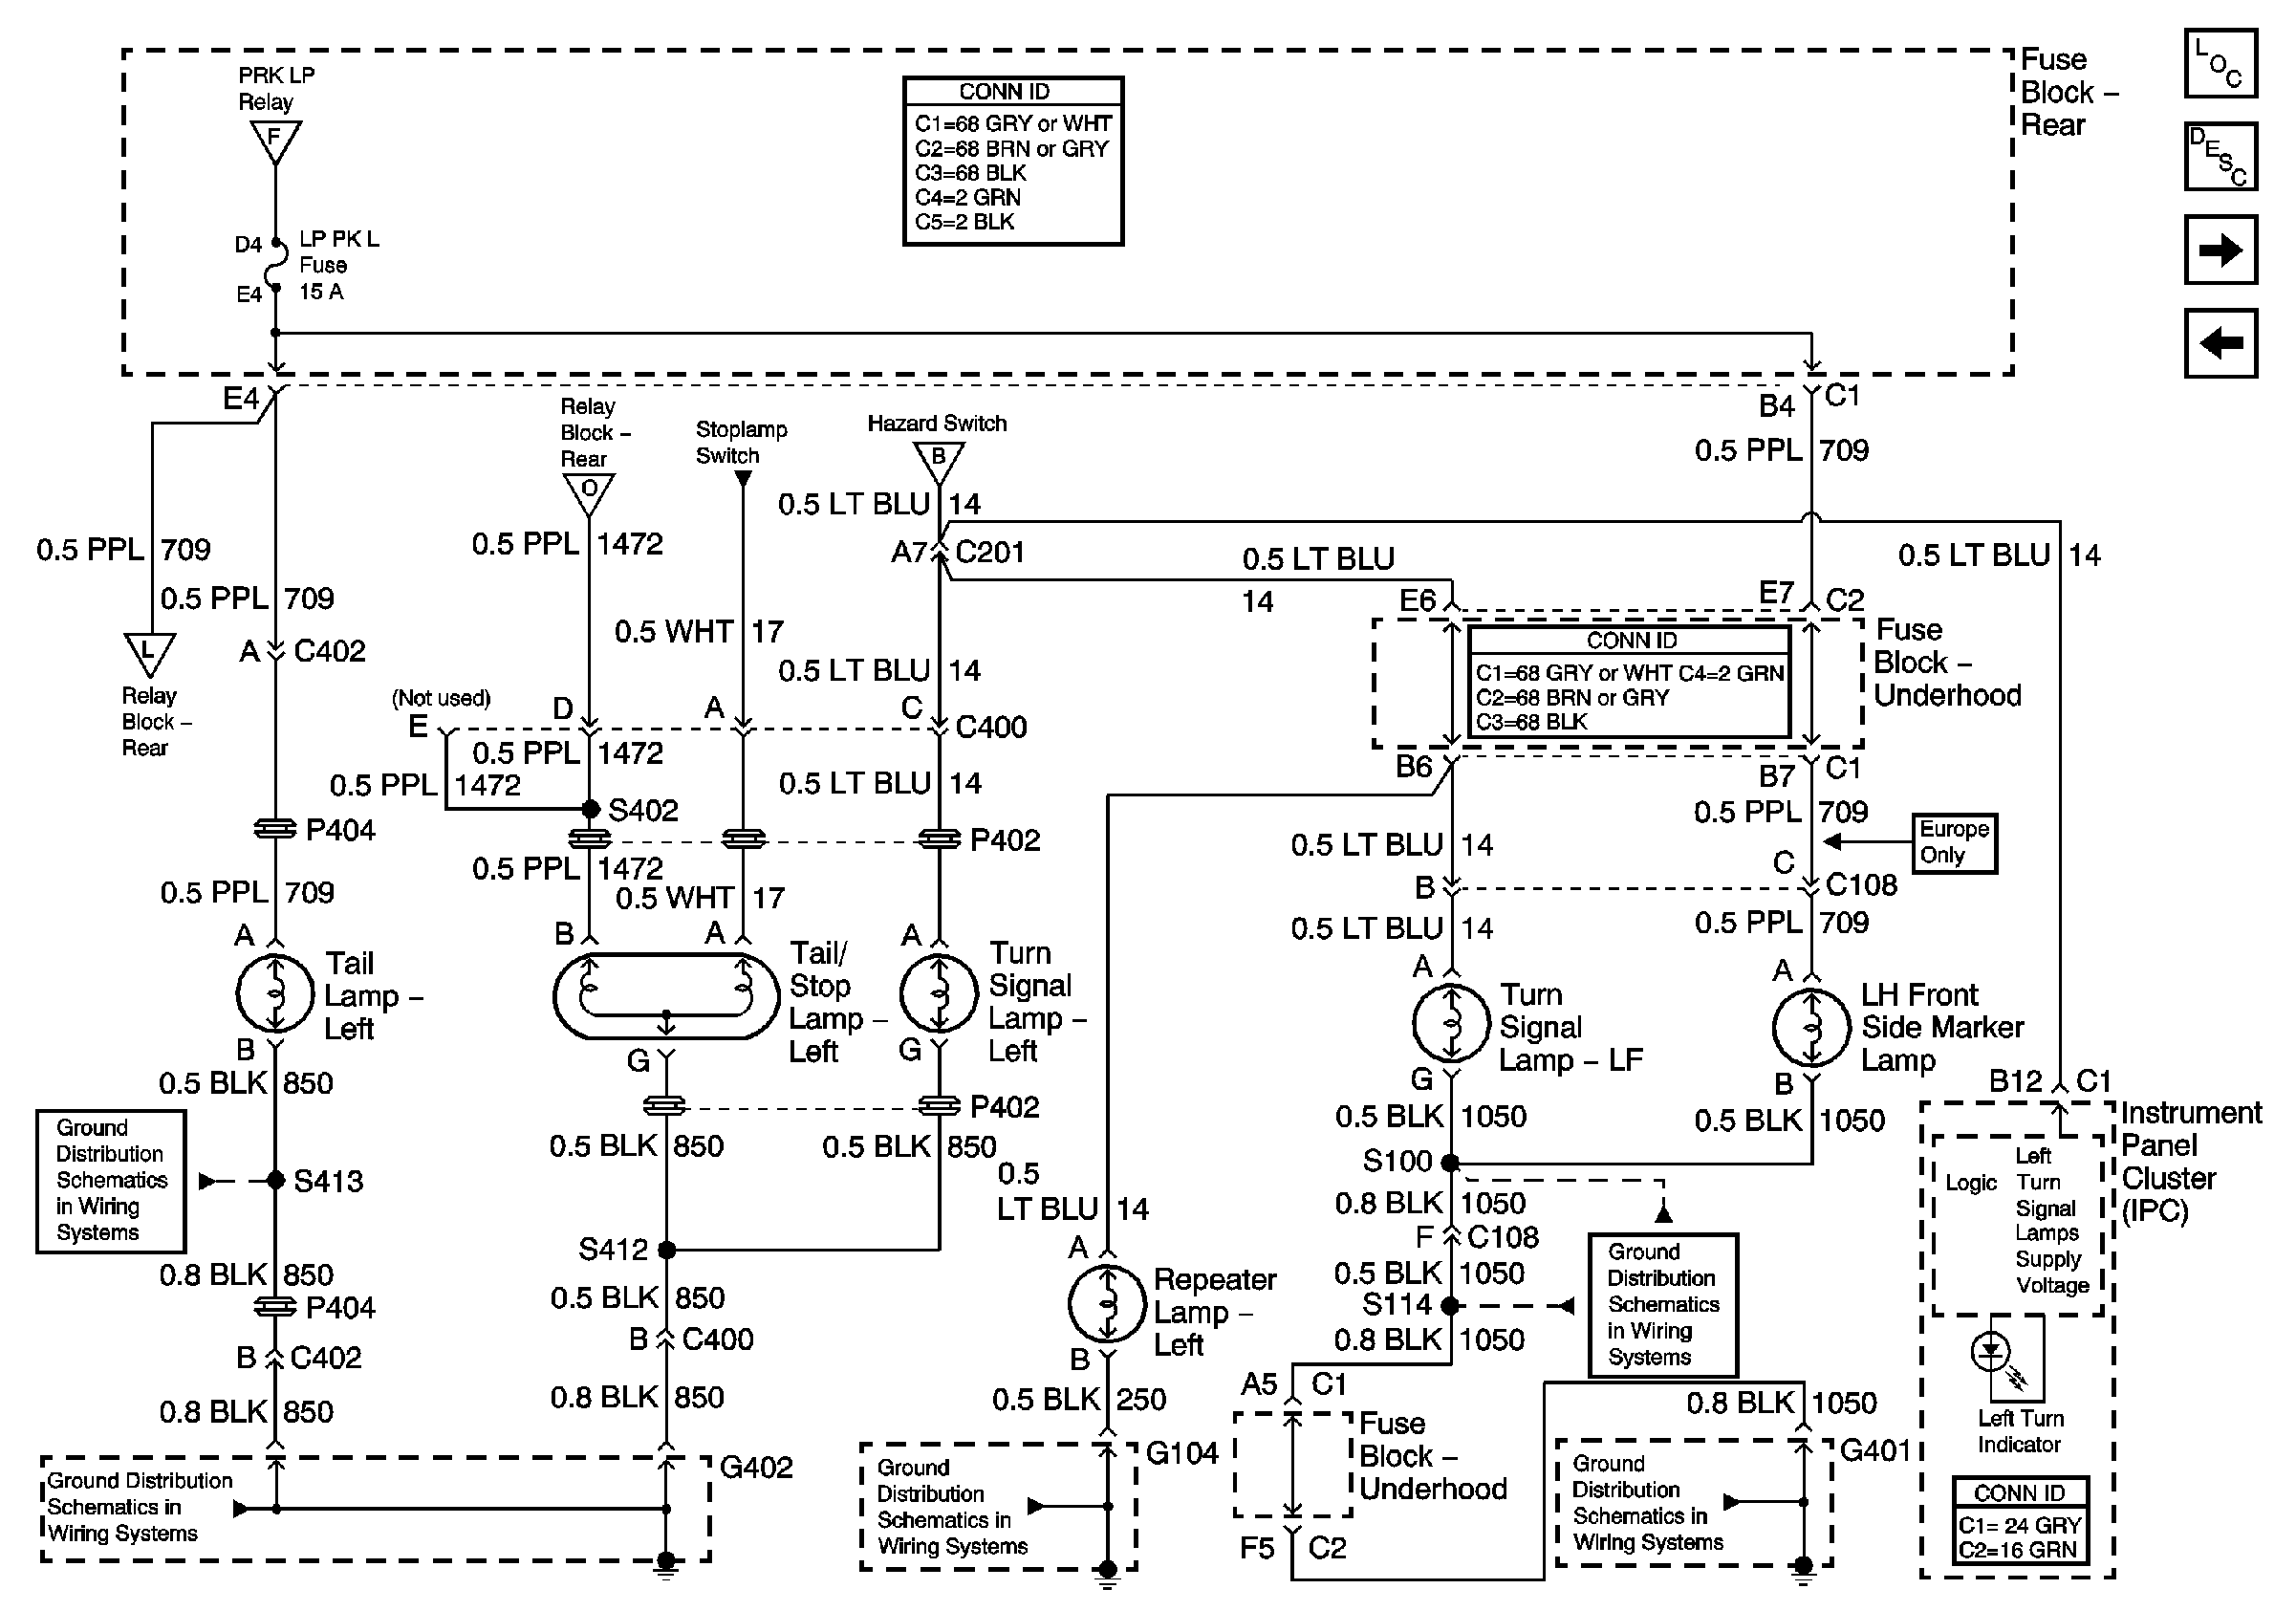
|
| Figure 6: |
Position Lamps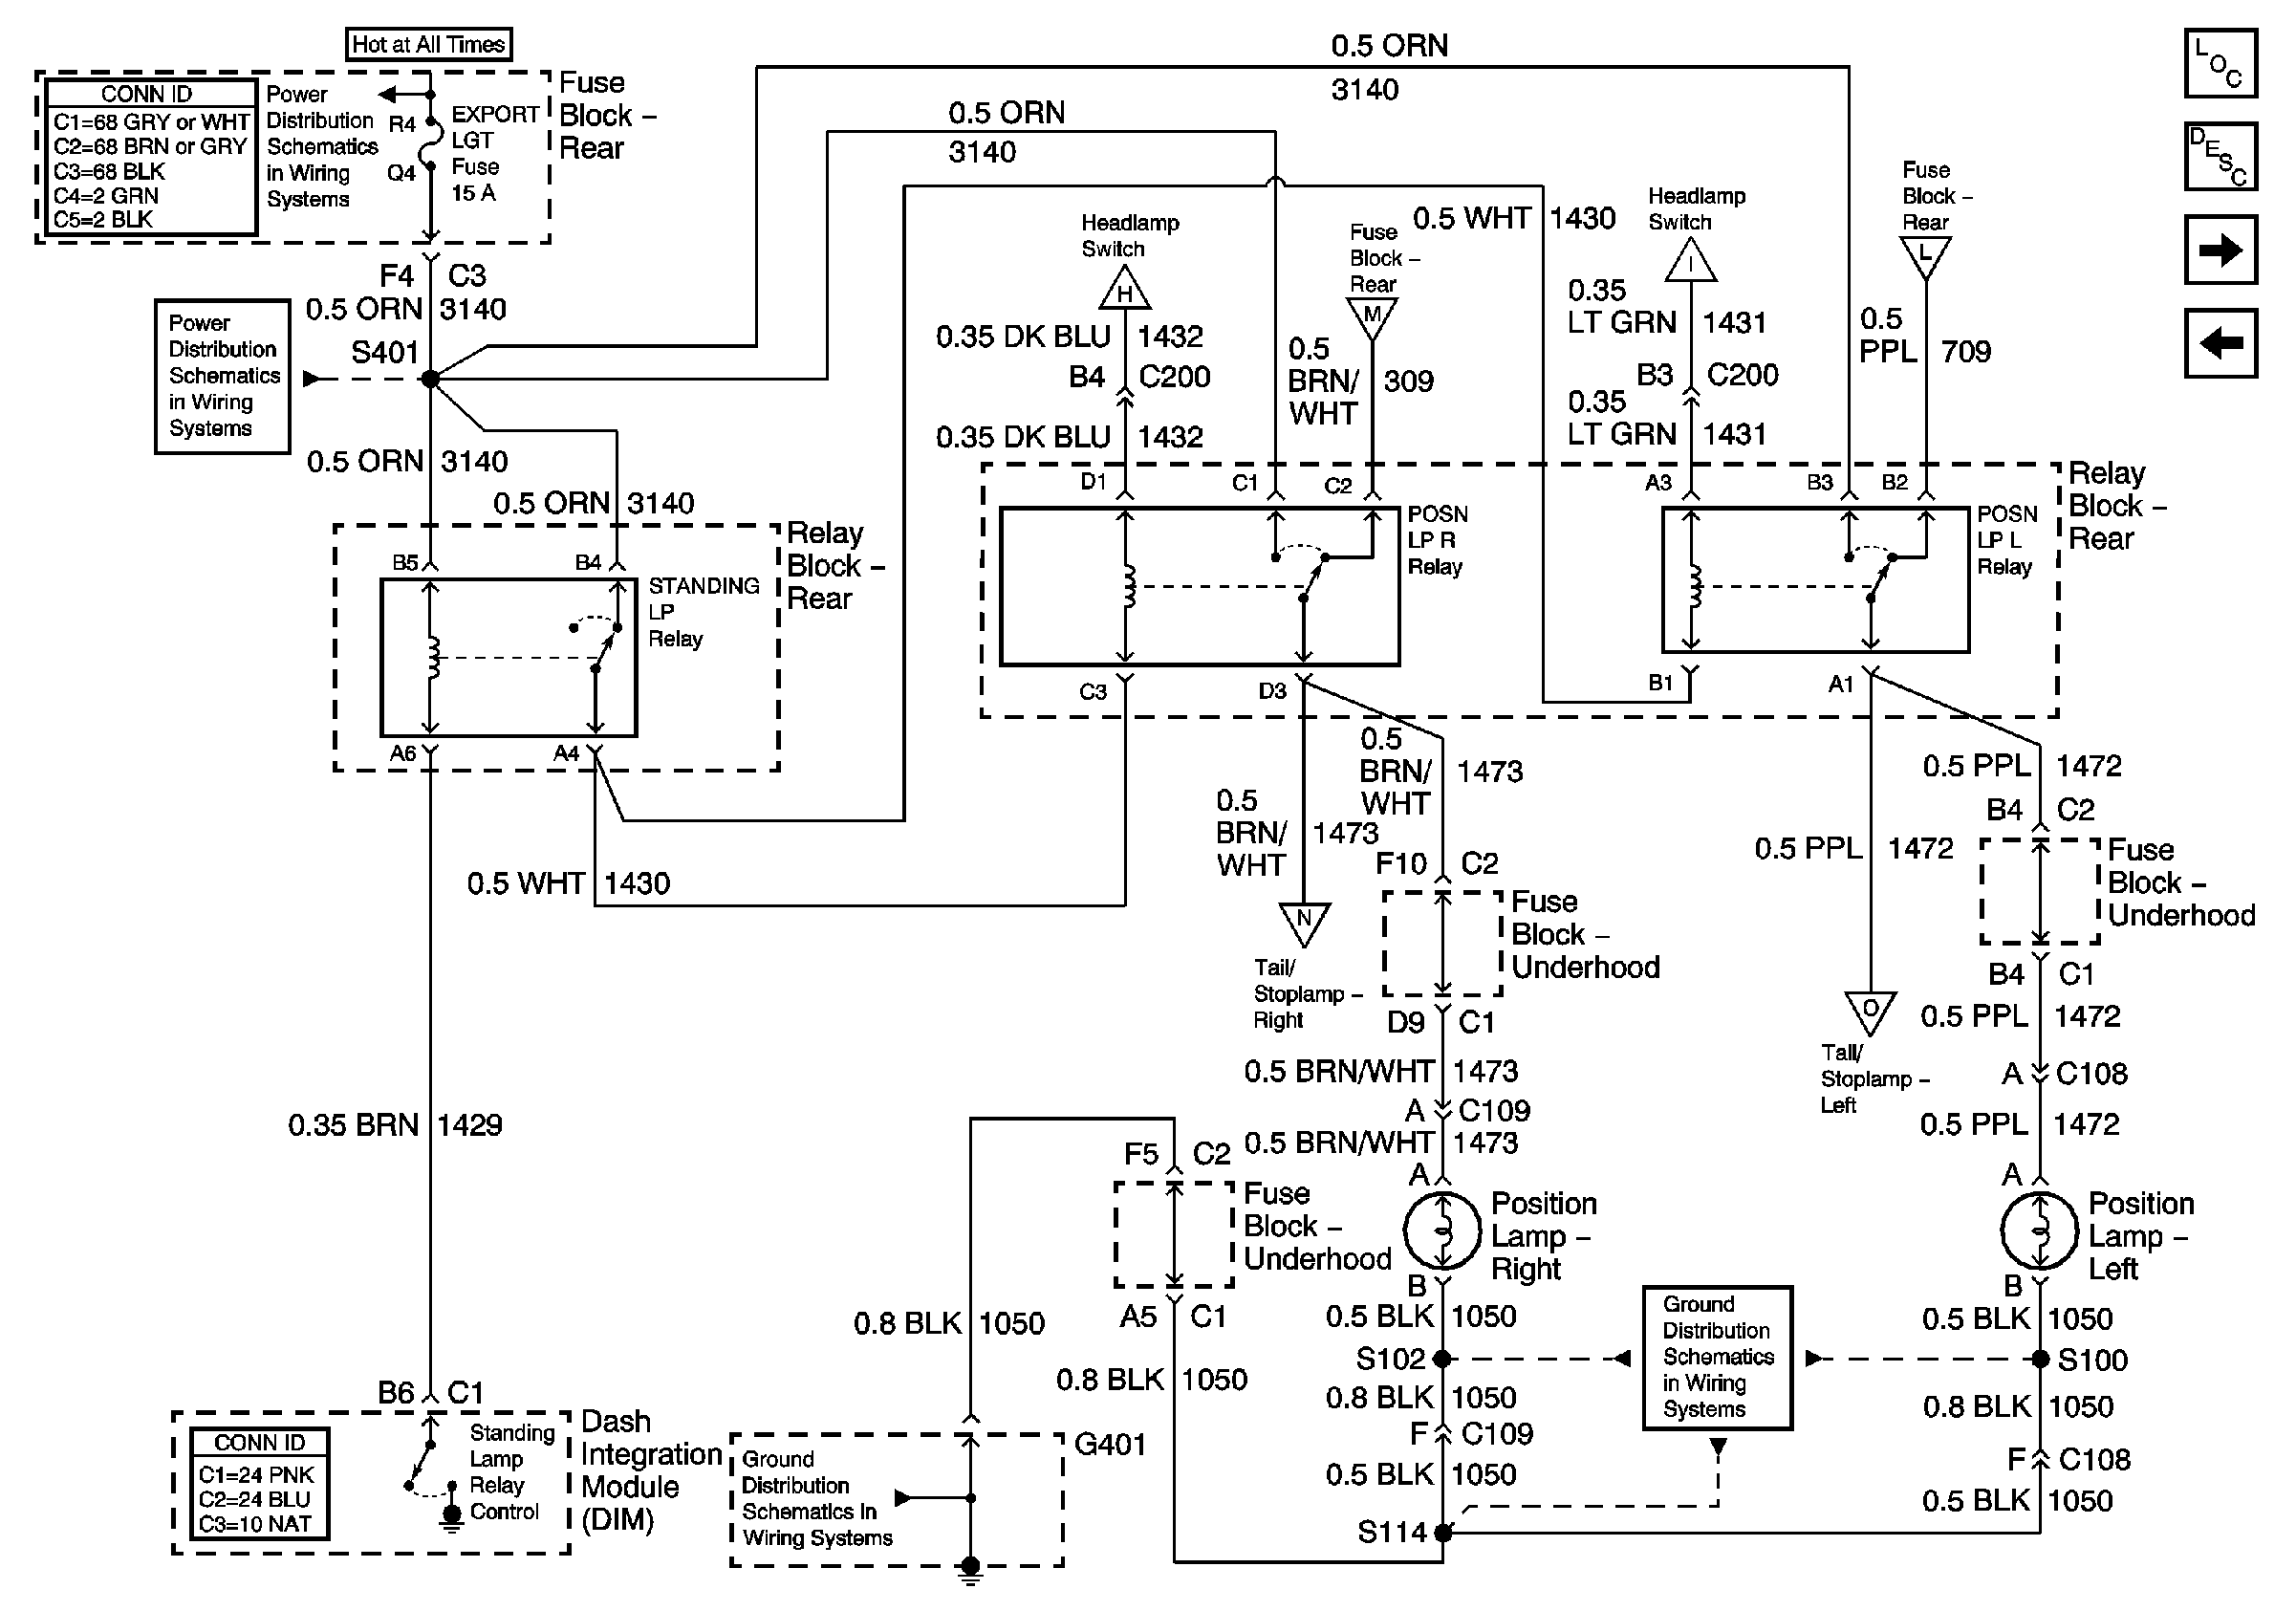
|
| Figure 7: |
License, Underhood, and Cornering Lamps
|
| Figure 8: |
Backup Lights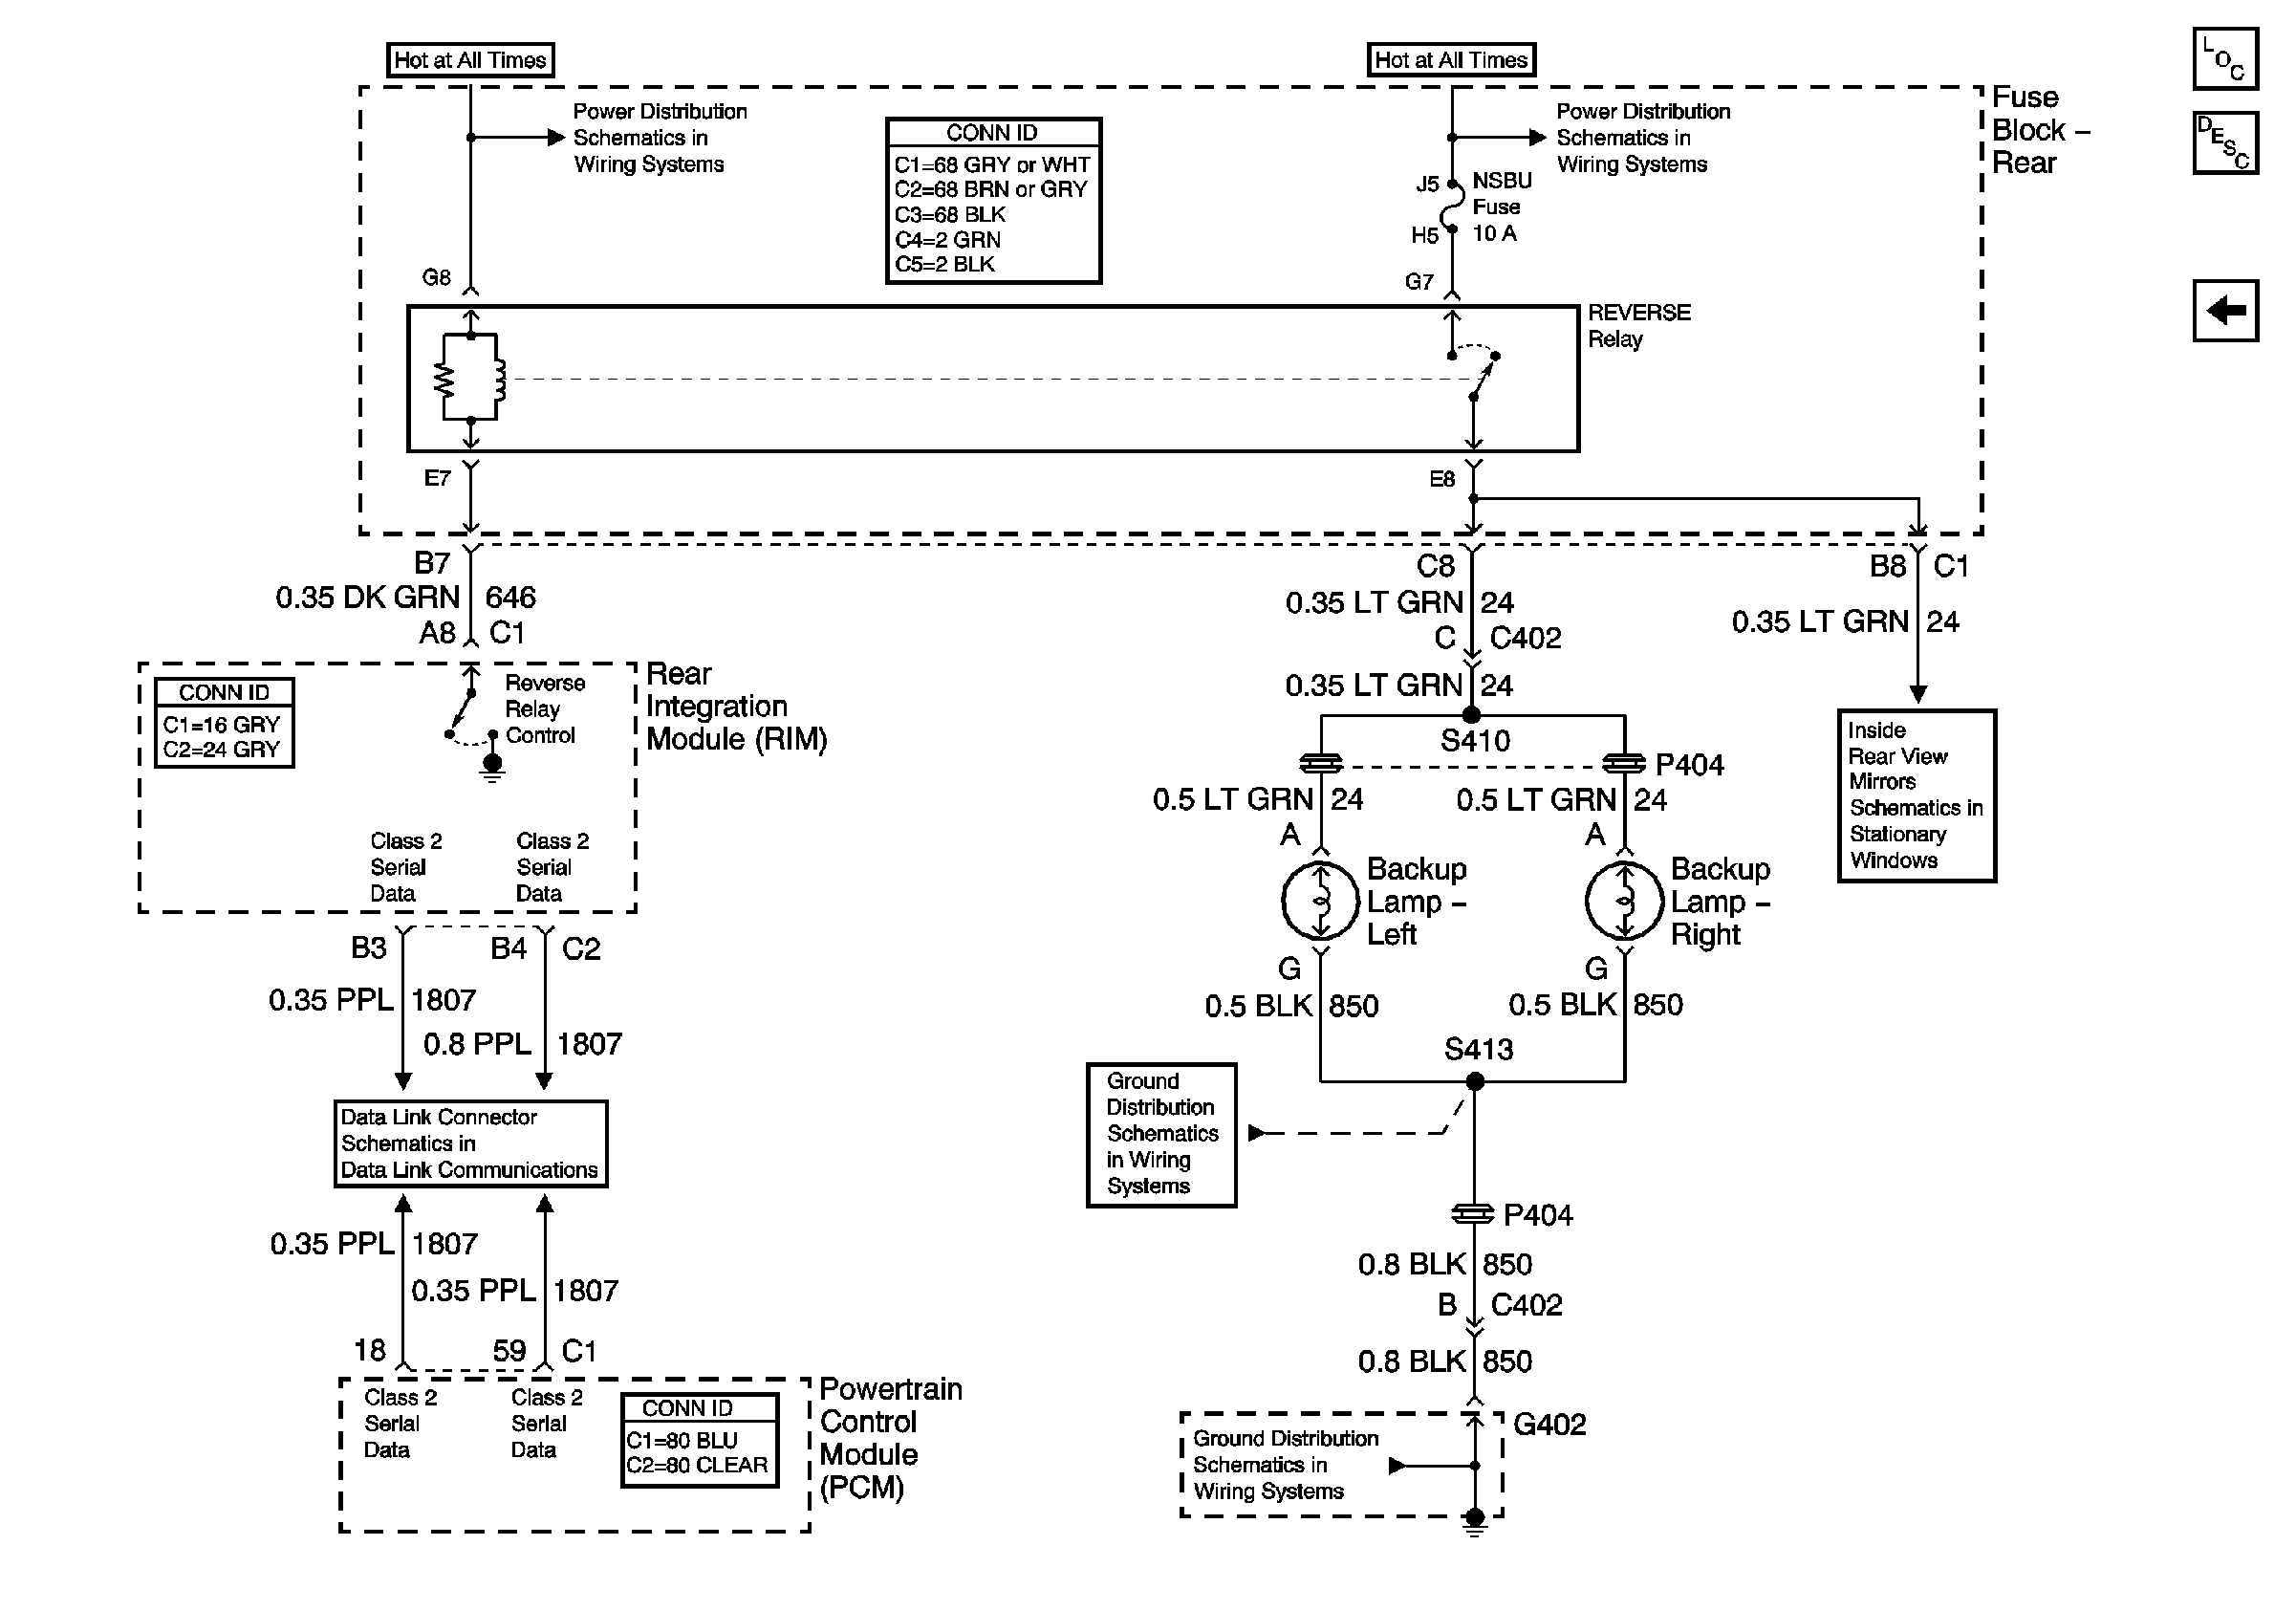
|
