Parking Brake Lever Pedal Assembly Replacement LHD
Removal Procedure
- Raise and suitably support the vehicle. Refer to Lifting and Jacking the Vehicle in General Information.
- To ensure the park brake pedal is in the full returned position, pull forward on the emergency release lever.
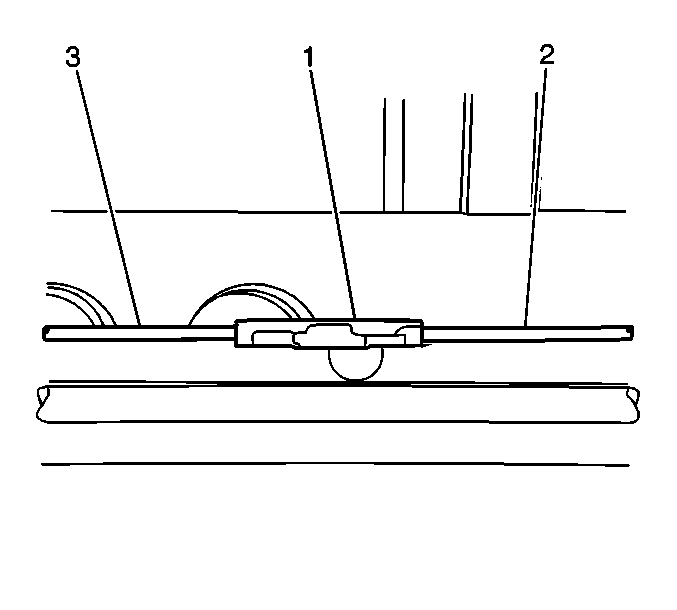
- Pull down on the front park brake cable (3) to relieve tension on the park brake cable.
- Remove the park brake cable (3) from the cable connector (1).
- Lower the vehicle. Refer to Lifting and Jacking the Vehicle in General Information.
- Remove left closeout/sound insulator panel to access the lever assembly. Refer to Instrument Panel Insulator Panel Replacement - Left Side in Instrument Panel, Gages and Console.
- Remove the left knee bolster. Refer to Knee Bolster Replacement in Instrument Panel, Gauges and Console.
- Remove the foot rest pad from the carpet. Refer to Foot Rest Replacement in Interior Trim.
- Pull back the carpet to expose the park brake cable and lever assembly.
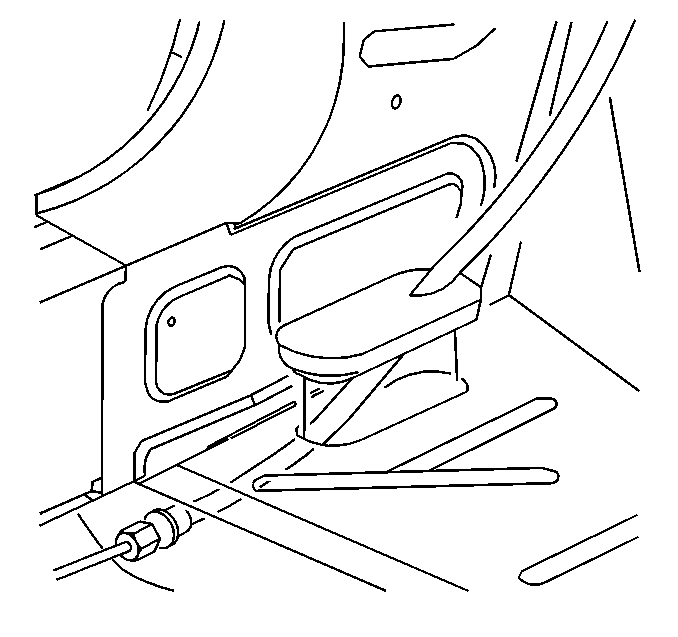
- Remove the grommet from the floor pan.
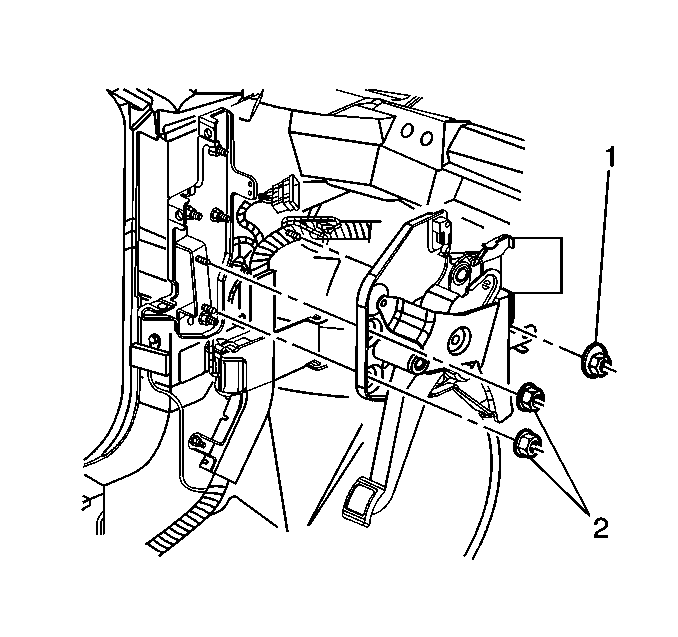
- Remove the park brake assembly mounting nuts (1, 2).
- Disconnect the electrical connector from the park brake assembly .
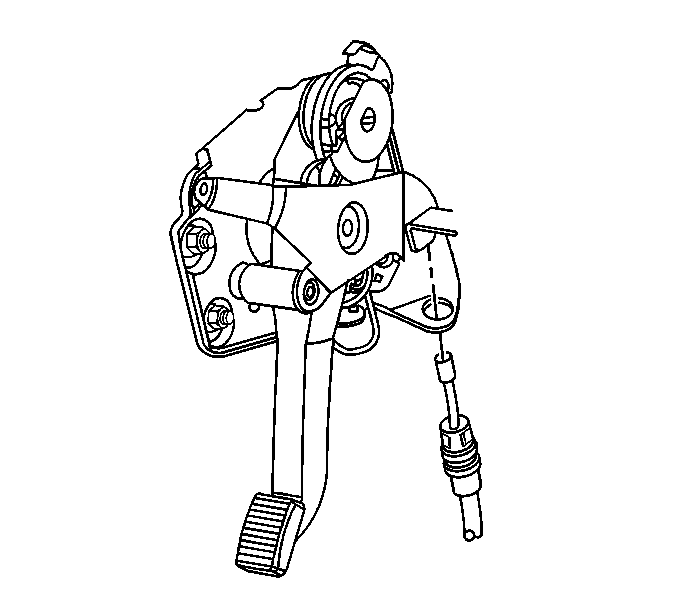
- Remove the front park brake cable from the park brake pedal assembly.
- Remove the park brake pedal assembly from the vehicle.
Installation Procedure
- Install the front park brake cable into the park brake pedal assembly.
- Connect the electrical connector to the park brake assembly.
- Install the park brake assembly to the mounting studs.
- Install the park brake lever mounting nuts (1, 2).
- Install the cable and grommet into the floor pan.
- Raise the vehicle. Refer to Lifting and Jacking the Vehicle in General Information.
- Reconnect the front cable (3) to the cable connector (1).
- Lower the vehicle.
- If installing a new park brake pedal assembly, you must remove the park brake pedal and park brake cable tension set pins.
- Reposition the carpet.
- Install the foot rest pad to the carpet. Refer to Foot Rest Replacement in Interior Trim.
- Install the left knee bolster. Refer to Knee Bolster Replacement in Instrument Panel, Gages and Console.
- Install the left closeout/sound insulator. Refer to Instrument Panel Insulator Panel Replacement - Left Side in Instrument Panels, Gages, and Console.


Notice: Use the correct fastener in the correct location. Replacement fasteners must be the correct part number for that application. Fasteners requiring replacement or fasteners requiring the use of thread locking compound or sealant are identified in the service procedure. Do not use paints, lubricants, or corrosion inhibitors on fasteners or fastener joint surfaces unless specified. These coatings affect fastener torque and joint clamping force and may damage the fastener. Use the correct tightening sequence and specifications when installing fasteners in order to avoid damage to parts and systems.
Tighten
Tighten the park brake pedal assembly mounting nuts to 24 N·m
(18 lb ft).

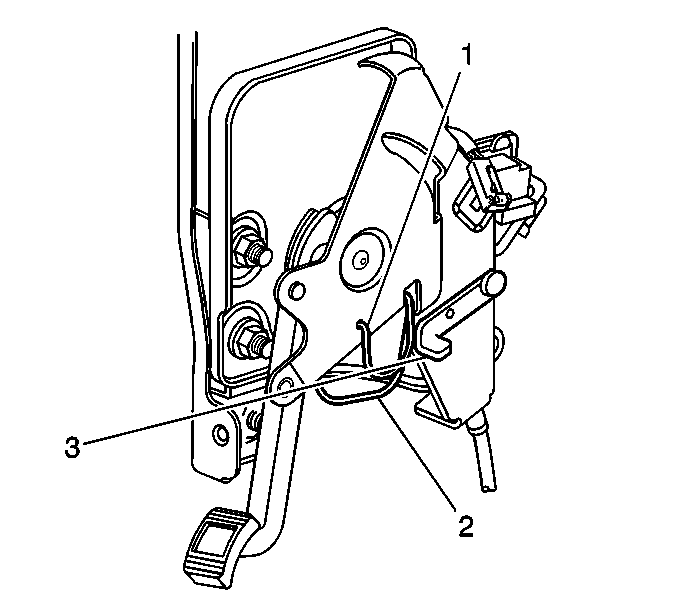
| • | To set the park brake pedal, rotate the pedal tension pin (1) down and pull sideways to remove the pedal tension release pin. |
| • | To set the park brake cable tension, pull down and twist the cable tension release pin (2) to remove the park brake cable tension pin. |
Parking Brake Lever Pedal Assembly Replacement RHD
Removal Procedure
- Raise and suitably support the vehicle. Refer to Lifting and Jacking the Vehicle in General Information.
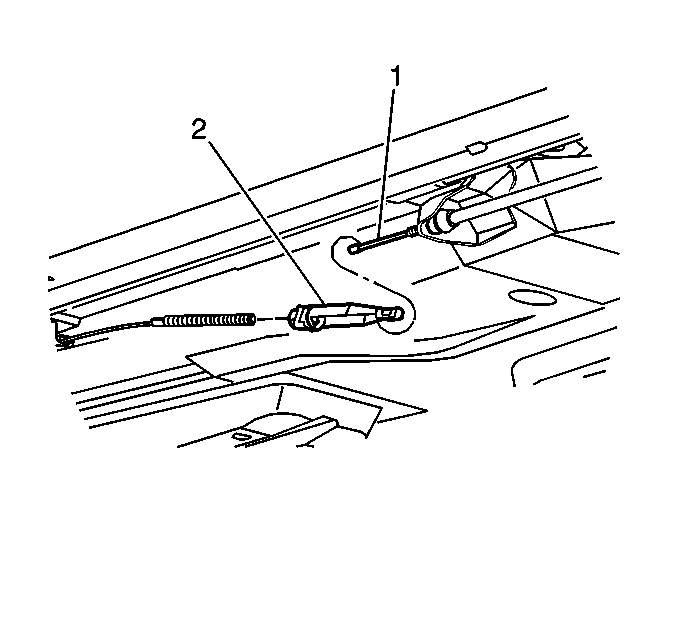
- Loosen the park brake cable at the adjuster (2).
- Lower the vehicle. Refer to Lifting and Jacking the Vehicle in General Information.
- Disable the SIR system. Refer to Disabling the SIR System in SIR.
- Remove the right closeout/sound insulators. Refer to and Instrument Panel Insulator Panel Replacement - Right Side in Instrument Panel, Gages and Console.
- Remove the right knee bolster. Refer to Knee Bolster Replacement in Instrument Panel, Gages and Console.
- Remove the left closeout/sound insulators. Refer to Instrument Panel Insulator Panel Replacement - Left Side in Instrument Panel, Gages and Console.
- Remove the right foot rest pad from the carpet. Refer to Foot Rest Replacement in Interior Trim.
- Remove the floor console. Refer to Console Replacement in Instrument Panel, Gages and Console.
- To gain access to the upper two mounting bolts, remove the air outlet duct. Refer to Instrument Panel Outer Air Outlet Upper Duct Replacement - Right Side in Heating, Ventilation and Air Conditioning.
- Remove the steering column. Refer to Steering Column Replacement in Steering Wheel and Column.
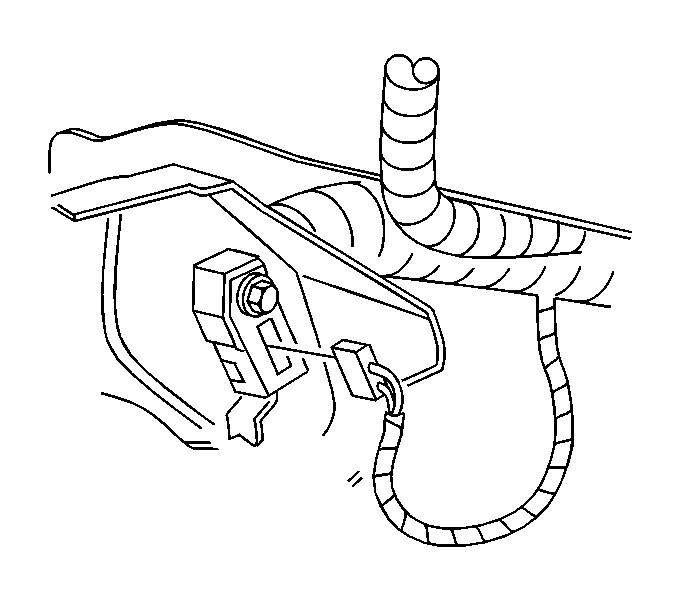
- Disconnect the electrical connectors from the park brake warning lamp switch.
- Disconnect the electrical connectors from the park brake release solenoid.
- Remove the park brake pedal assembly two upper mounting bolts.
- Remove the lower mounting bolt.
- Remove the park brake pedal assembly.
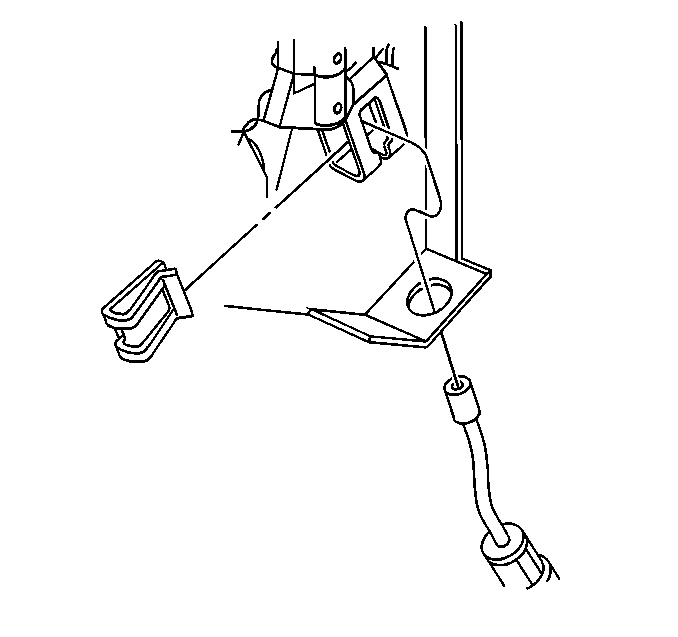
- Remove the park brake cable retaining nut.
- Disconnect the park brake cable from the park brake pedal assembly.

Installation Procedure
- Connect the park brake cable to the park brake pedal assembly.
- Install the park brake cable retaining nut.
- Install the park brake pedal assembly to the mounting studs.
- Install the park brake pedal upper and lower mounting bolts.
- Connect the electrical connectors to the park brake warning lamp switch.
- Connect the electrical connector to the park brake release solenoid.
- Install the air outlet duct. Refer to Instrument Panel Outer Air Outlet Upper Duct Replacement - Right Side in Heating, Ventilation and Air Conditioning.
- Install the steering column. Refer to Steering Column Replacement in Steering Wheel and Column.
- Install the floor console. Refer to Console Replacement in Instrument Panel, Gages and Console.
- Install the right foot rest pad to the carpet. Refer to Foot Rest Replacement in Interior Trim.
- Raise the vehicle. Refer to Lifting and Jacking the Vehicle in General Information.
- Adjust the park brake cable. Refer to Park Brake Adjustment .
- Lower the vehicle.
- Reposition the carpet.
- Install the right knee bolster. Refer to Knee Bolster Replacement in Instrument Panel, Gages and Console.
- Install the left closeout/sound insulators. Refer to Instrument Panel Insulator Panel Replacement - Left Side in Instrument Panel, Gages and Console.
- Install the right closeout/sound insulators. Refer to Instrument Panel Insulator Panel Replacement - Right Side in Instrument Panel, Gages and Console.
- Enable the SIR system. Refer to Enabling the SIR System in SIR.

Notice: Use the correct fastener in the correct location. Replacement fasteners must be the correct part number for that application. Fasteners requiring replacement or fasteners requiring the use of thread locking compound or sealant are identified in the service procedure. Do not use paints, lubricants, or corrosion inhibitors on fasteners or fastener joint surfaces unless specified. These coatings affect fastener torque and joint clamping force and may damage the fastener. Use the correct tightening sequence and specifications when installing fasteners in order to avoid damage to parts and systems.
Tighten
Tighten the park brake pedal assembly mounting nuts to 27 N·m
(20 lb ft).
